
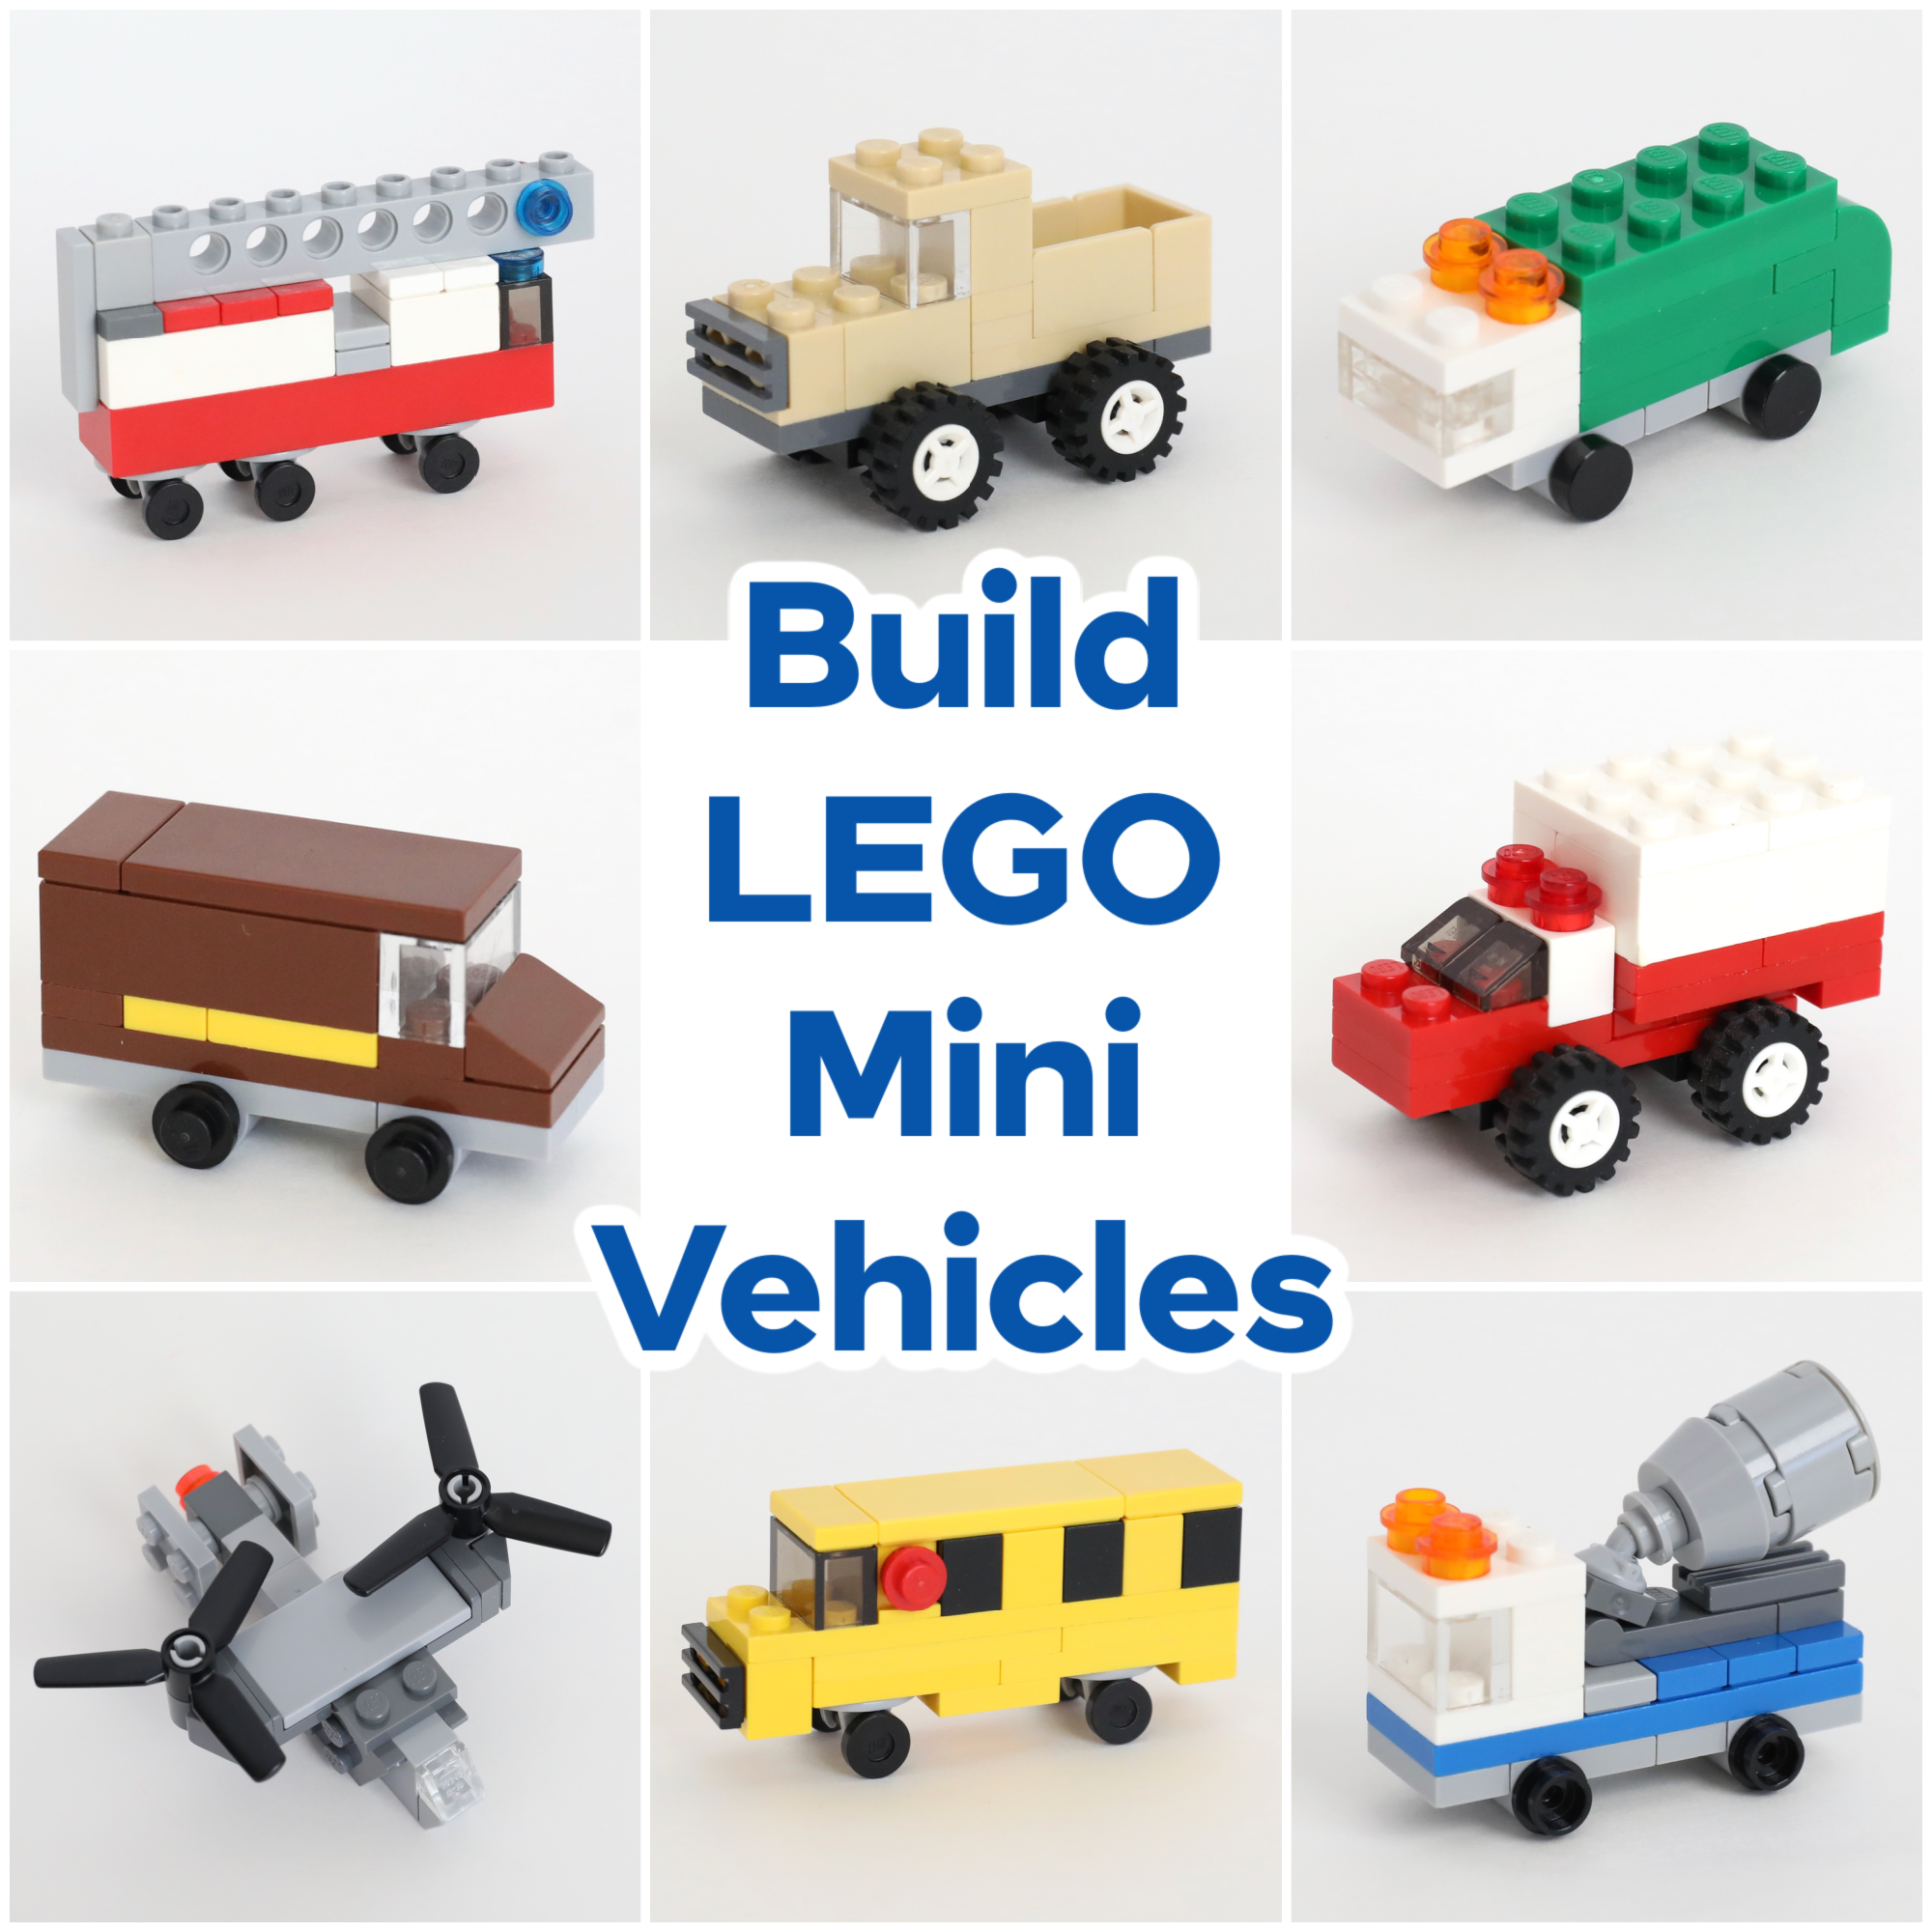
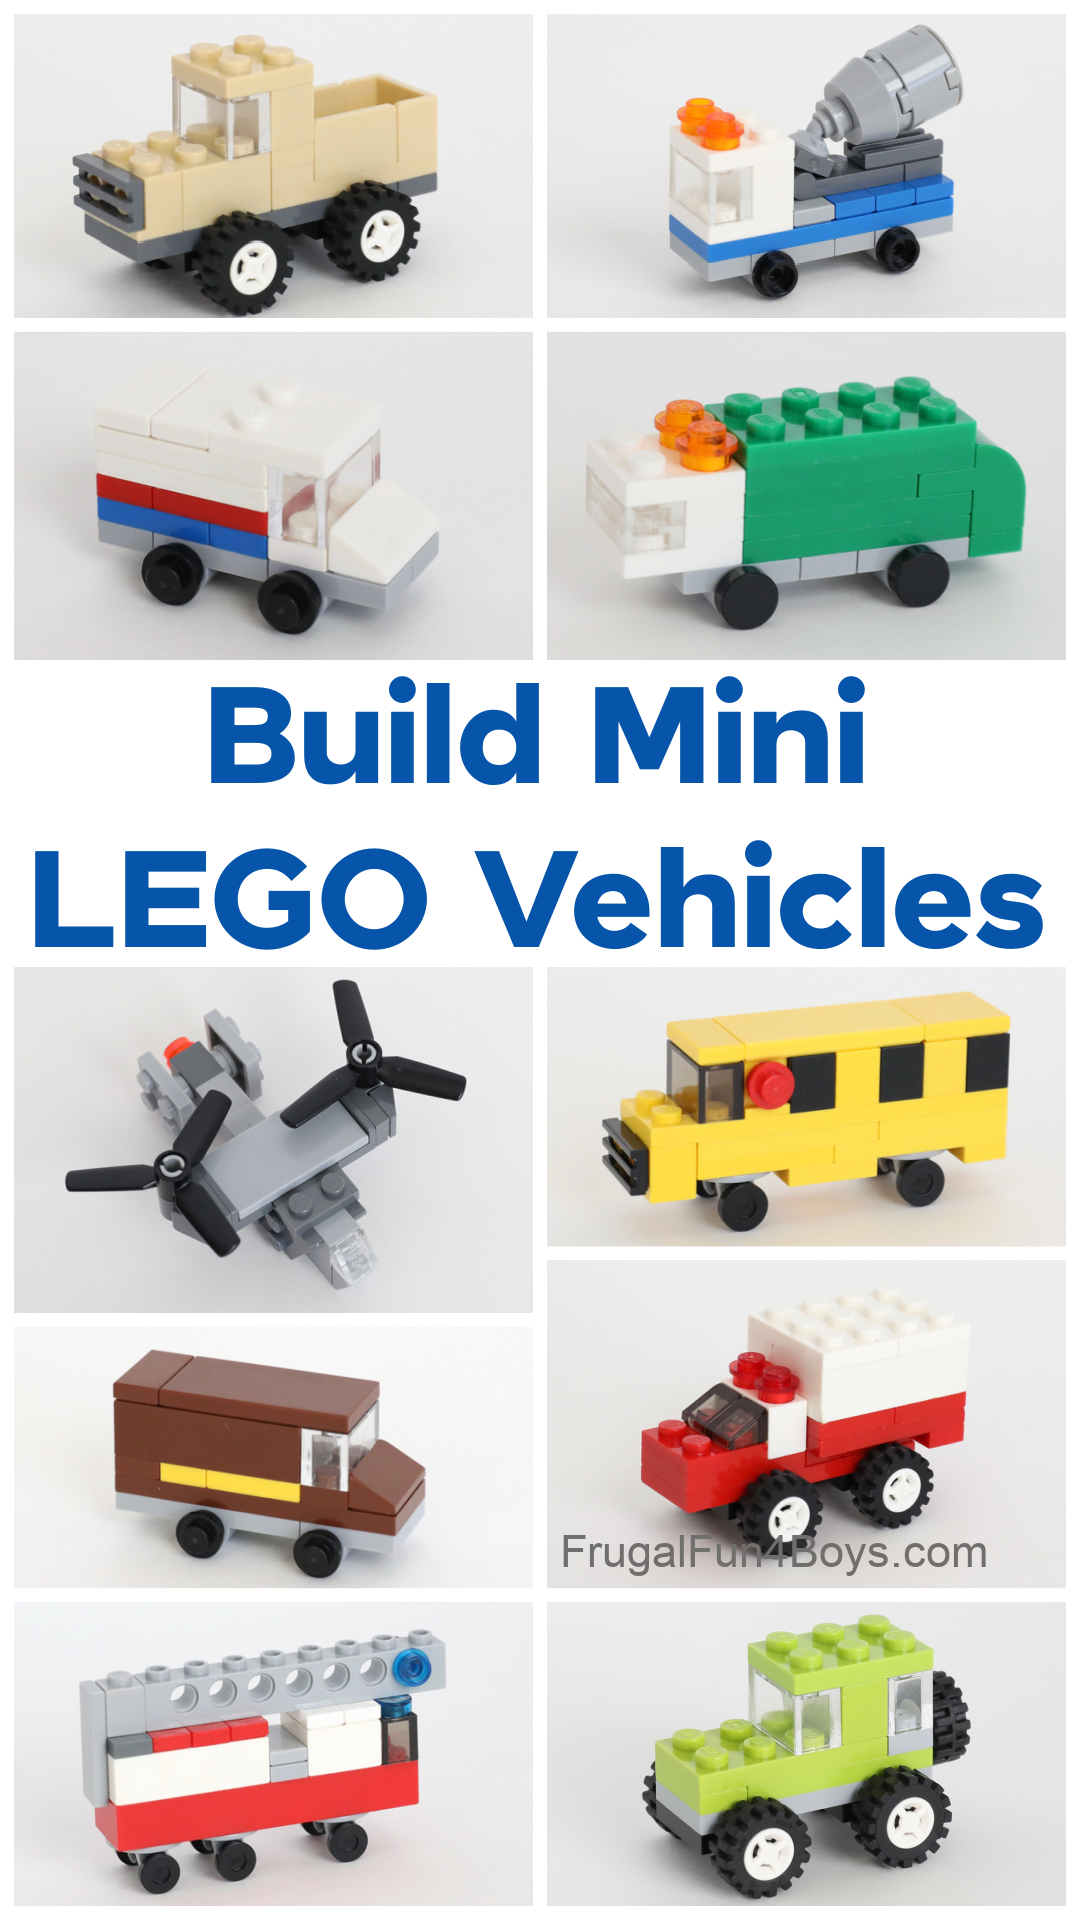
Here’s a collection of super cool mini LEGO vehicles to build! Learn how to make a mini LEGO school bus, mail truck, fire truck, ambulance, cement truck, UPS truck, pickup truck, recycling truck, and a military airplane.
We love building tiny LEGO projects, and we’ve got more than just vehicles on this site if you’re looking for fun mini builds.
When you’re building on a mini scale, you have to get creative about what you use. Regular wheels might be too big, but what other pieces can be a wheel? A house door might be too large for a tiny house, but what else can make a door? So much fun!
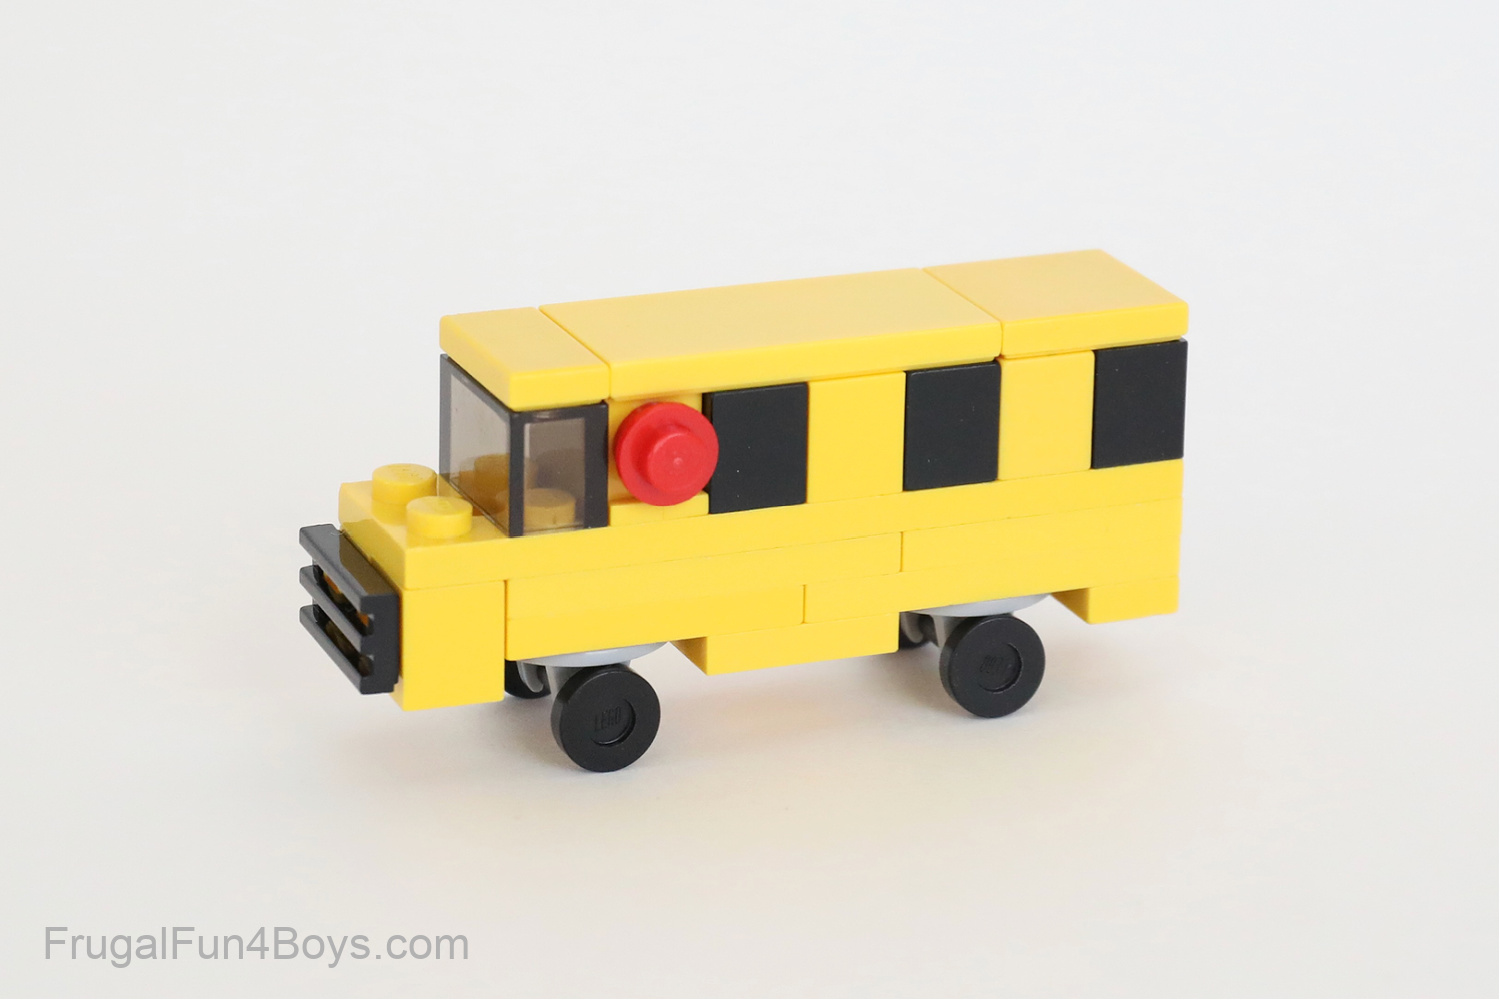
SCHOOL BUS
This adorable little school bus is one of my favorites! This was designed by my 13 year old son. He also designed the cement truck, fire truck, and UPS truck.
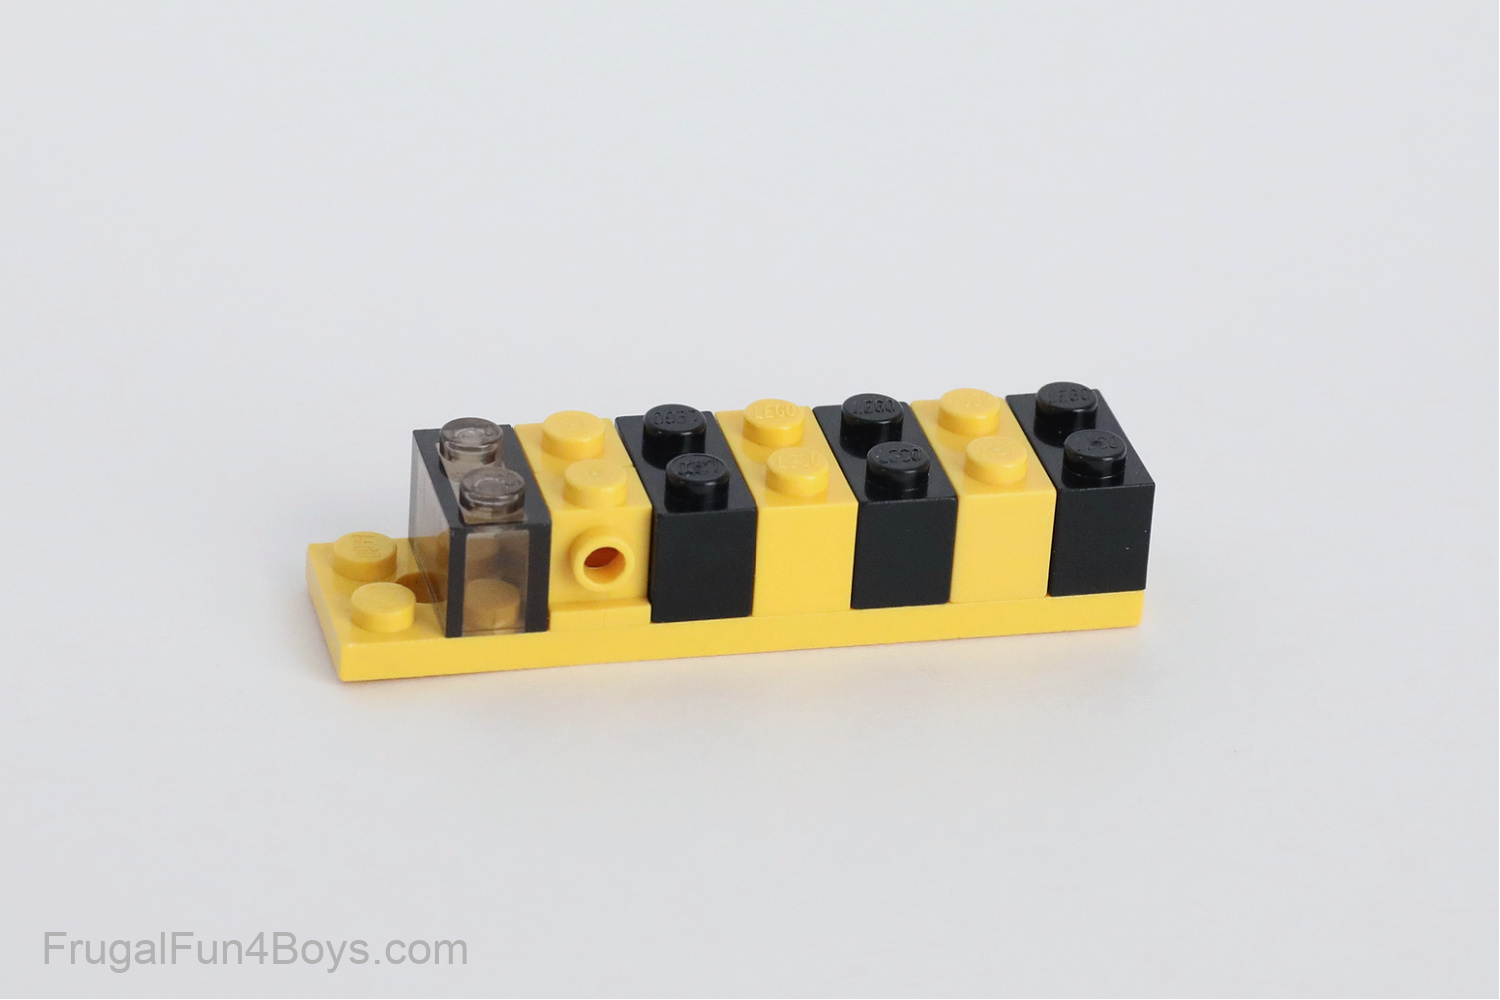
Start with a 2 x 8 yellow plate. Add three 1 x 2 black bricks and two 1 x 2 yellow bricks. Then add a 1 x 1 yellow brick and a 1 x 1 yellow brick with a stud on the side. The stud will hold the stop sign.
For the windshield, we used a 1 x 2 translucent black brick. A clear brick would work also.
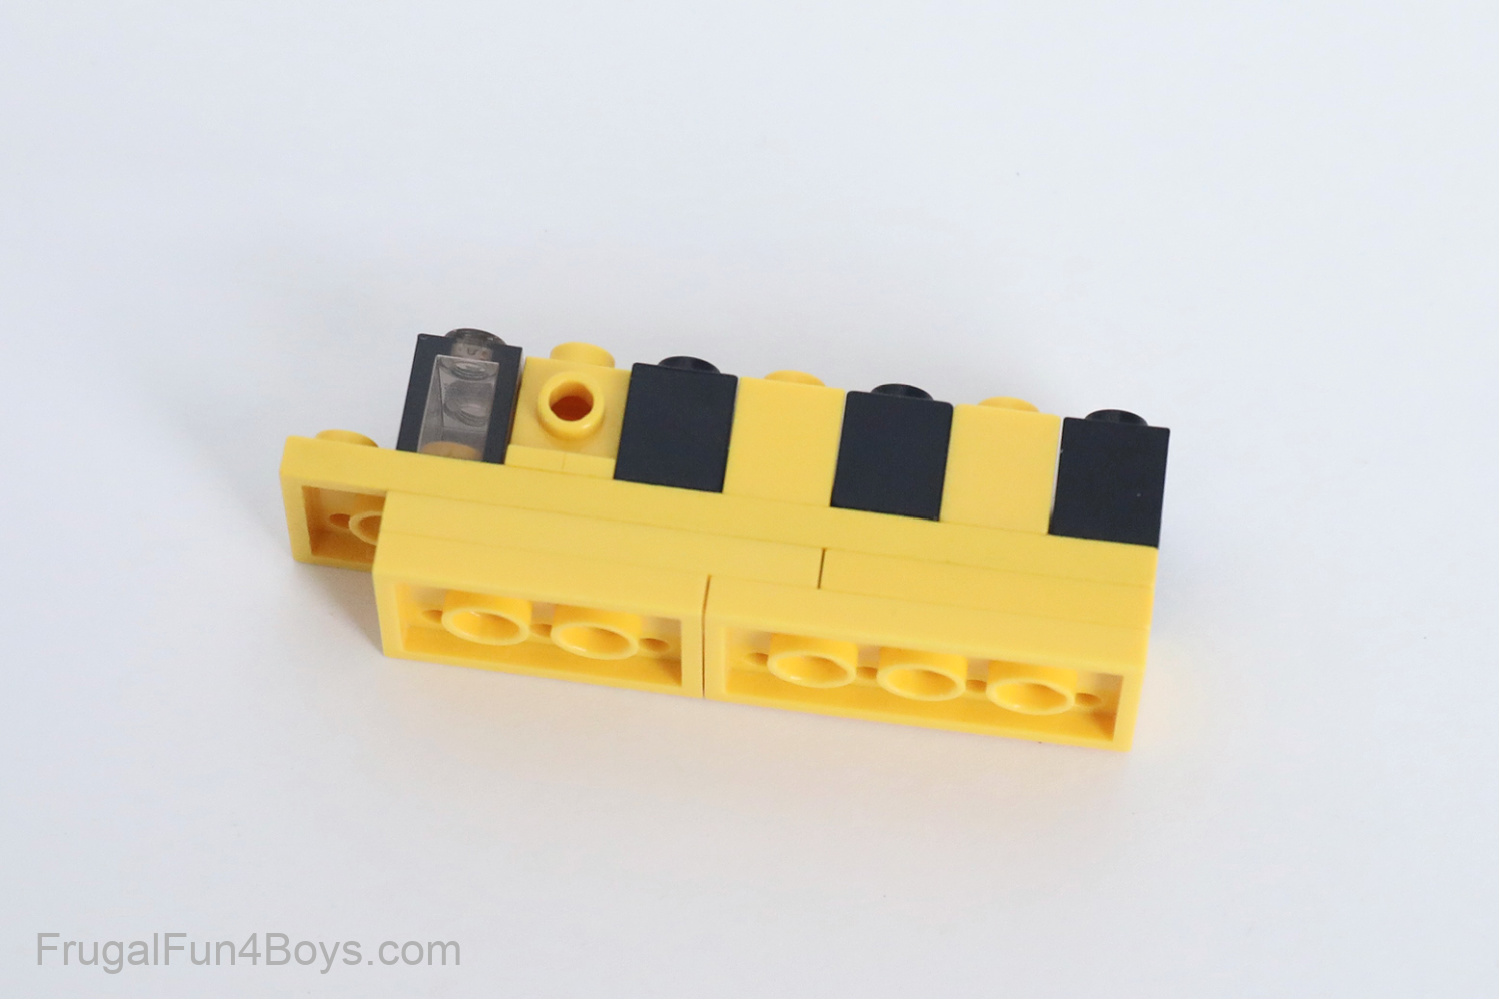
Add some plates to the underside of the school bus. We used a 2 x 4 yellow plate and a 2 x 3 yellow plate. Then we added another set of those – another 2 x 4 and 2 x 3.
Place two 1 x 1 yellow bricks with a stud on the side on the front of the bus. Then add a 1 x 2 black grill.
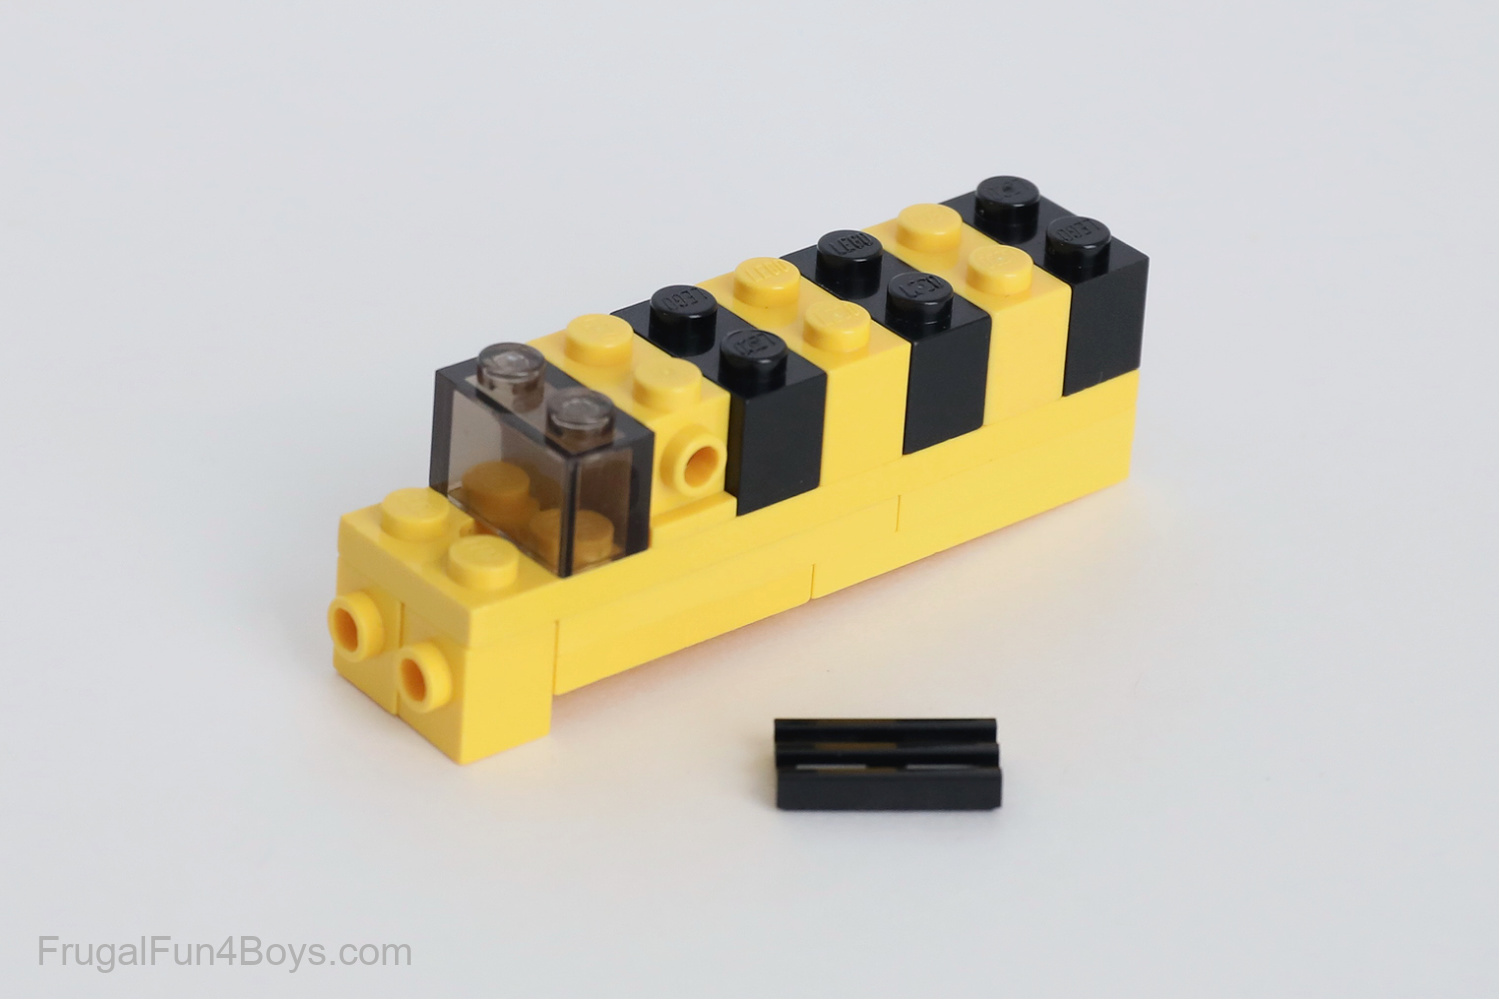
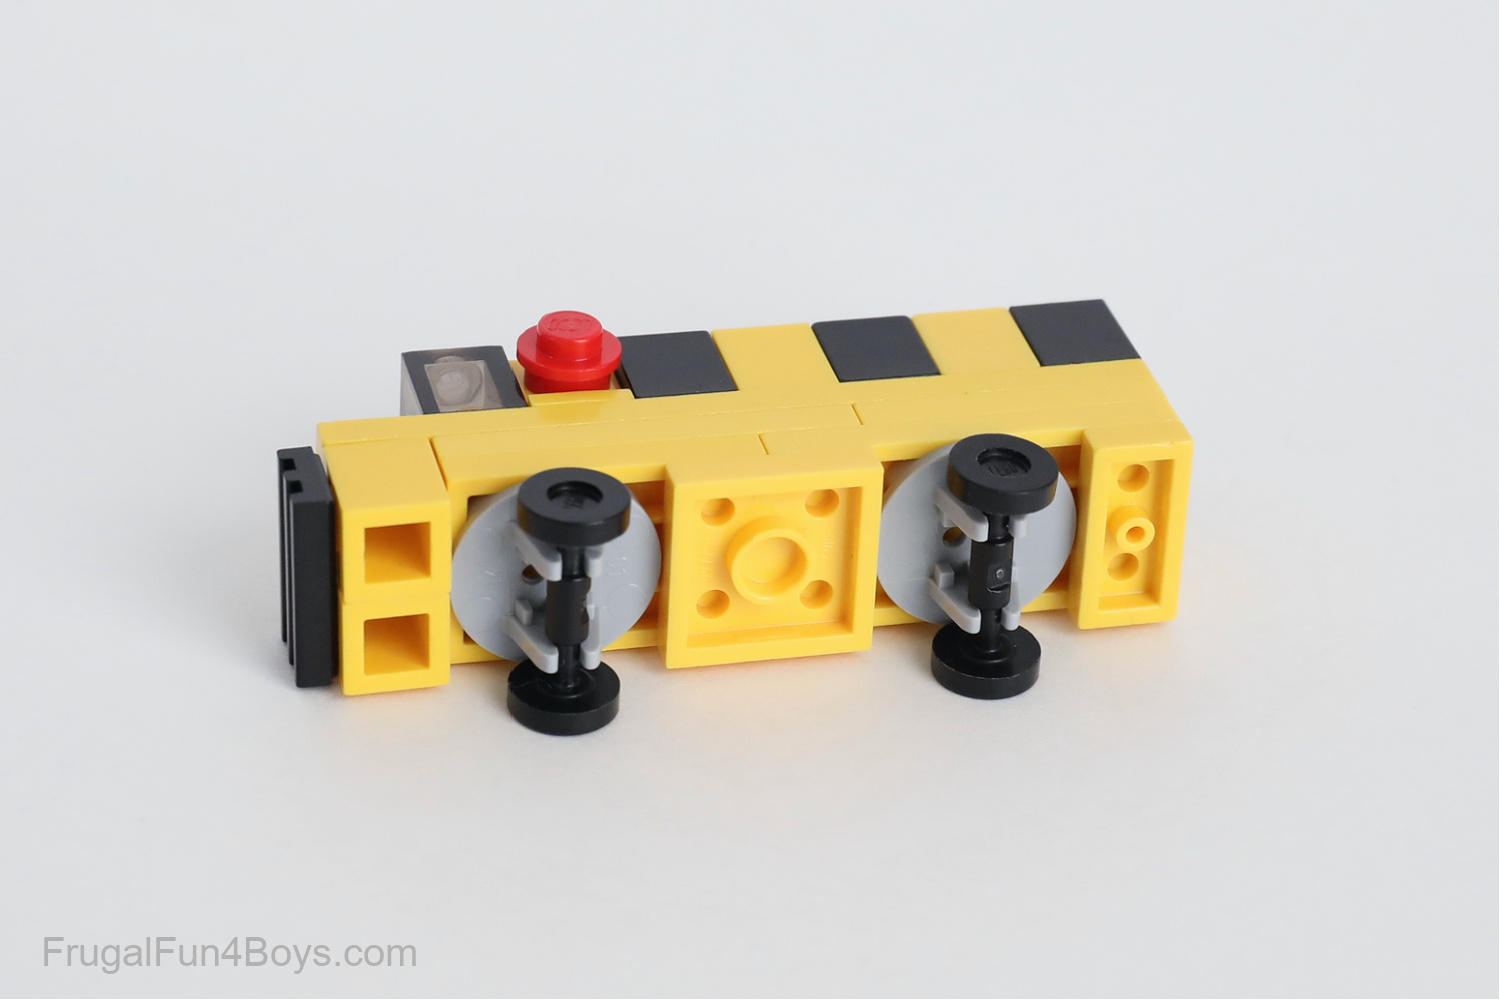
It’s time to add the wheels. We used two sets of 2 x 2 light gray round plates with skateboard wheels.
Add a 2 x 2 yellow plate and a 1 x 2 yellow plate around the wheels.
Then add a 1 x 1 red round plate for the stop sign.
Finish up your school bus by adding yellow tiles to the roof. If you don’t have tiles, plates will be just fine.
We used 2 x 4, 2 x 2, and 1 x 2 yellow tiles. A 2 x 4 and a 2 x 3 would have been even better.
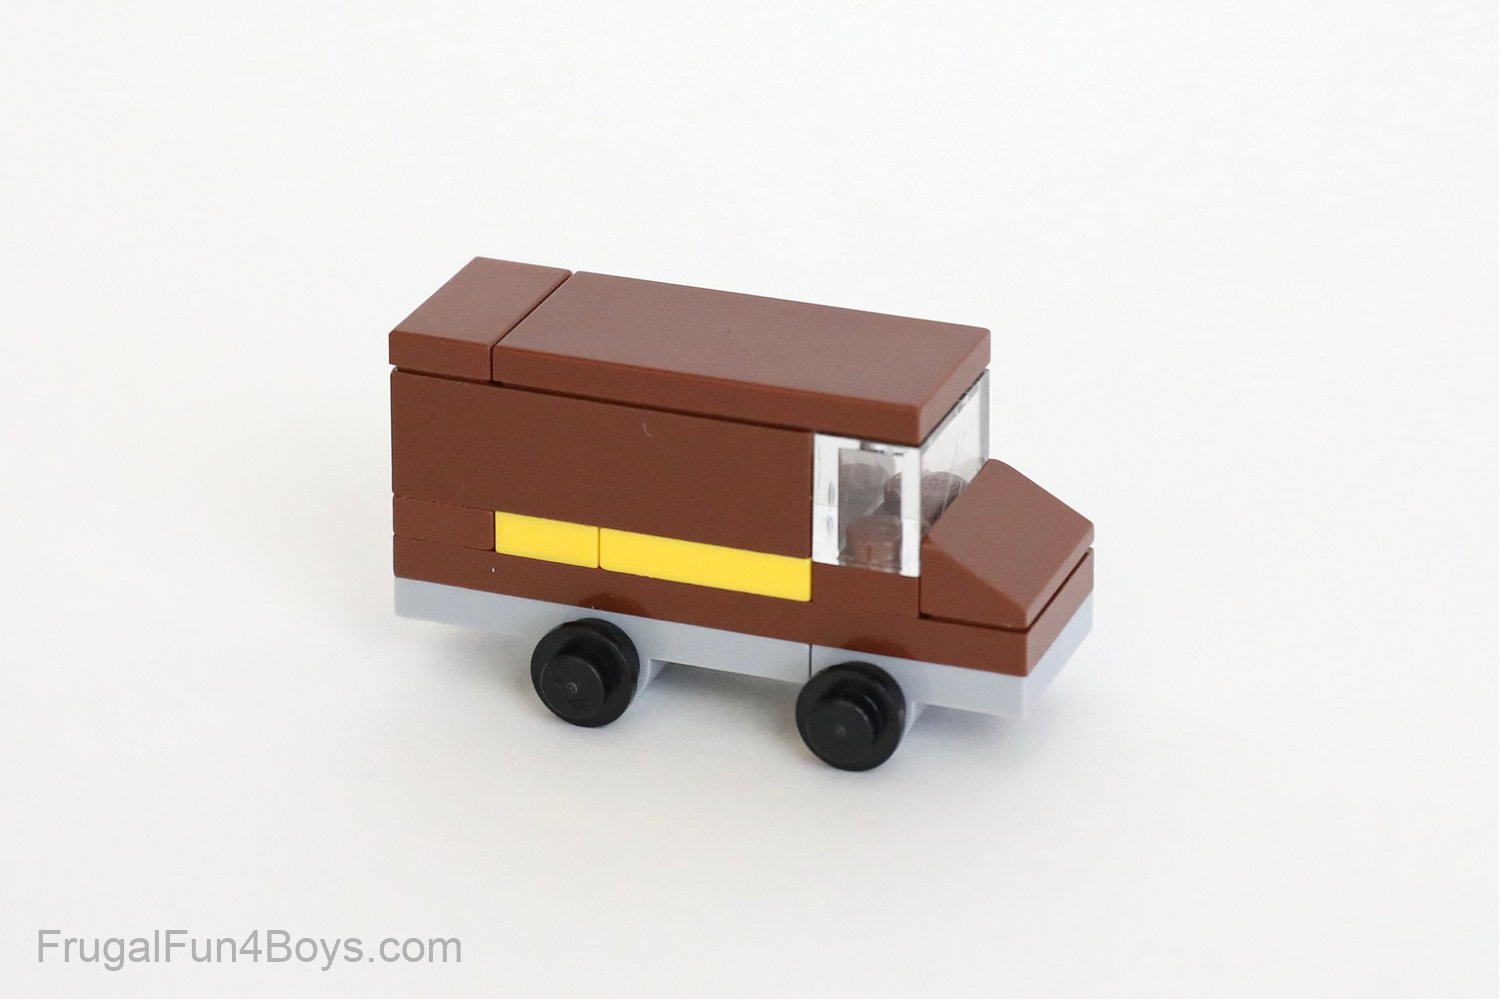
UPS TRUCK
This little truck is so cute! This vehicle will show you a different way to create wheels for LEGO mini vehicles.
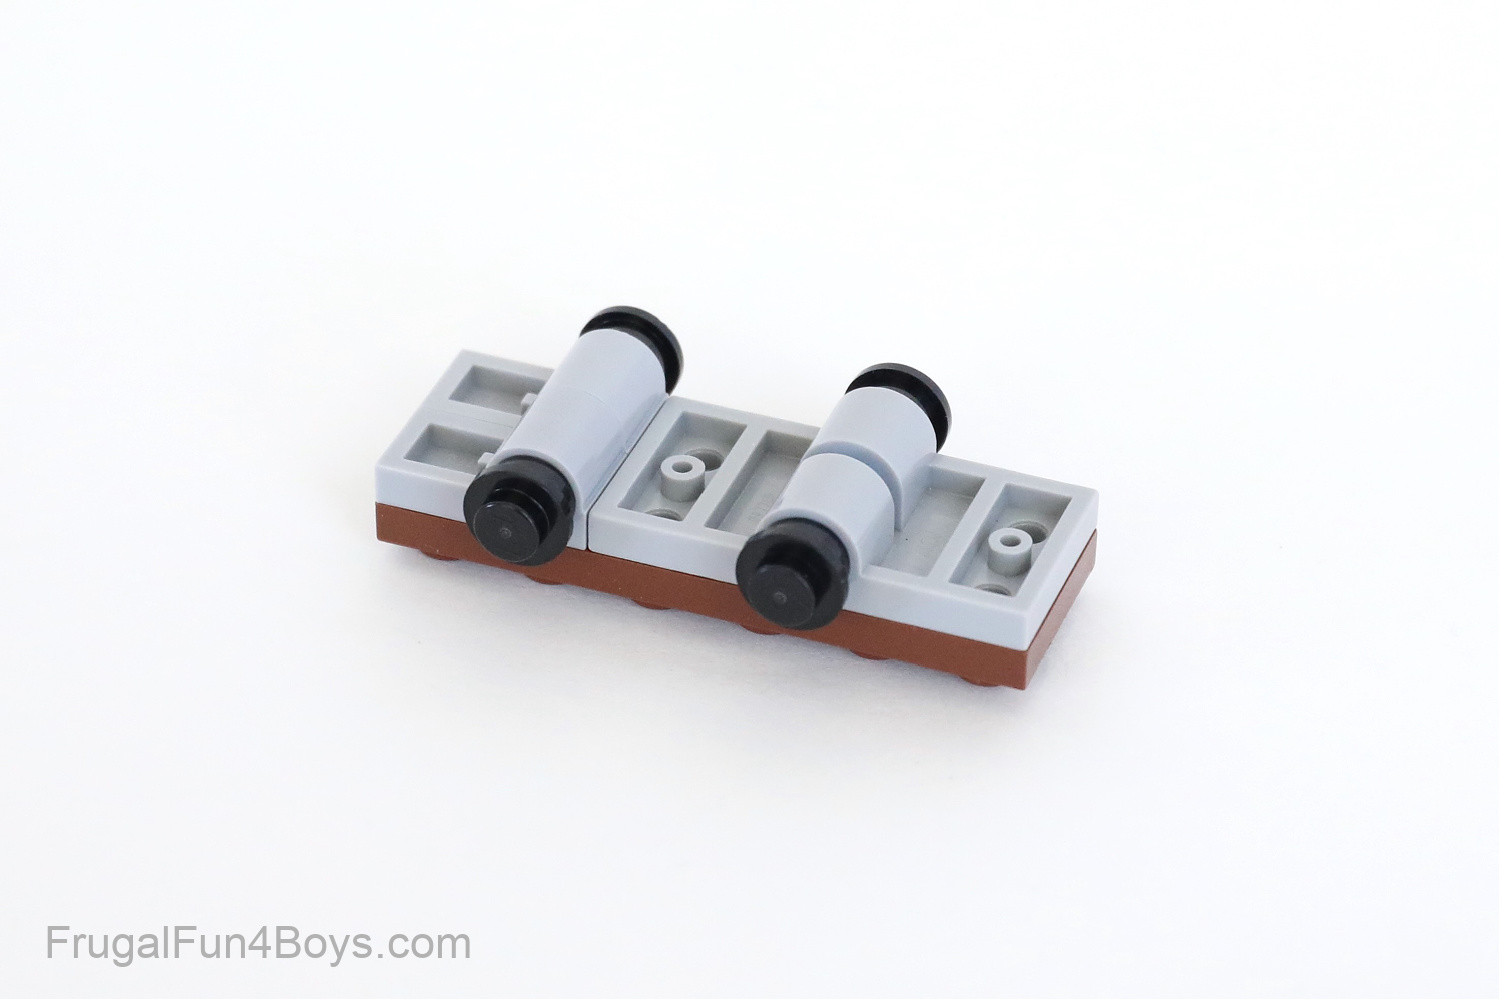
Gather the pieces shown for building the wheels.
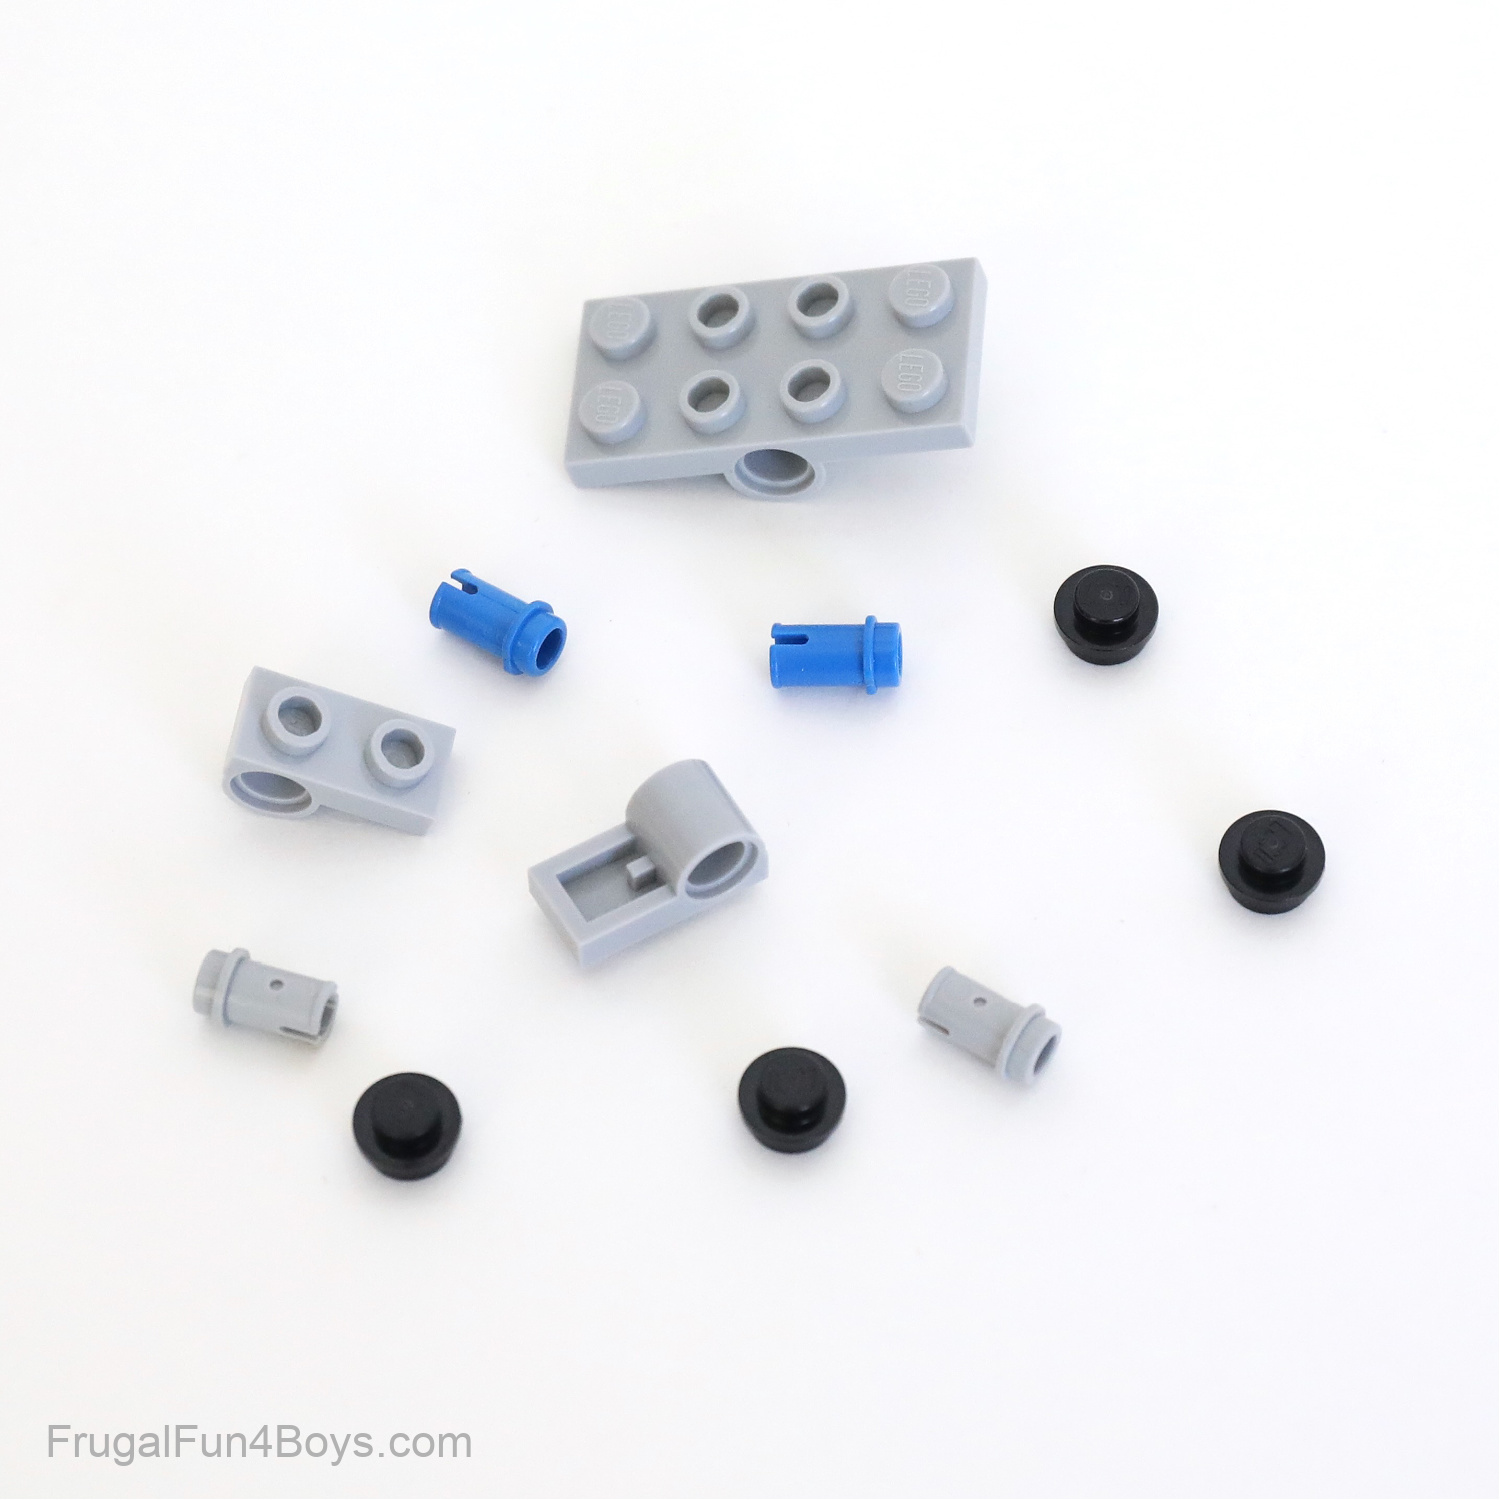
Insert two Technic pins (half length) into the pin holes. The light gray half pins allow the wheels to turn, while the blue pins have some friction. Attach a 1 x 1 black round plate to the end of each pin.
For this vehicle, a 2 x 4 plate with two pin holes and two 1 x 2 plates with a pin hole worked well.
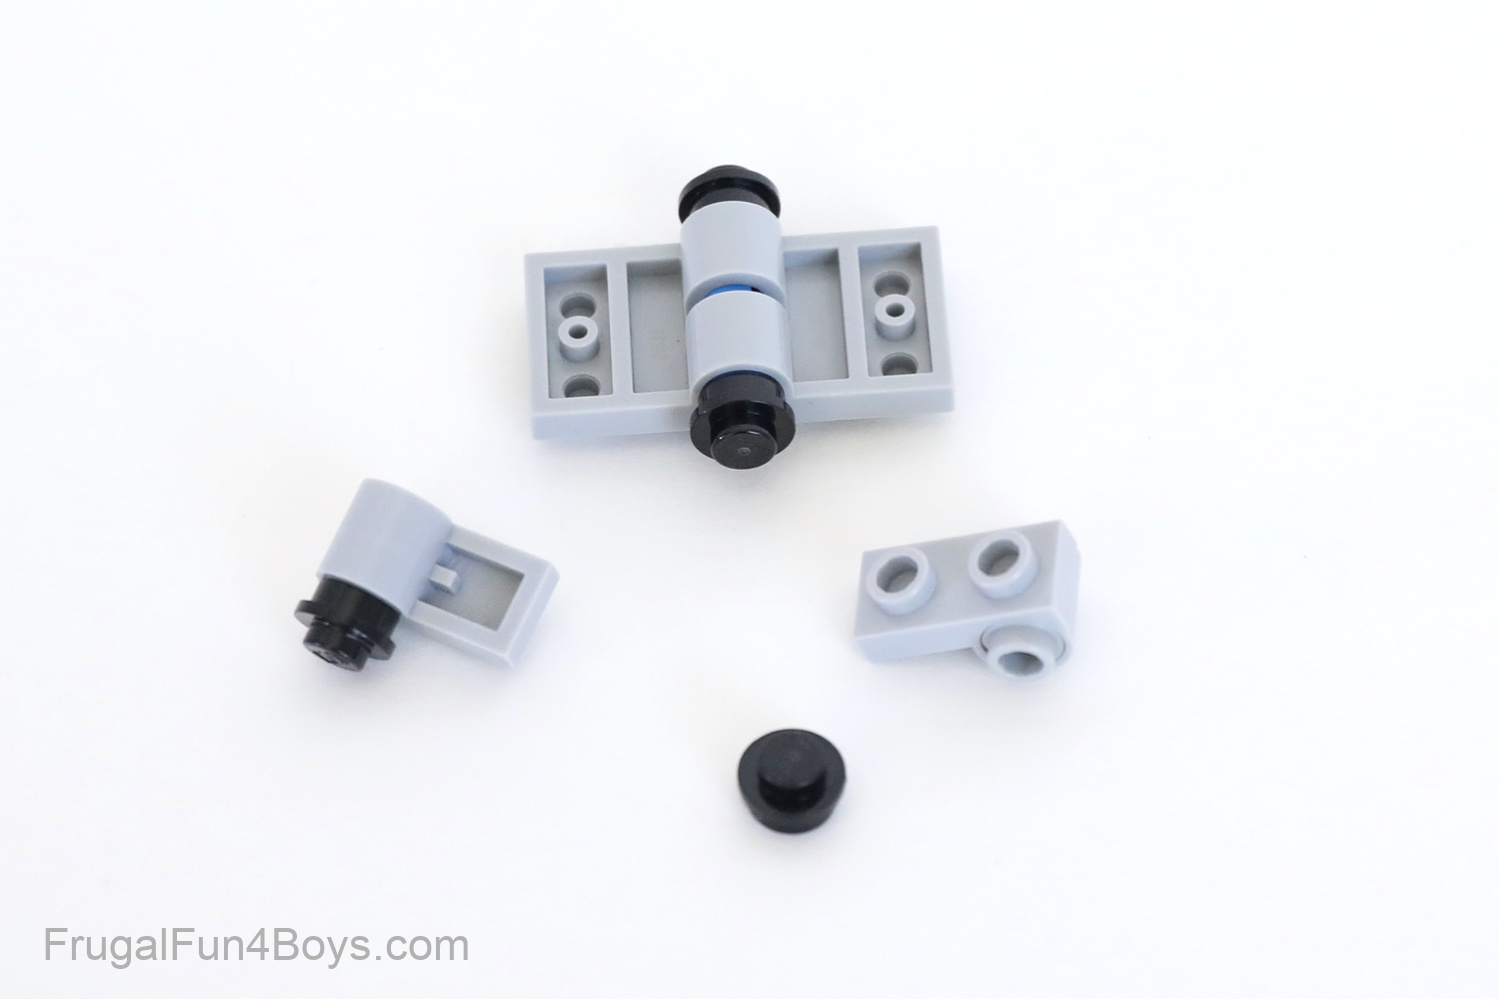
Attach the plates with pin holes to the underside of a 2 x 6 brown plate.
Turn the truck over. Add a 1 x 2 brown plate, a 1 x 2 yellow plate, a 2 x 2 yellow plate, another 1 x 2 brown plate, and a 1 x 2 brown slop (30 degree).
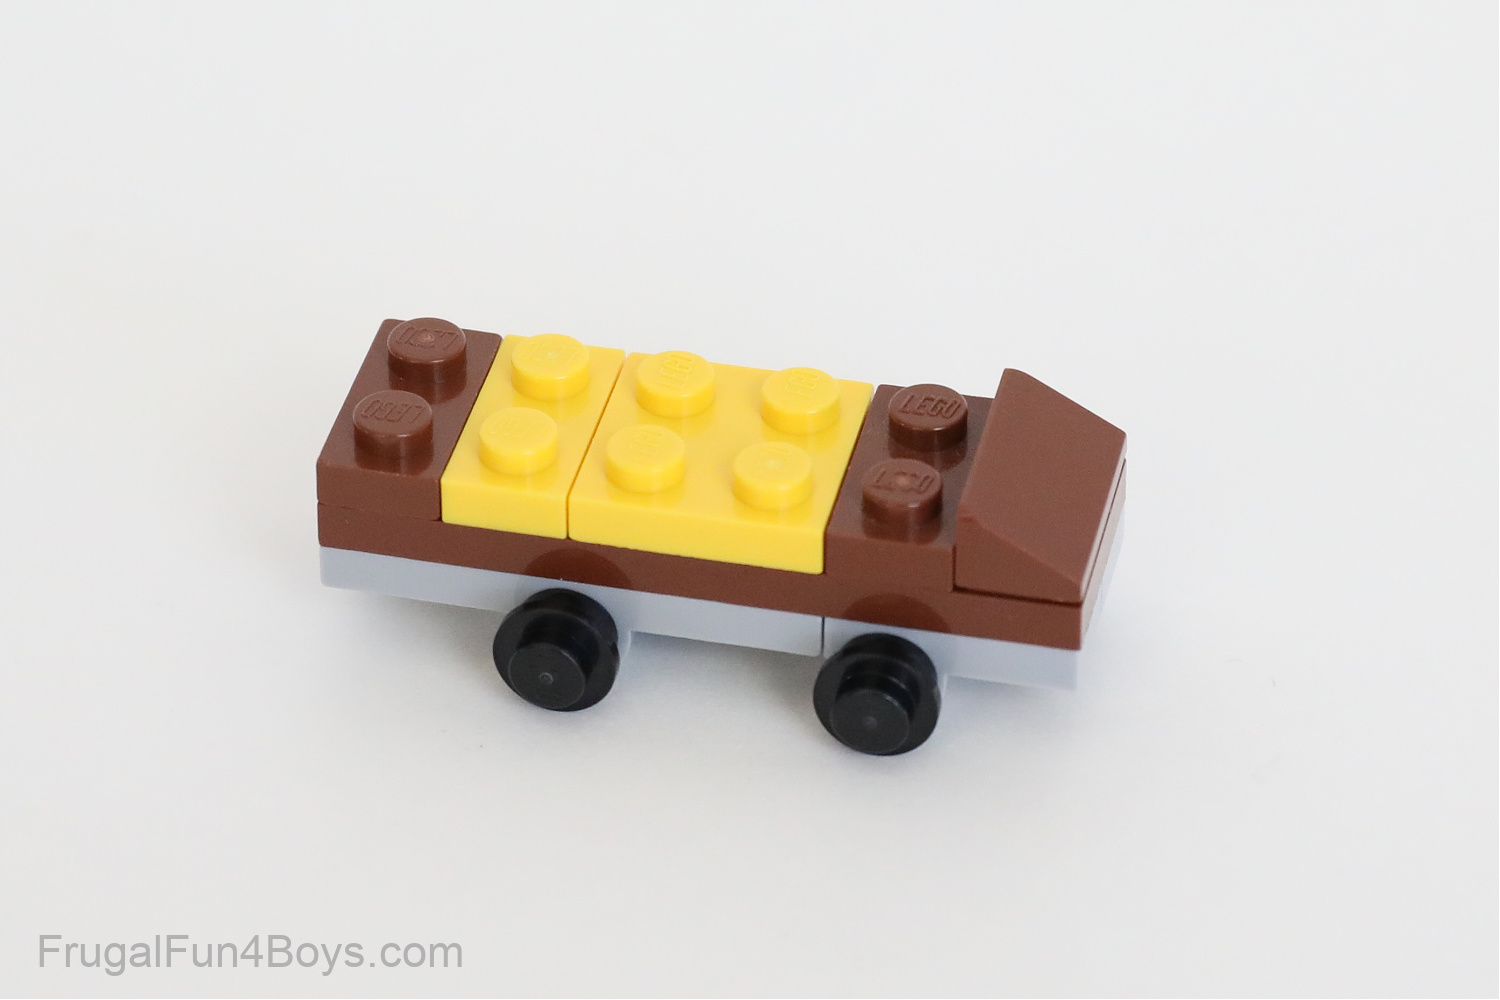
Then finish up the truck with a 2 x 4 brown brick and a 1 x 2 clear brick. Place a 1 x 2 brown tile and a 2 x 4 brown tile on the roof. Your tiny UPS truck is complete!
MAIL TRUCK
Use this same building technique to make an adorable mail truck. We used four 1 x 2 light gray plates with pin holes for the wheels on this vehicle.
FIRE TRUCK
Create a cool mini LEGO hook and ladder truck!
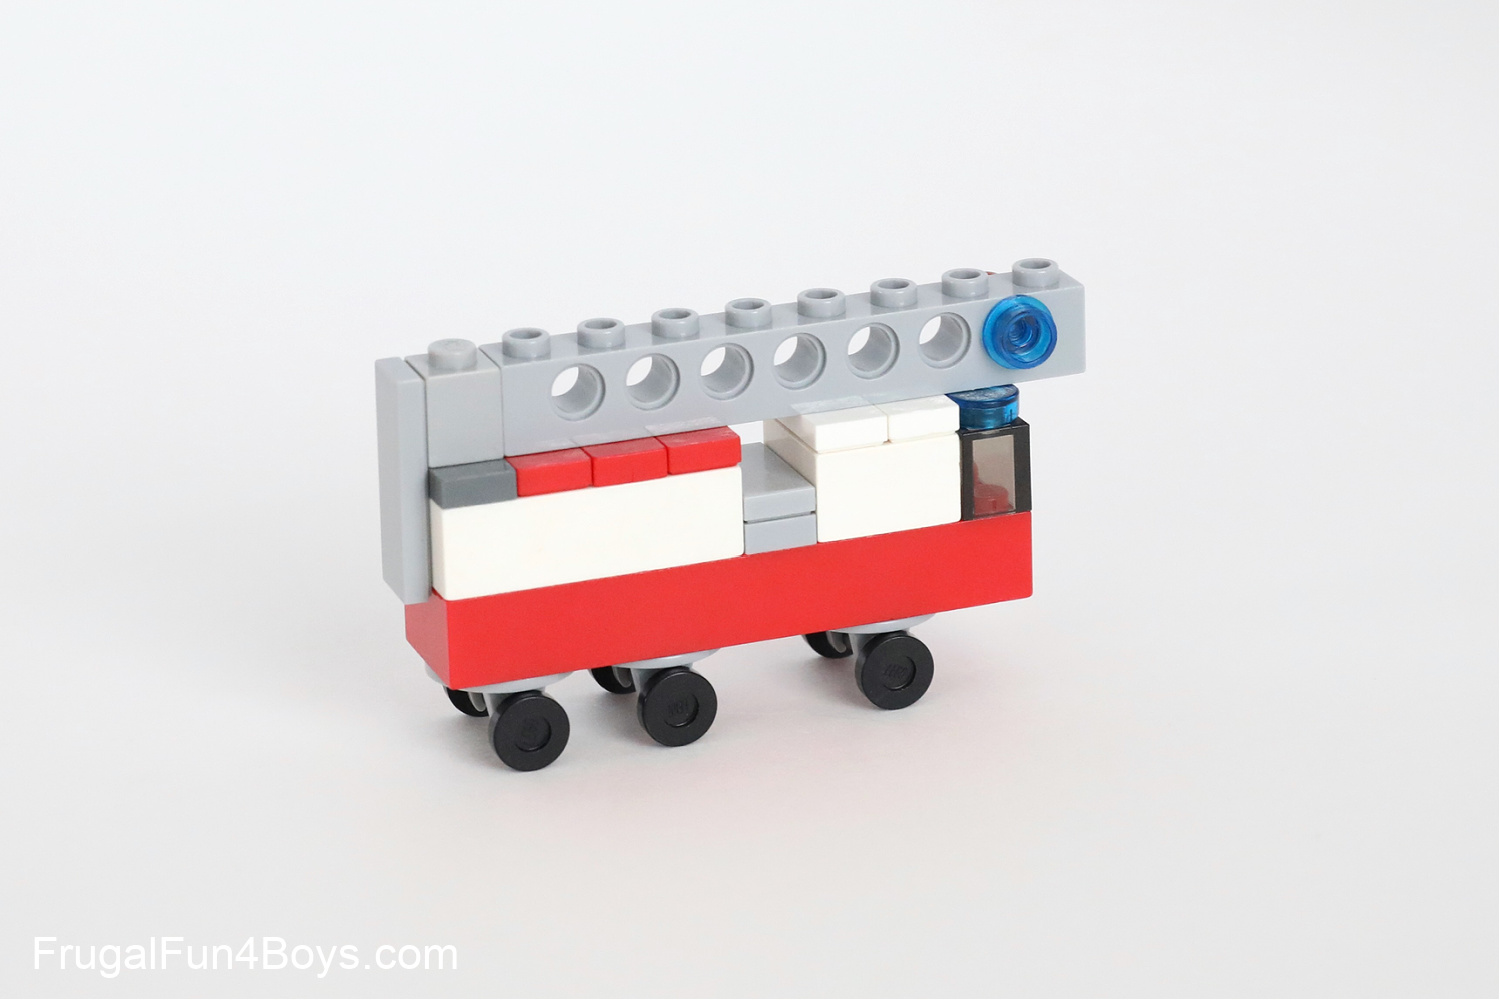
Start with a 2 x 8 red brick as the base. We used three sets of skateboard wheels for this fire truck.
You’ll want to use a row of 1 x 2 plates with one stud (jumper plates) on the top of the fire truck. These will hold the ladder and center it on the truck.
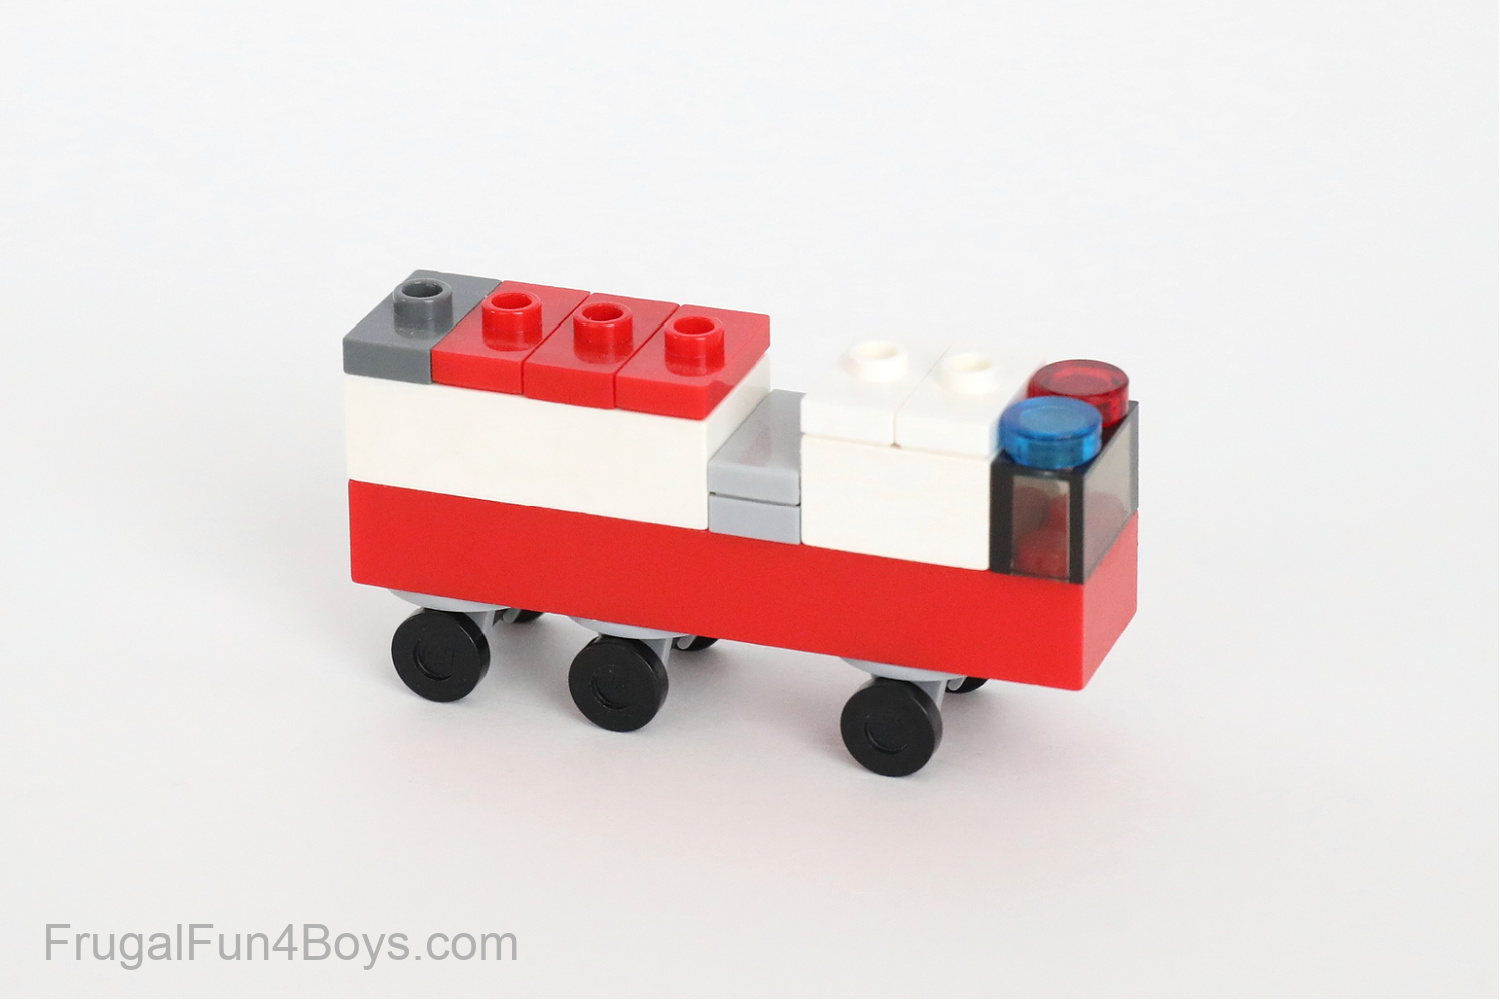
We used a 1 x 8 light gray Technic brick for the ladder.
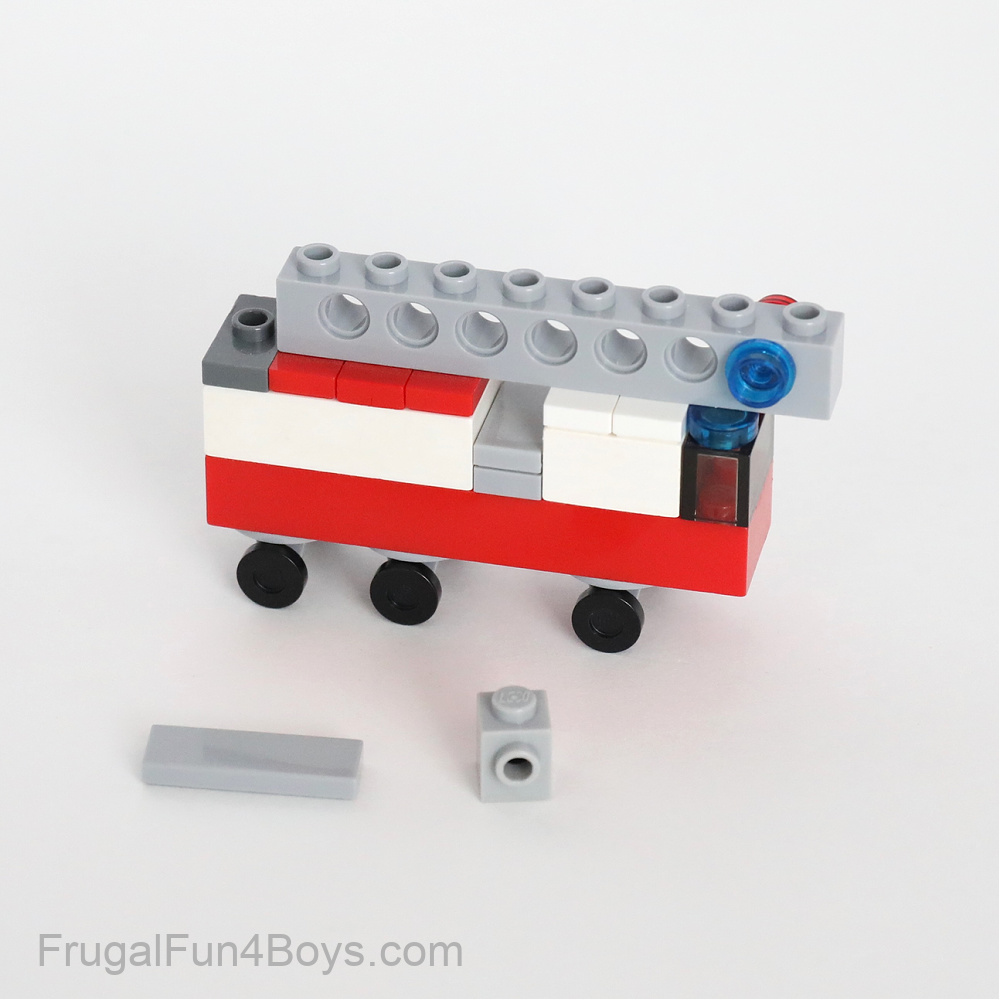
Finish up the truck with a 1 x 1 light gray brick with one stud on the side and a 1 x 3 light gray tile.
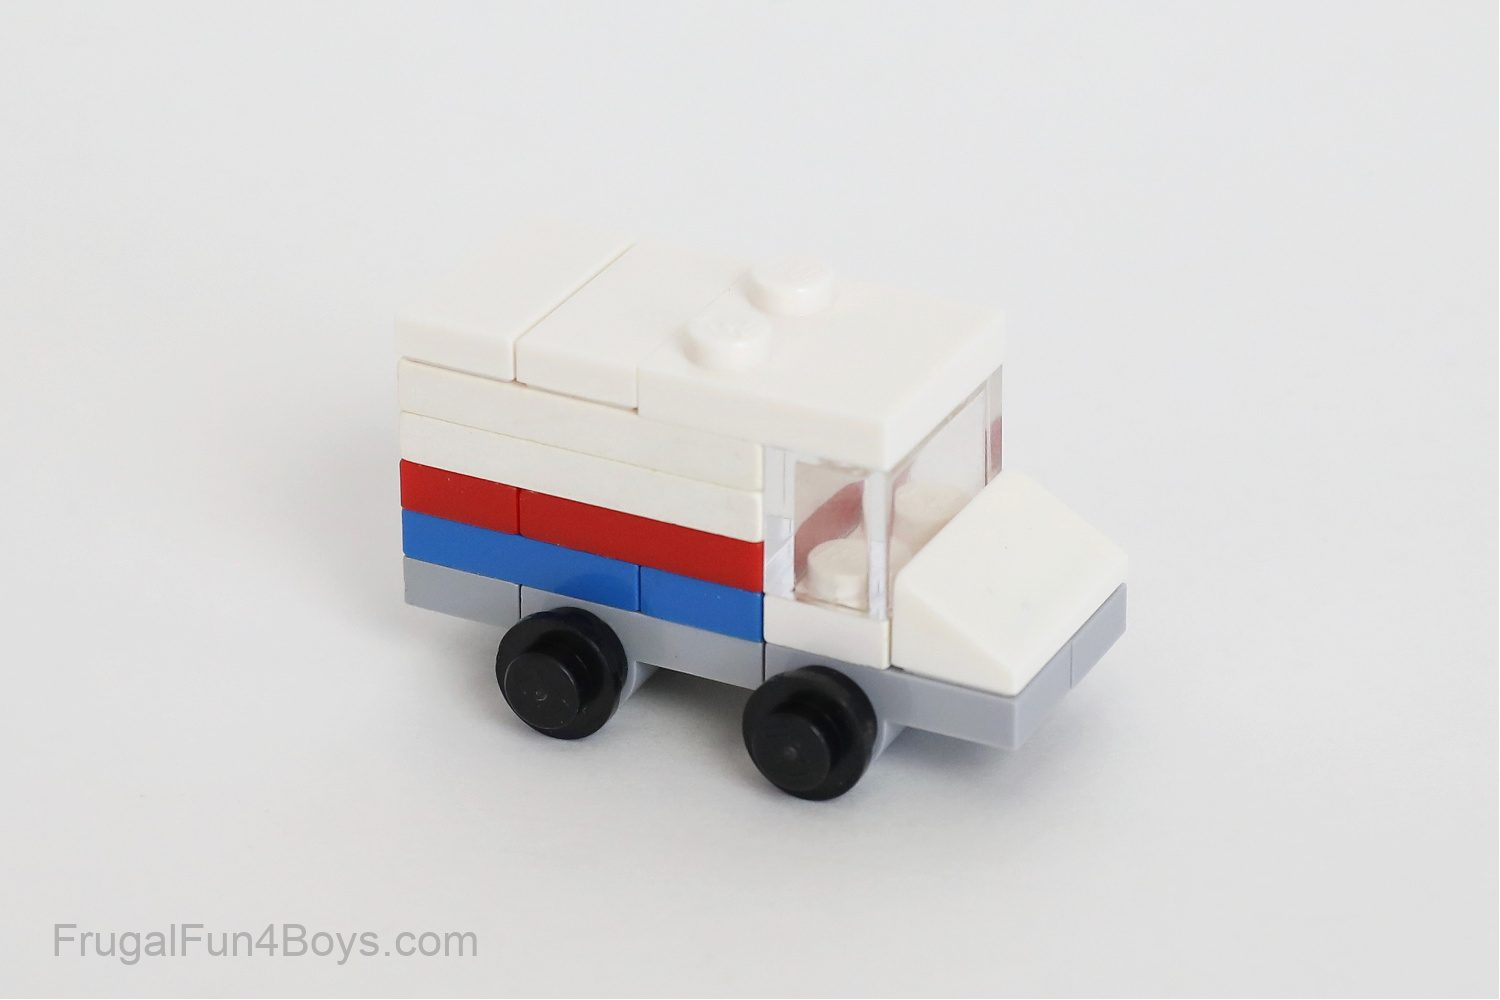
AMBULANCE
Of course you need a mini ambulance to go with your little fire truck!
The proportions are key in making this actually look like an ambulance. The vehicle base is two studs wide, while the back end (the patient area) is three studs wide.
This photo shows how I centered three studs over two studs. By using a row of jumper plates, you can attach a back end that is three studs wide.
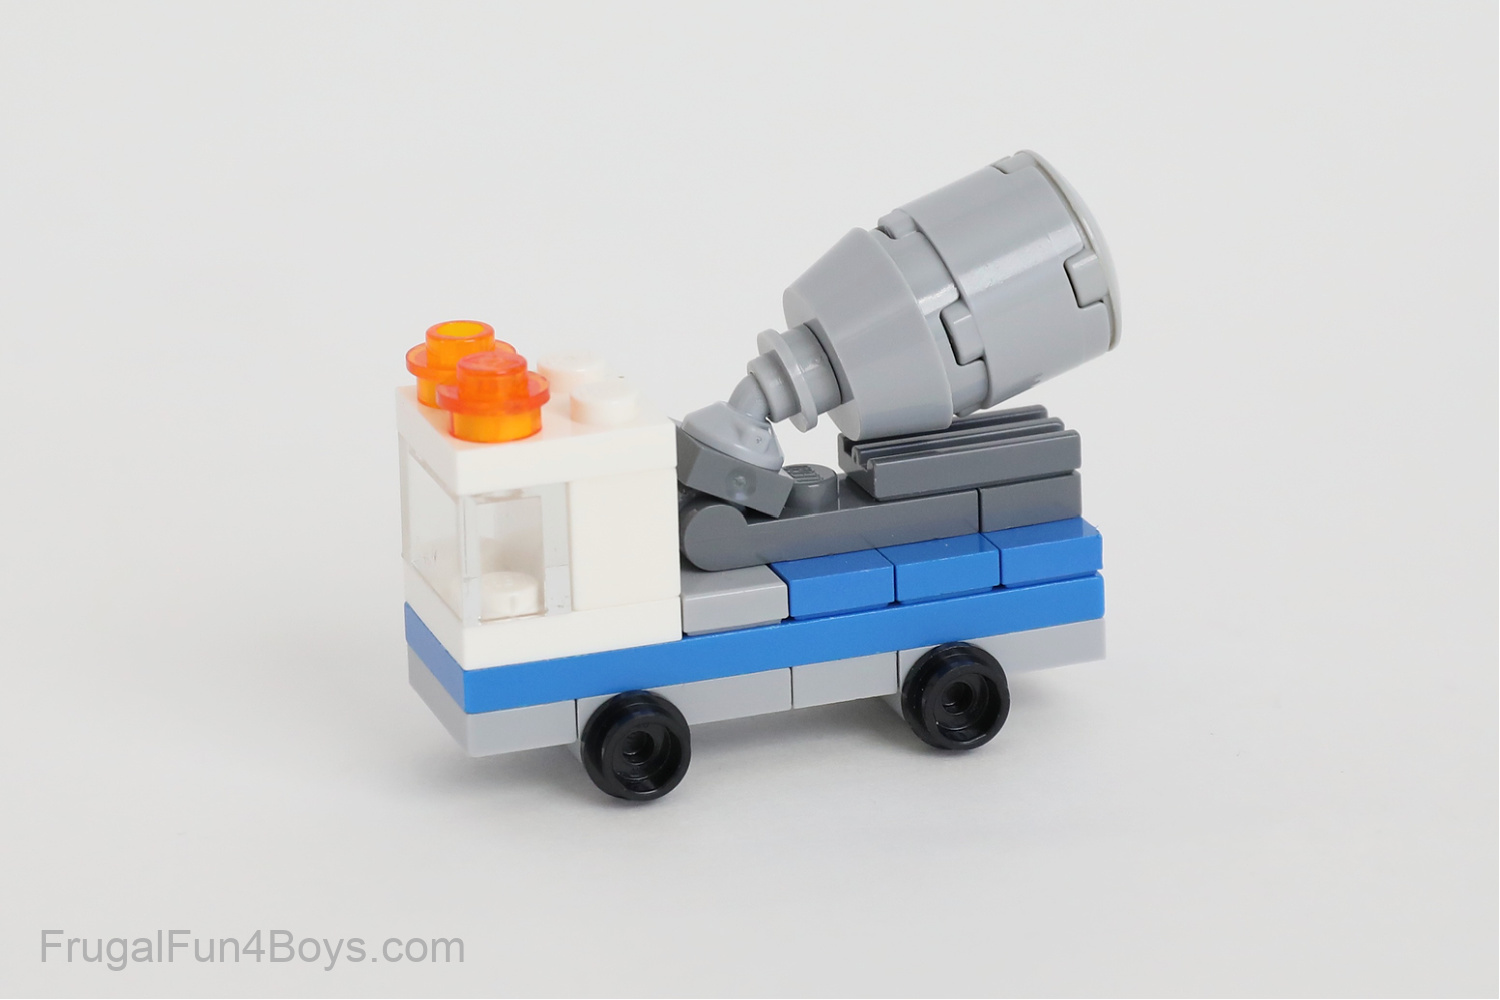
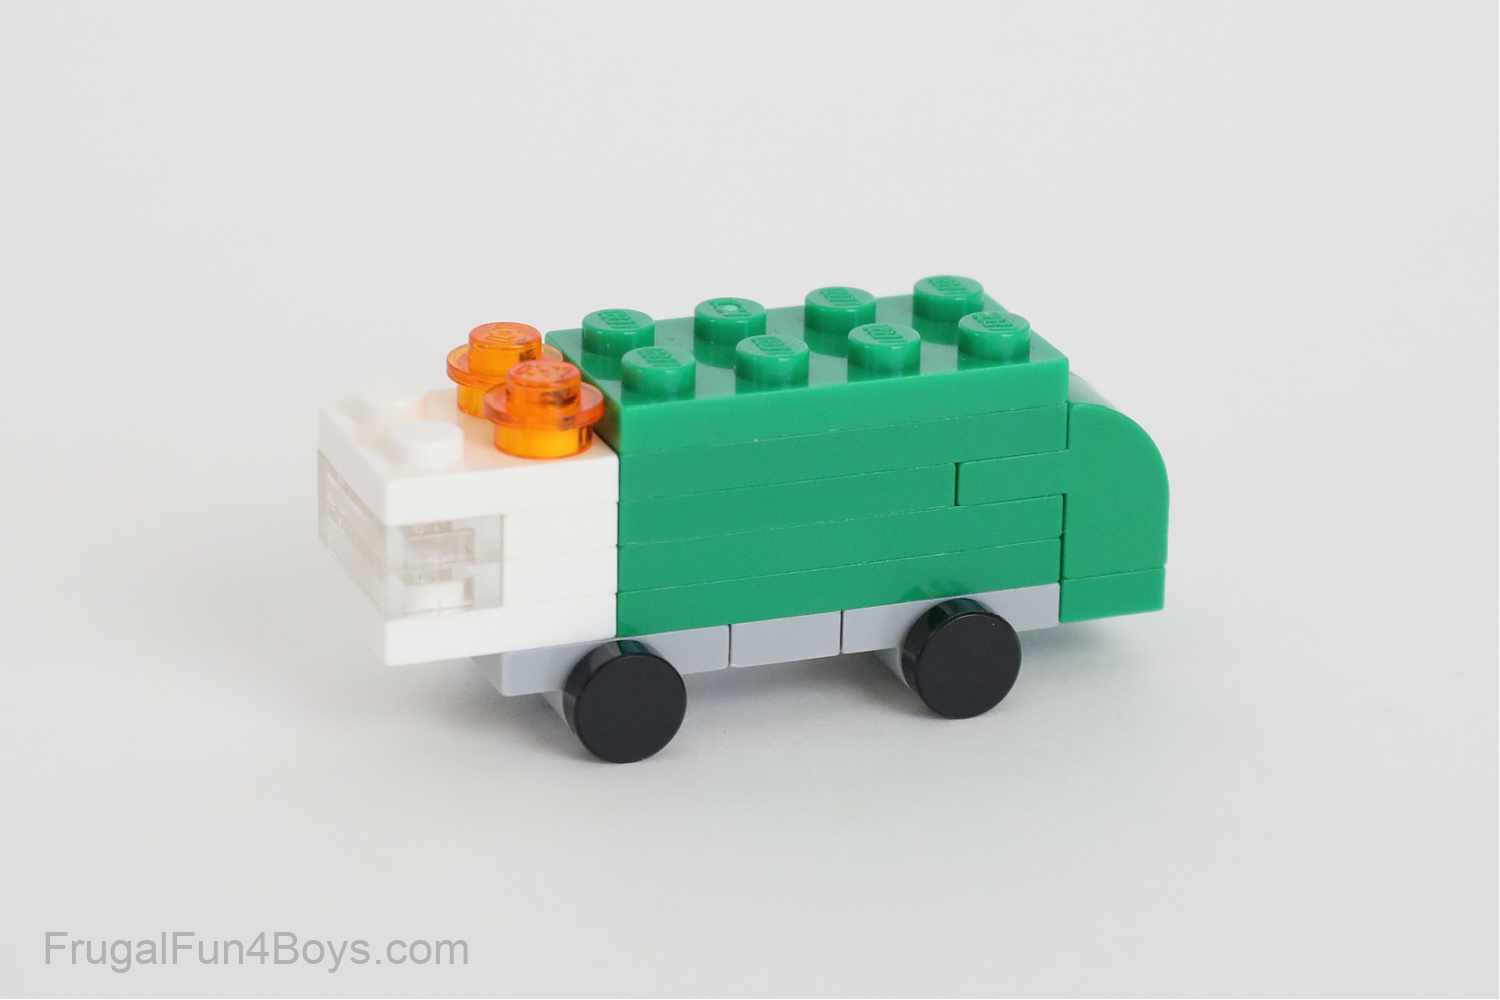
CEMENT TRUCK
My 13 year old son was determined to come up with a little cement truck! It took some time to figure out what pieces to use, but I think it turned out super cute.
Start with a 2 x 6 blue plate.
The cab is a 2 x 2 white plate with a 1 x 2 clear brick and a 1 x 2 white brick on top. Then add another 2 x 2 white plate and two translucent orange 1 x 1 round plates as lights. A row of blue jumper plates (1 x 2 plates with one stud on top) will hold the cement mixer.
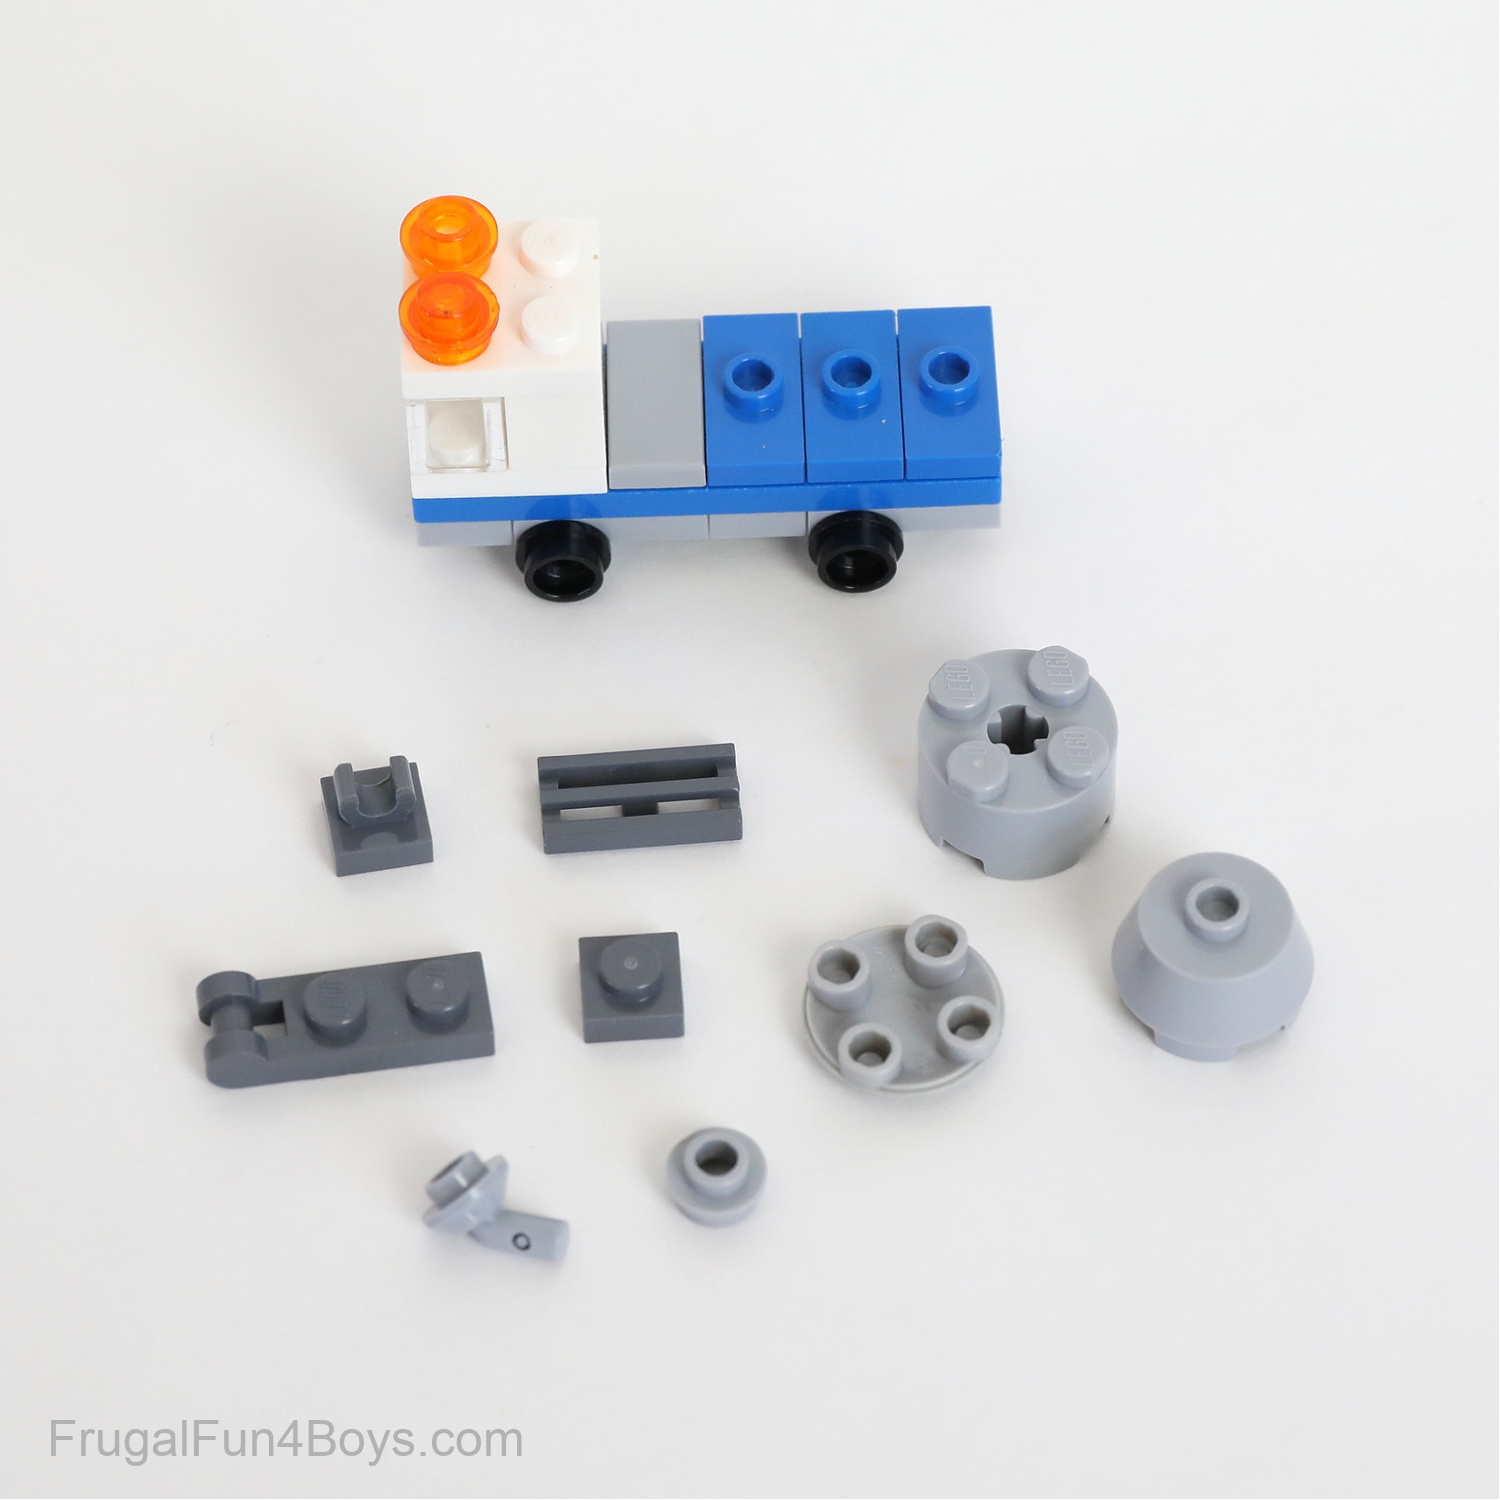
Attach a 1 x 2 dark gray plate with a handle on the end and a 1 x 1 dark gray plate to the truck. Then add a 1 x 2 dark gray grill.
Build the cement mixer by attaching a 2 x 2 light gray cone to a 2 x 2 round brick. Add a 2 x 2 light gray round plate with a rounded bottom.
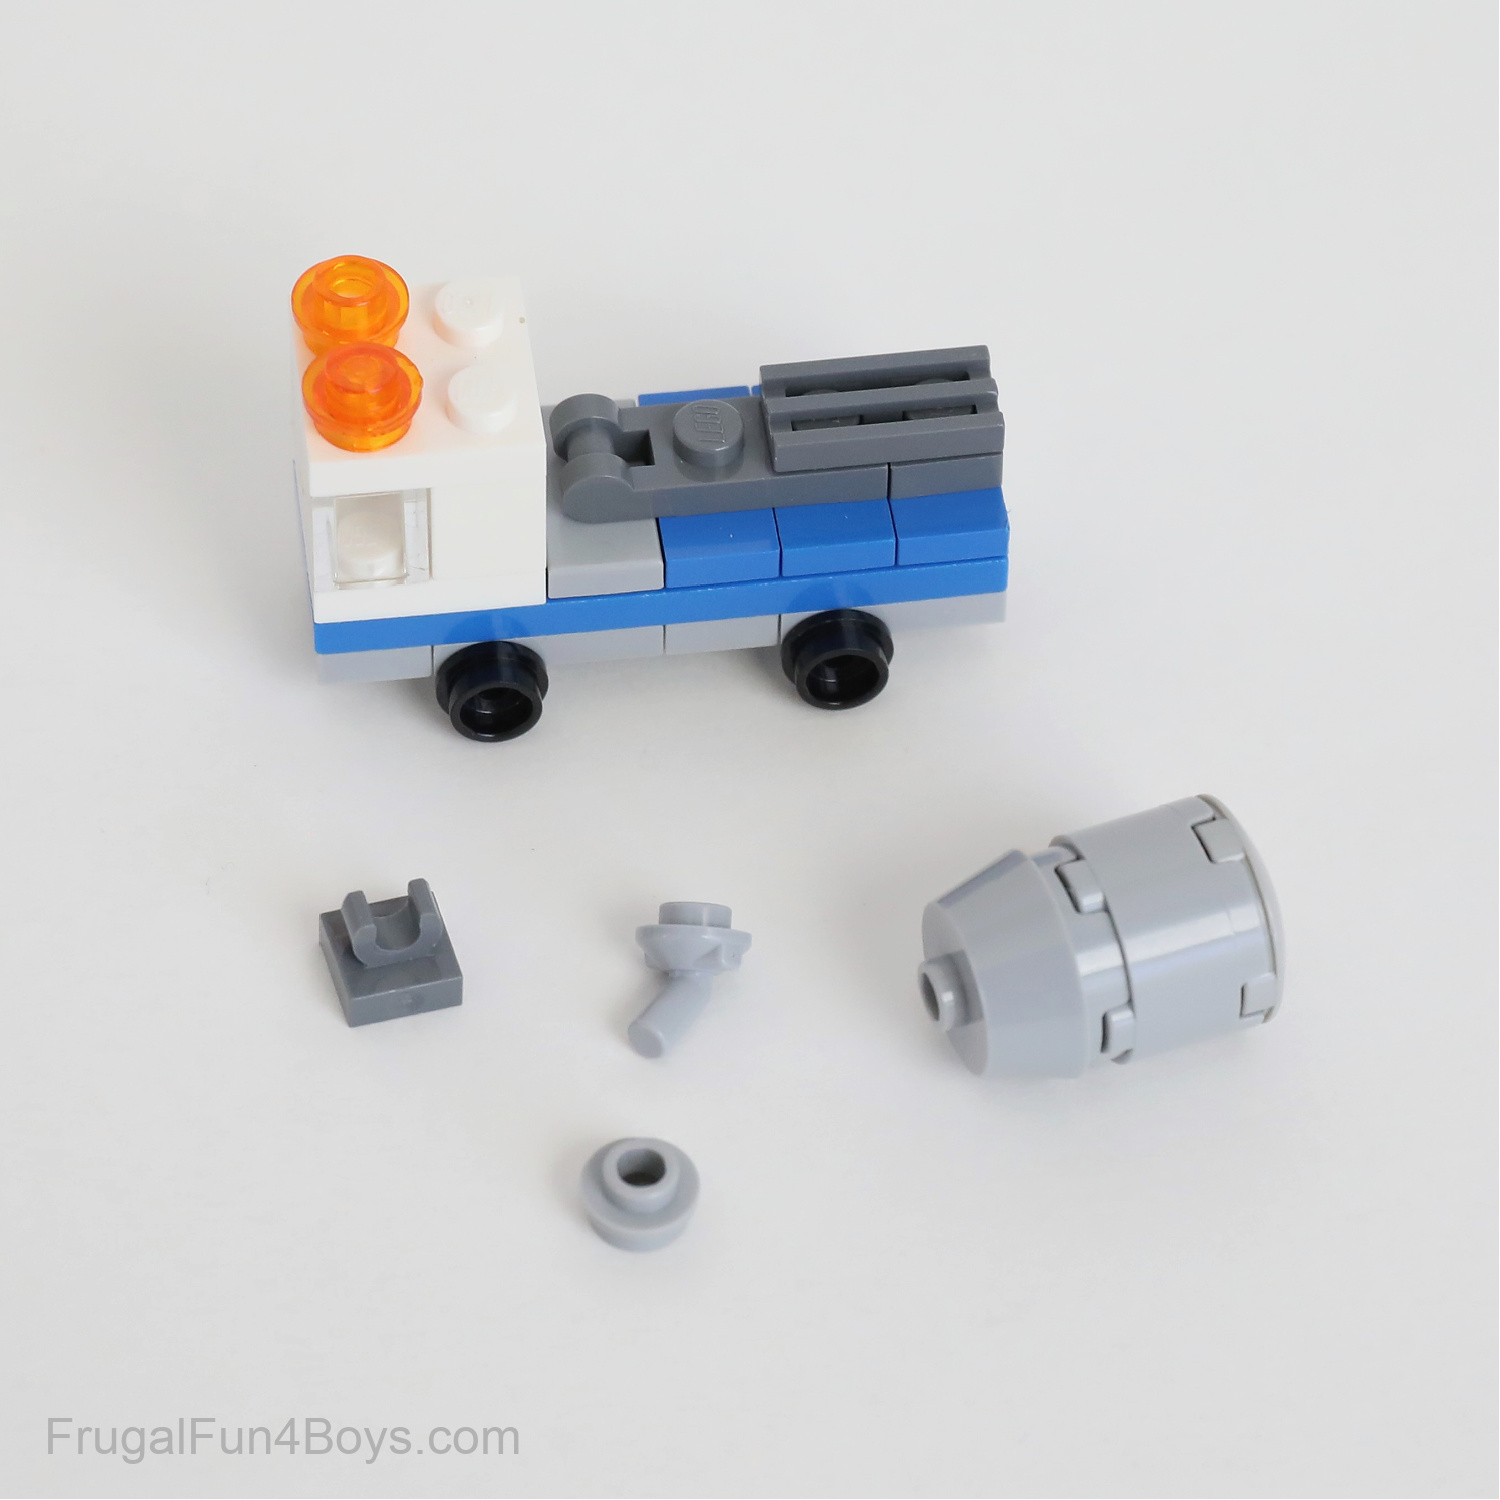
To attach the cement mixer to the truck, my son used a 1 x 1 dark gray plate with a clip, a 1 x 1 light gray round plate with an open stud, and that little light gray piece with a bar. I cannot find that piece on Brick Link because I can’t remember what it’s called! Sorry!
RECYCLING TRUCK
This cute little recycling truck is one of my favorites! I used two 2 x 1 x 1 1/3 curved slope bricks for the back end of the truck. Otherwise, this truck is just plates.
These wheels are 1 x 1 black round tiles instead of round plates. I love how they look! We just didn’t have enough of these for all of the vehicles.
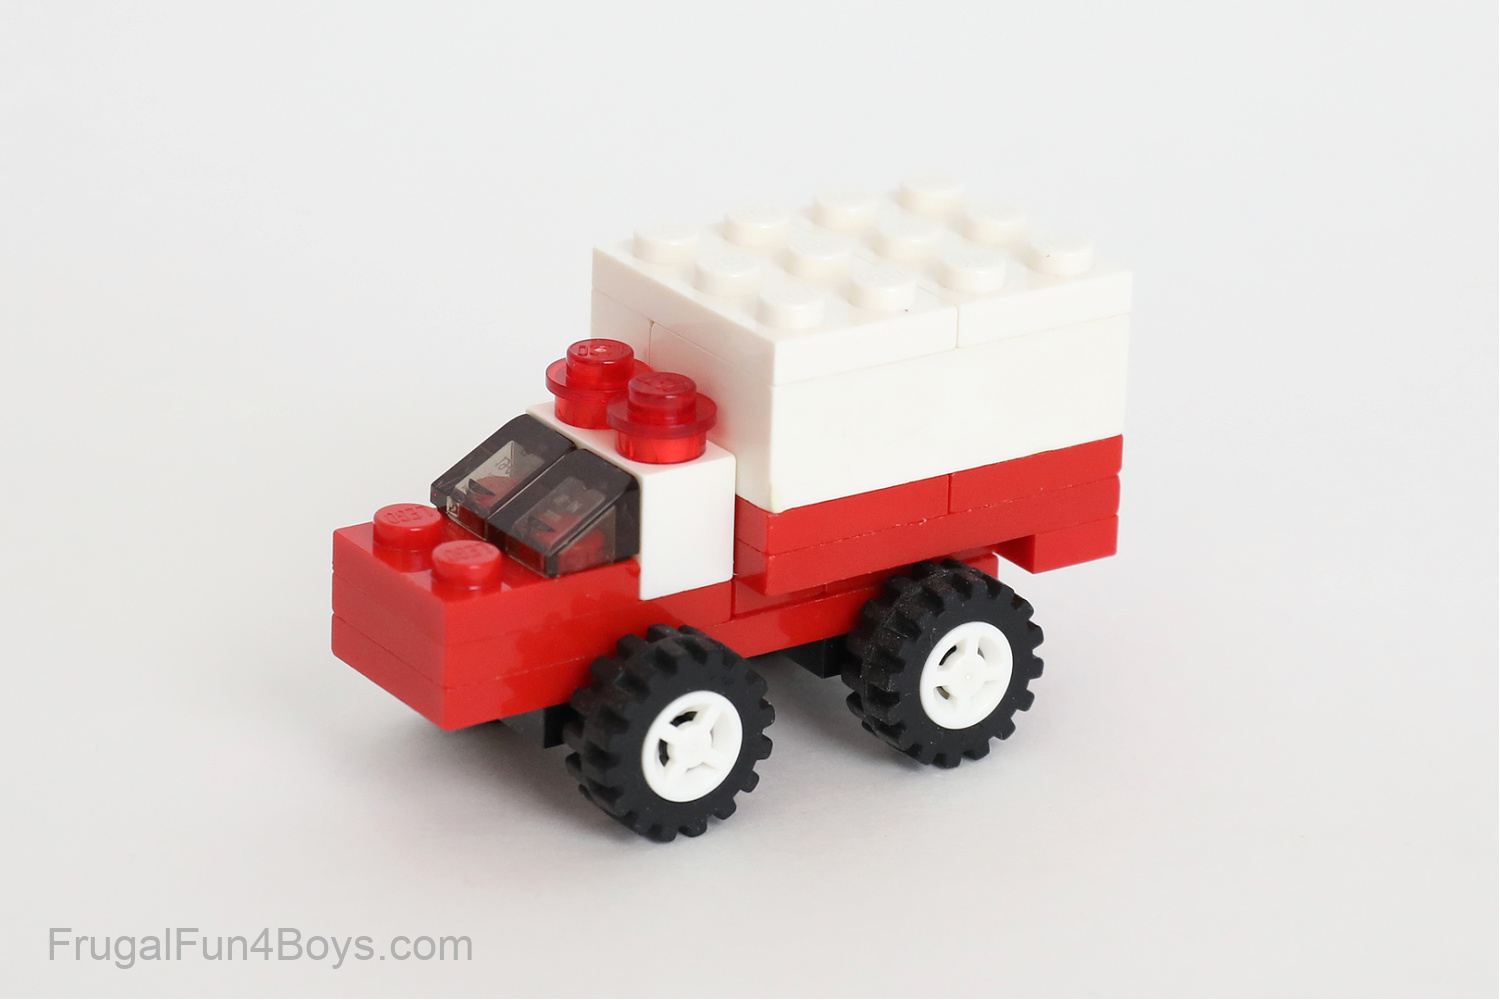
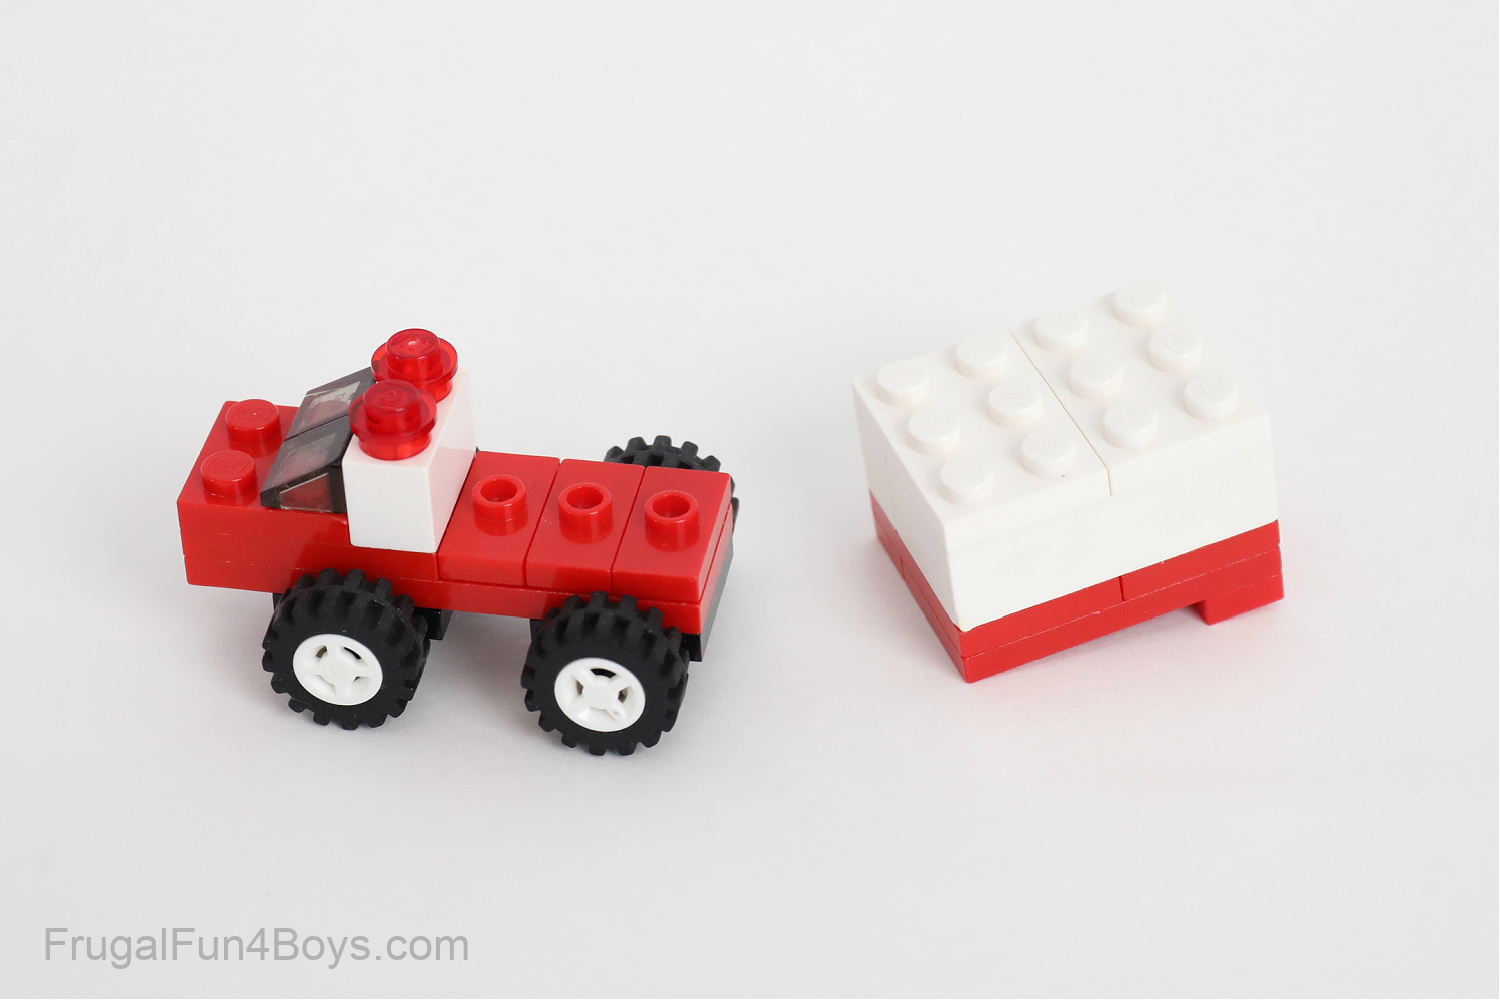
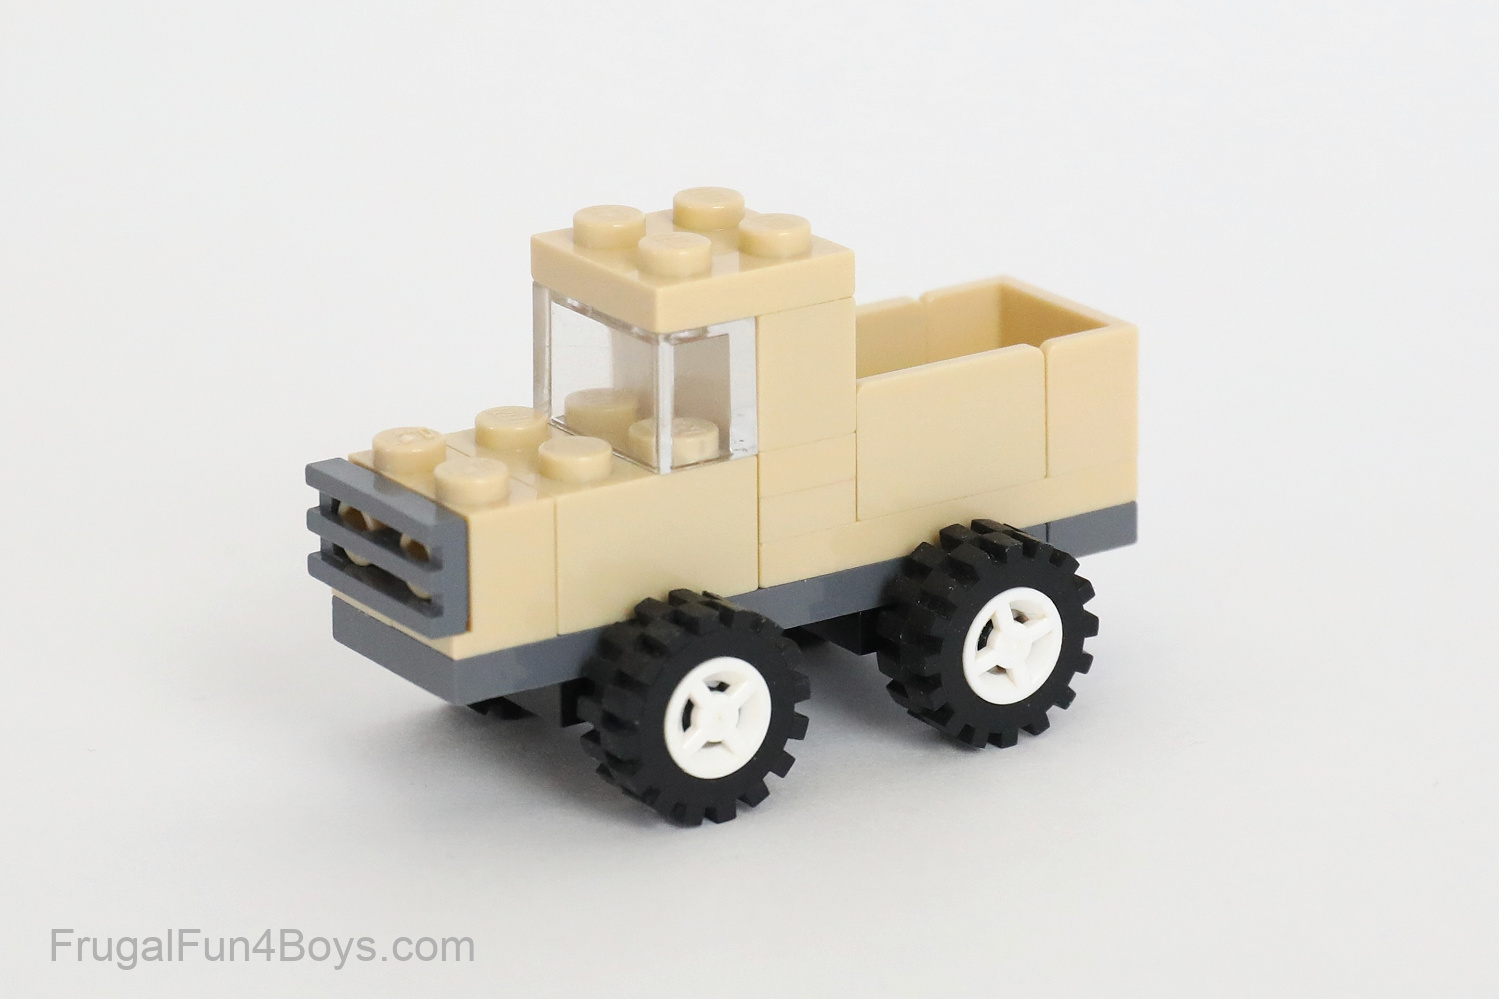
PICKUP TRUCK
Build a cute little pickup truck! I started with a 2 x 6 dark gray plate and a 1 x 2 dark gray plate.
The bed of the truck is built from three panels: two 1 x 2 x 1 panels, and one 1 x 2 x 1 panel with two sides.
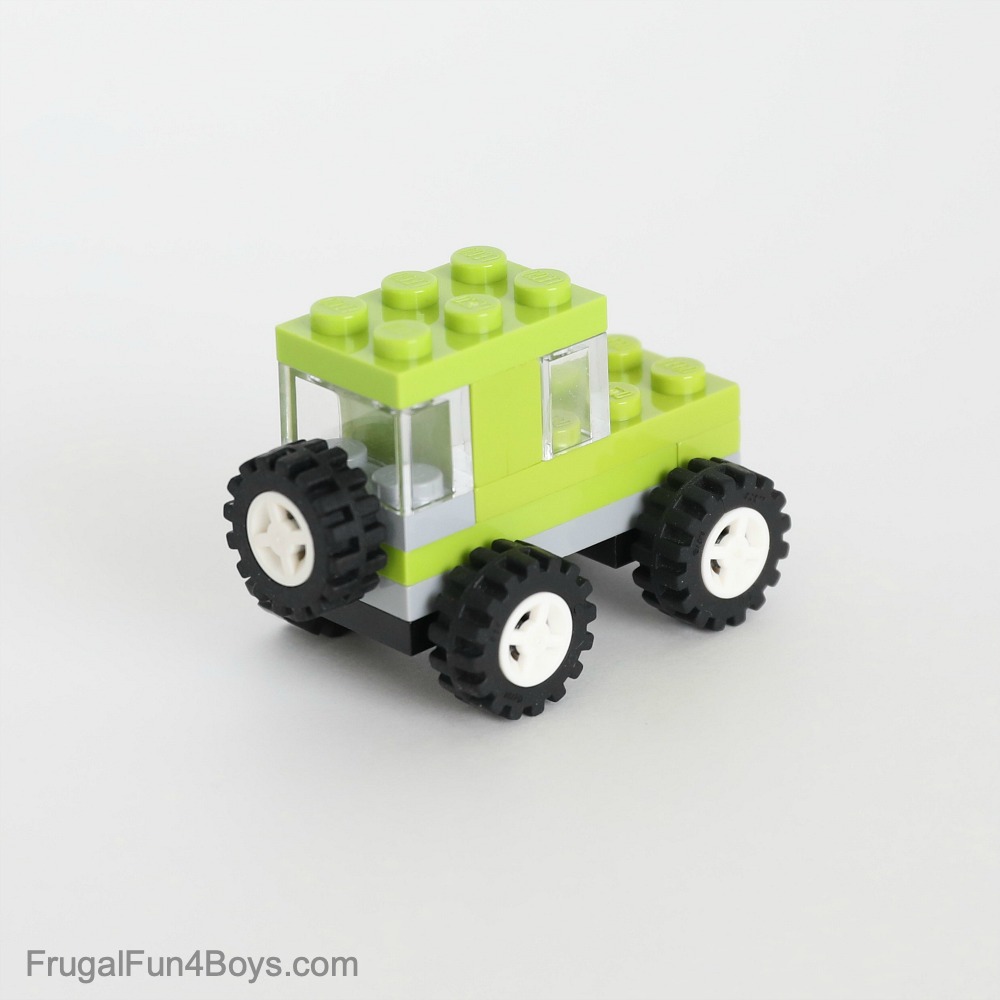
Similar to the pickup truck, here’s a little Jeep. It would also be fun to build this one in red or blue!
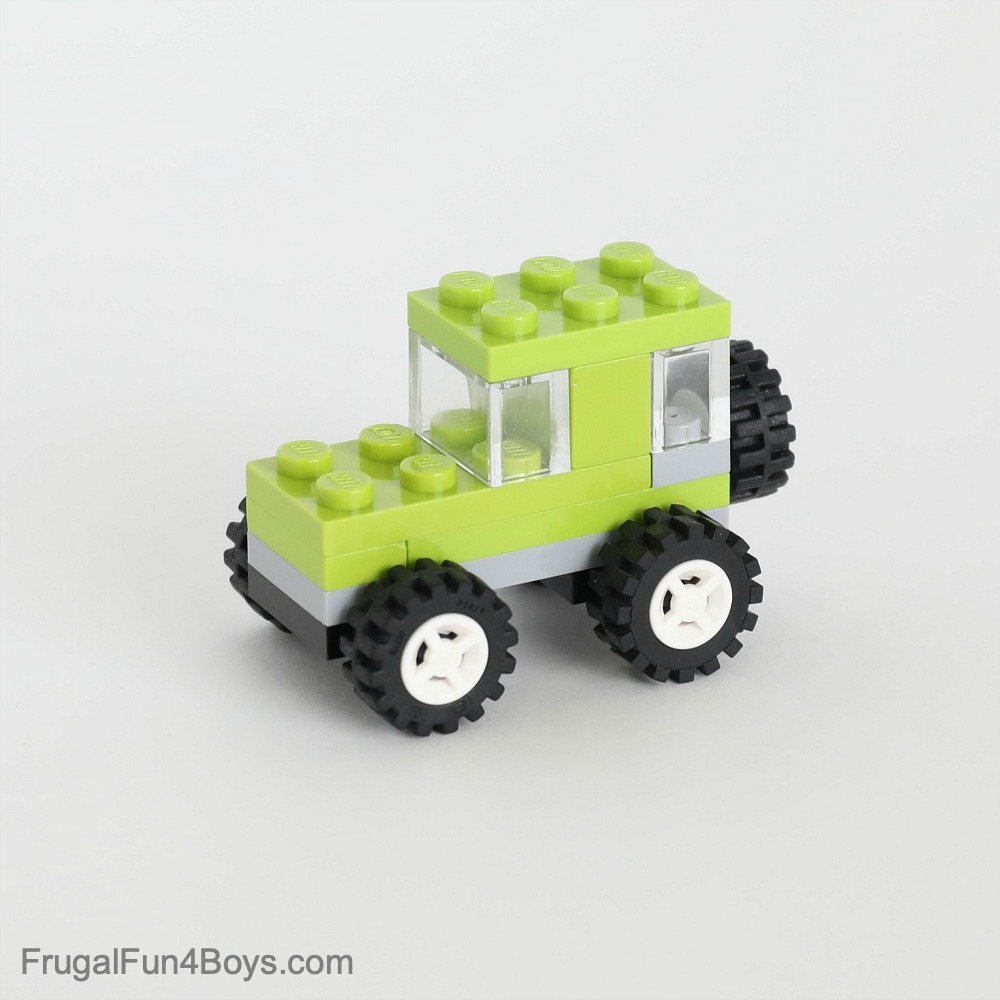
The tire on the back is attached to a 1 x 2 light gray plate with a wheel holder.
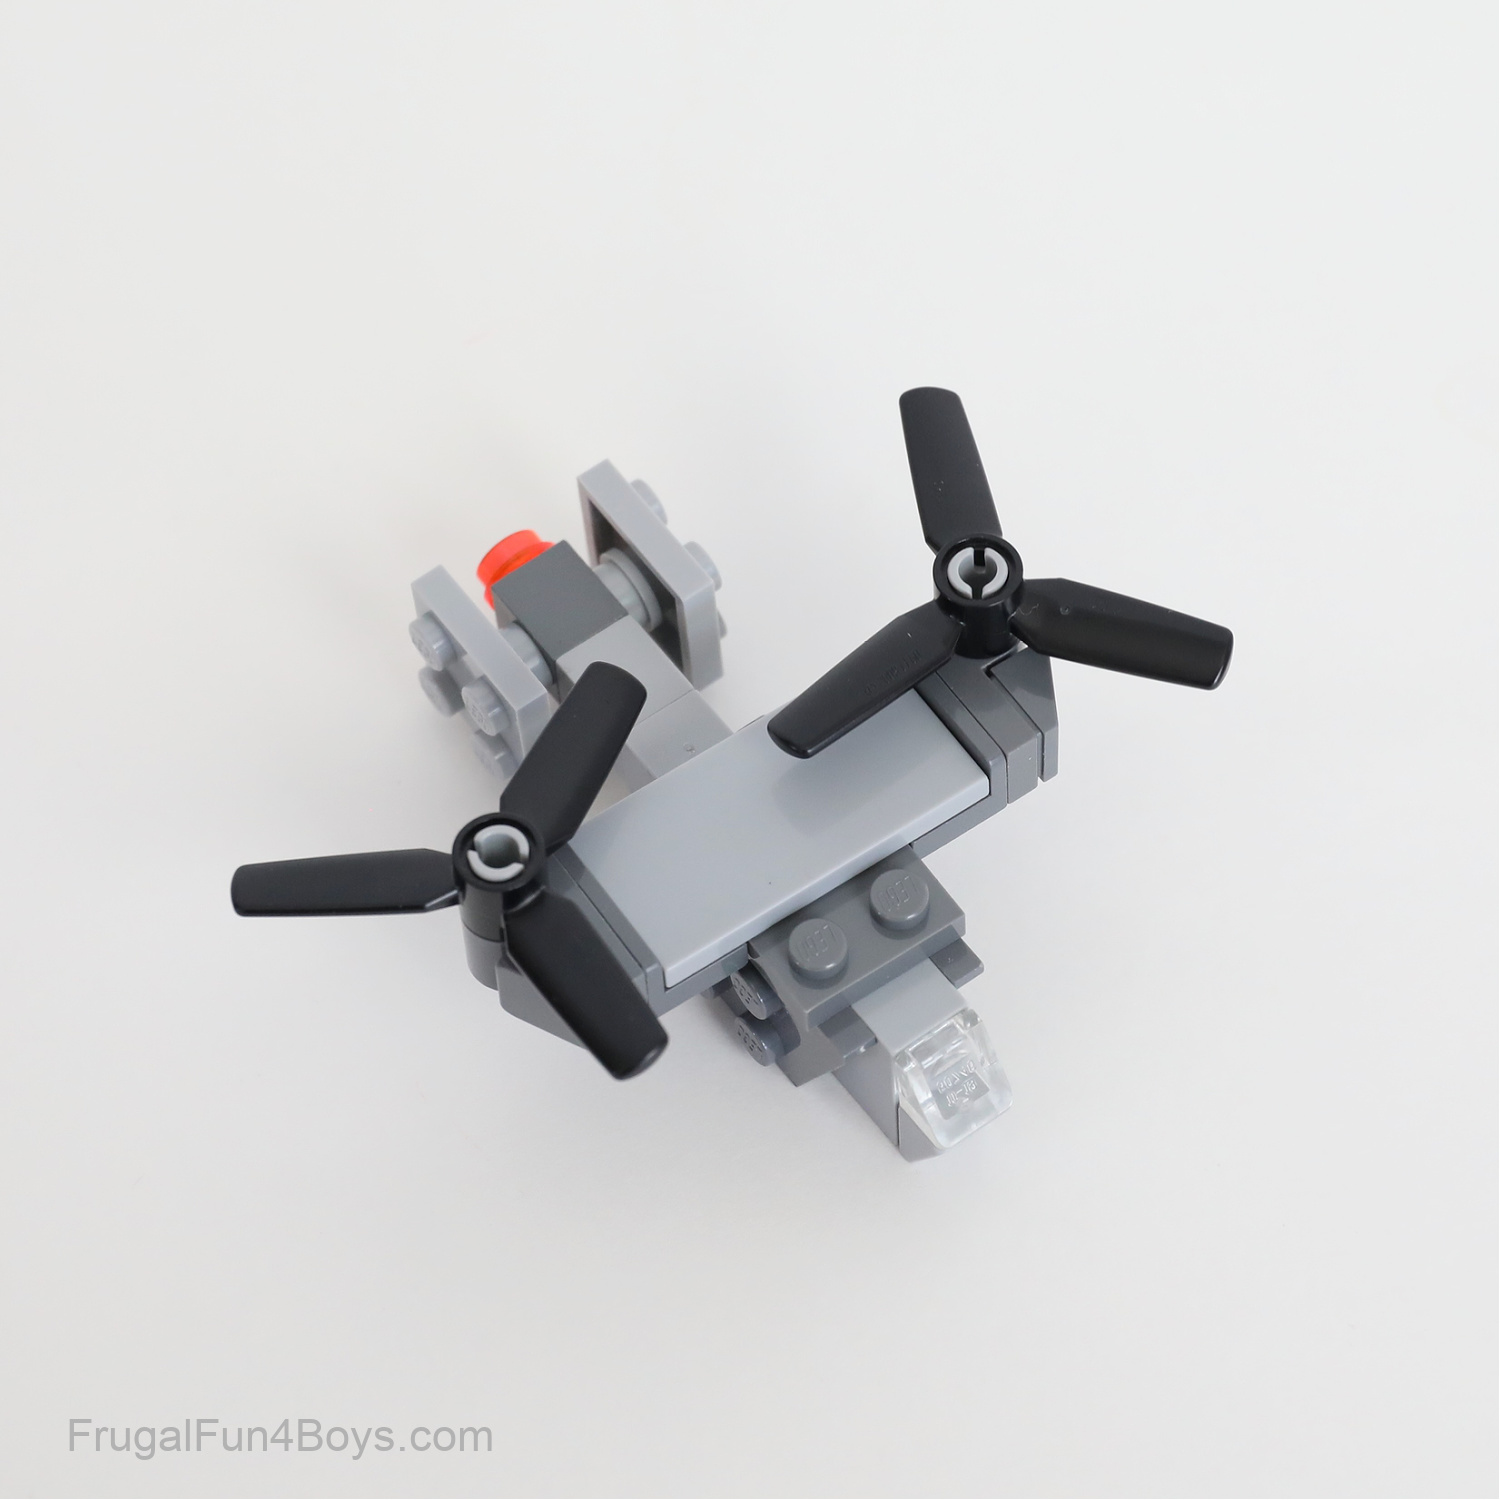
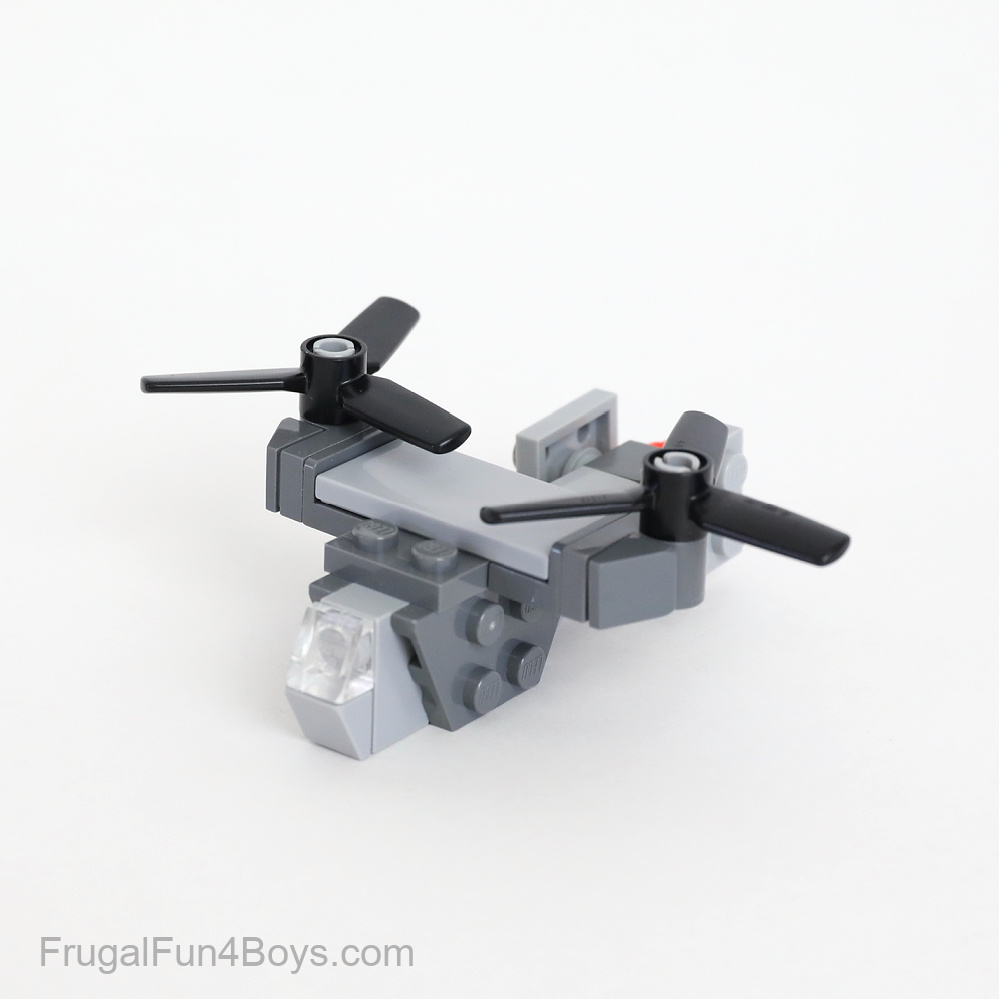
OSPREY AIRCRAFT
My 16 year old son built this cool Osprey. This is a military plane that has both vertical takeoff and landing.
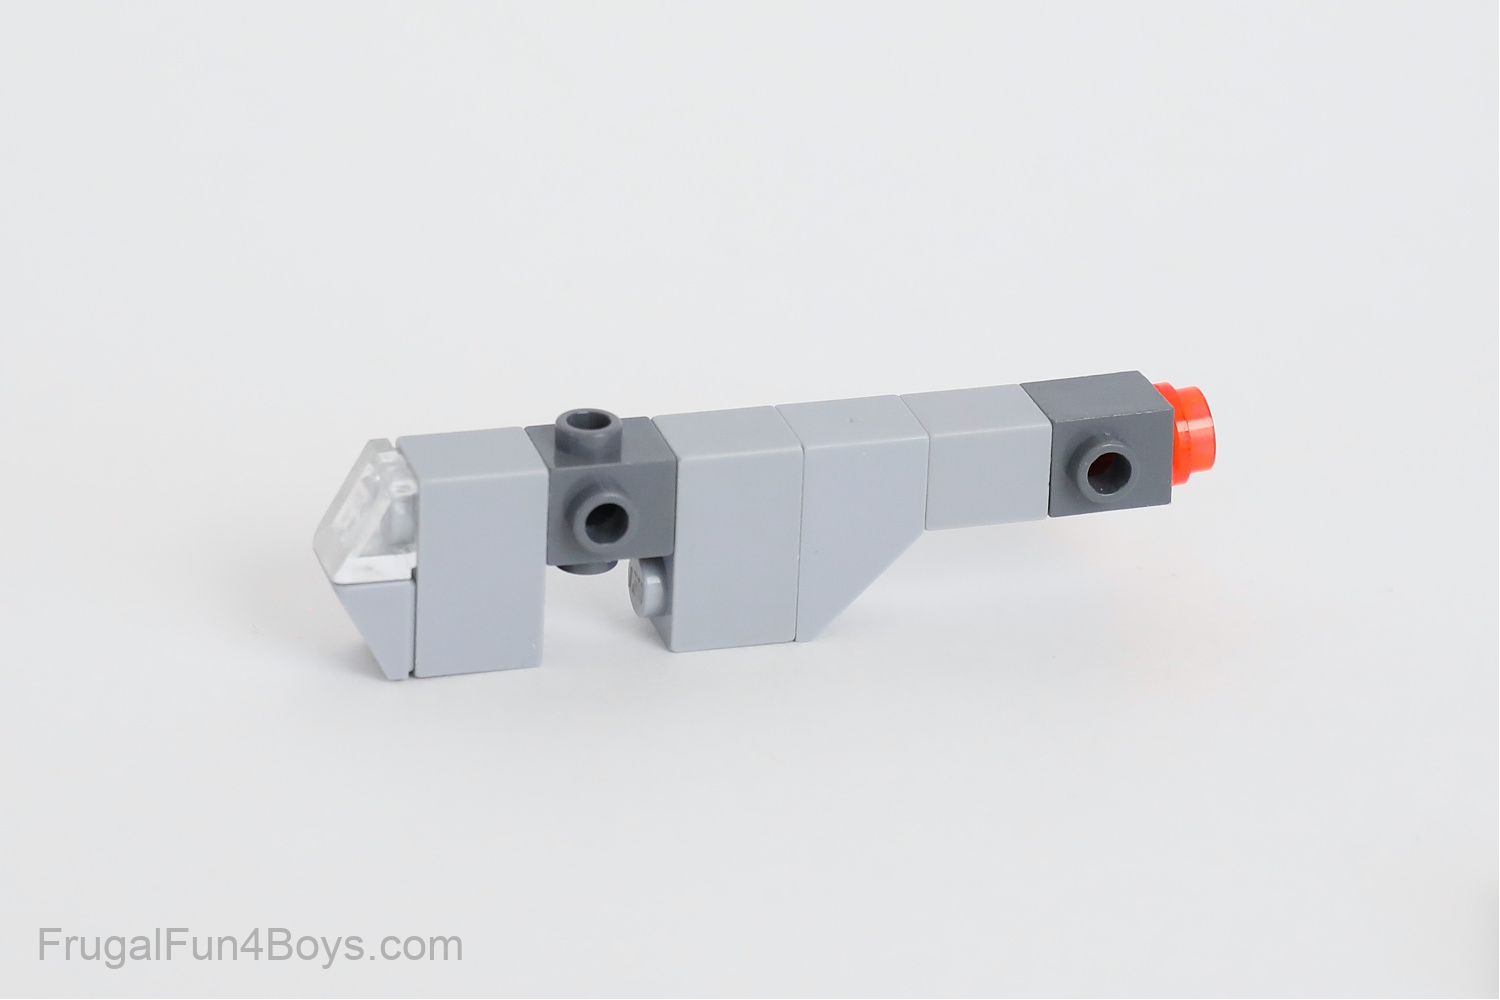
This is the core of the plane. The studs will be used to hold the wings and tail.
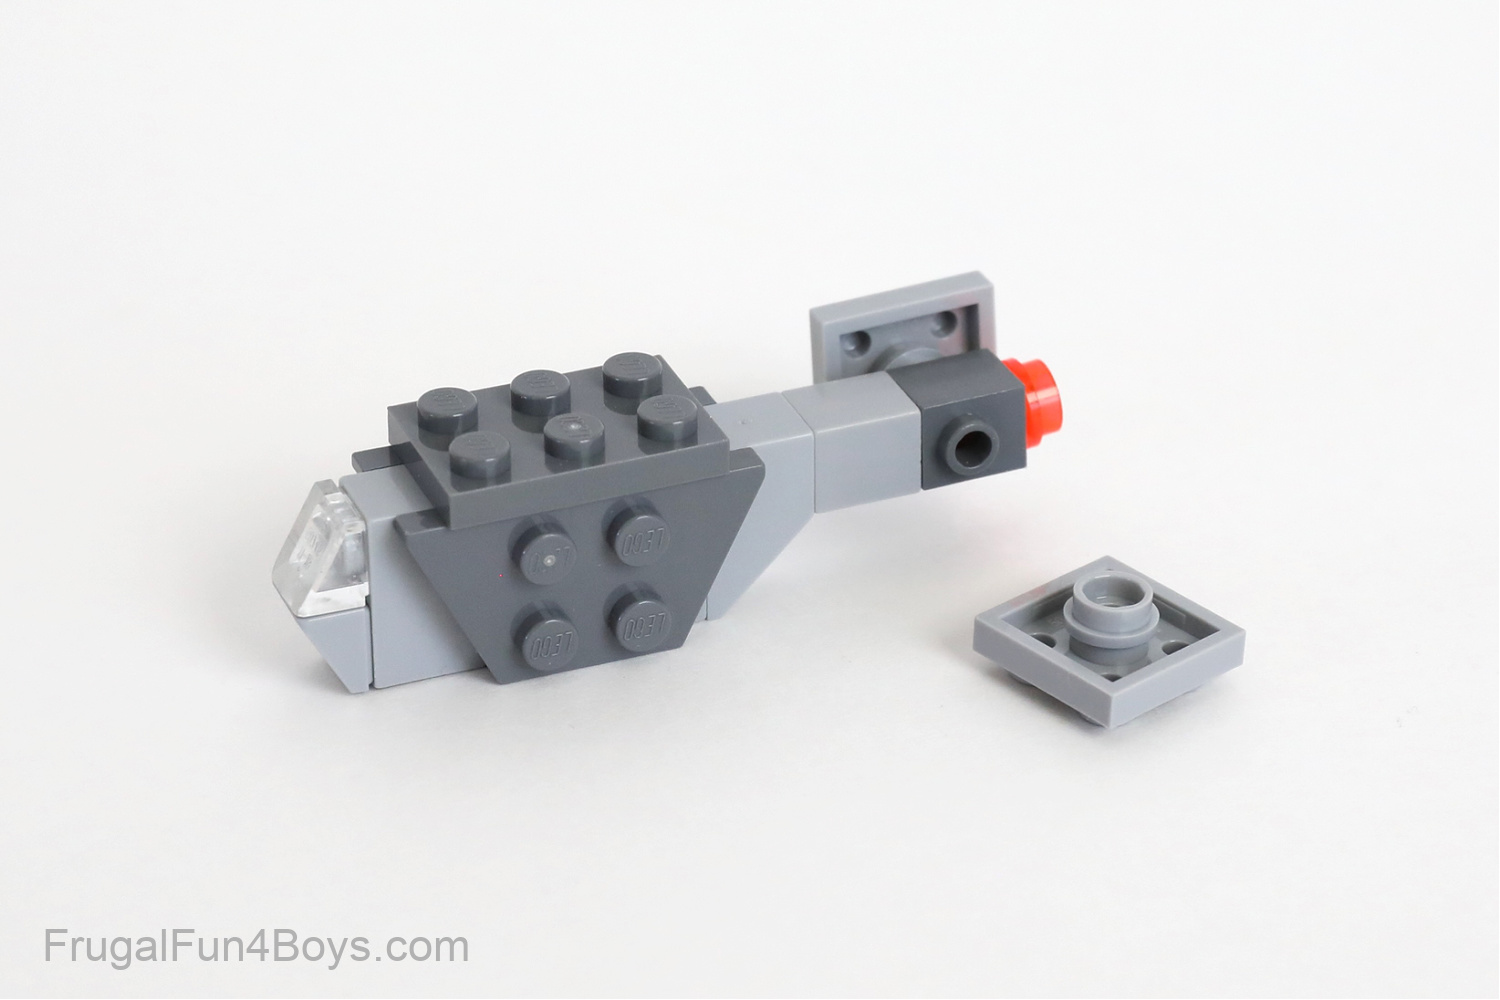
Add a 2 x 4 wedge plate on each side of the plane. Then put a 2 x 3 plate on the top. The tail is made from a 2 x 2 plate and a 1 x1 round plate on each side.
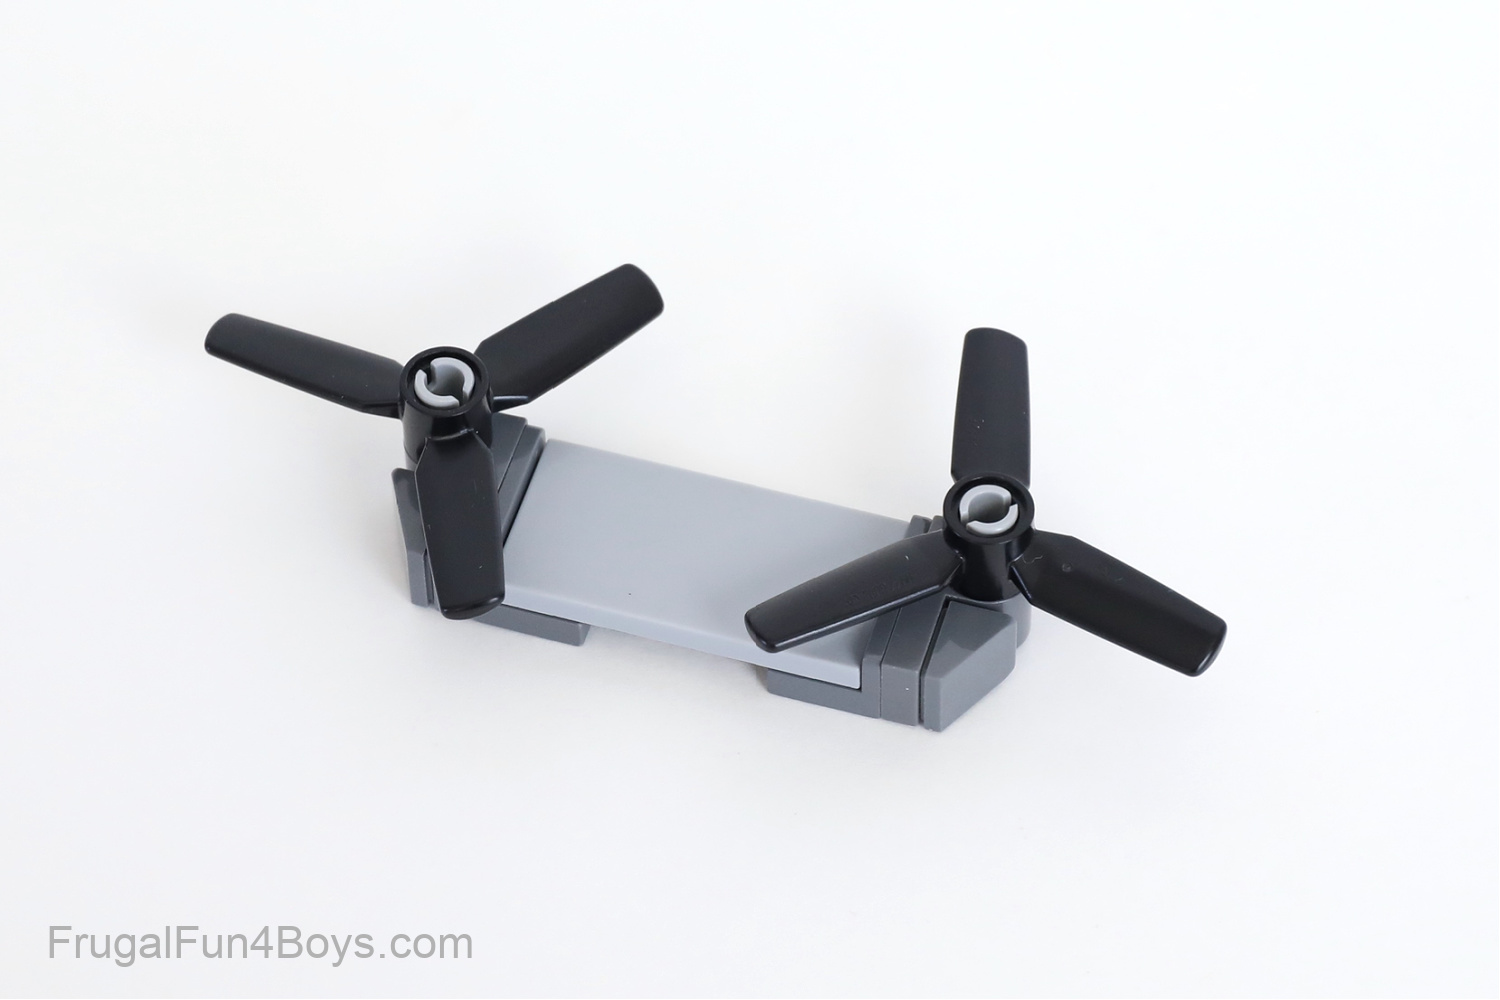
Here are the pieces he used for the wings. There is a 2 x 4 light gray tile in the center. Then, each side has a 1 x 2 – 1 x 2 dark gray inverted bracket, a 1 x 2 dark gray plate with a pin hole on top, a 1 x 1 slope, a light gray pin, and a propeller.
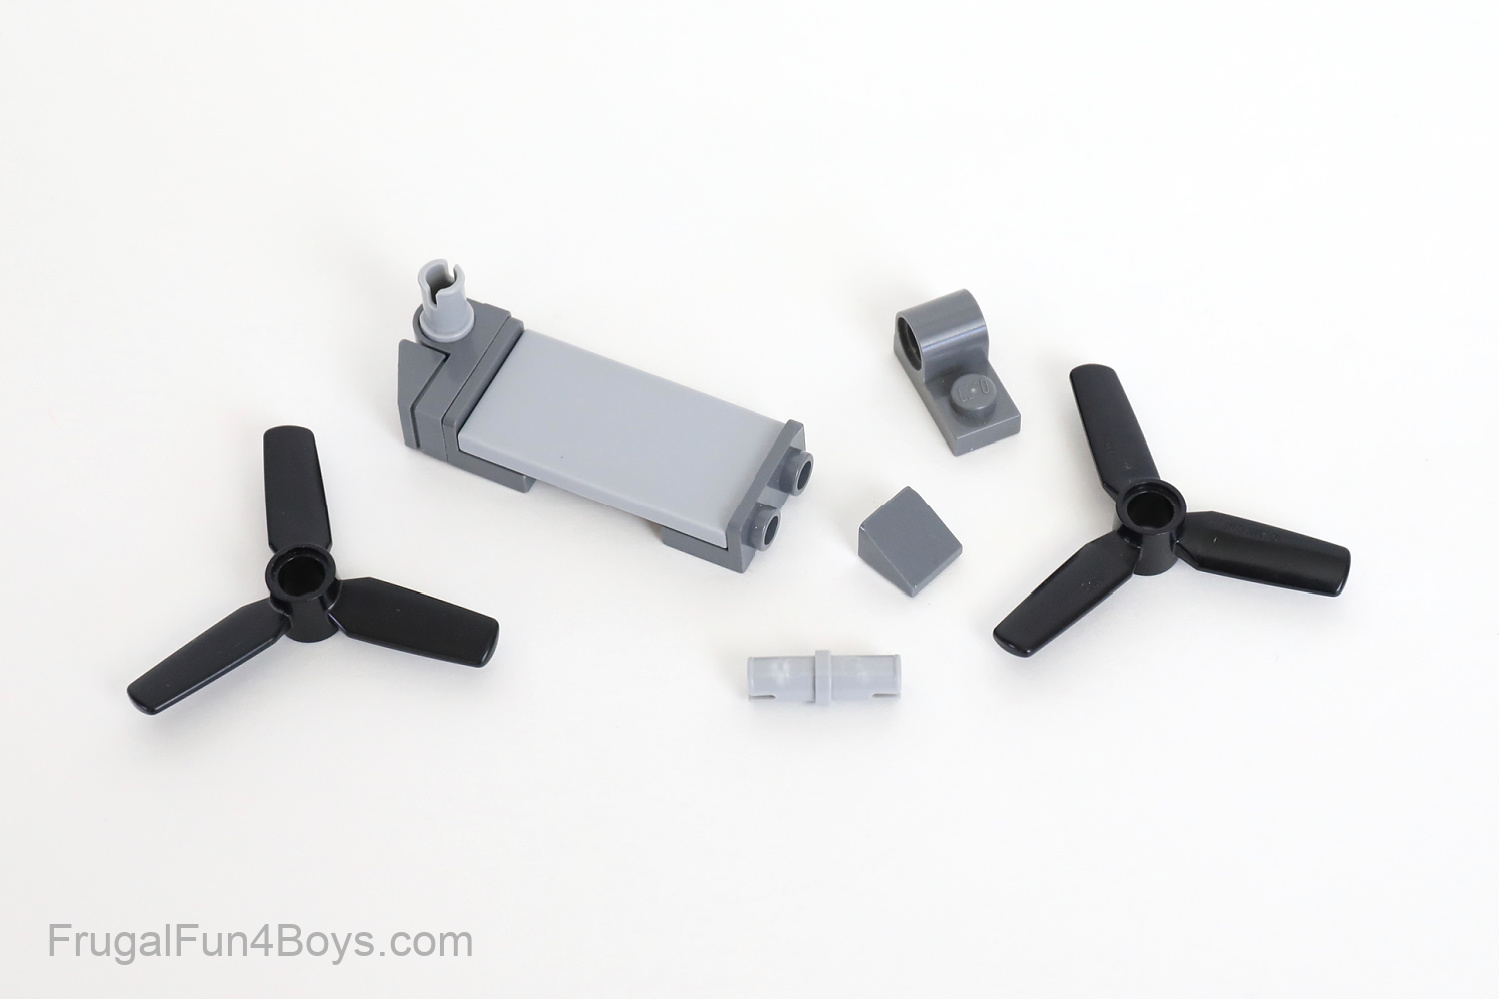
Here are the wings with both sides assembled.
Attach the wings and your Osprey is done!
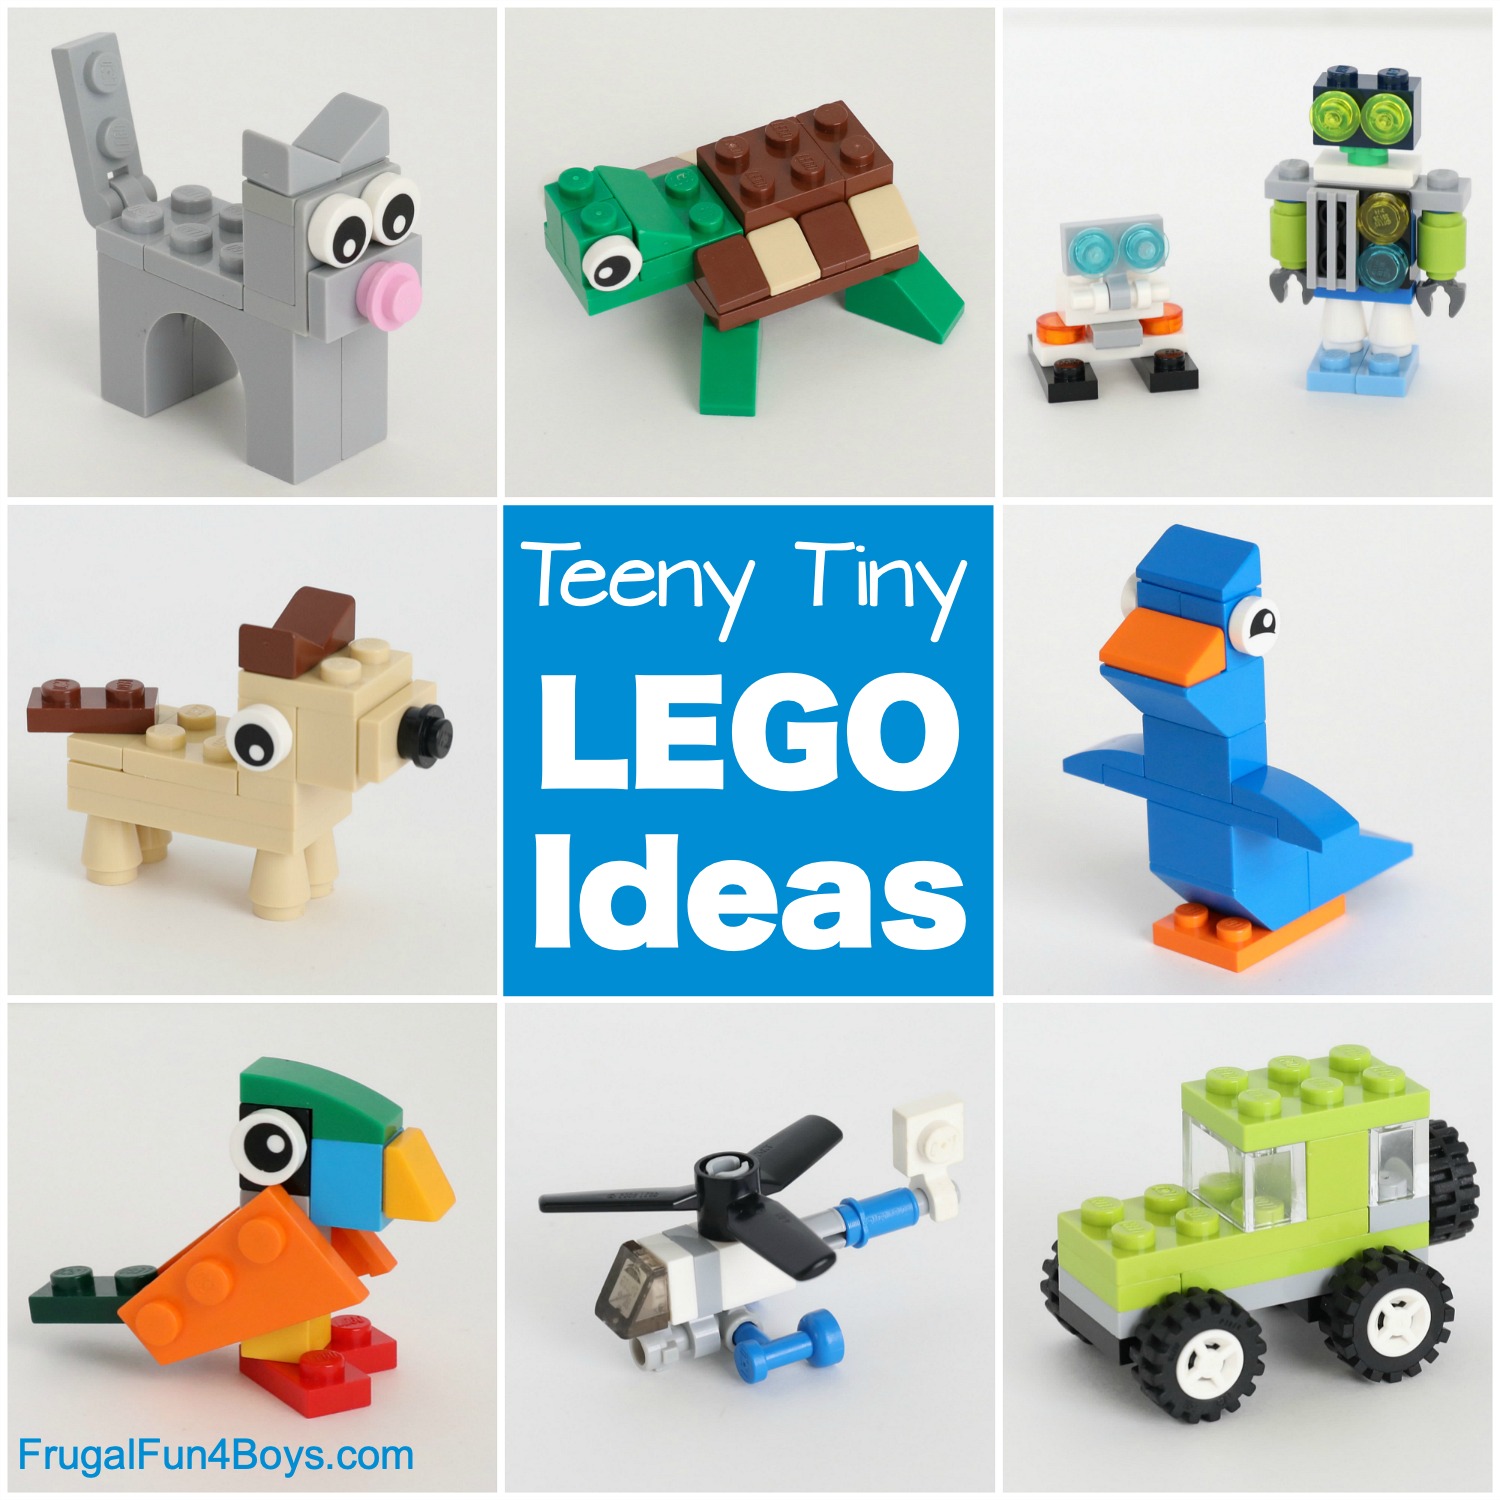
If you enjoyed these mini LEGO vehicles, you’ll want to check out our LEGO Mini Projects! We’ve got several.
Here are Tiny Mini LEGO Projects to Build – these are some of my favorites! There are tiny robots, animals, and more.
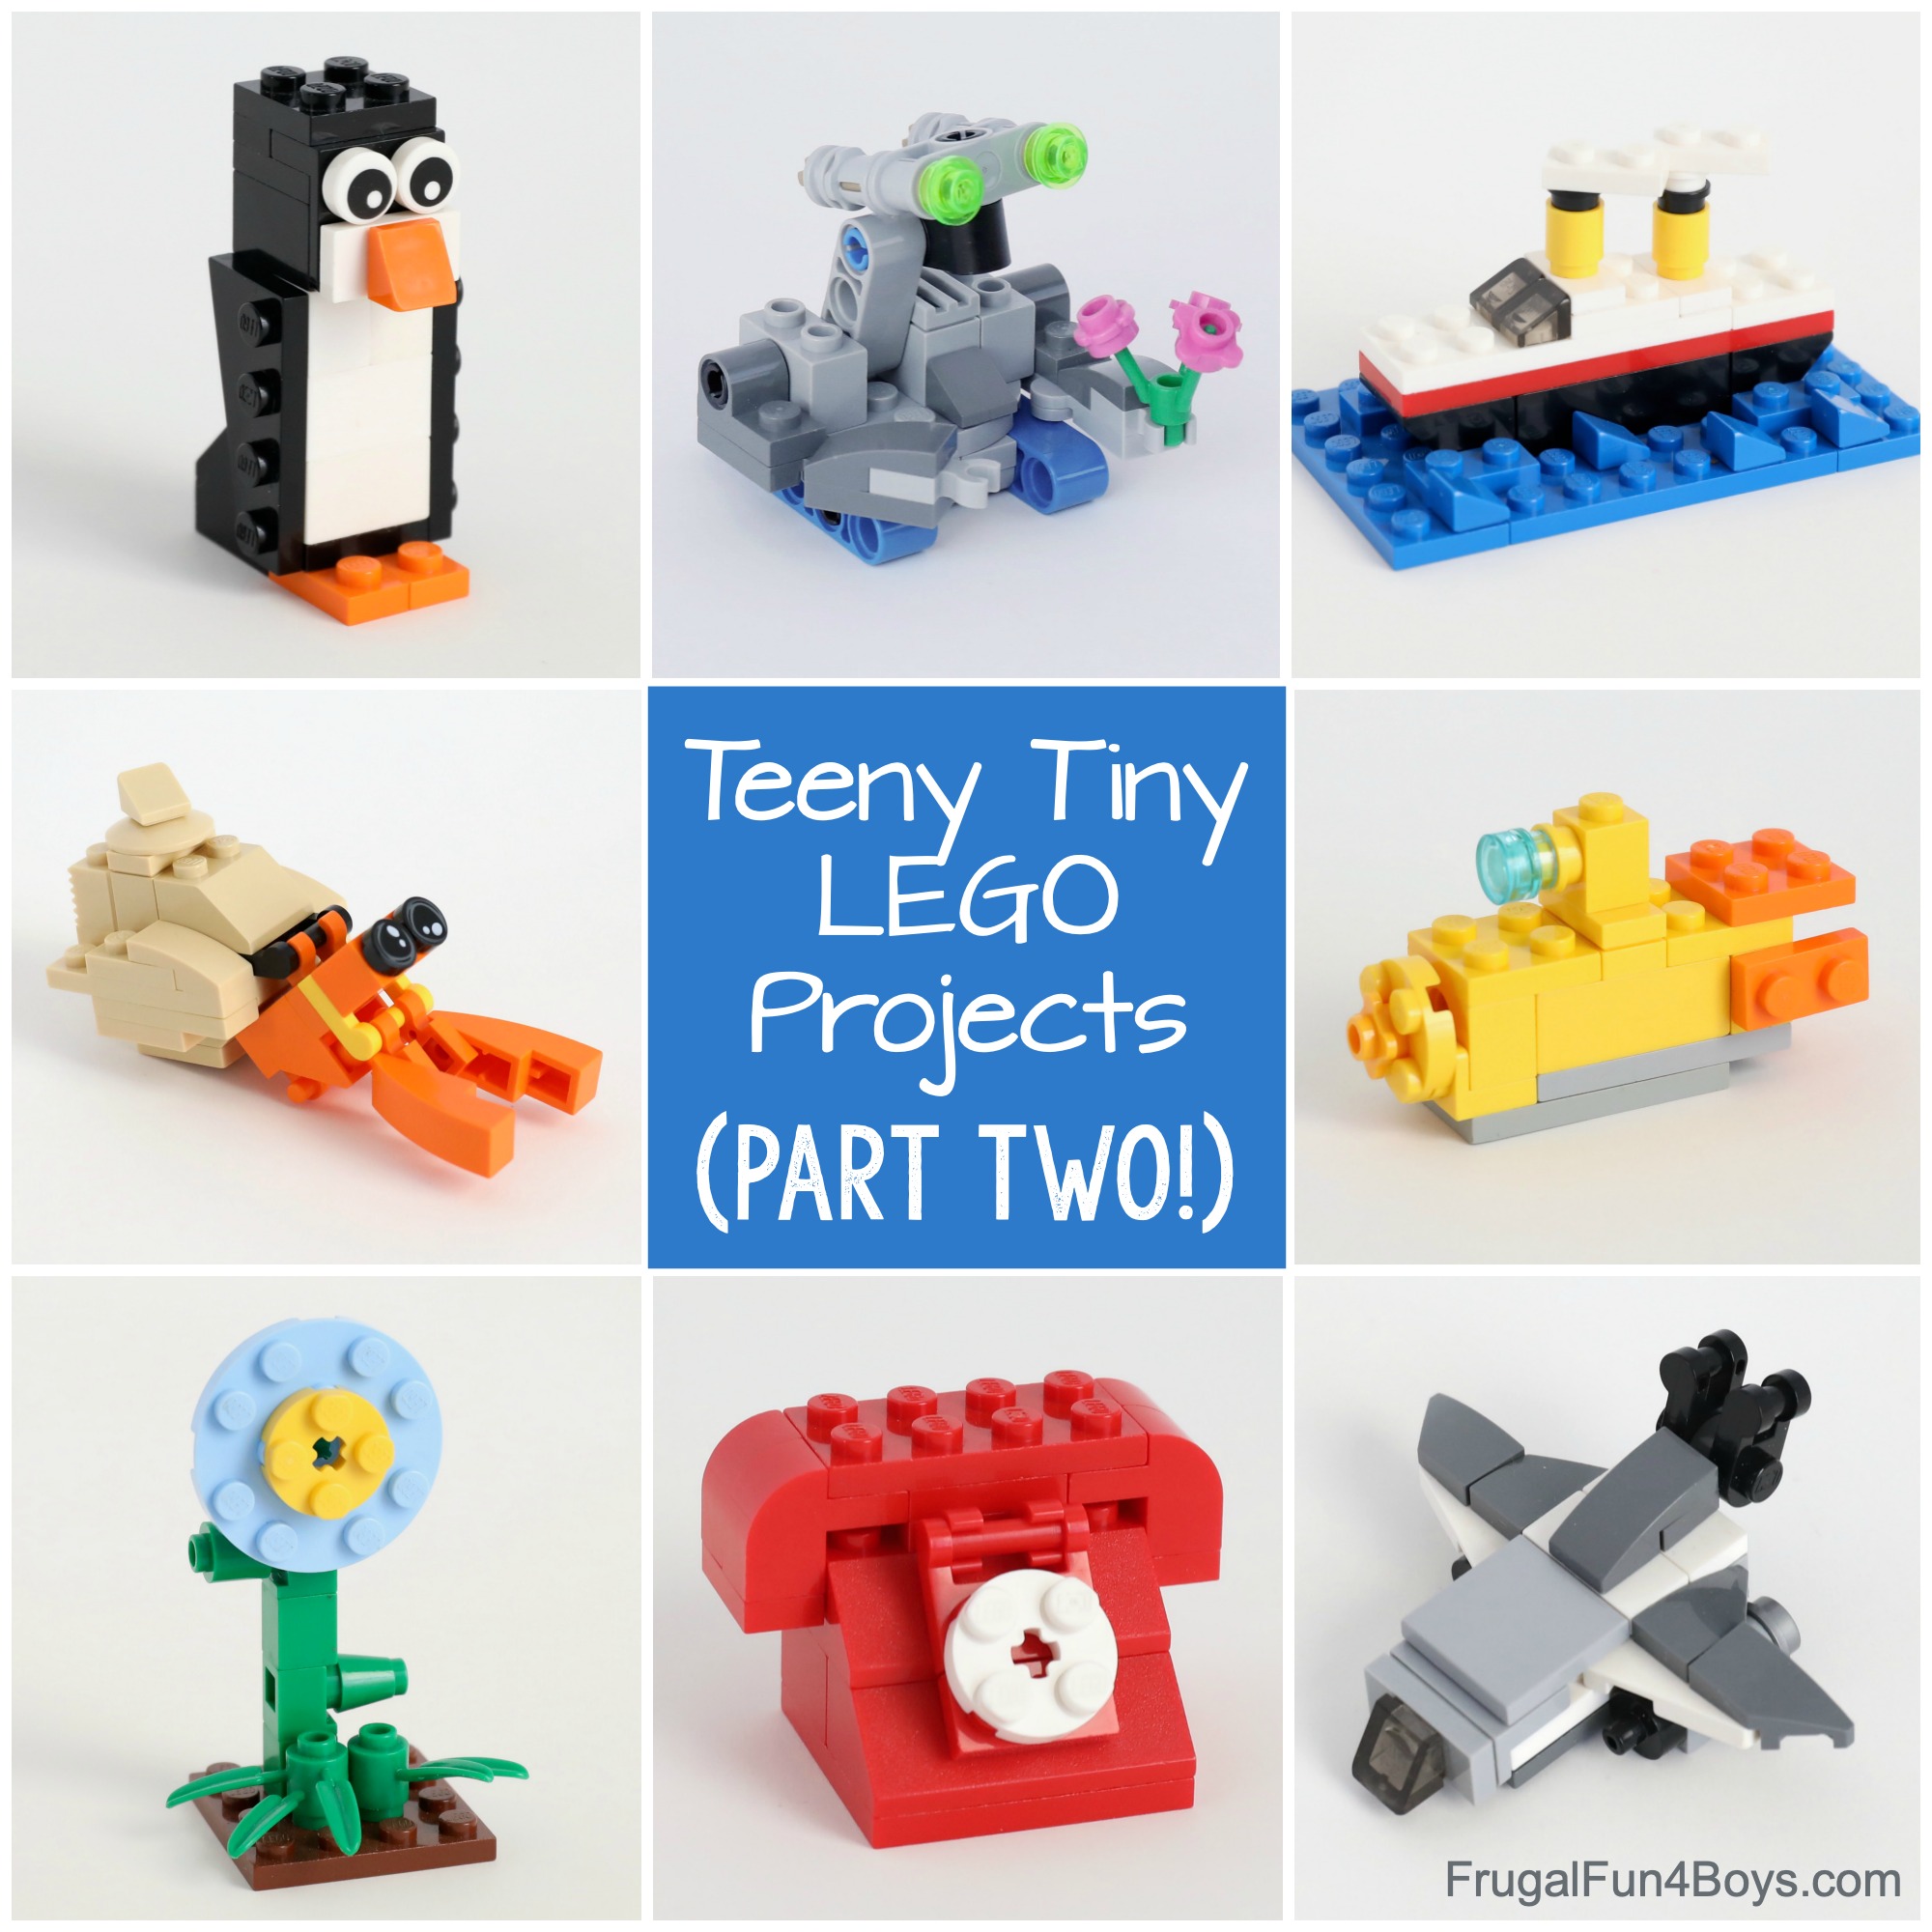
Here’s Tiny Mini LEGO Projects Part 2.
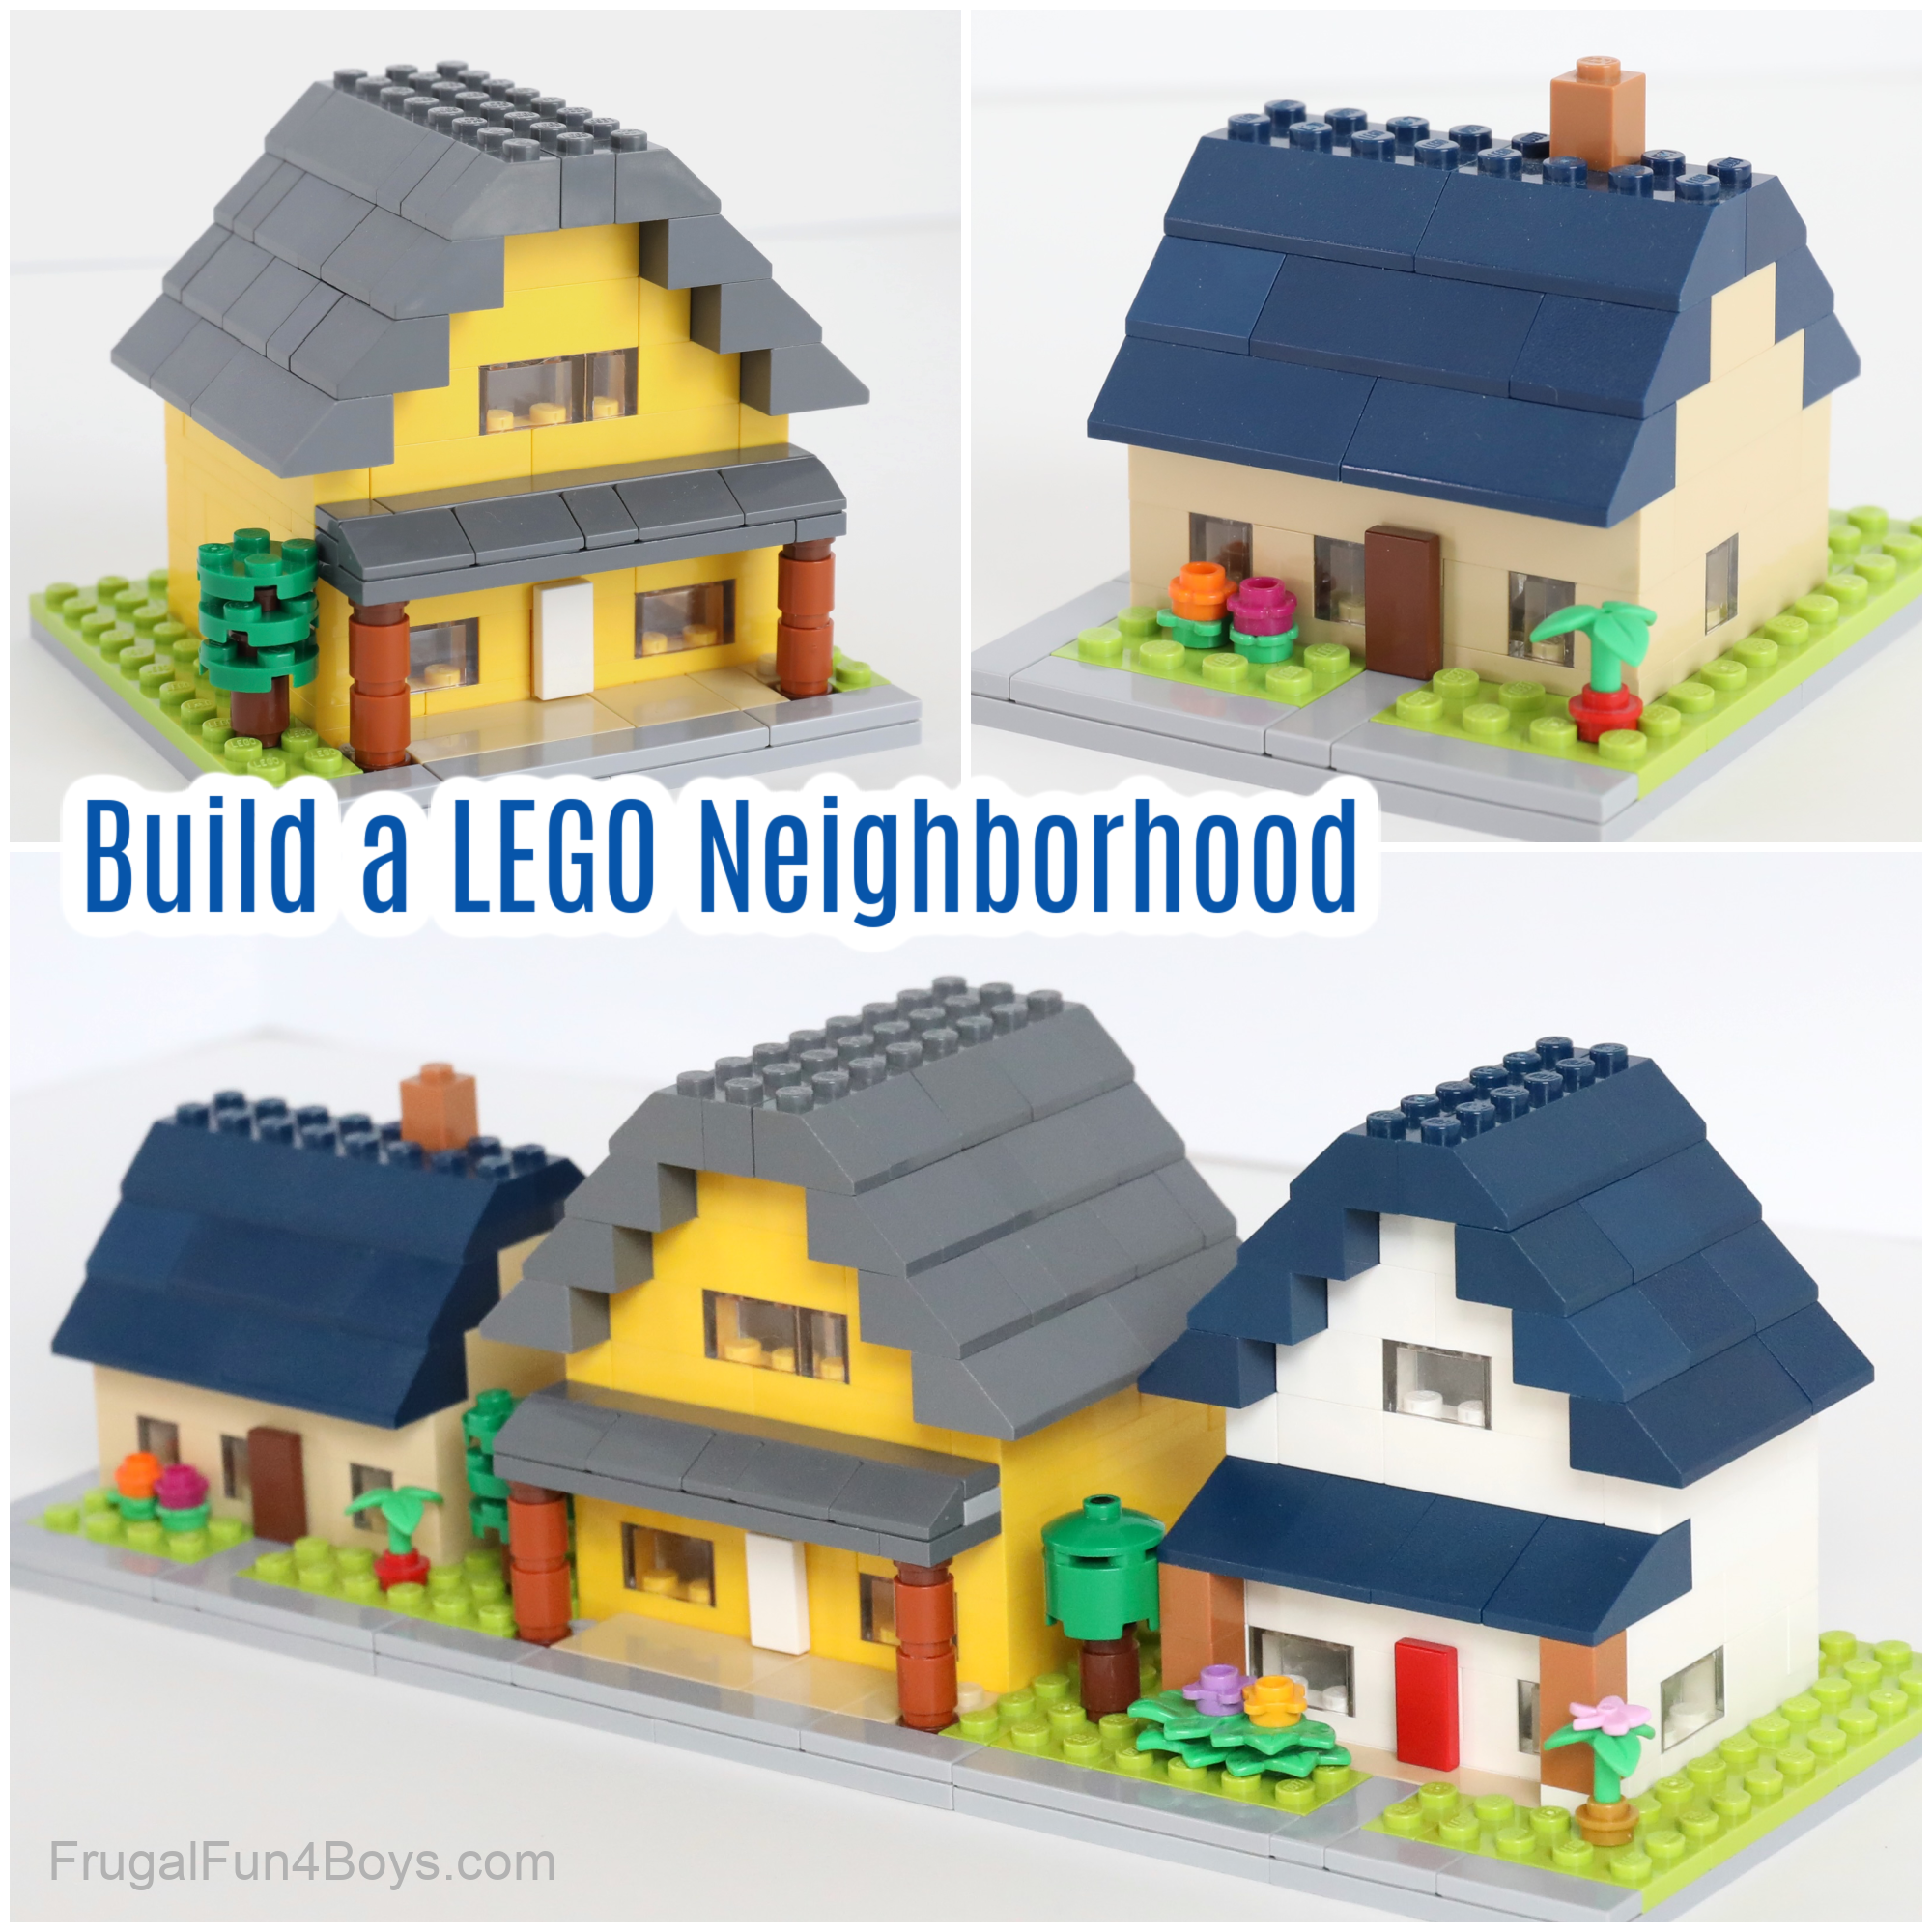
And then here are some adorable LEGO houses on a tiny scale. I have this little neighborhood on display in our LEGO room.
Have fun building mini LEGO vehicles!
3 Comments
Karyn Kyle Nov 11, 2022
I love your many displays of lego cars, animals, misc. and buildings!
I have tons of legos and kits but I find that I'm always missing pieces that I need to make some of your creations or I have the pieces, but in so many different colors that mine don't look as nice as yours.
Carolyn Greene Nov 18, 2022
Top class ideas Sarah.Love the lego scavenger hunt.
Cindy Nov 19, 2022
Thank you for so many ideas
Post a Comment