
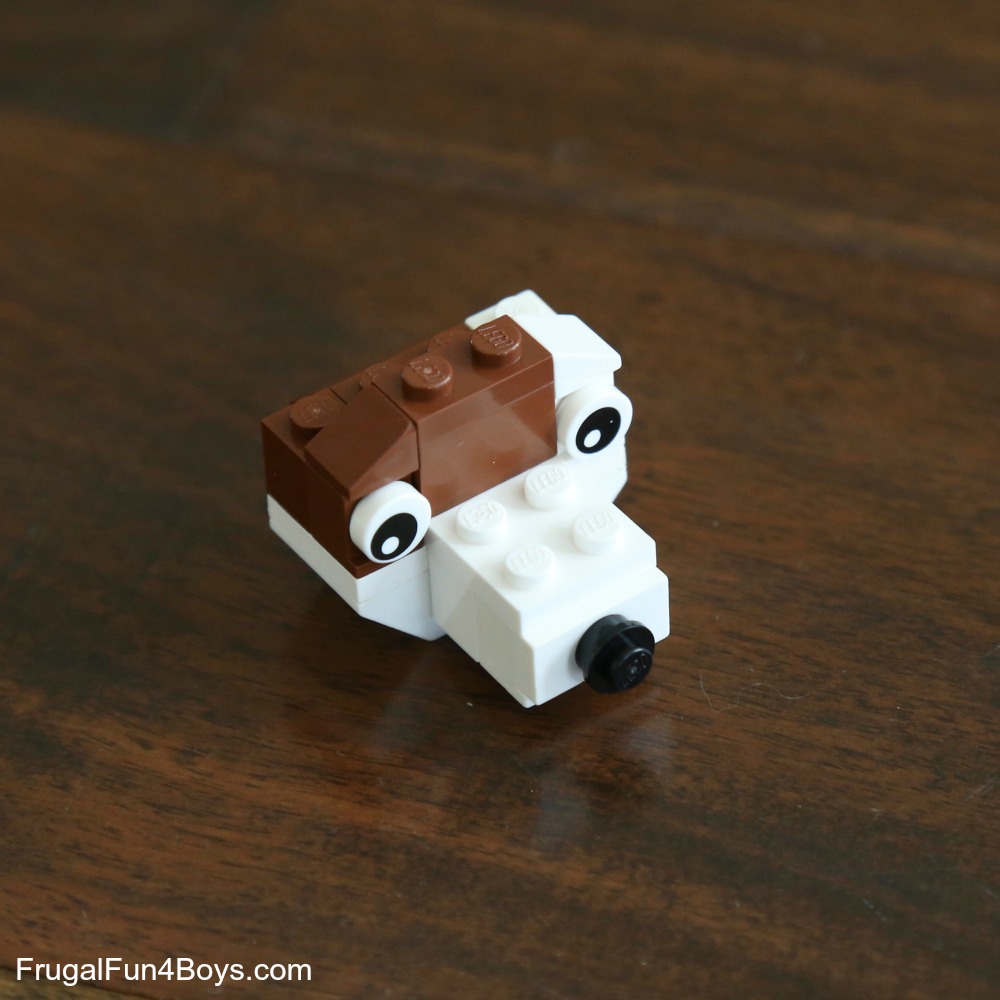
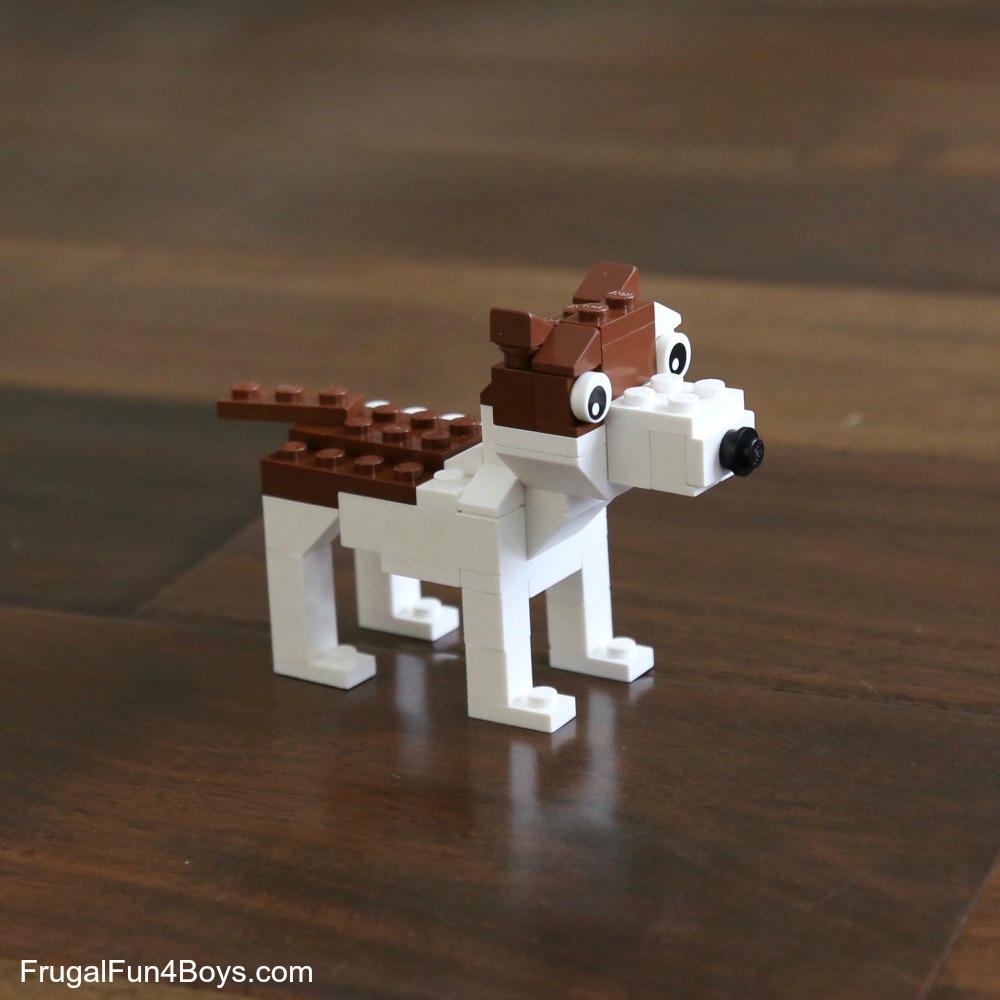
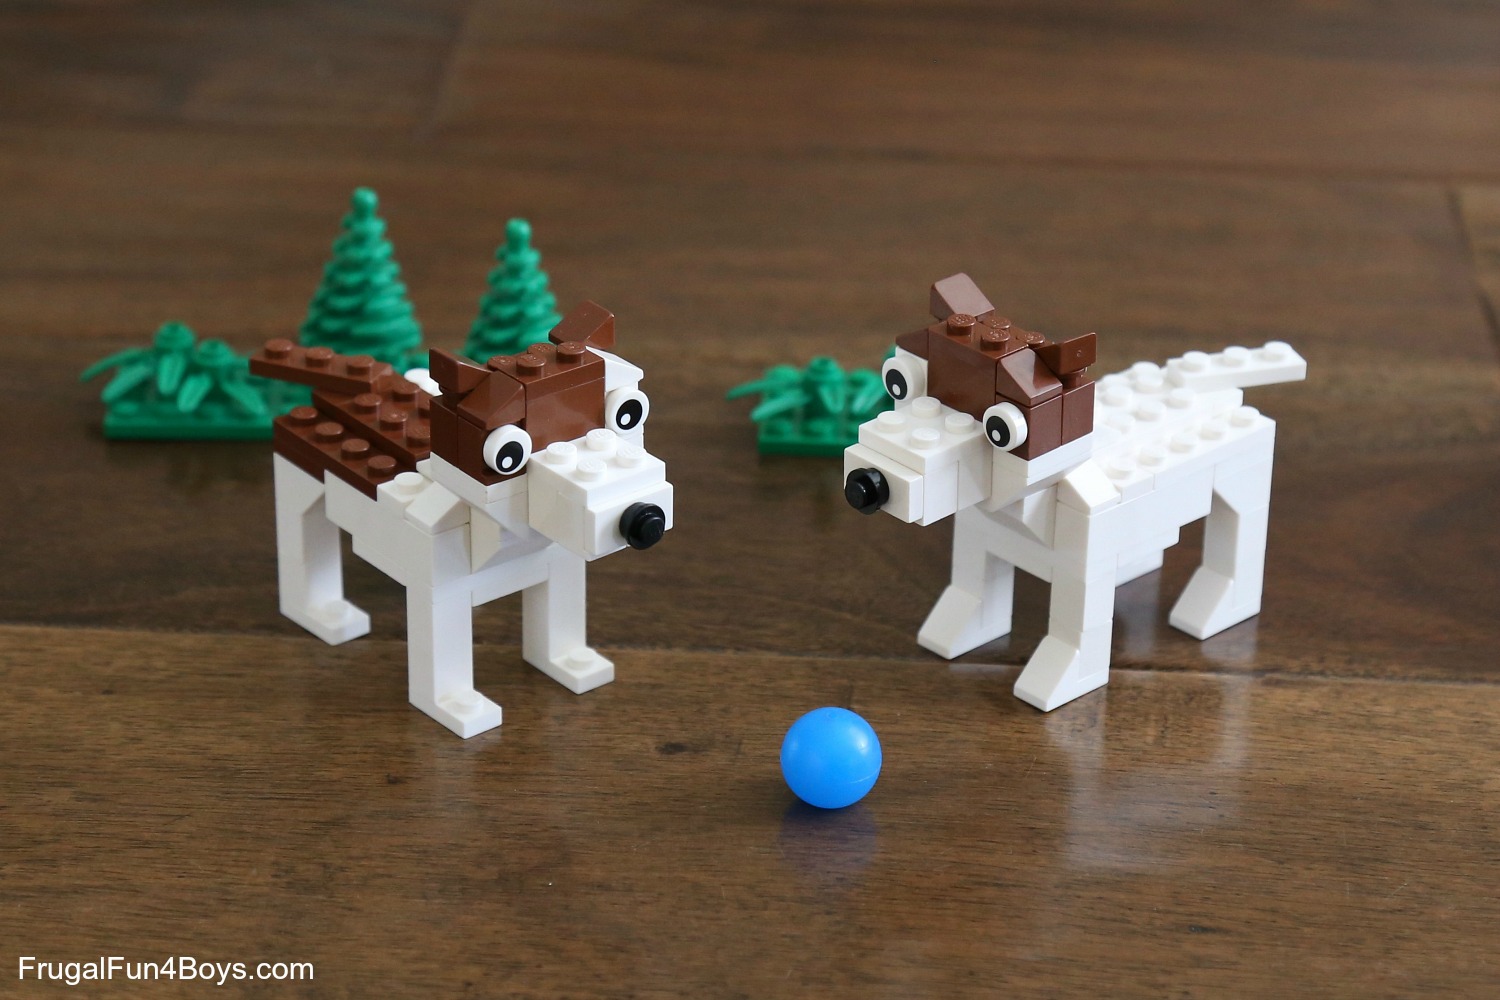
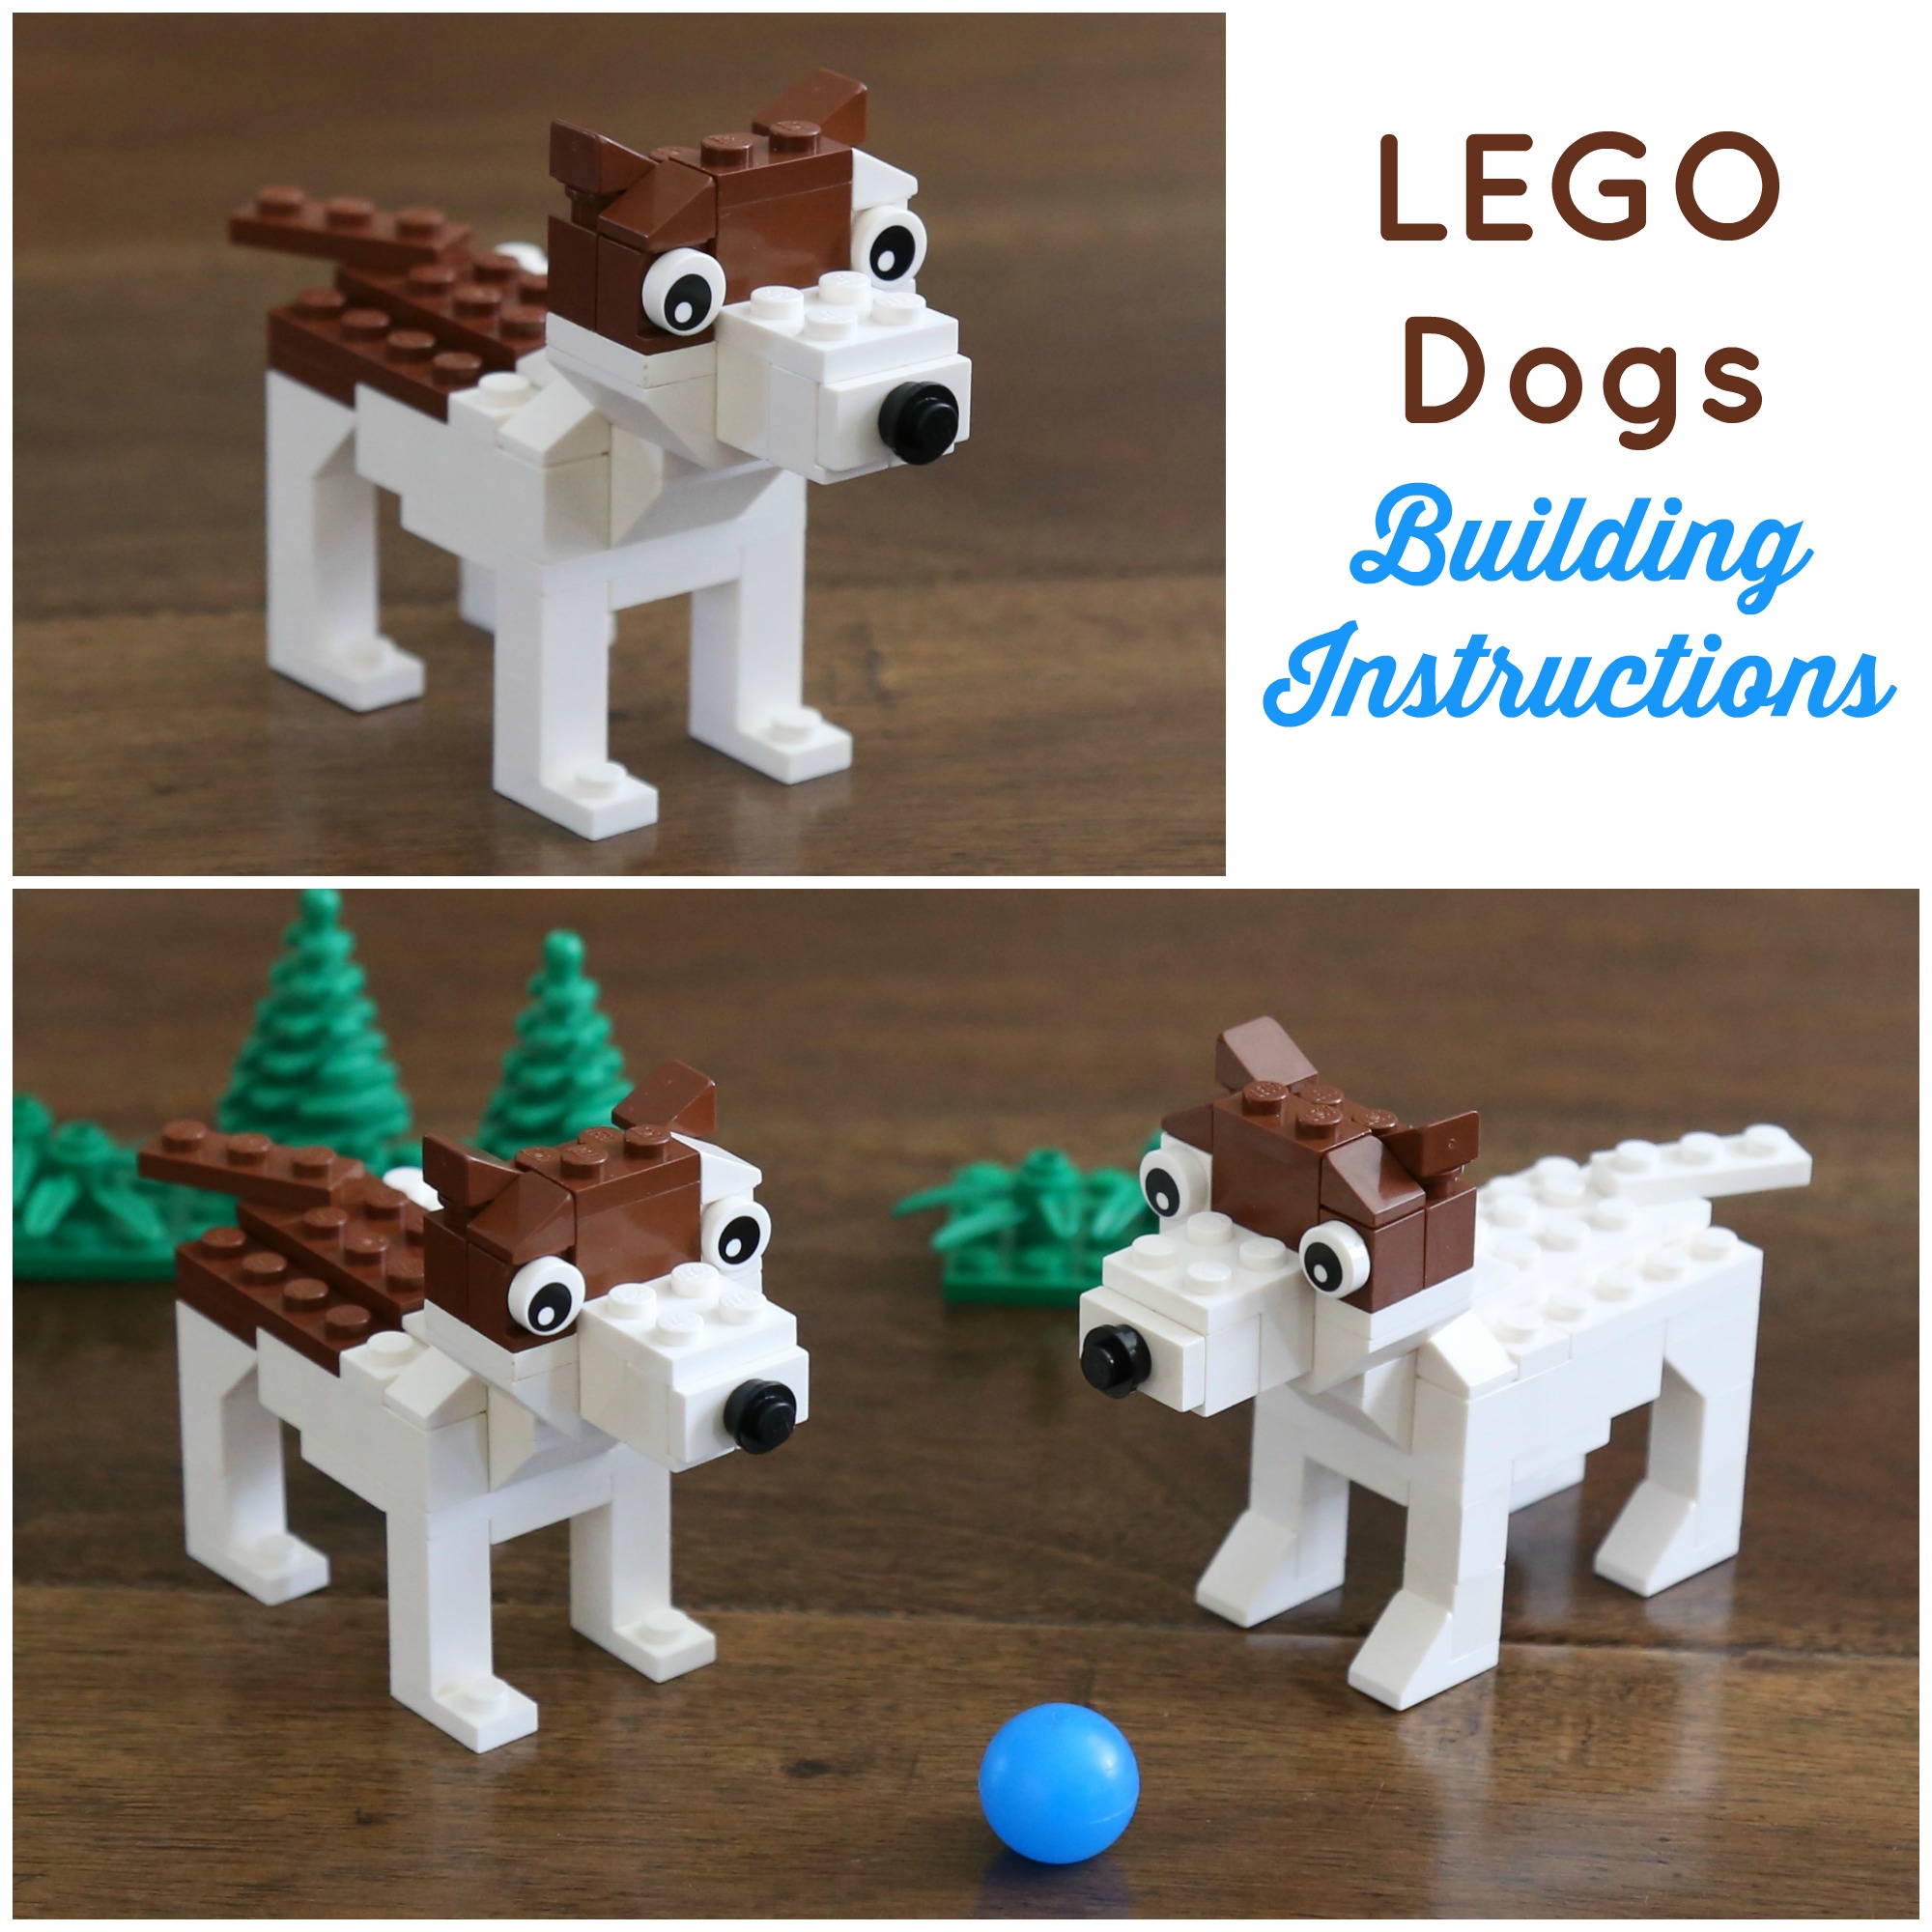
Here are some building instructions for making LEGO® dogs! I patterned this design after a Jack Russel terrier, although it was difficult to make the ears flop over the way a terrier’s ears do. So it will just have to be a generic terrier type dog – ha!
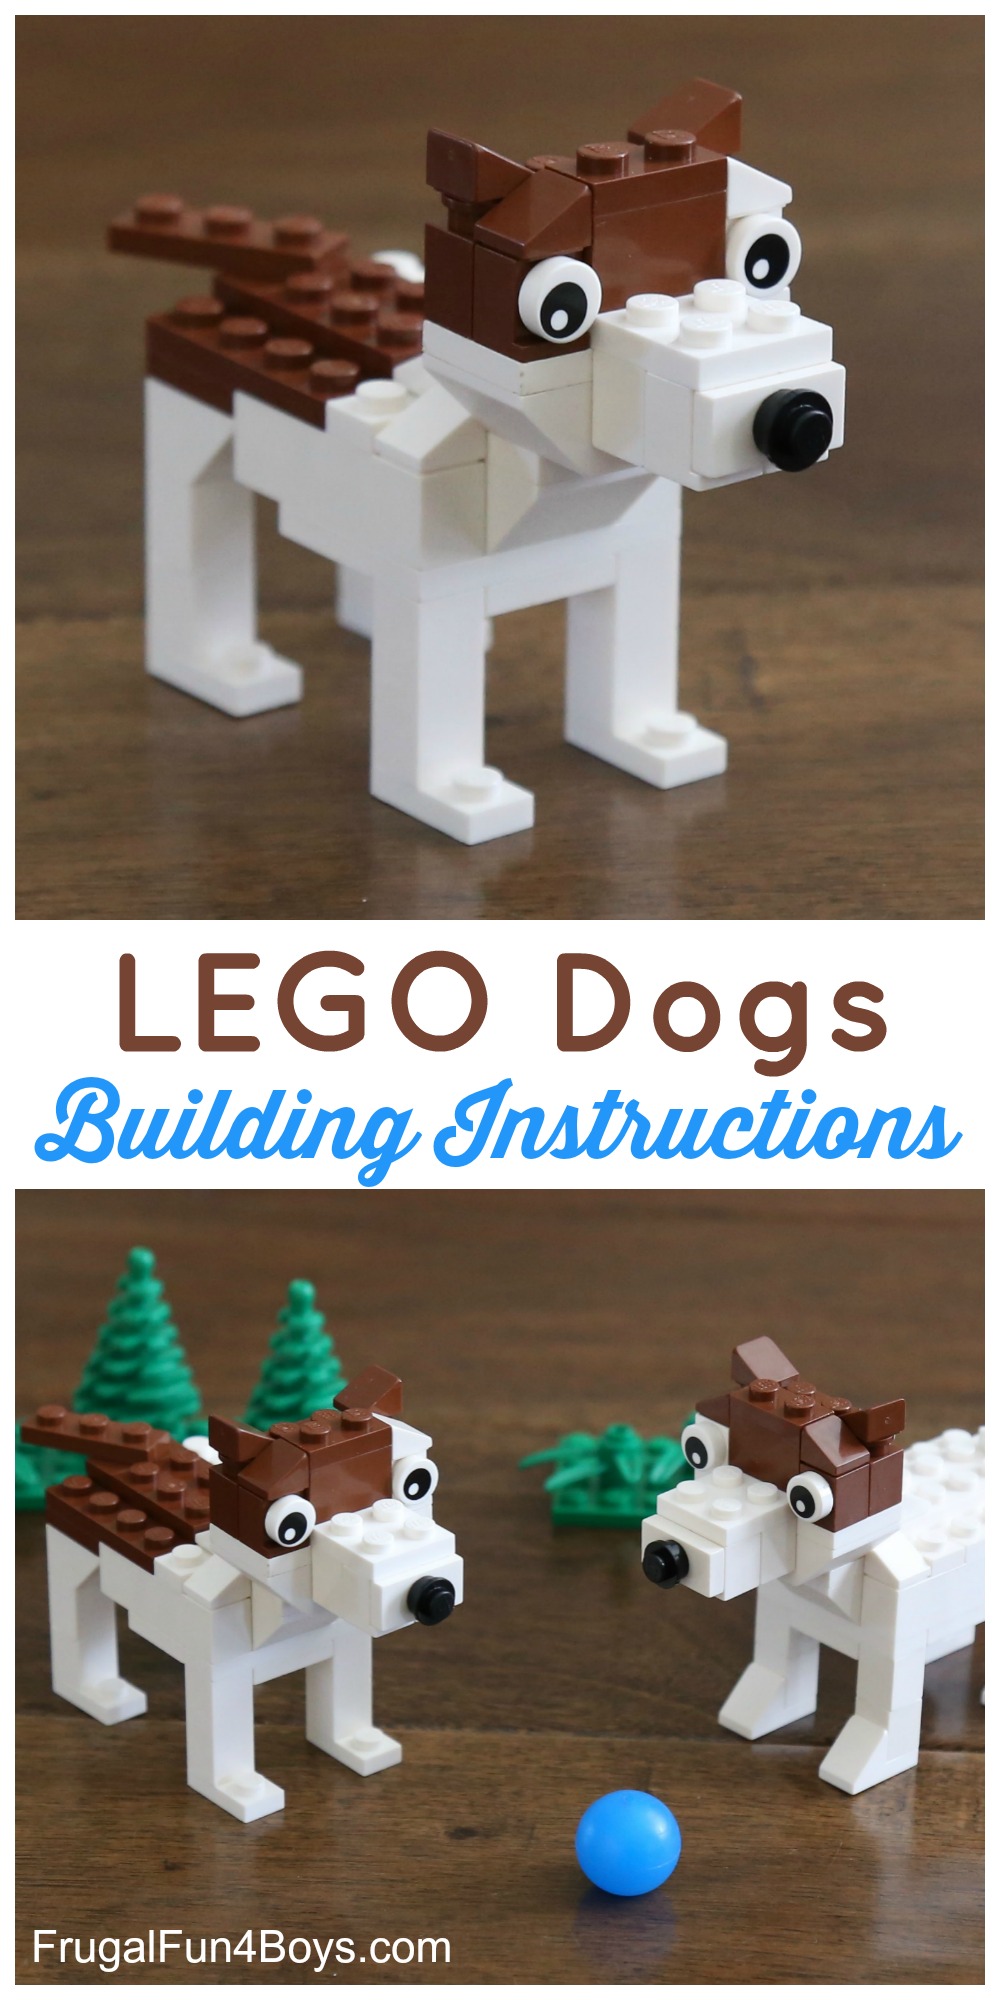
The coloring of the dogs doesn’t have to be exactly the same as what I did, so that will help with finding all the pieces you need. Just use what you have!
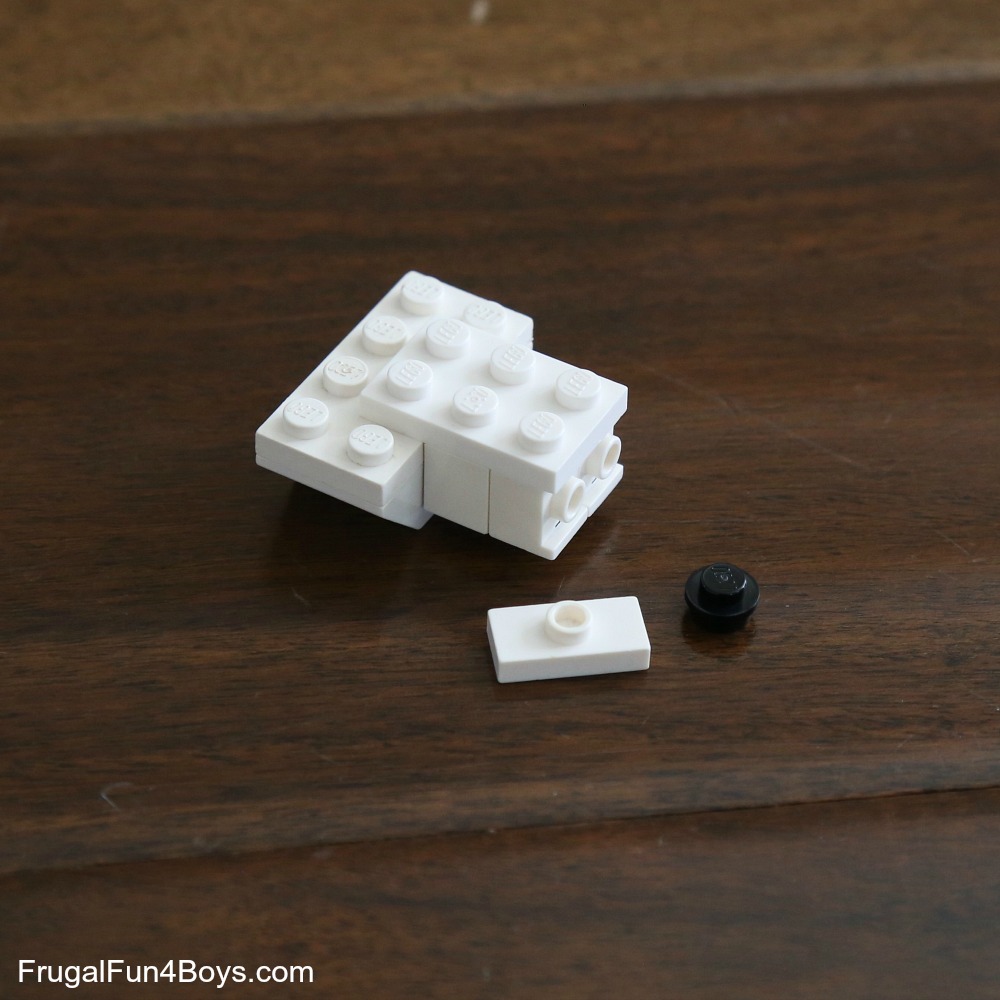
Step 1: Start with a 2 x 4 plate and two 2 x 2 inverted slopes.
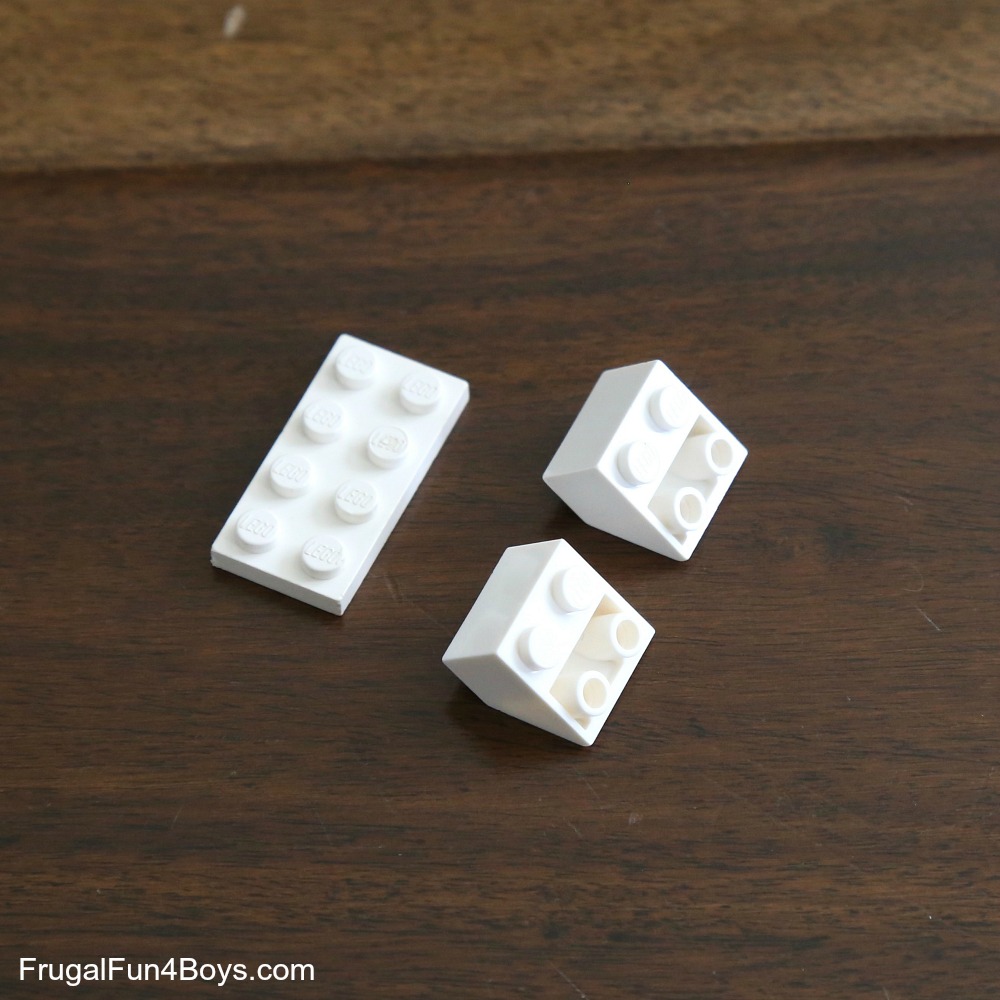
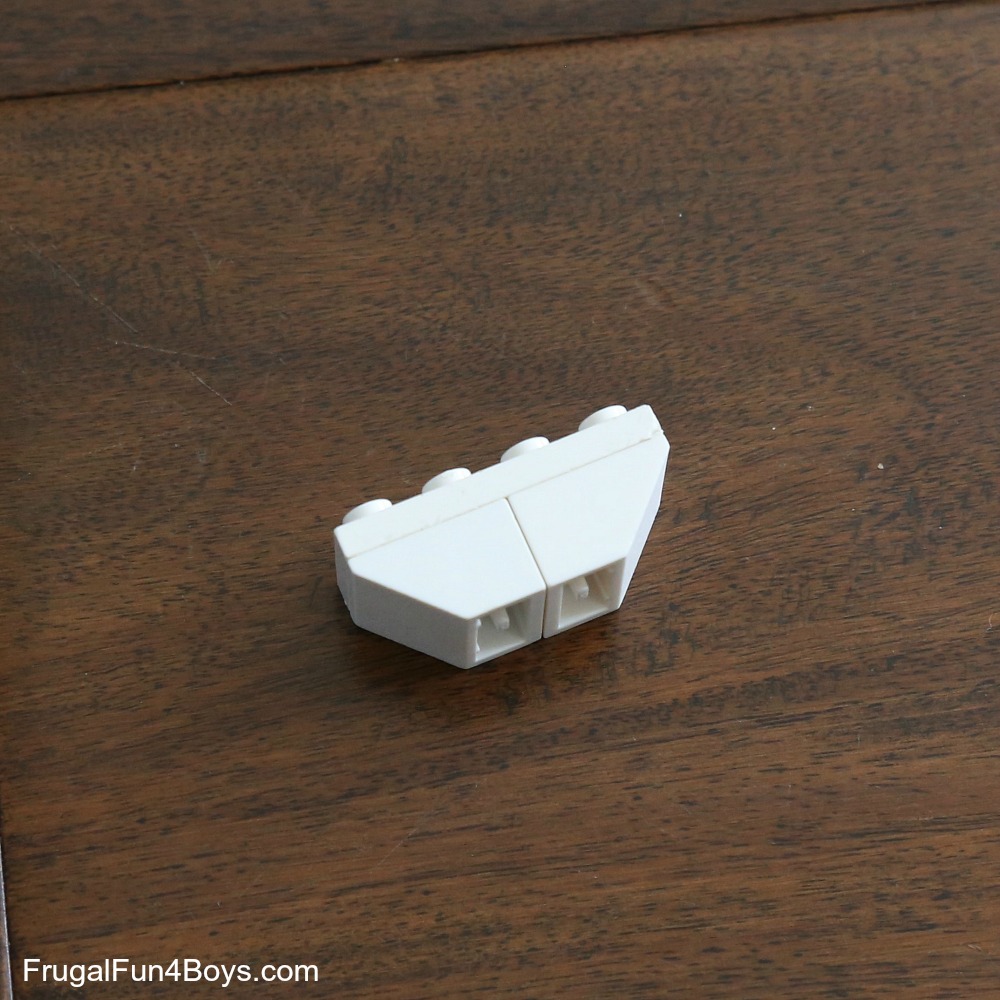
Step 2: Attach them as shown.
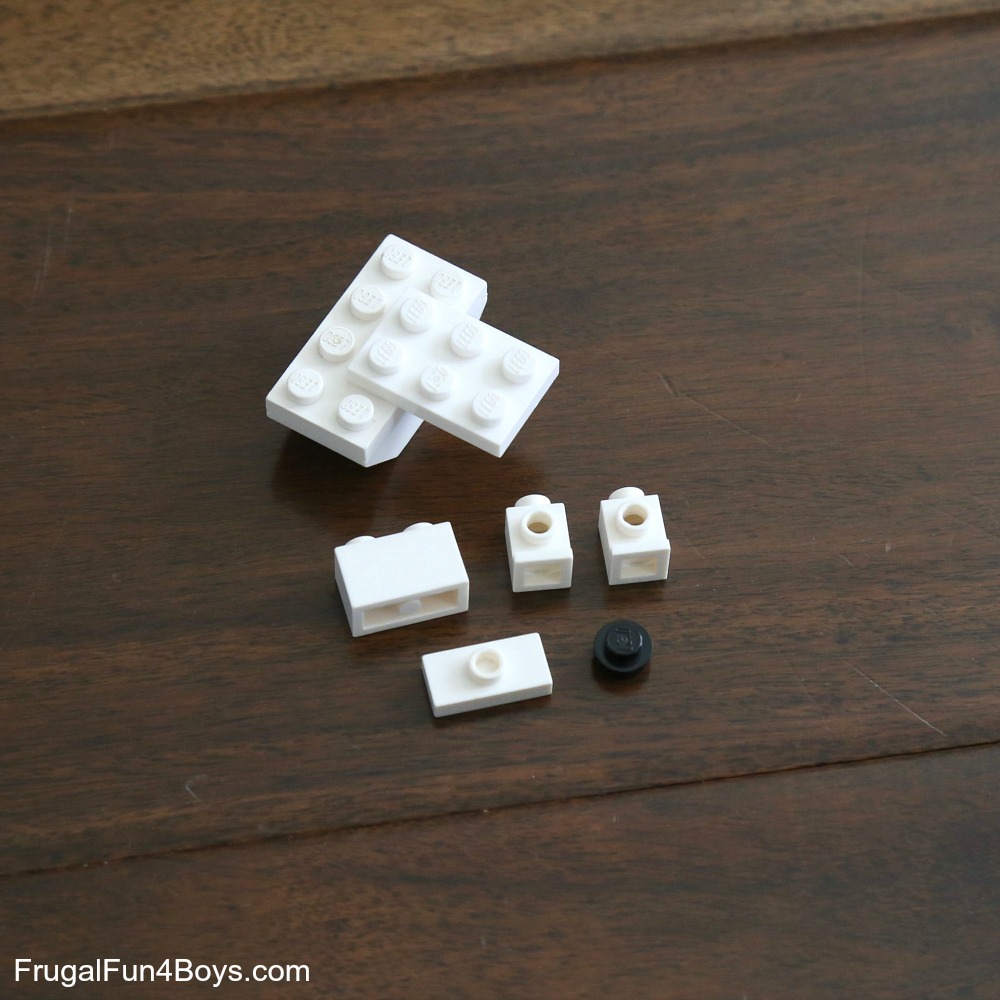
Step 3: Add a 2 x 3 plate so that it hangs off by 4 studs as shown. Find a 1 x 2 brick, a 1 x 2 plate with one stud on top, two 1 x 1 bricks with a stud on the side, and a 1 x 1 black round plate.
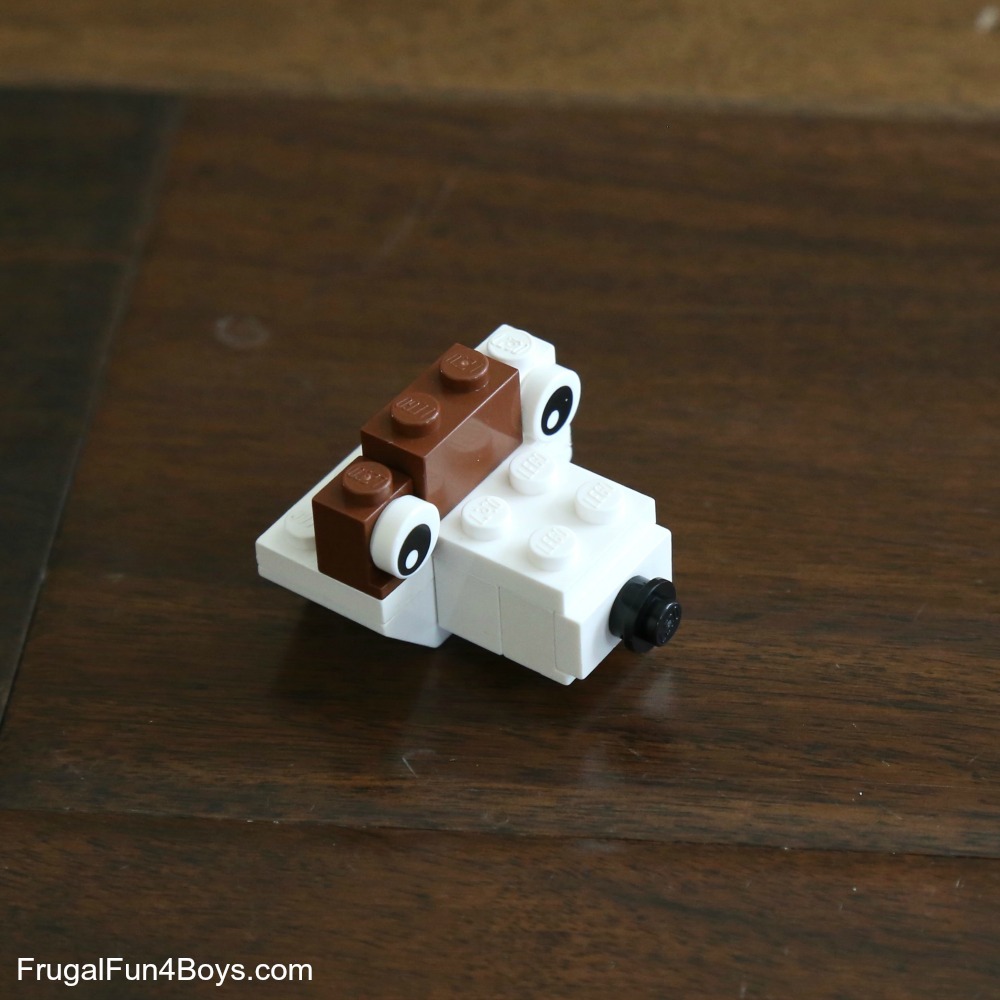
Step 4: Attach the 1 x 2 brick, then add the two 1 x 1 bricks with a stud on the side (headlight style).
Step 5: Attach the 1 x 2 plate with one stud on top to the headlight bricks. Then add the 1 x 1 black round plate for the nose.
Add 1 x 1 bricks with a stud on the side to hold the eyes. Place a 1 x 2 brick between the eyes.
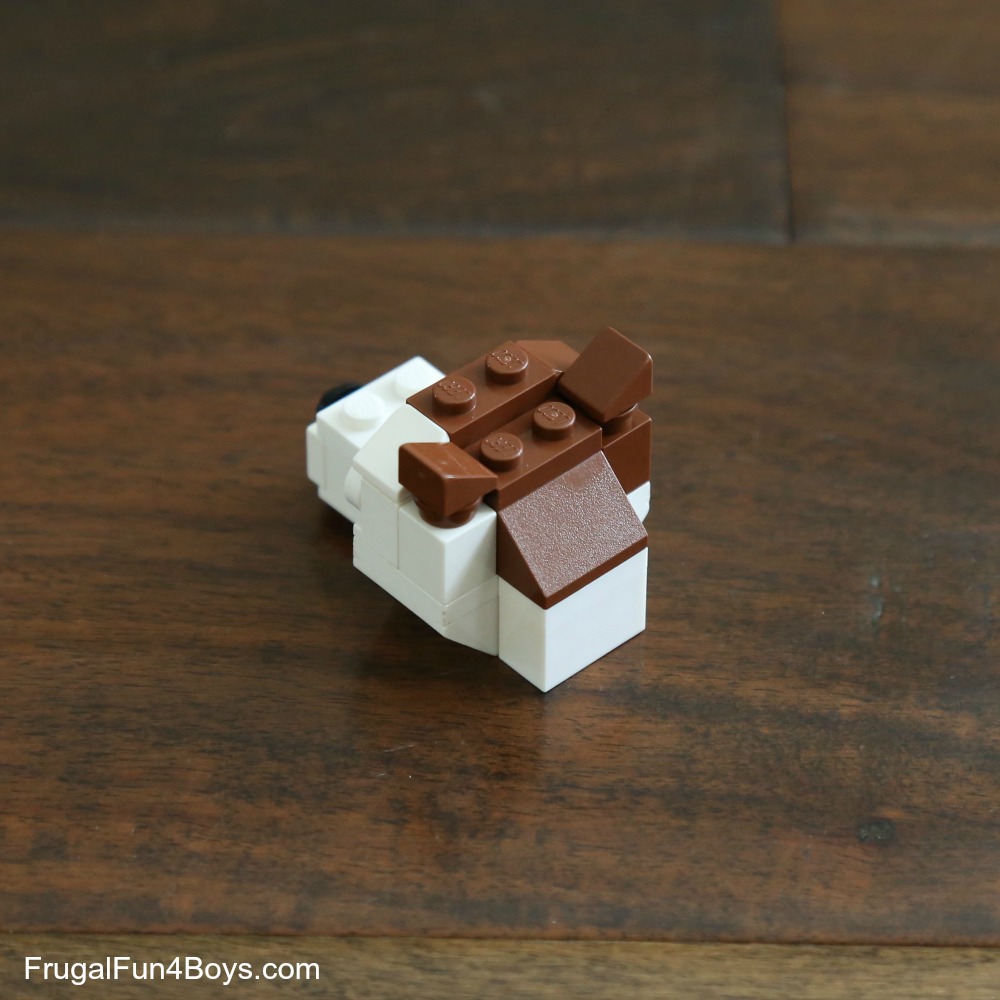
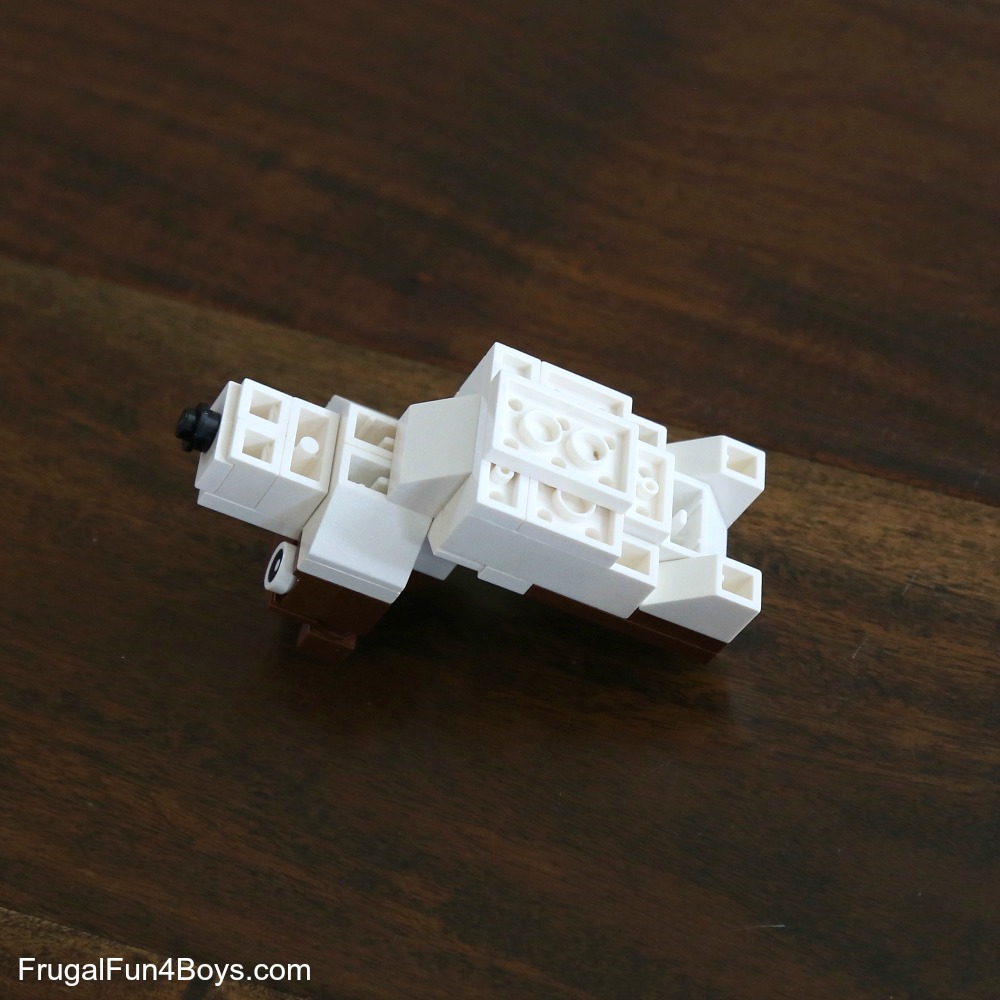
Step 6: Turn the head around. Add a 2 x 2 slope and two 1 x 1 bricks.
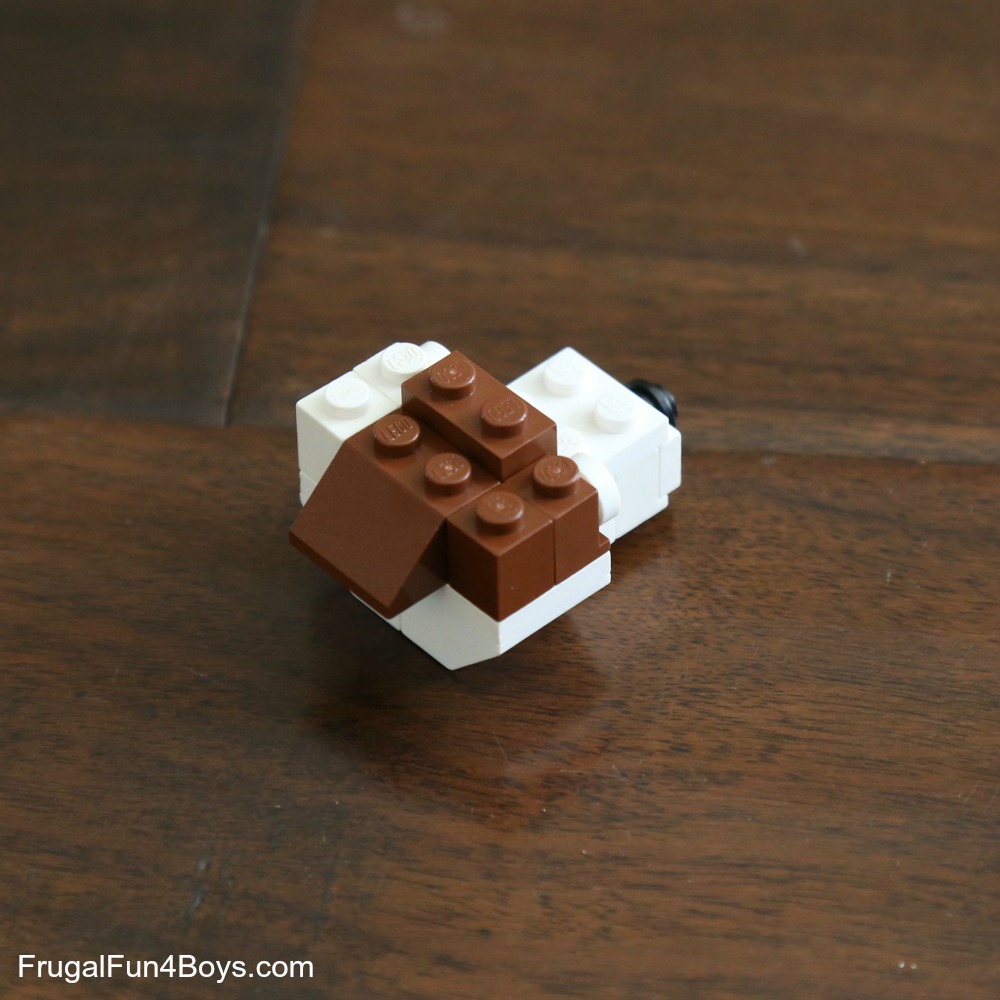
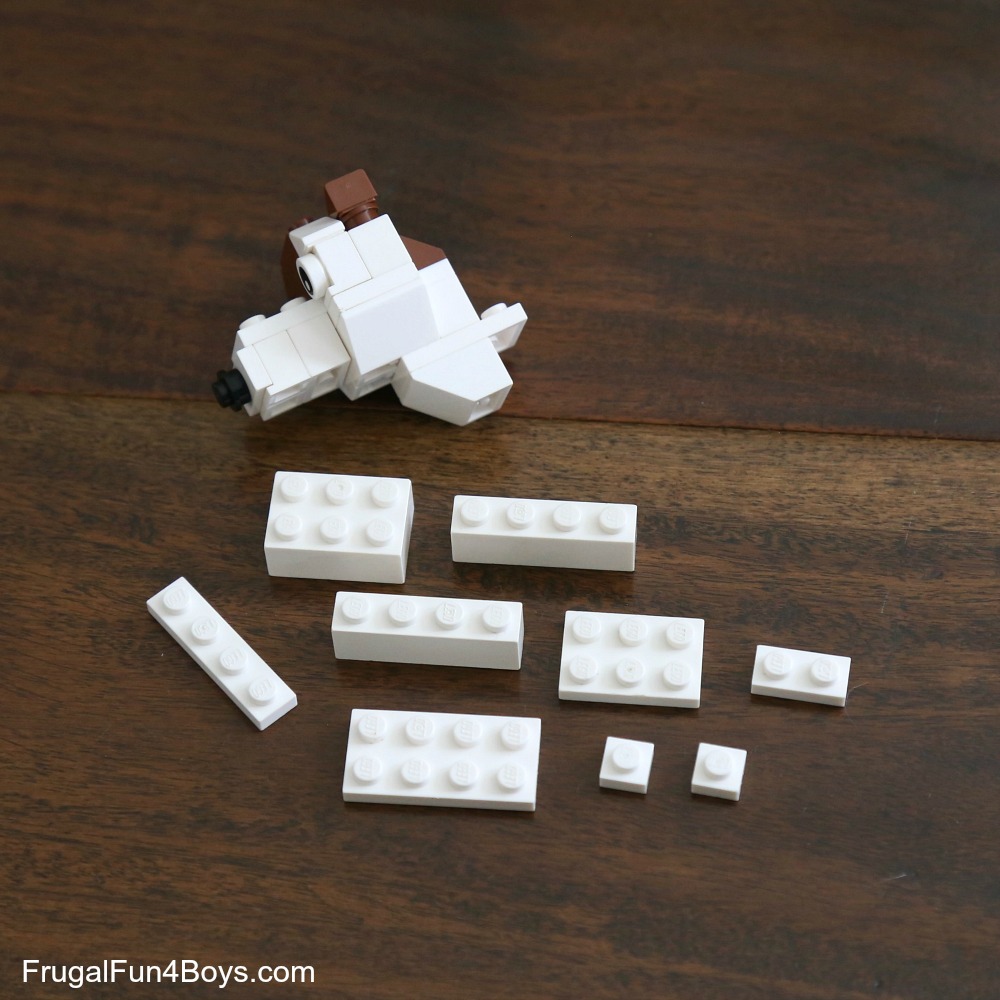
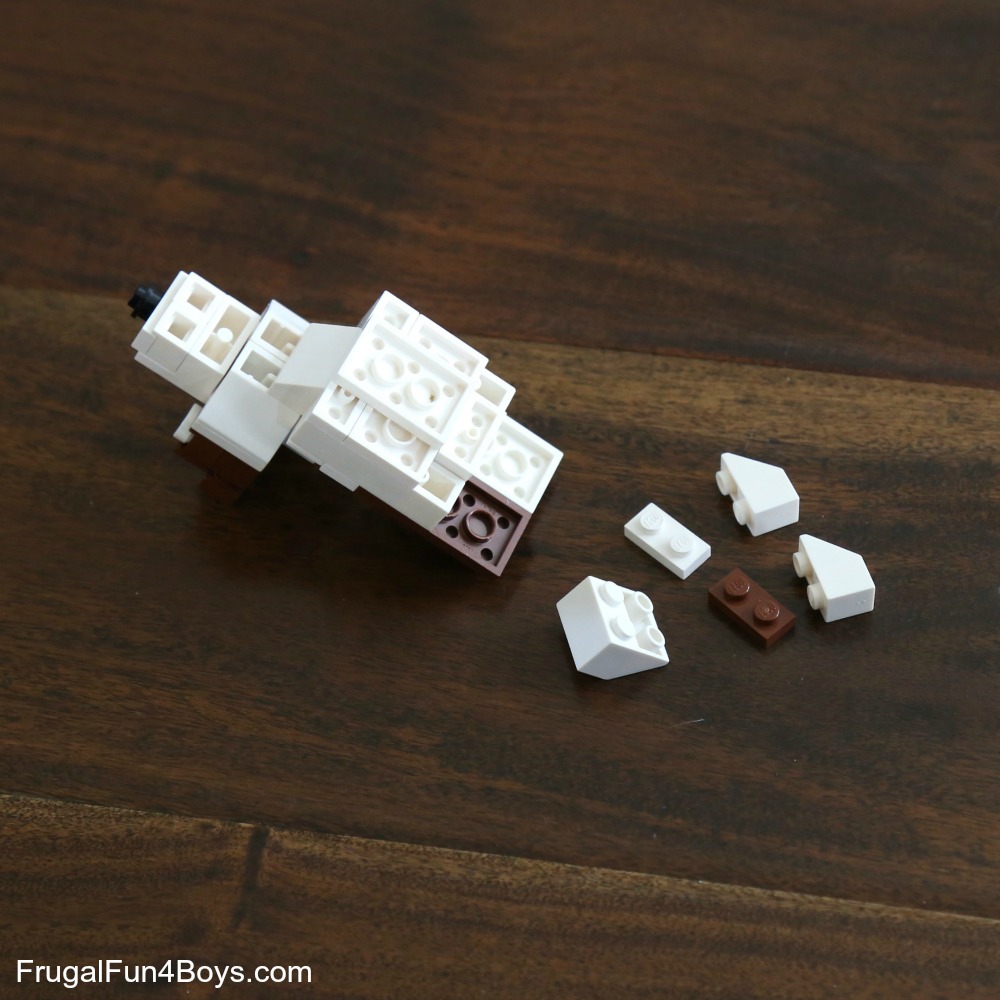
Step 7: Find the bricks shown.
Step 8: Add the bricks to the top of the head.
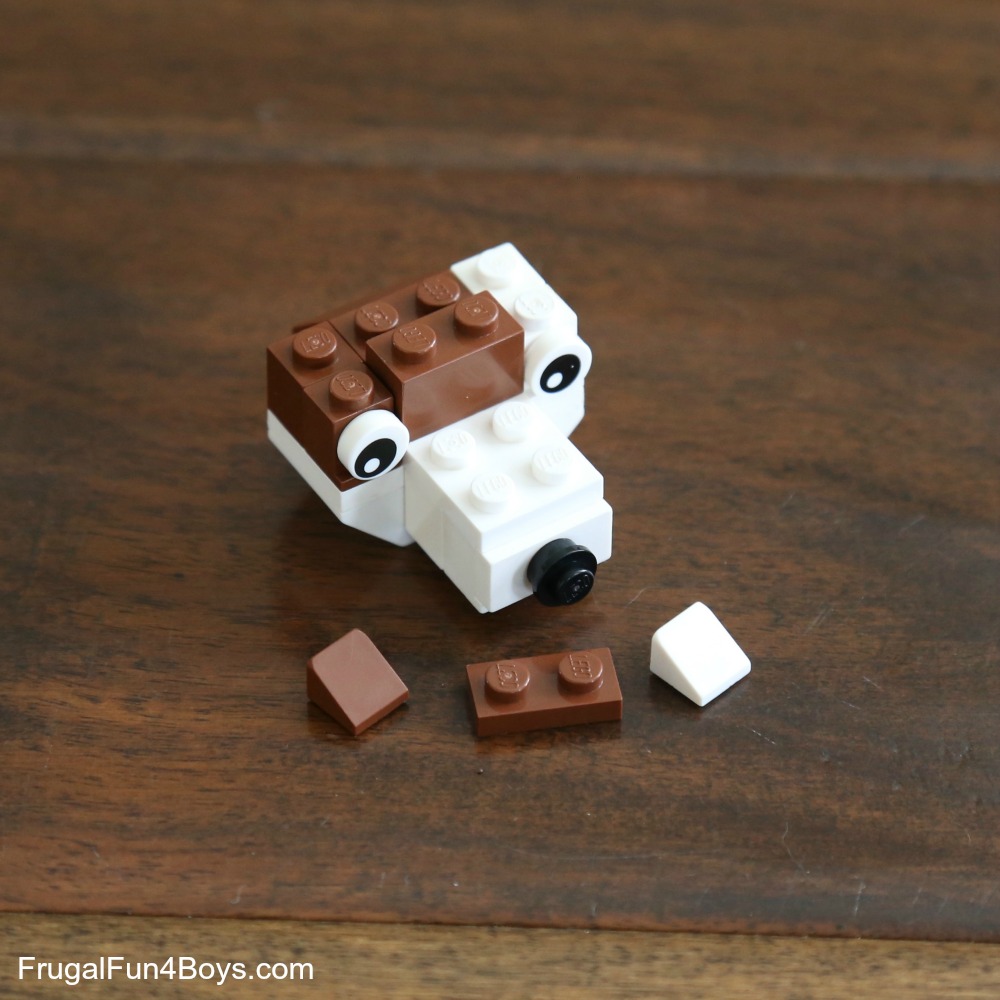
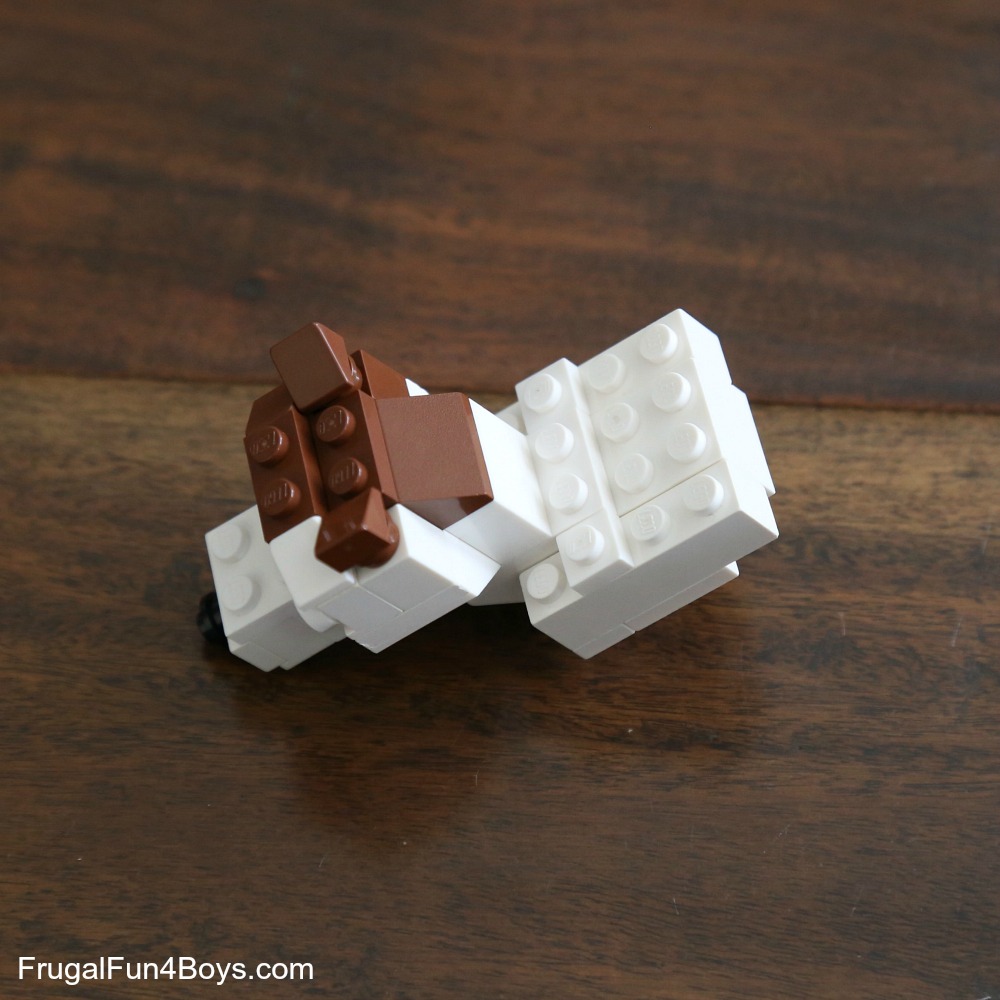
Step 9: Find the bricks shown for building the back of the head.
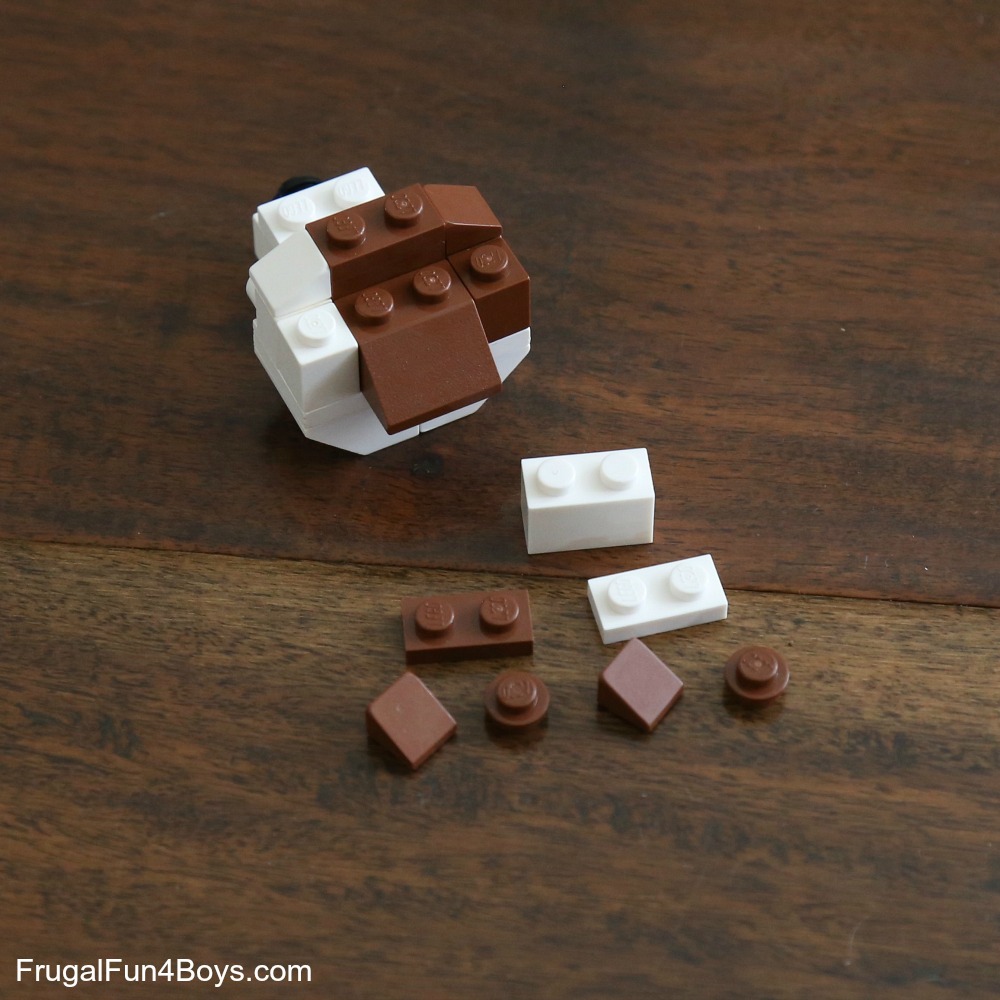
Step 10: Attach the two white bricks under the 2 x 2 brown slope. For the ears, stack a 1 x 1 slope on top of a 1 x 1 round plate. Put the 1 x 2 brown plate between the ears.
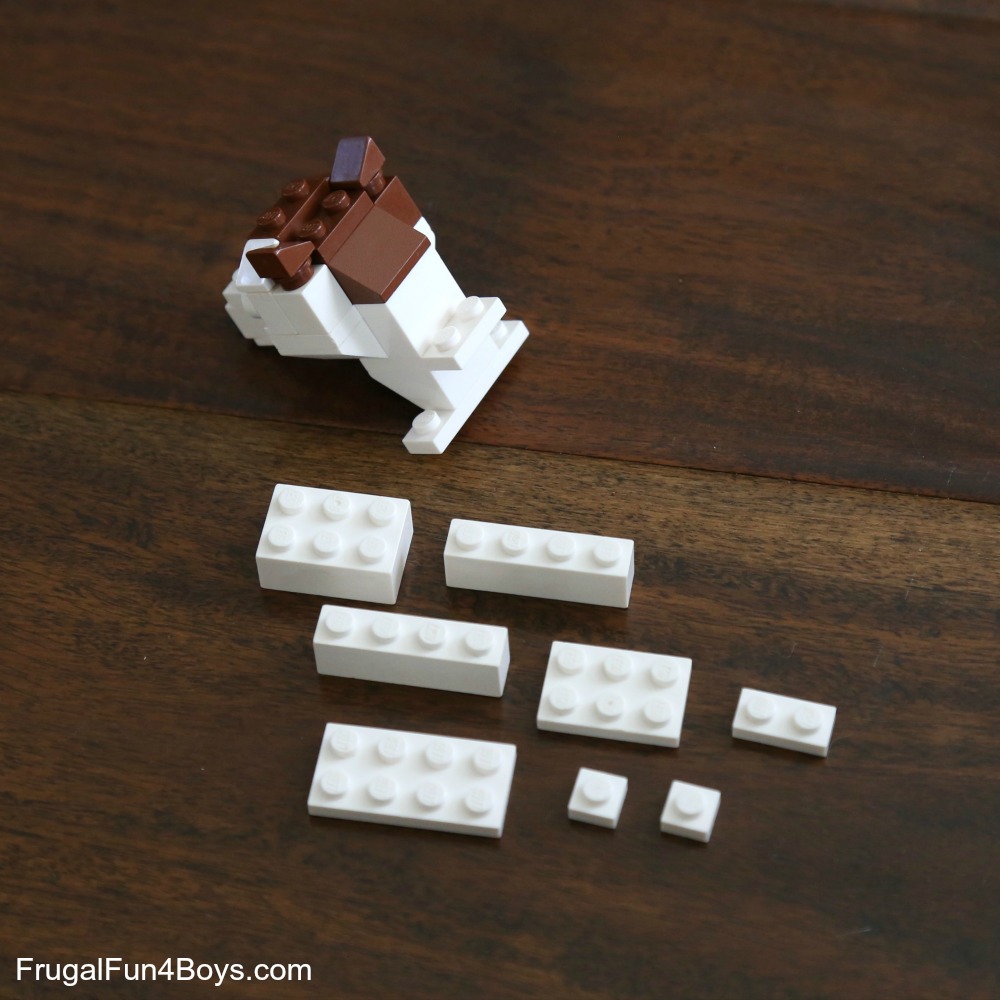
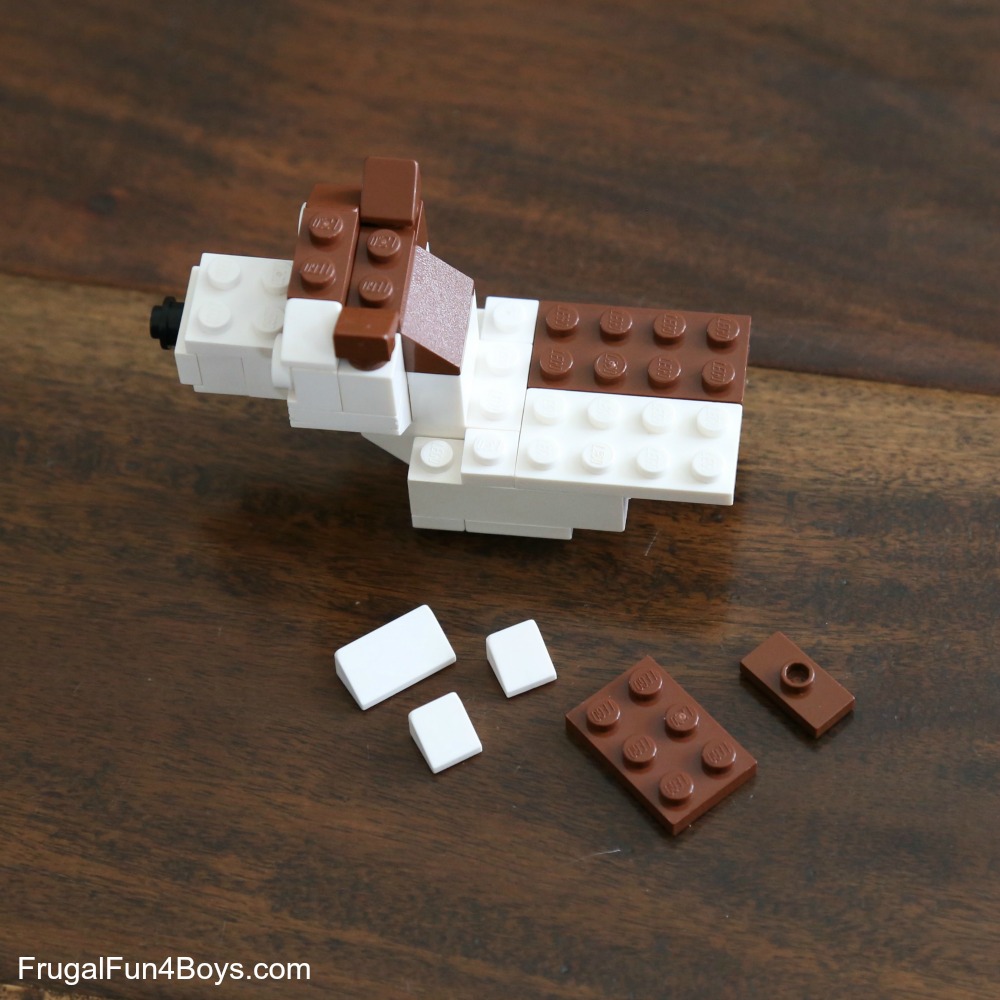
Step 11: Attach a 2 x 3 plate and a 2 x 2 inverted slope under the head.
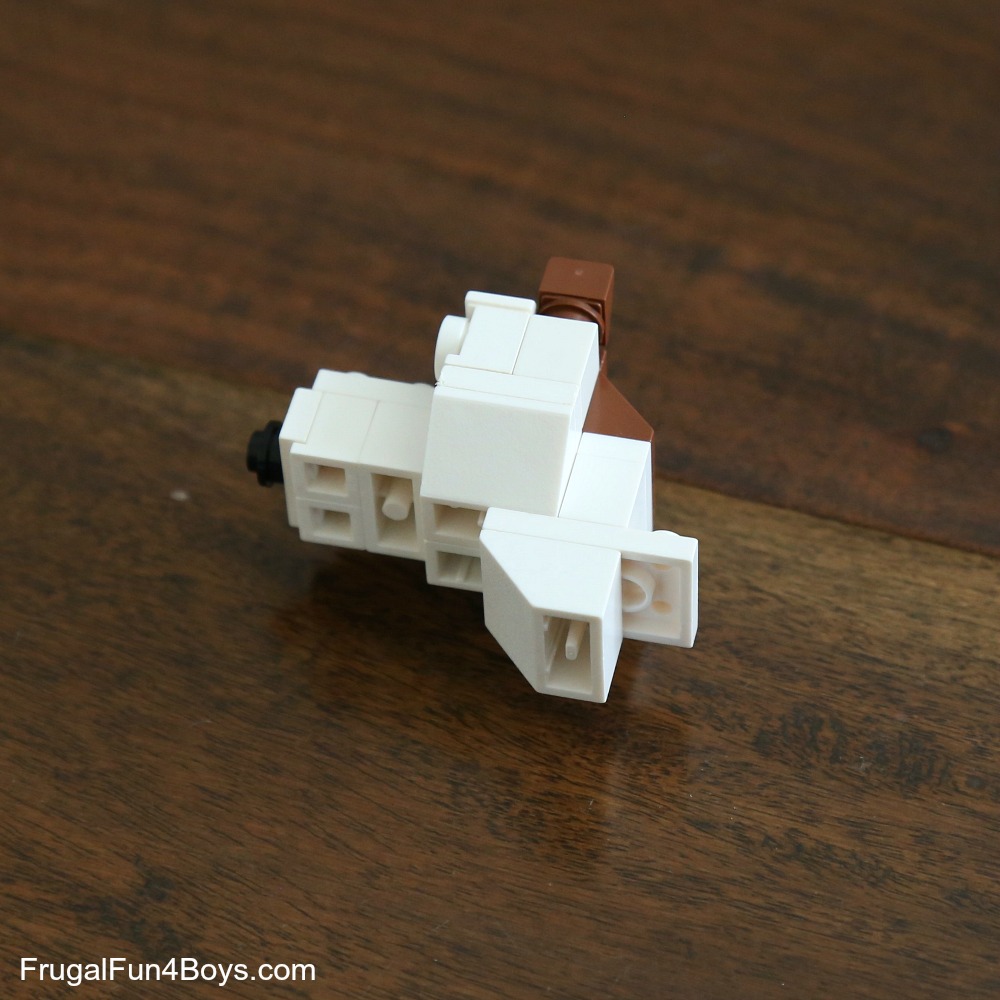
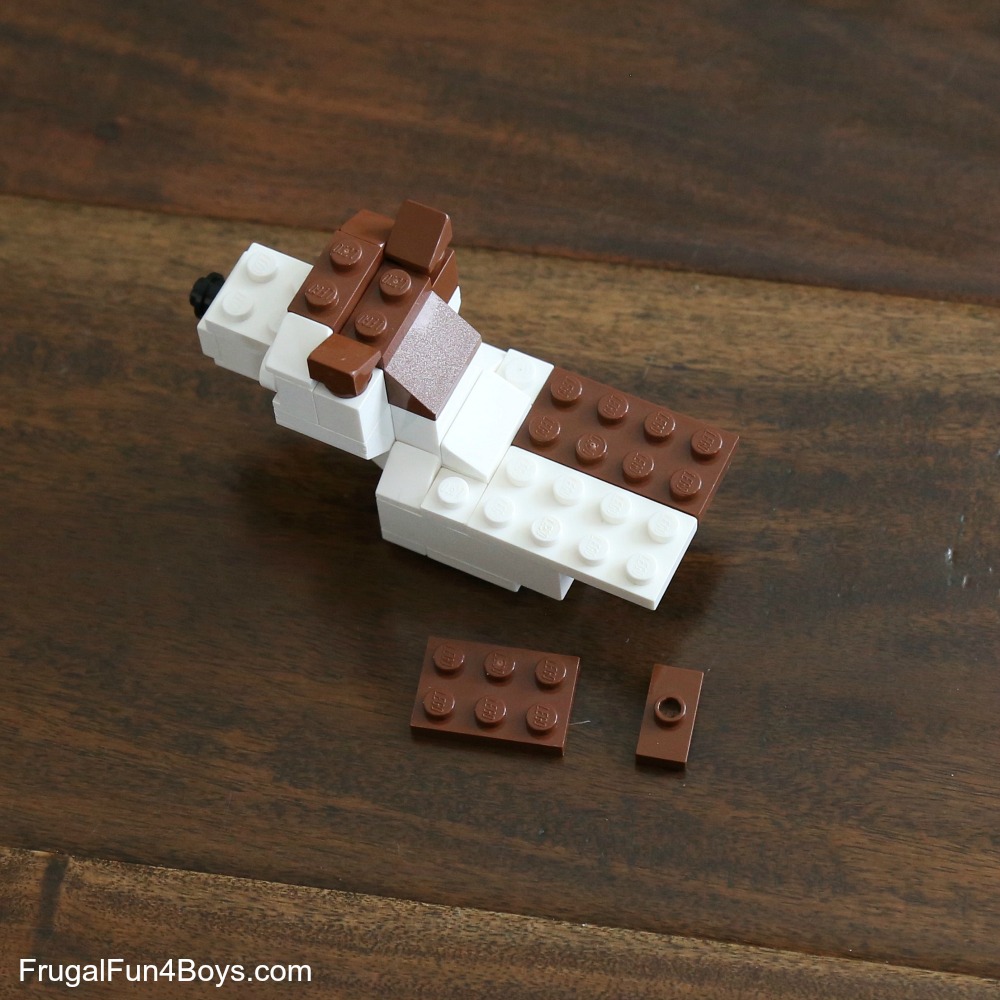
Step 12: Gather the bricks shown.
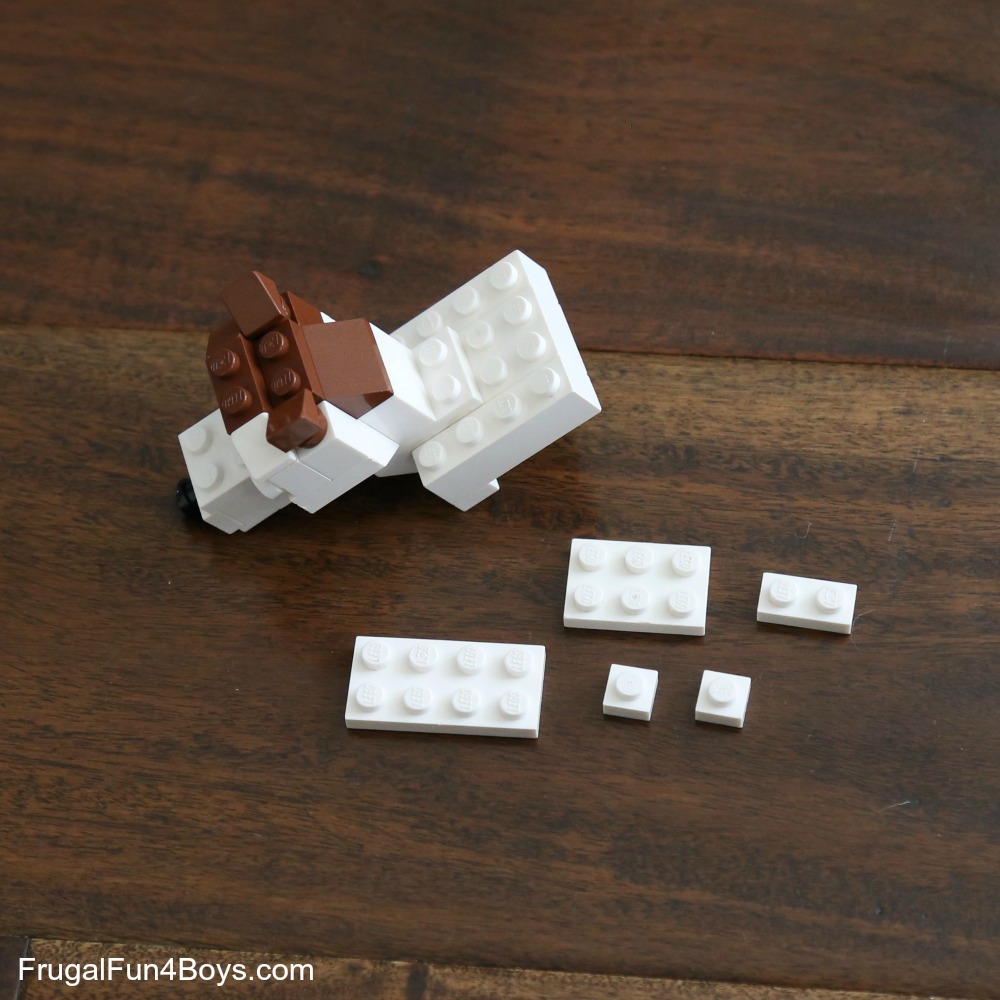
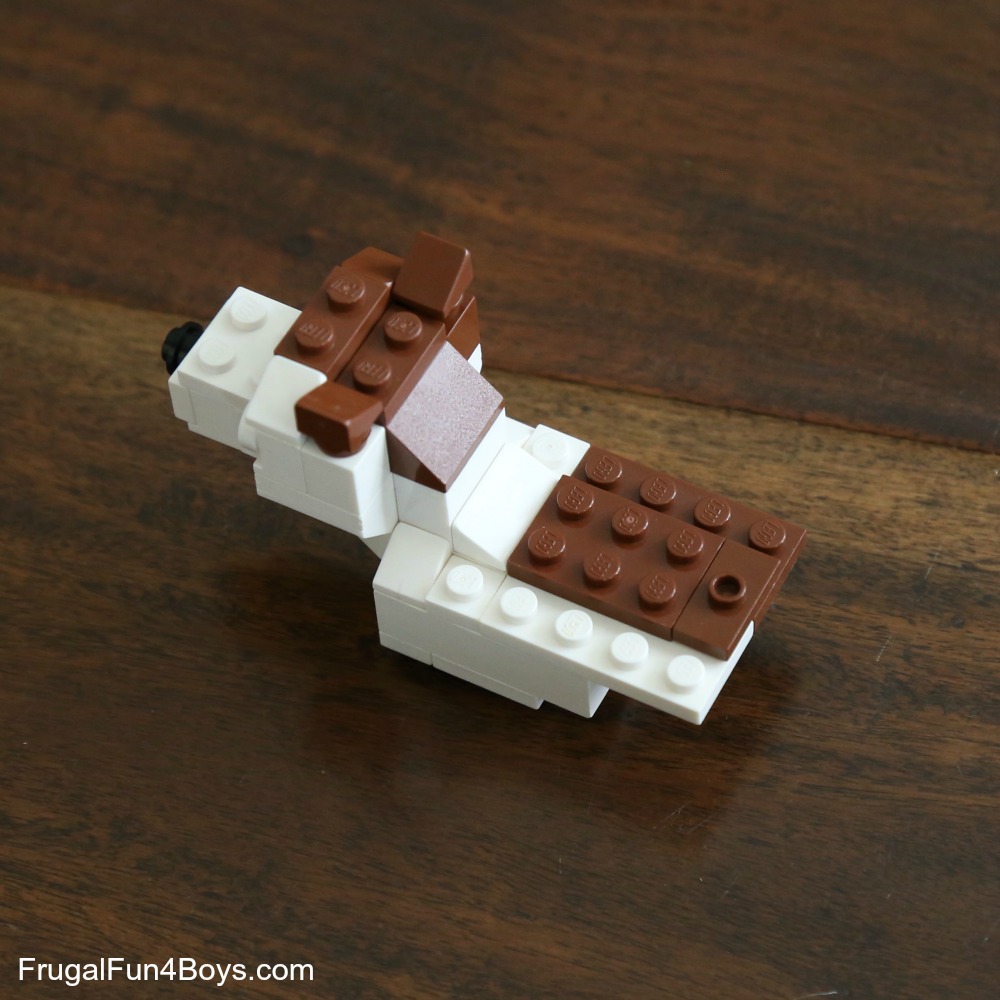
Step 13: Attach the 1 x 4 plate under the neck.
Step 14: Then add a 2 x 3 brick and two 1 x 4 bricks. The 1 x 4 bricks attach to the top of the 1 x 4 plate from the previous step.
Step 15: Turn the dog over and attach a 2 x 4 plate, then a 2 x 3 plate and a 1 x 2 plate (on the far right side of the photo).
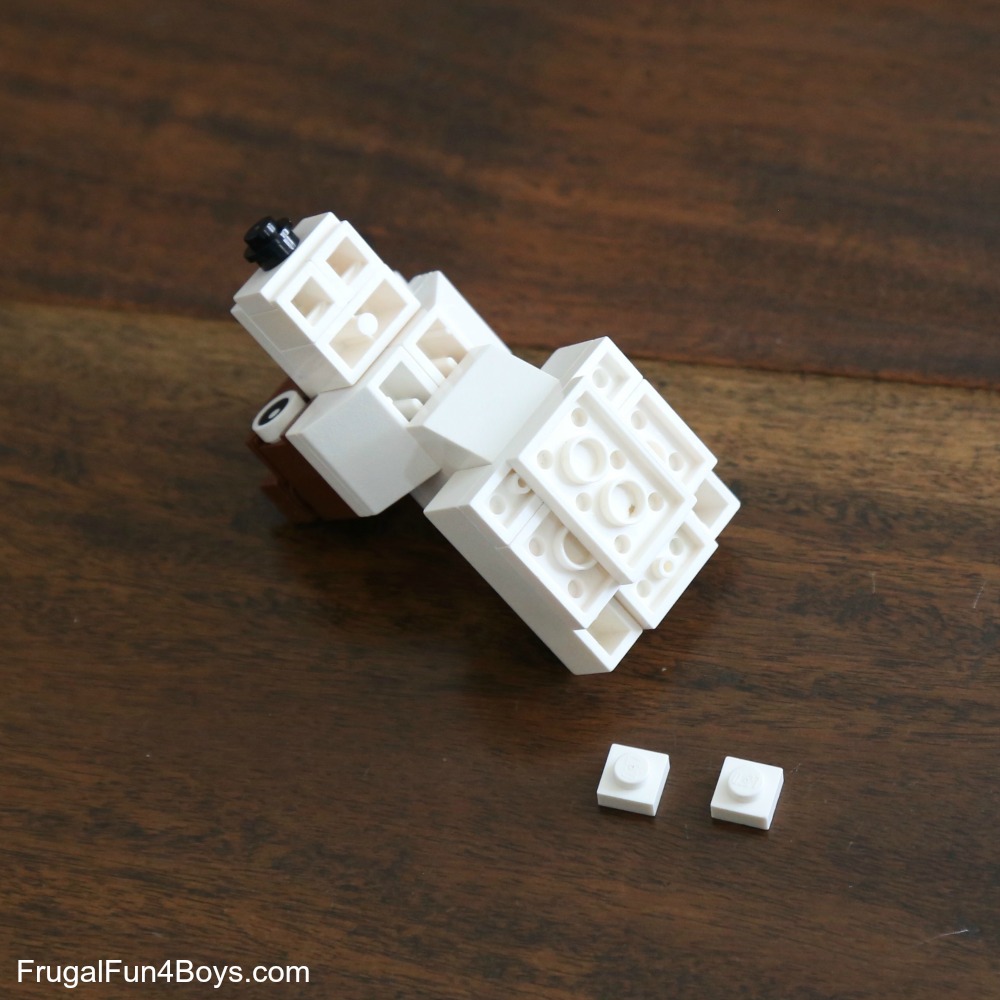
Step 16: Turn the dog back over and add the two 1 x 1 plates.
Step 17: Attach a 2 x 4 white plate and a 2 x 4 brown plate to the dog’s back. Then find the bricks shown.
Step 18: Add the 1 x 2 slope behind the head and place a 1 x 1 slope on each side of the neck.
Step 19: Attach the 2 x 3 plate and the 1 x 2 plate with one stud on top to the dog’s back.
Step 20: Turn the dog over and then gather the bricks shown.
Step 21: Attach one of the 1 x 2 plates to each of the 1 x 2 inverted slopes. Then attach all three inverted slopes to the underside of the body.
Step 22: Add the legs, and the dog is complete! Each leg has two 1 x 1 bricks and one 1 x 2 plate.
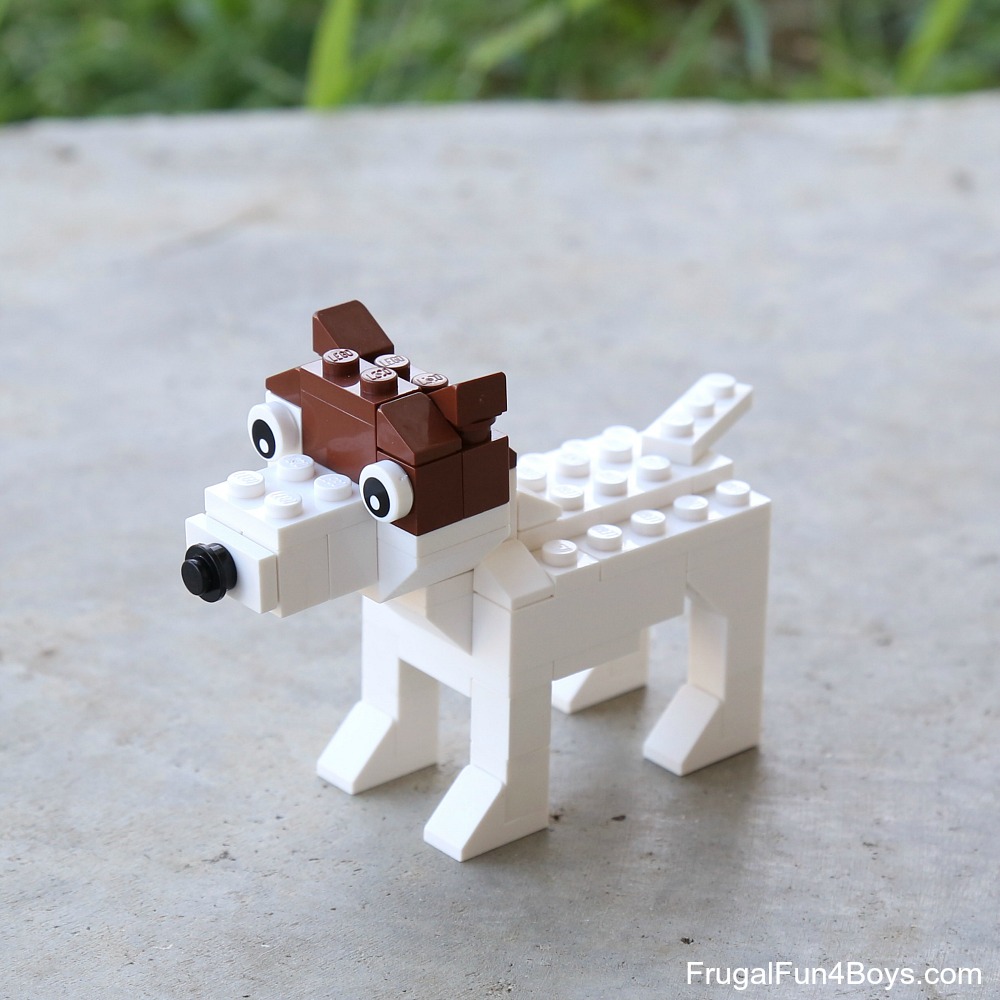
Then build more terriers! This one has slightly different coloring. I also used different bricks for the feet – they are a 1 x 2 slope with cutout. I can’t decide which feet I like better!
Build a doggy park for your LEGO® dogs!
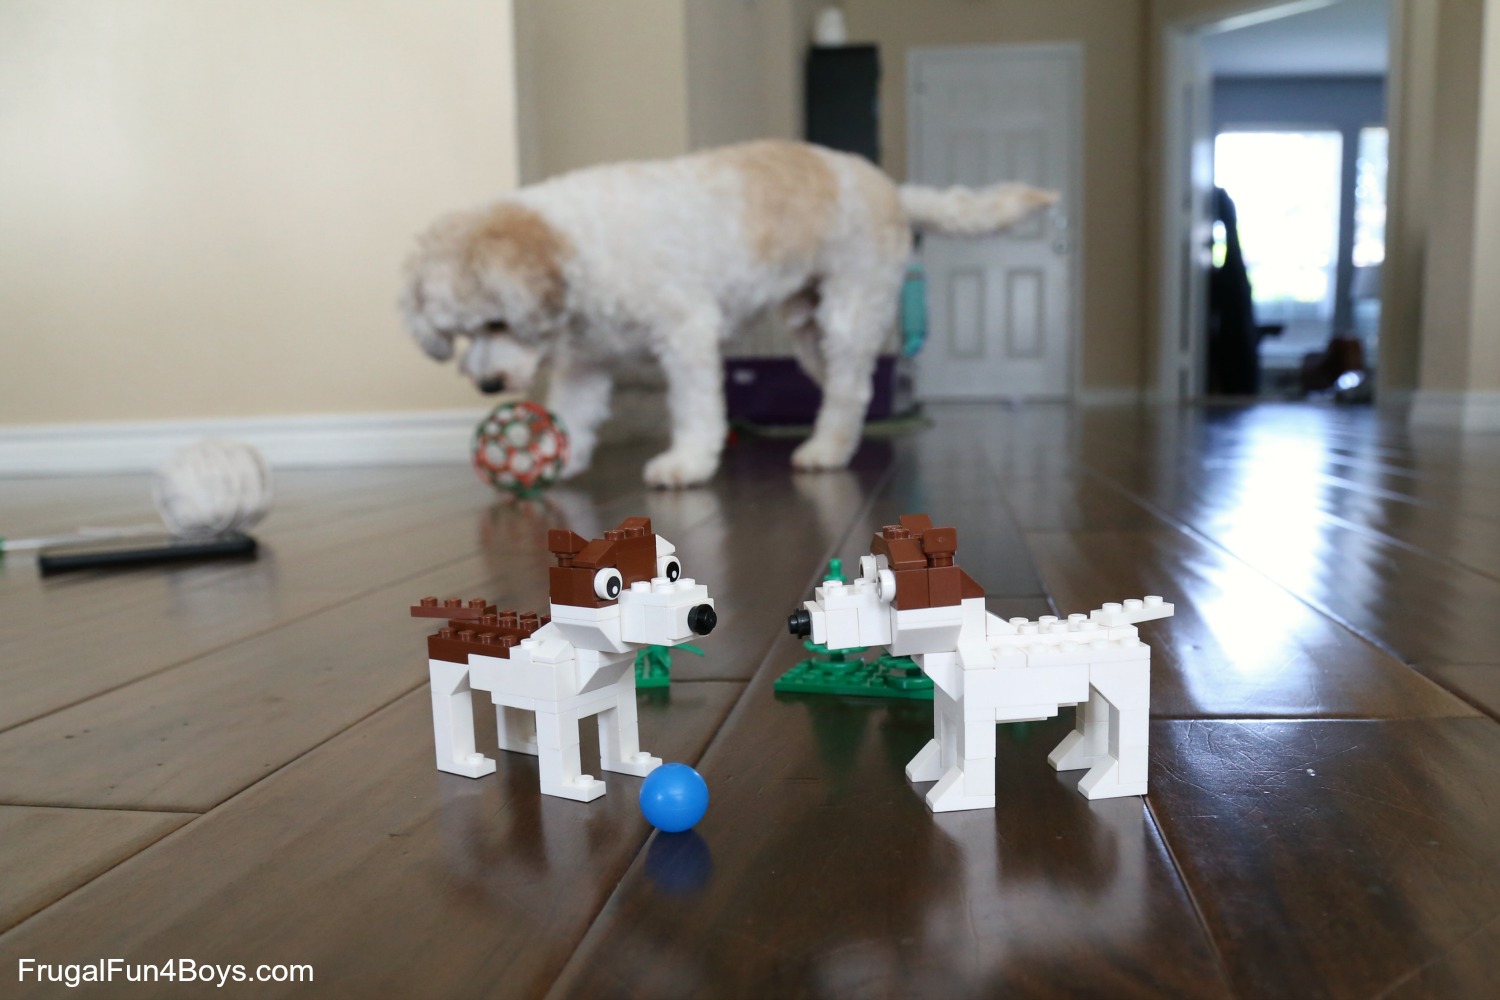
As I was photographing these LEGO dogs and their little ball, along came our real dog with his ball. Such a goof! He loves to photobomb my blog photos. I could include him in every post if I wanted to because he’s always finding a way to get in front of the camera.
Need more LEGO® building ideas?
- More LEGO® Dogs to build
- LEGO® Guinea Pigs
- LEGO® Cats – I’m not a cat fan, but this is one of my favorite projects!
LEGO® is a trademark of the LEGO® group of companies which does not authorize, sponsor, or endorse this site.
5 Comments
dragon ball super Aug 8, 2017
these dogs look so cool. Thanks a lot for sharing it.
Viet Anh Auto Aug 9, 2017
This looks so cute. ^^
Q Apr 8, 2018
Hey - a content list of components would be a great addition & huge time saver.
WolfAndRaven Sep 24, 2020
Thanks so much for this! I don't really have kids, but I ended up 3D modelling this for a class!
Shraddha Dec 3, 2022
From my 6yo - Cute puppy!
Very good instructions. He was able to built it on his own. Thank you!
Post a Comment