
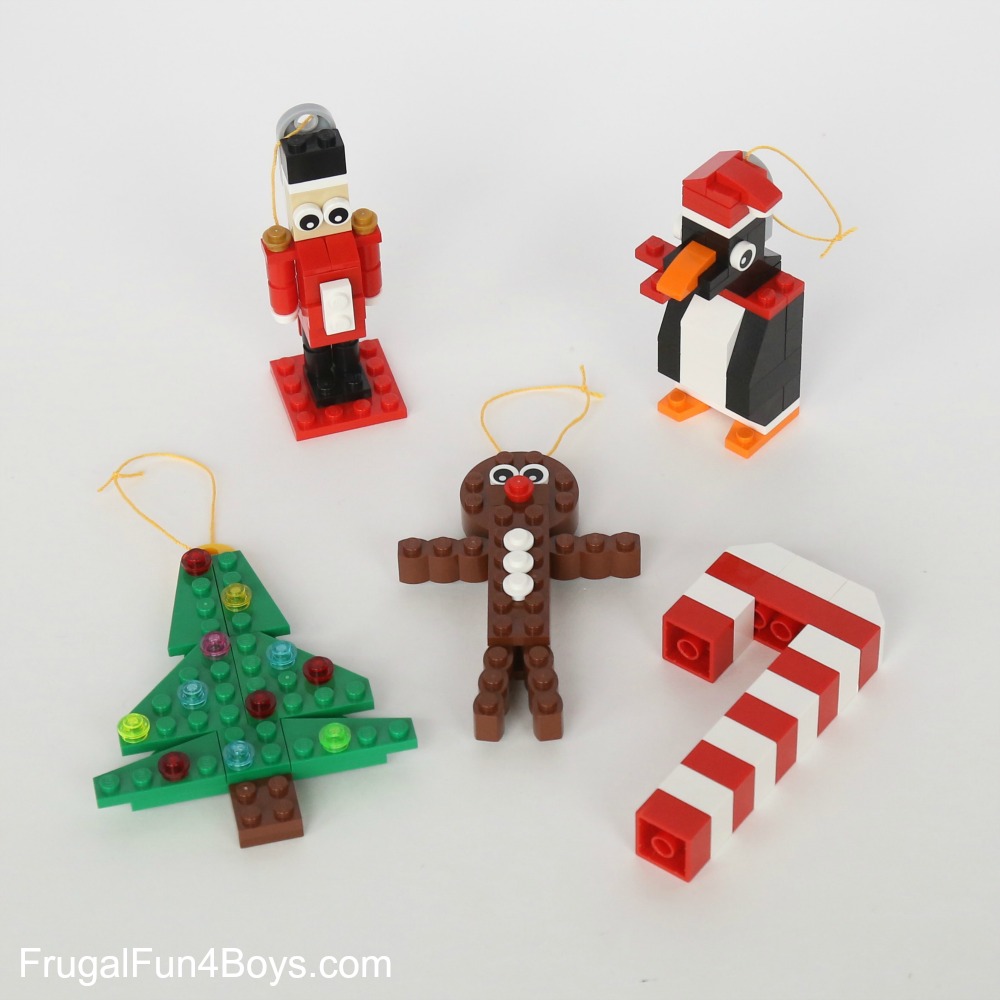
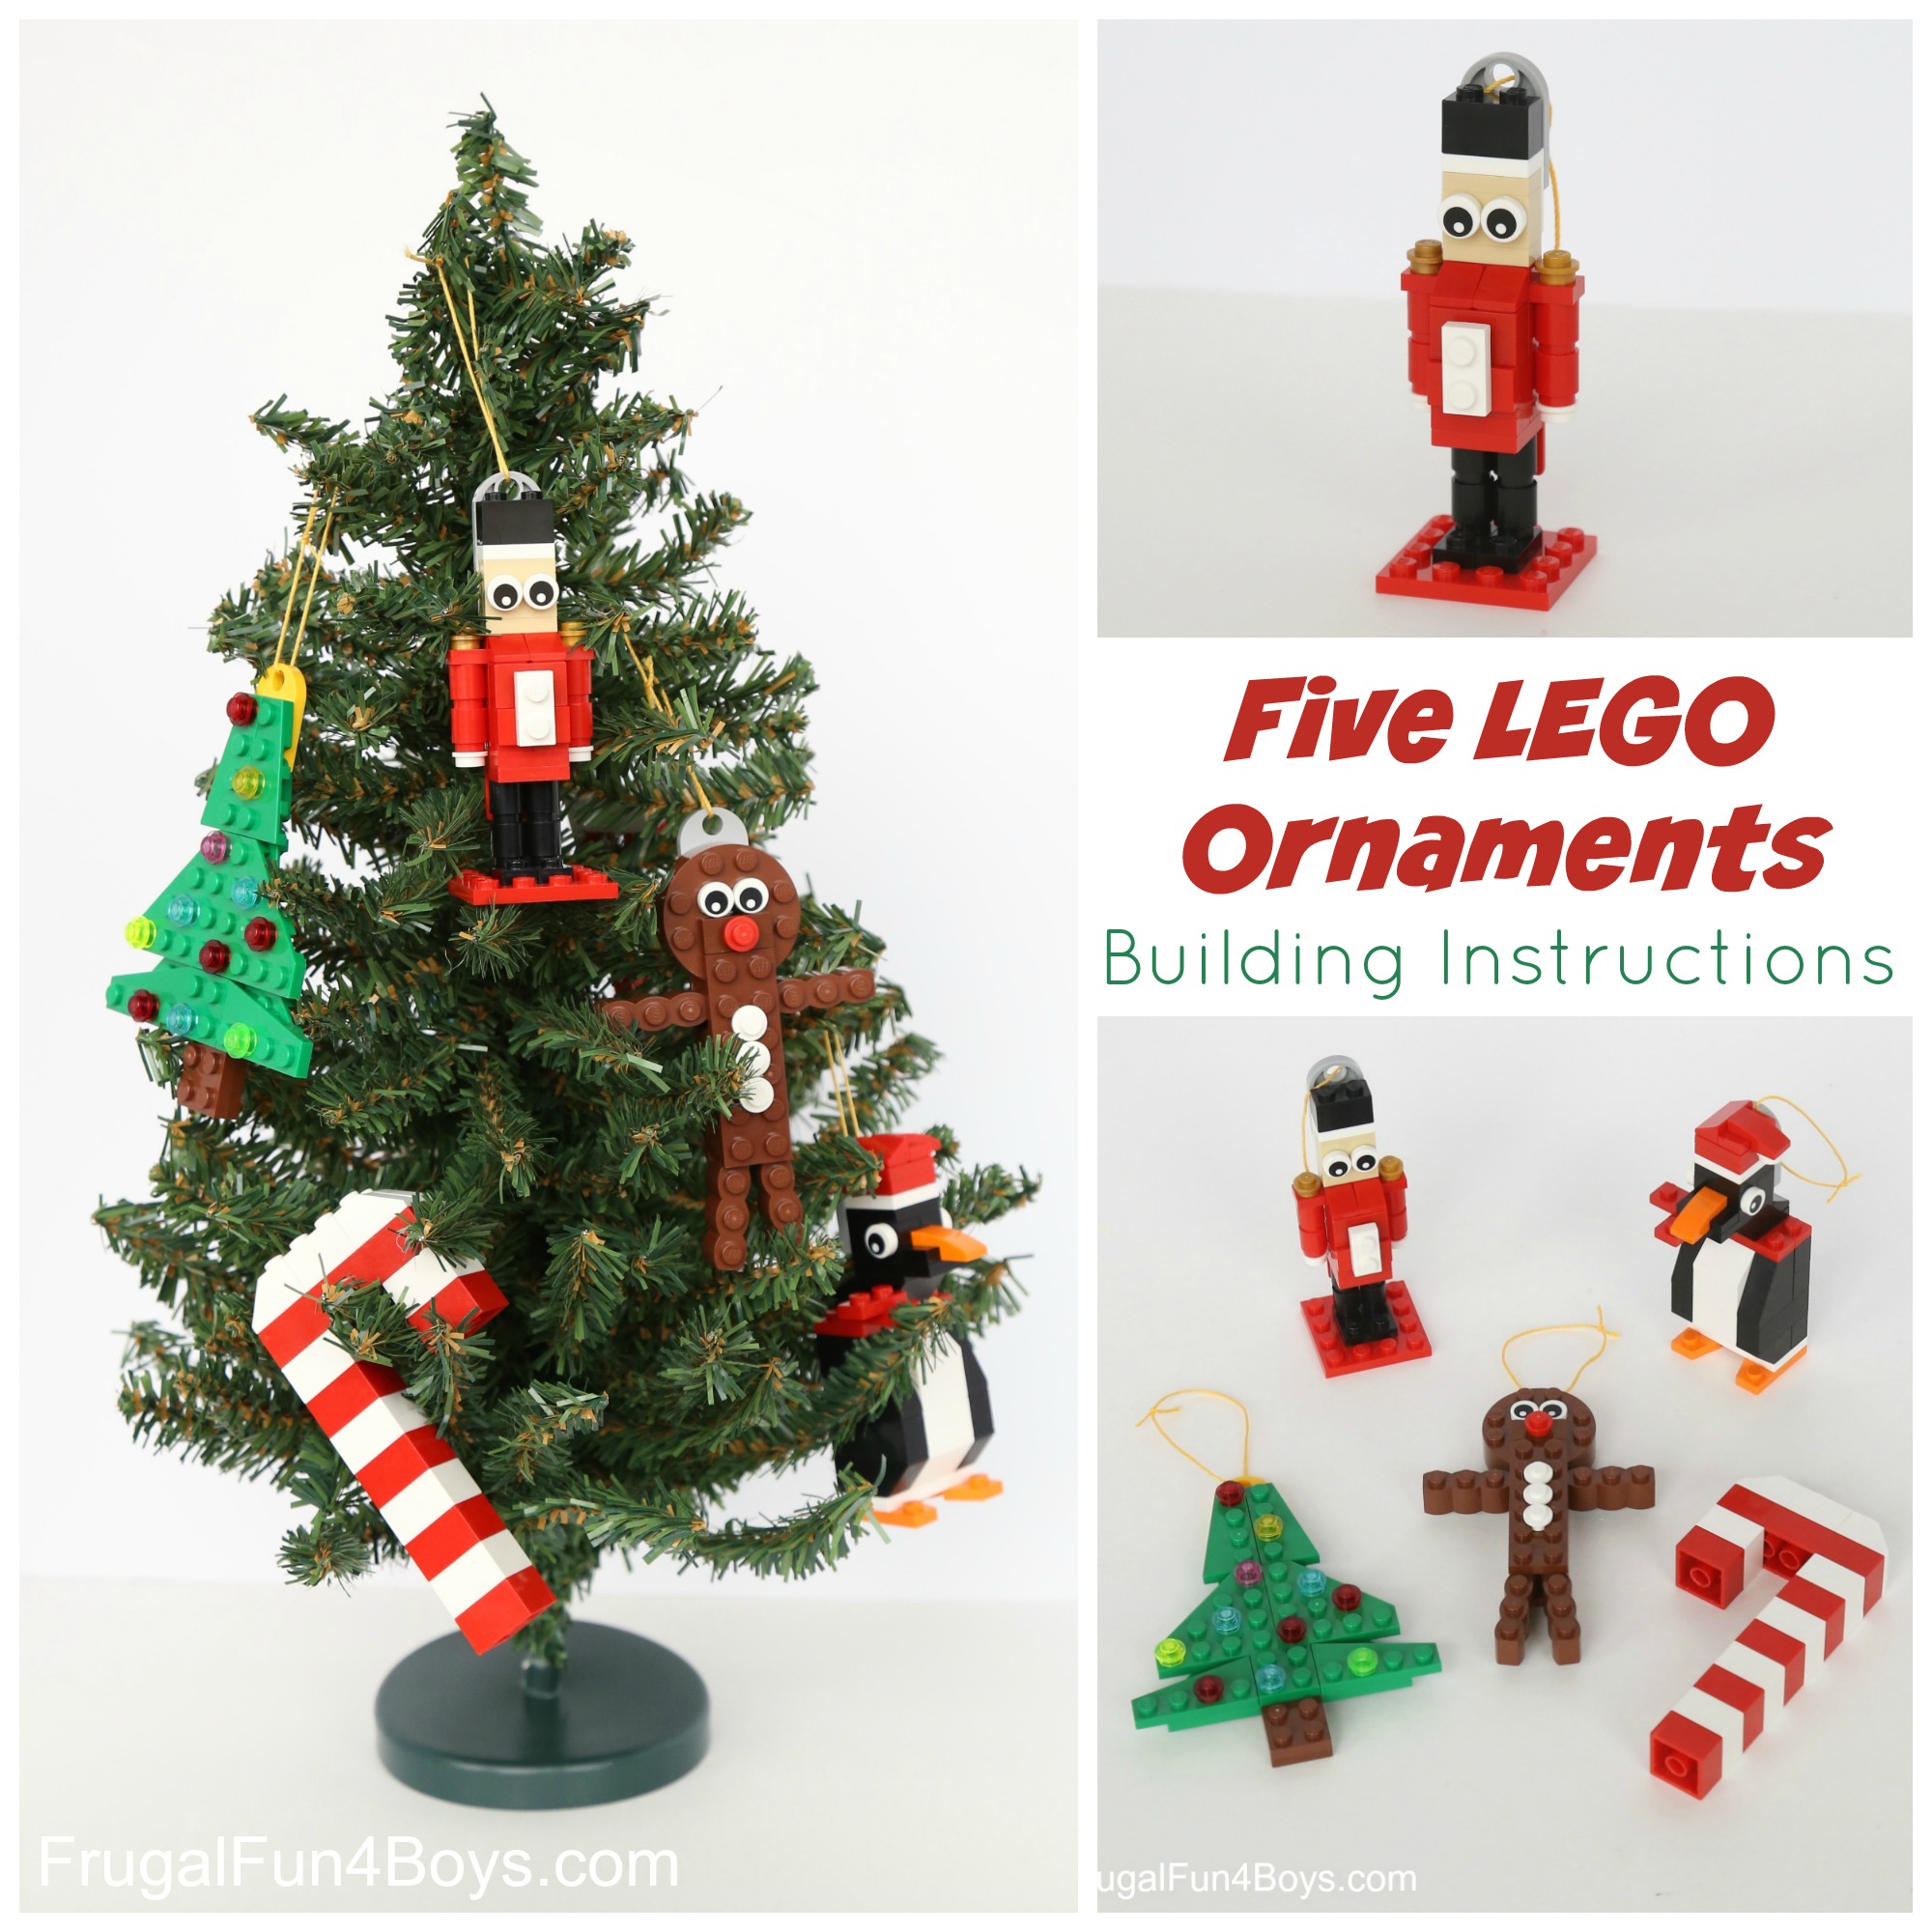
Let’s kick off the Christmas season with some LEGO® ornaments to build! Here are five fun ornament designs for trimming your tree. They don’t necessarily have to be ornaments, though. Use them to decorate your mantel or as a table centerpiece.
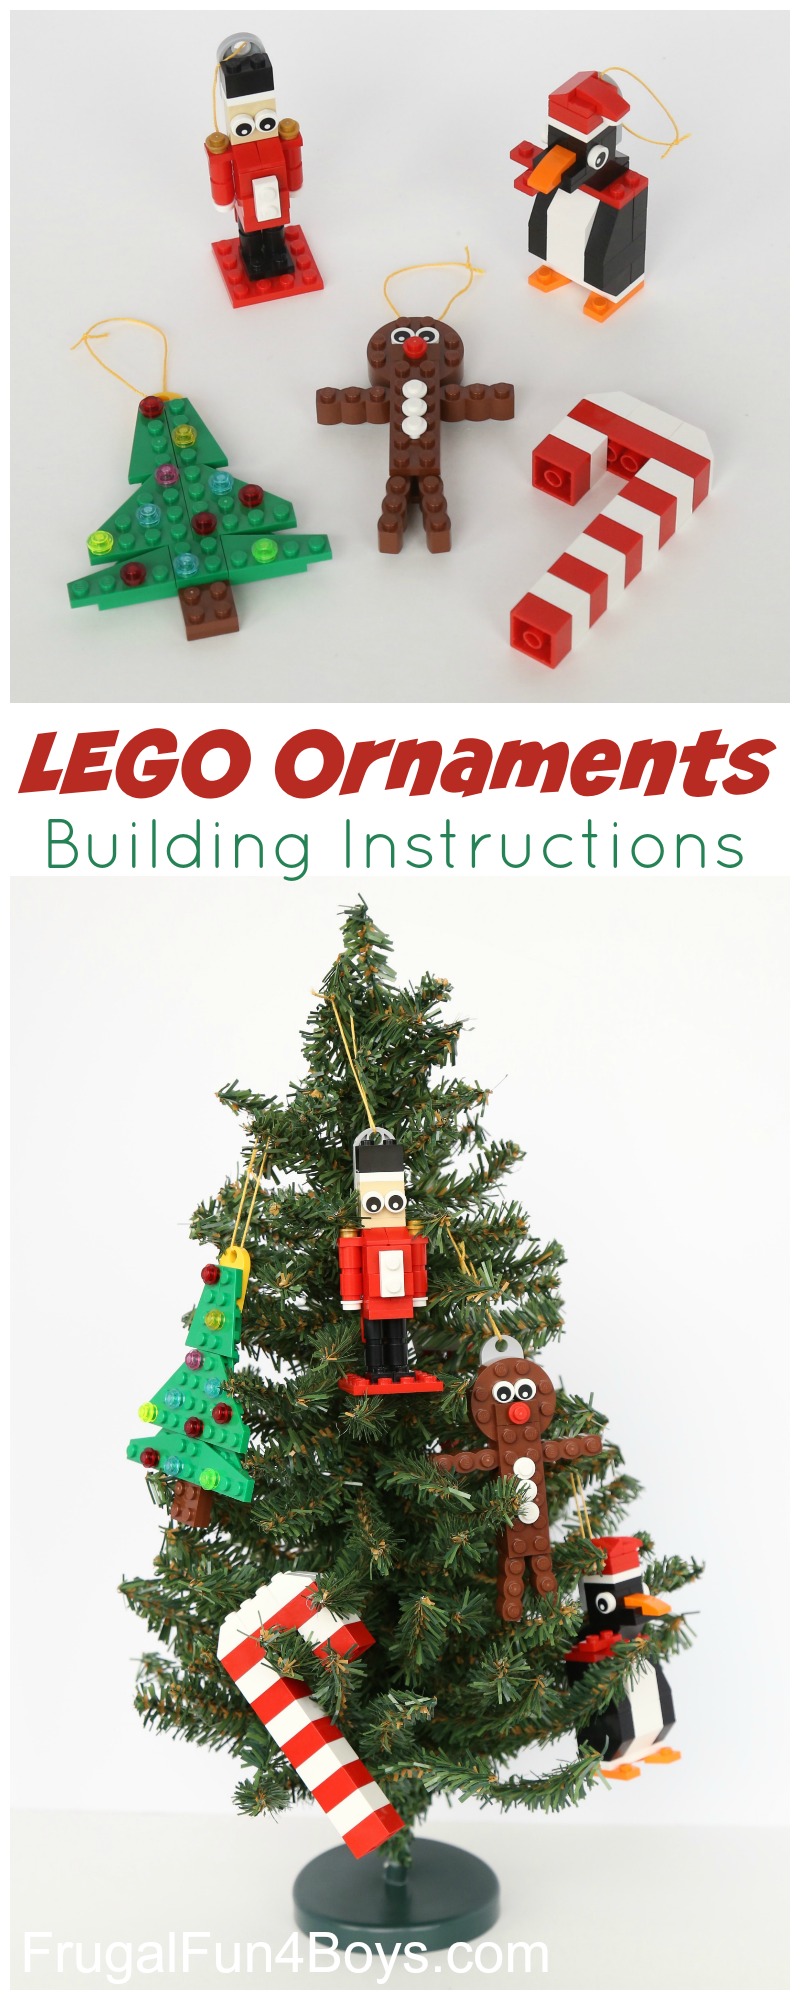
Build a Nutcracker, a Penguin, a Gingerbread Man, a Candy Cane, and a Tree. These projects are definitely some of my favorites out of all of our Christmas projects.
Below are instructions and parts lists for each of the ornaments. If your kids don’t have the exact pieces or colors we used, encourage them to get creative with what they have. If you want to order individual bricks to supplement what you have, it’s really simple to do! We recommend Brick Link, and the link here goes to a post that will help you navigate that site.
Want printable instructions? Find our LEGO® Christmas E-book (12 projects) here: Christmas Projects to Build with LEGO® Bricks

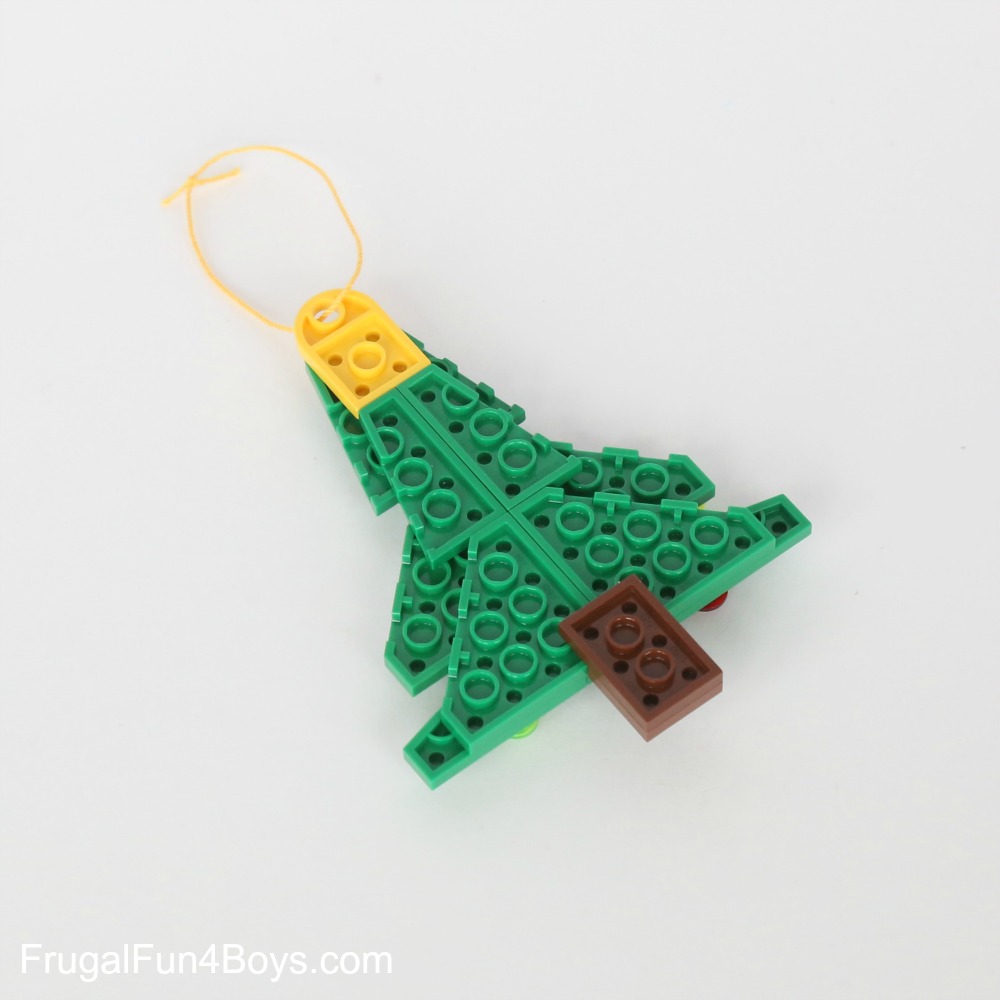
Christmas Tree
For the tree, you will need:
4 – 4 x 4 green corner plates
3 – 2 x 4 green wedge plates, right
3 – 2 x 4 green wedge plates, left
1 – 2 x 3 brown plates
1 – 2 x 2 brown plate
1 – 2 x 2 yellow plate with a curved end and a hole
1 x 1 round plates in various colors for ornaments
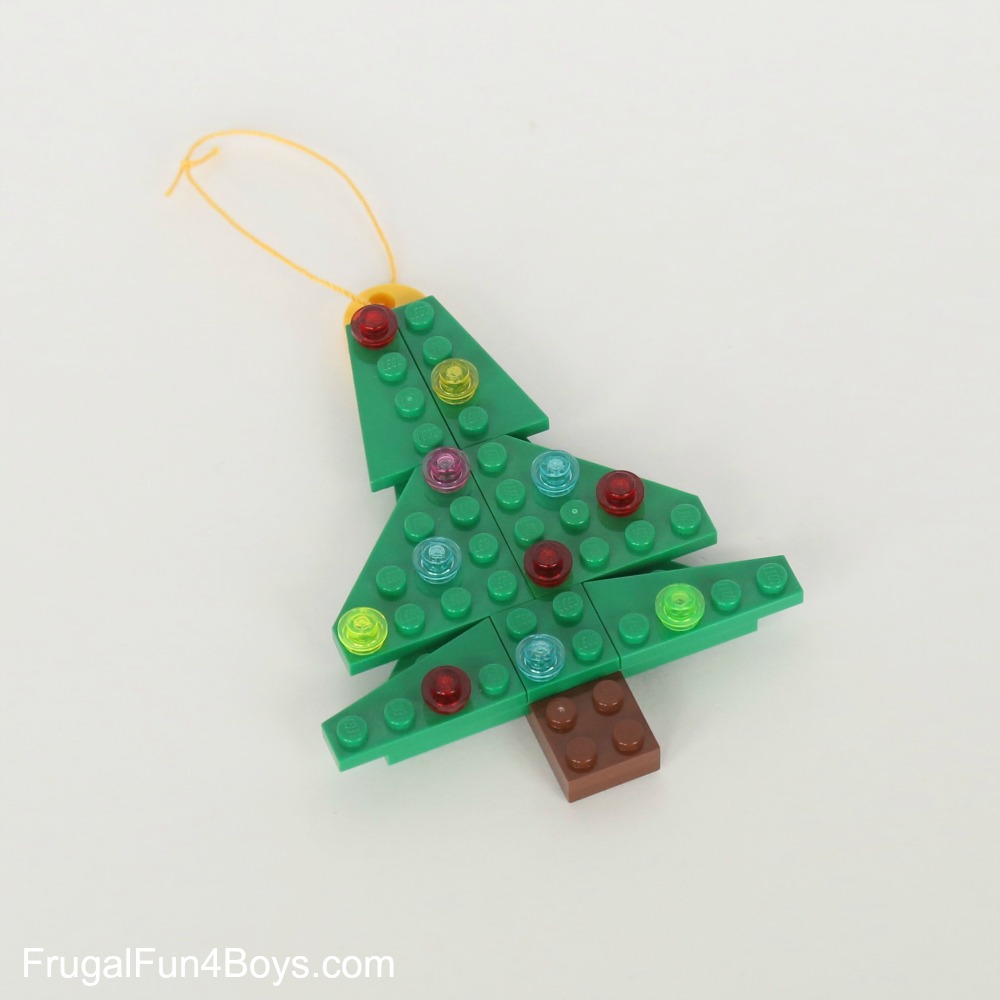
The trunk is a 2 x 2 brown plate on top of a 2 x 3 brown plate, and it attaches to the back of the tree. Here’s a view of the back:
We used string to hang each of the ornaments, except the candy cane.
Candy Cane
To build the candy cane, you will need:
2 – 2 x 2 white slopes
6 – 2 x 2 white bricks
1 – 2 x 6 red brick
5 – 2 x 2 red bricks

Just hang the candy cane over a tree branch.
Nutcracker
This miniature nutcracker might just be my favorite!
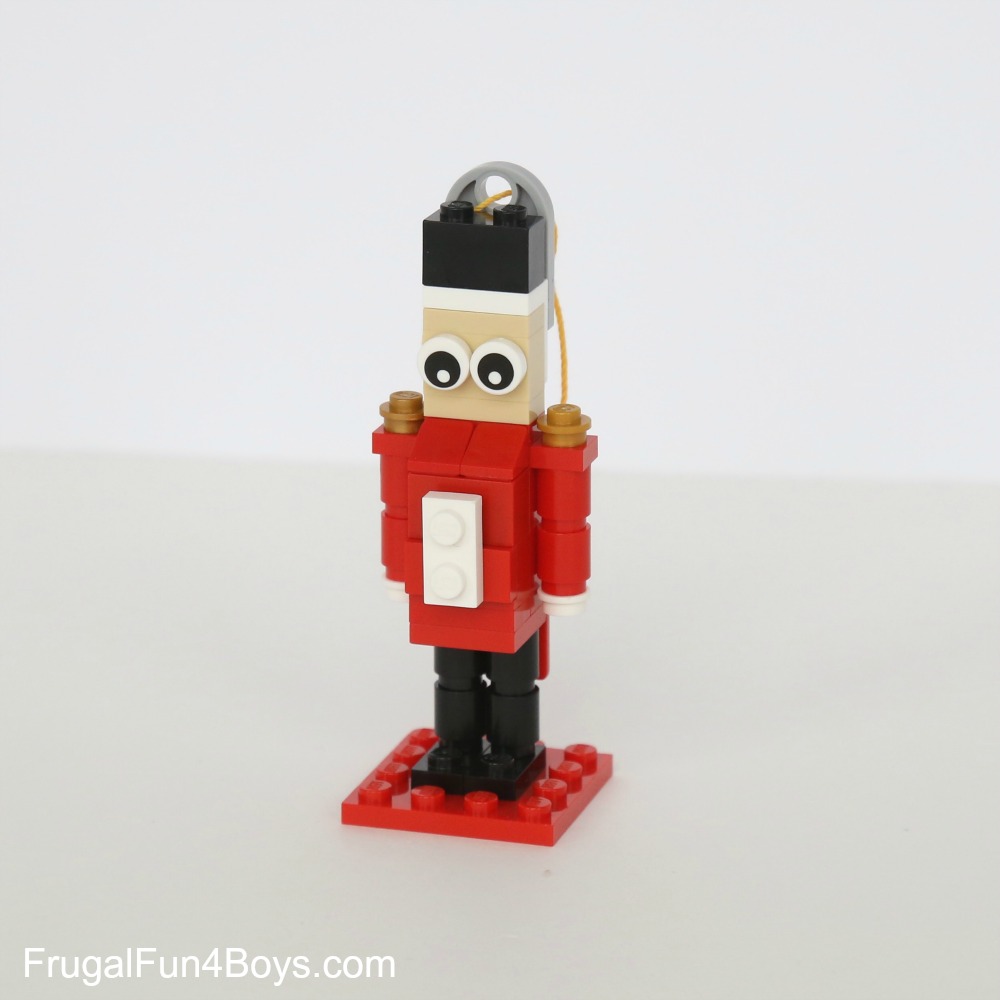
Since the nutcracker requires several steps, I put the instructions in another post to reduce scrolling on this already lengthy post. You can find the instructions here: Nutcracker Ornament
Gingerbread Man
Here’s what you need to make one:
1 – 4 x 4 brown round brick
4 – 1 x 4 brown bricks, modified log
3 – 1 x 2 brown bricks, modified log
2 – 2 x 6 brown plates
1 – 1 x 2 brown plate with one stud on top
2 – eyes
3 – 1 x 1 white round plates
1 – 1 x 1 red round plate
1 – 2 x 2 plate with a curved end and a hole

Step 1: Attach the brown bricks to a 2 x 6 brown plate as shown. The log modified bricks make it possible to angle the arms and legs slightly.
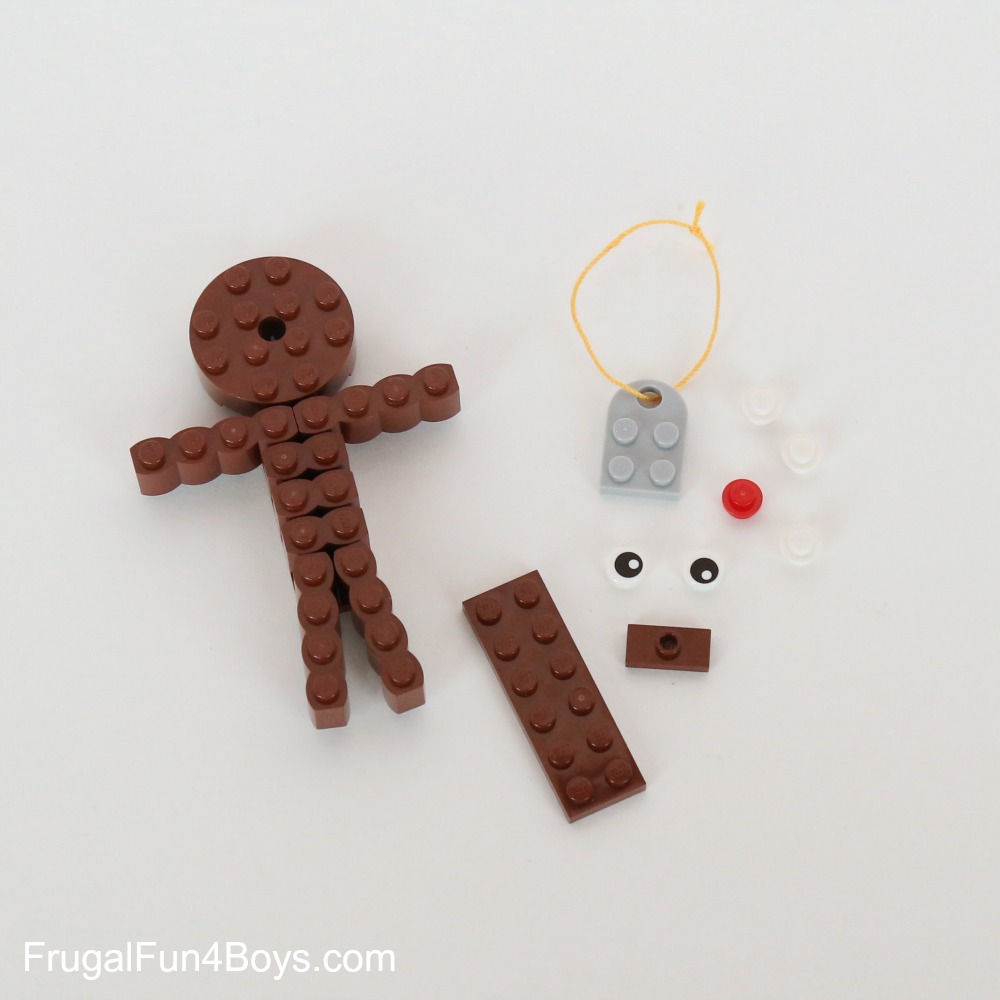
Step 2: Add the second 2 x 6 plate on top of the body. Attach the red nose to the 1 x 2 plate with one stud on top and add it to the face. Add the eyes and white buttons.

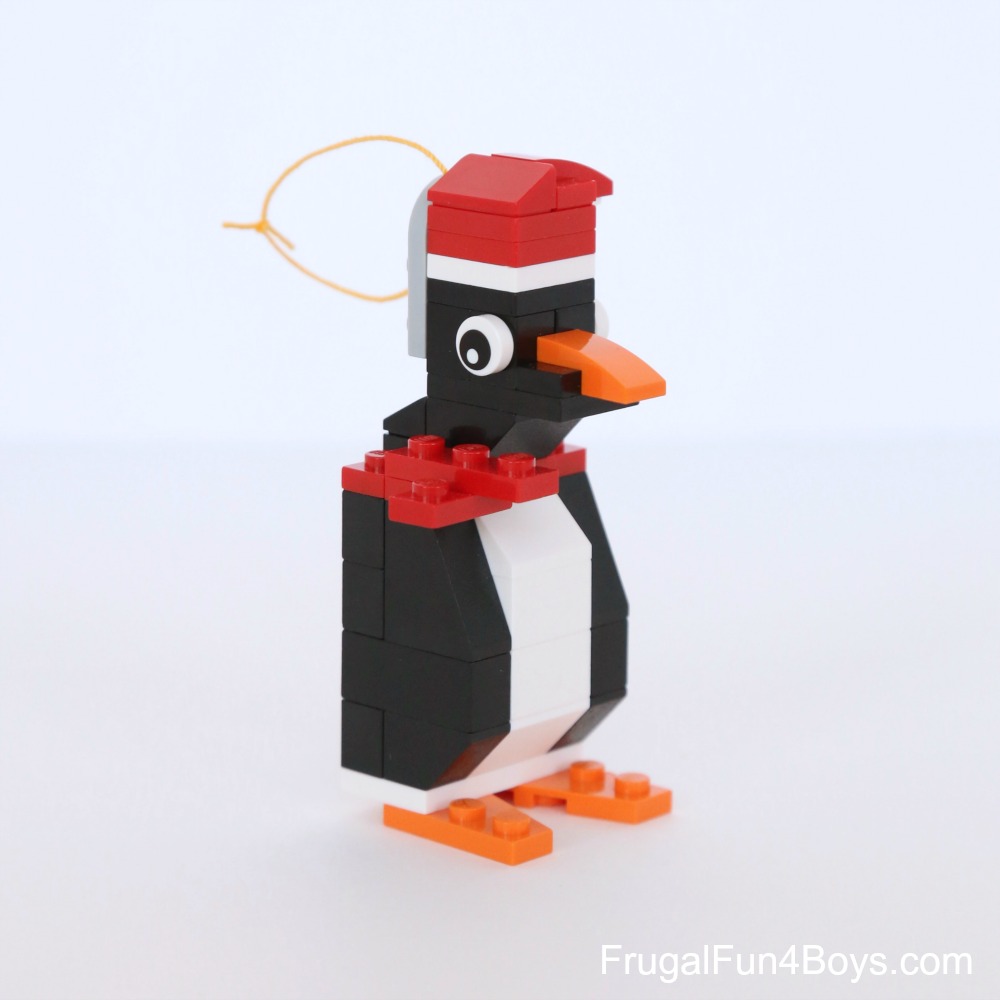
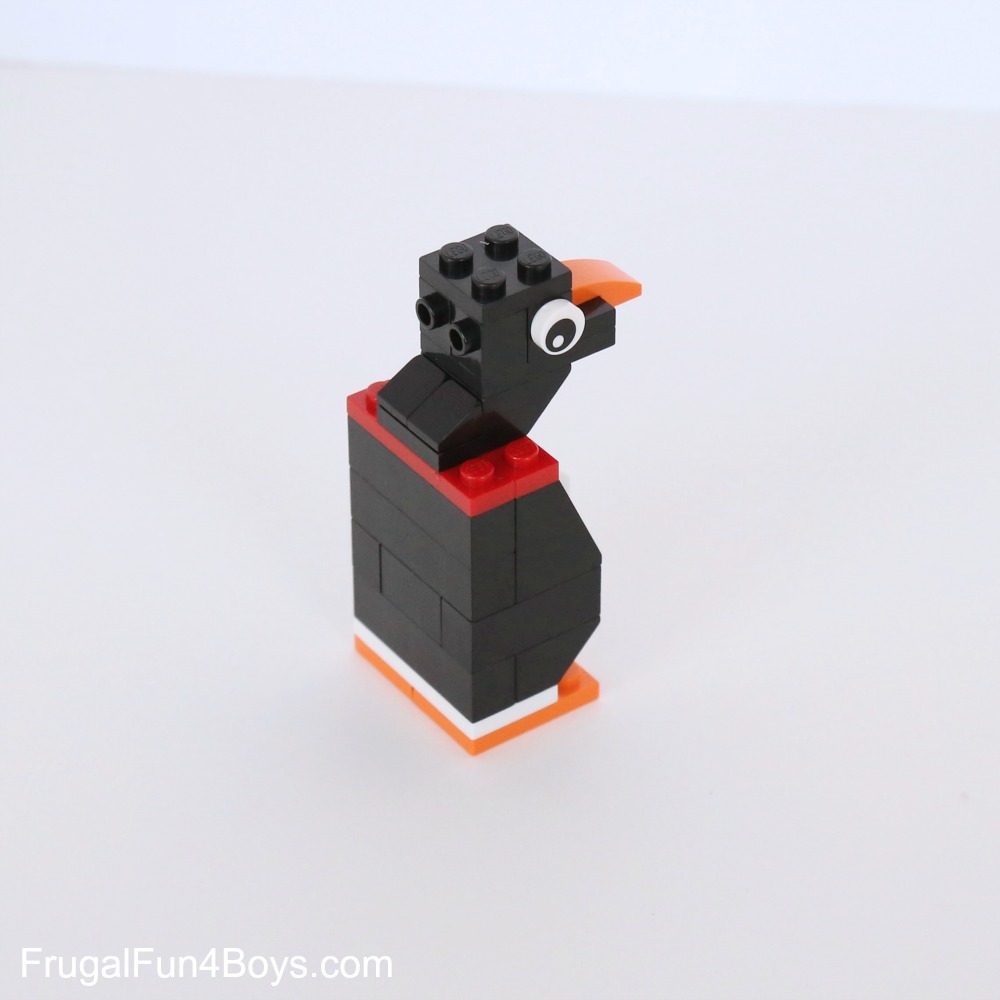
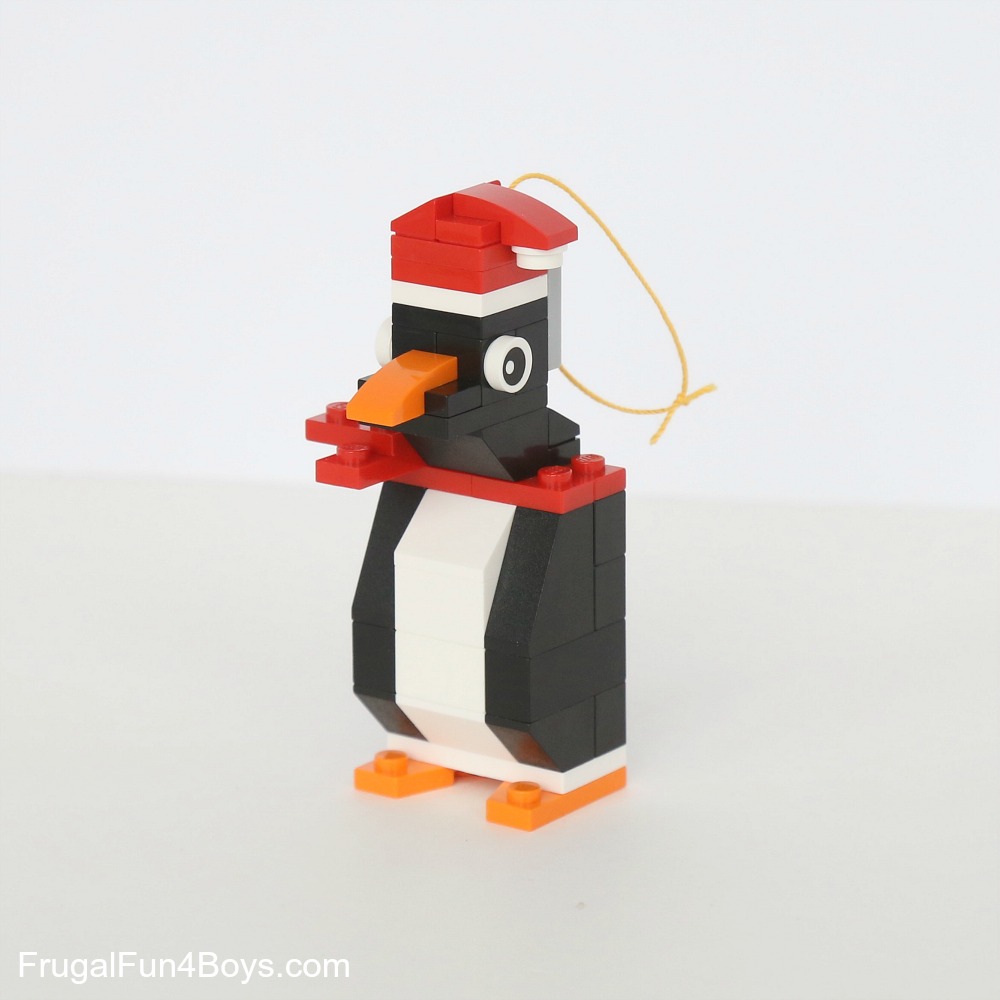
Santa Hat Penguin
To build one you will need:
3 – 1 x 4 black bricks
2 – 1 x 3 black bricks
1 – 1 x 2 black brick
2 – 1 x 2 black inverted slopes
4 – 1 x 1 black bricks with a stud on the side
1 – 2 x 3 black plate
1 – 2 x 2 black plate
1 – 1 x 2 black plate
1 – 1 x 2 black plate with one stud on top
2 – 1 x 1 black slopes, 30 degree
2 – 1 x 2 black slopes, 2 bricks high
1 – 2 x 4 white plate
2 – 2 x 2 white bricks
1 – 2 x 2 white plate
1 – 2 x 2 white slope
1 – 2 x 2 white slope, inverted
1 – 1 x 1 white round plate
1 – 1 x 4 red plate
2 – 2 x 2 red plates
3 – 1 x 2 red plates
1 – 1 x 3 red plate
1 – 1 x 2 red slope, 30 degree
1 – 1 x 2 red plate with one stud on top
1 – 1 x 2 red curved slope
1 – 2 x 3 orange wedge plate, right
1 – 2 x 3 orange wedge plate, left
1 – 1 x 2 orange curved slope
2 – eyes
1 – 2 x 2 light gray plate with a curved end and a hole
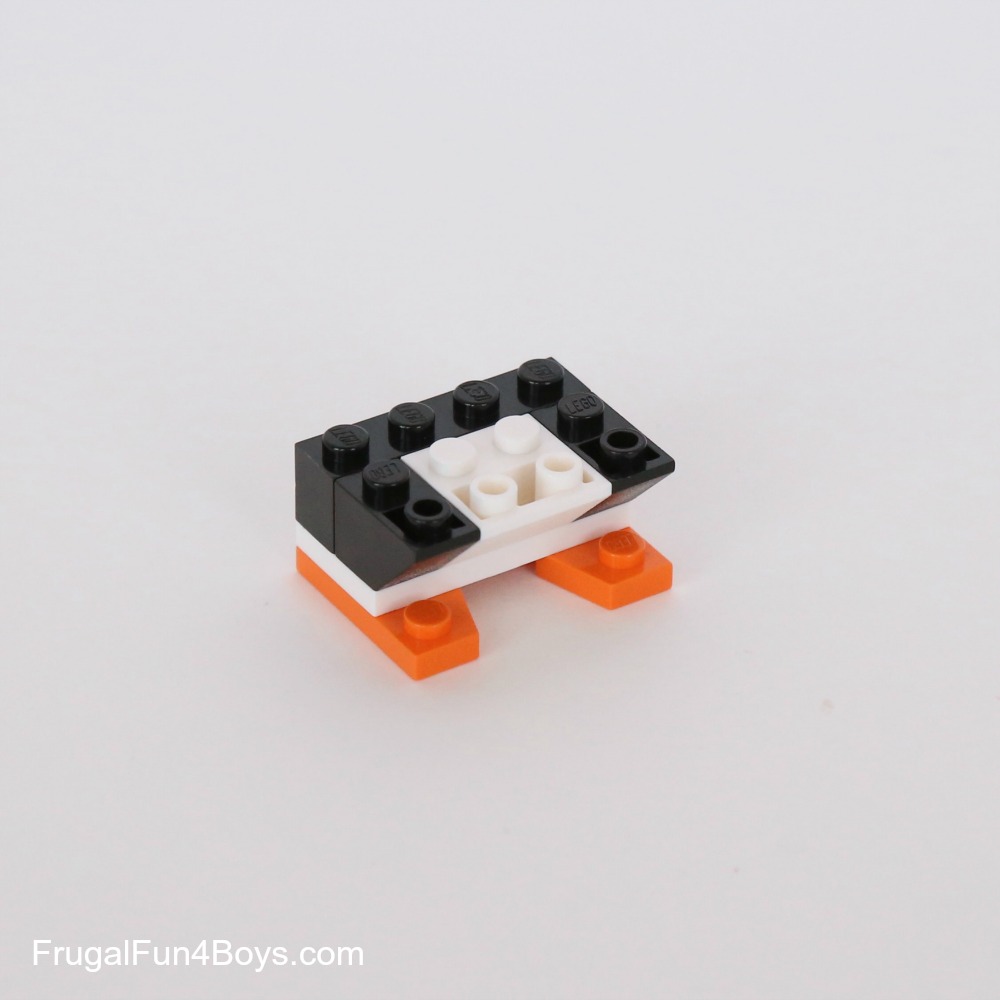
Step 1: Gather the pieces shown for building the penguins feet and body.
Step 2: Attach a 2 x 4 white plate to two 2 x 3 orange wedge plates. Then add the other bricks.
Step 3: Add two 1 x 3 black bricks, a 1 x 2 black brick, and a 2 x 2 white brick.
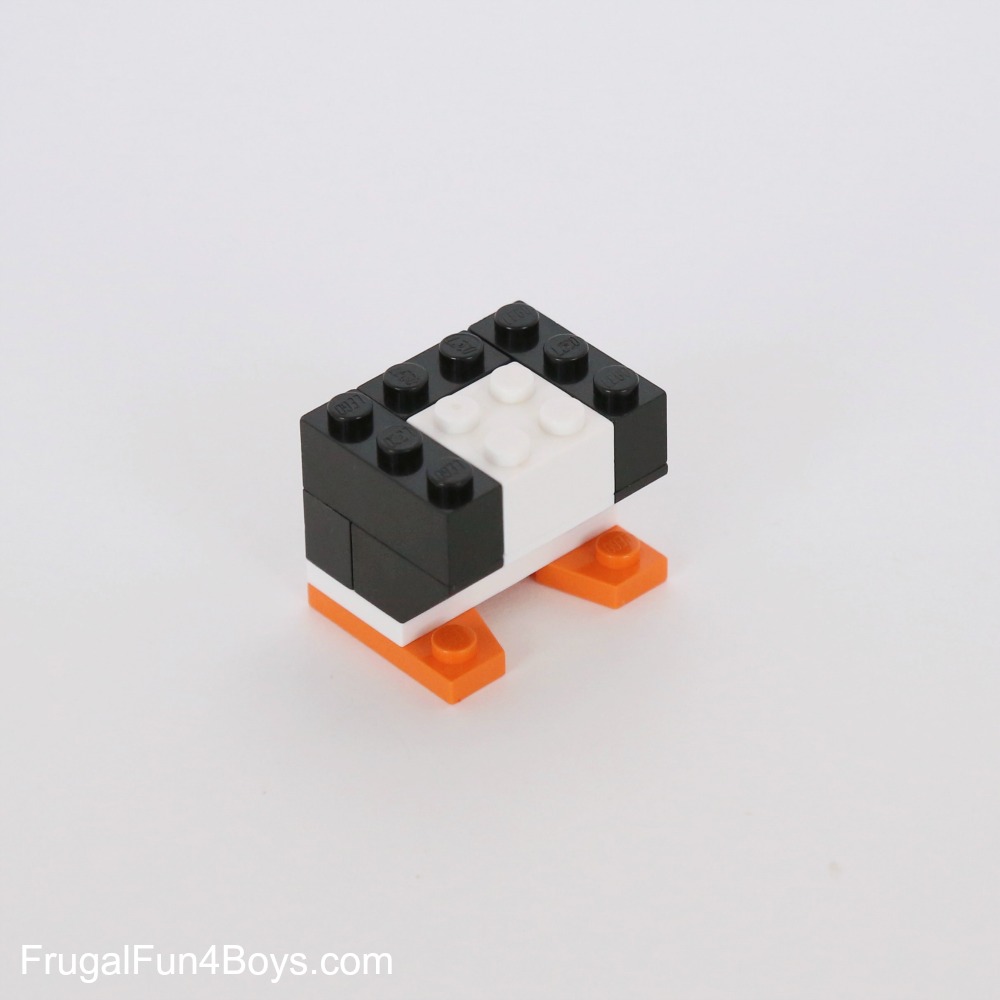
Step 4: Place a 2 x 2 white brick and then a 2 x 2 white slope on the front. Add two 1 x 4 black bricks to the back, and put a 1 x 2 black slope (2 bricks high) on each side.
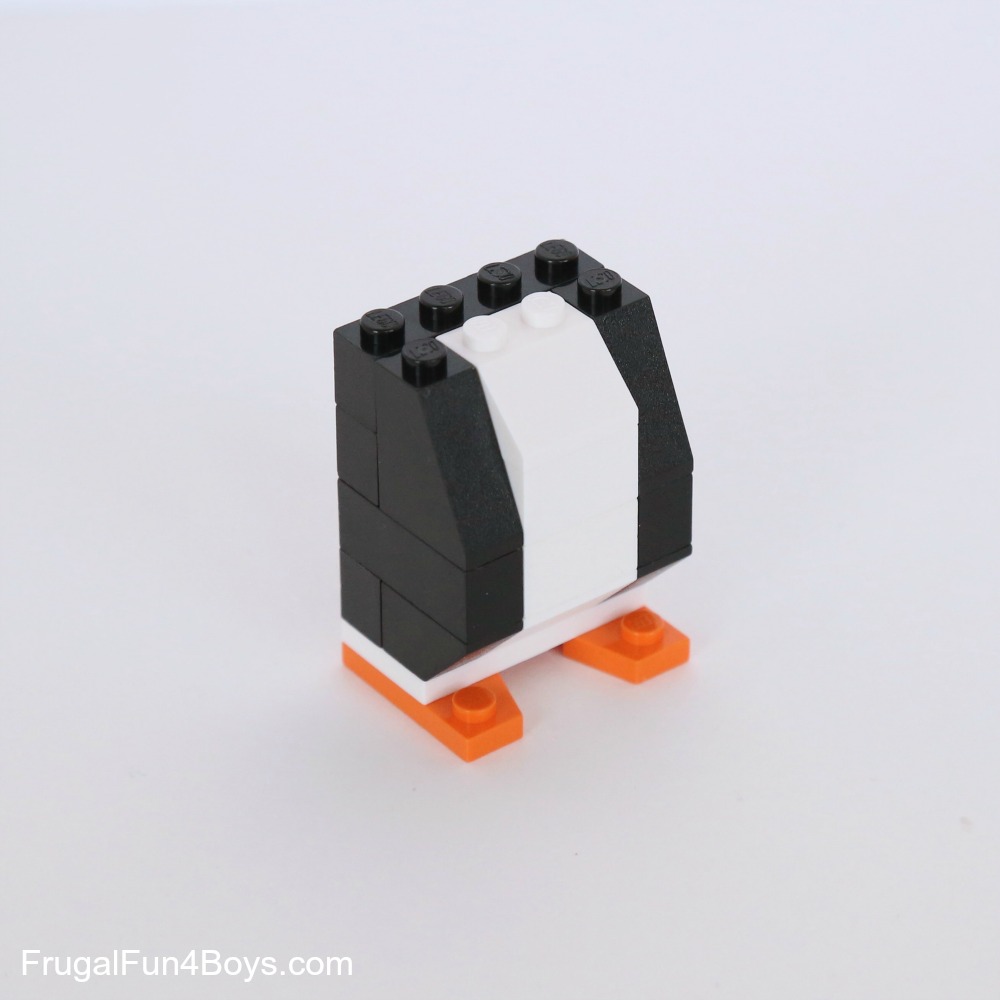
Step 5: Build the penguin’s scarf with a 1 x 4 red plate and two 1 x 2 red plates. Or just use a 2 x 4 plate – I couldn’t find one!
Step 6: Add a 2 x 2 black inverted slope, a 2 x 3 plate, and a 1 x 2 plate with one stud on top.

Step 7: Add four 1 x 1 bricks with a stud on the side. Two are for the eyes, and two are on the back of the head (to hold the brick that will hold the string). Add a 1 x 2 orange curved brick for the beak.
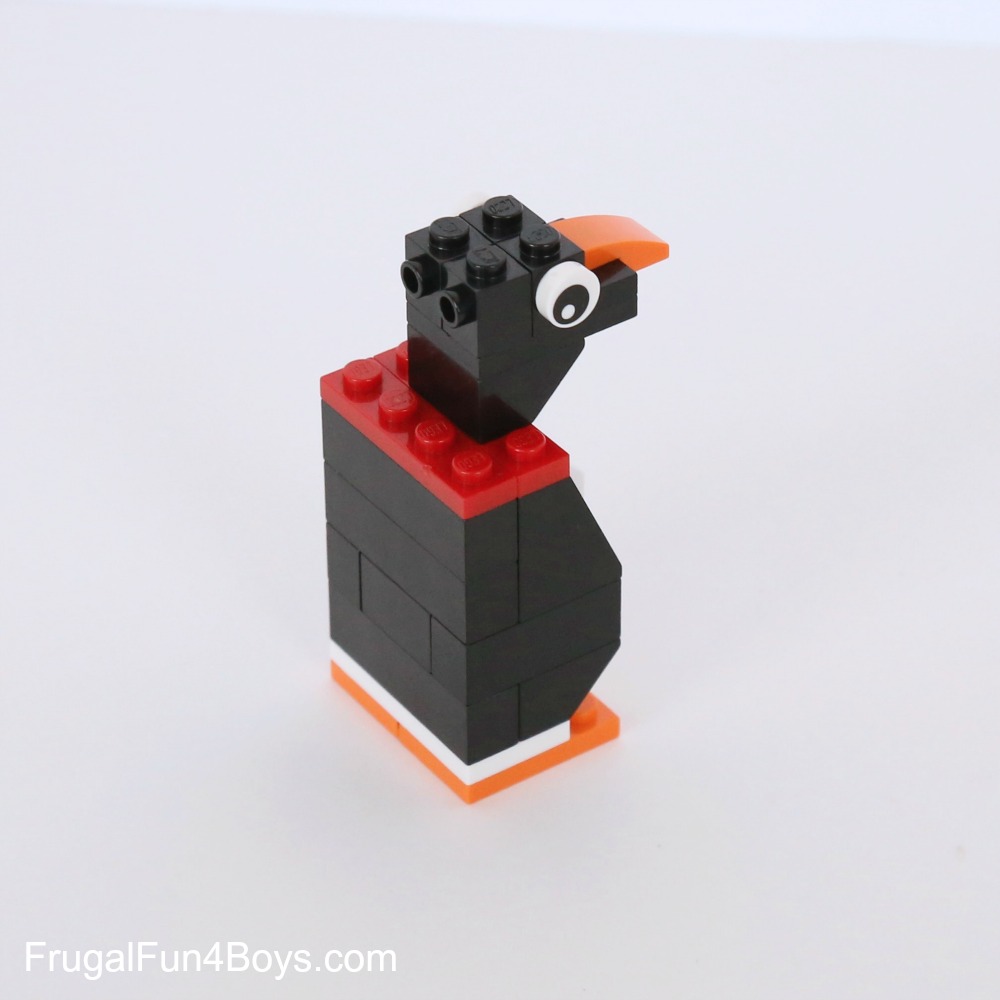
Step 8: Add a 2 x 2 black plate on top of the penguin’s head. Then add a 1 x 2 black plate and two 1 x 1 slopes to the back of the neck.
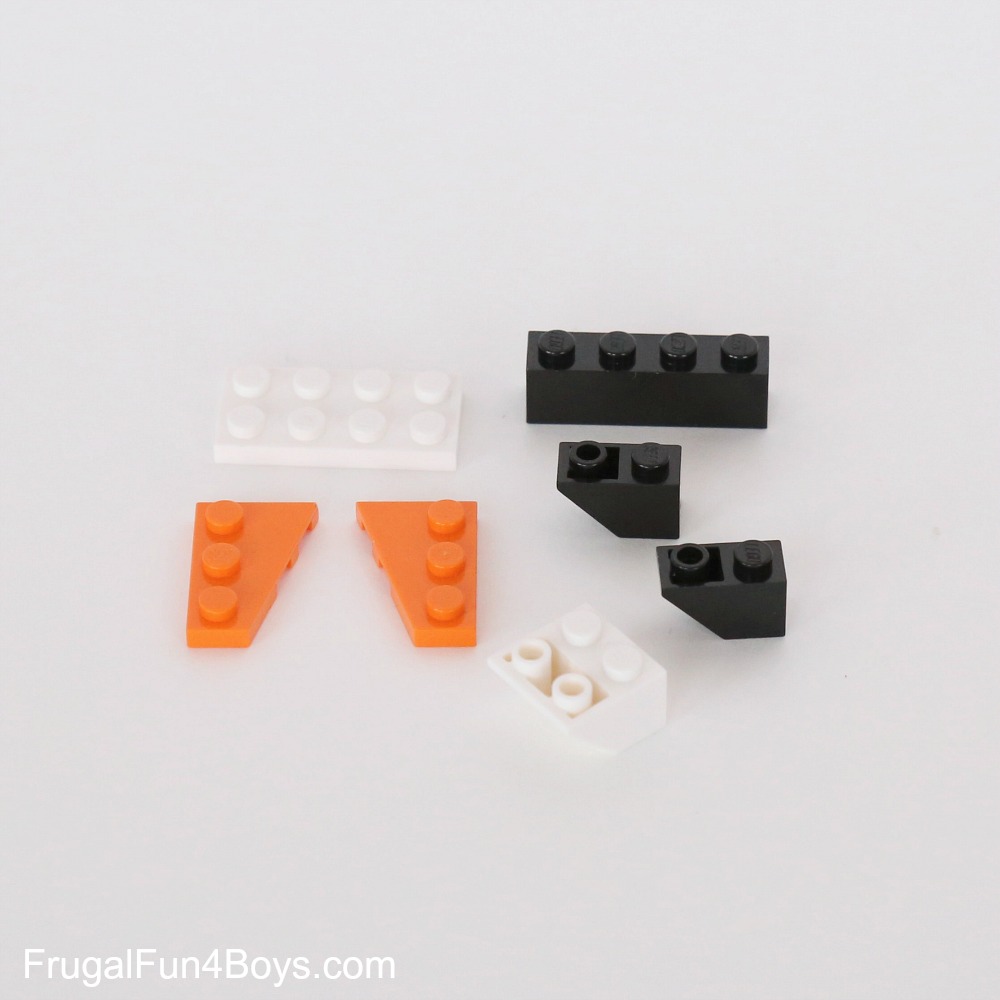
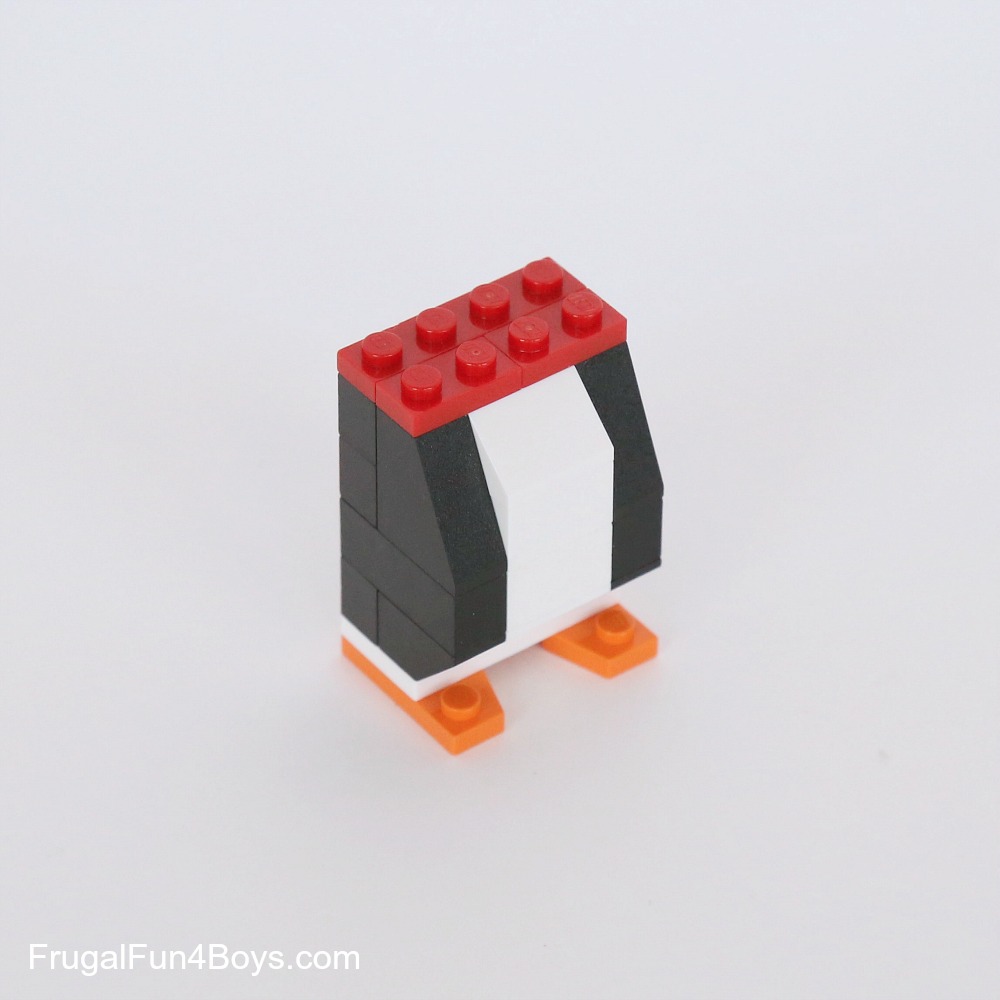
Step 9: Build the hat. Add a 2 x 2 white plate, then two 2 x 2 red plates. Then add a 1 x 2 slope and a 1 x 2 plate with one stud on top. The pieces to build the scarf and the point on the hat are shown below.
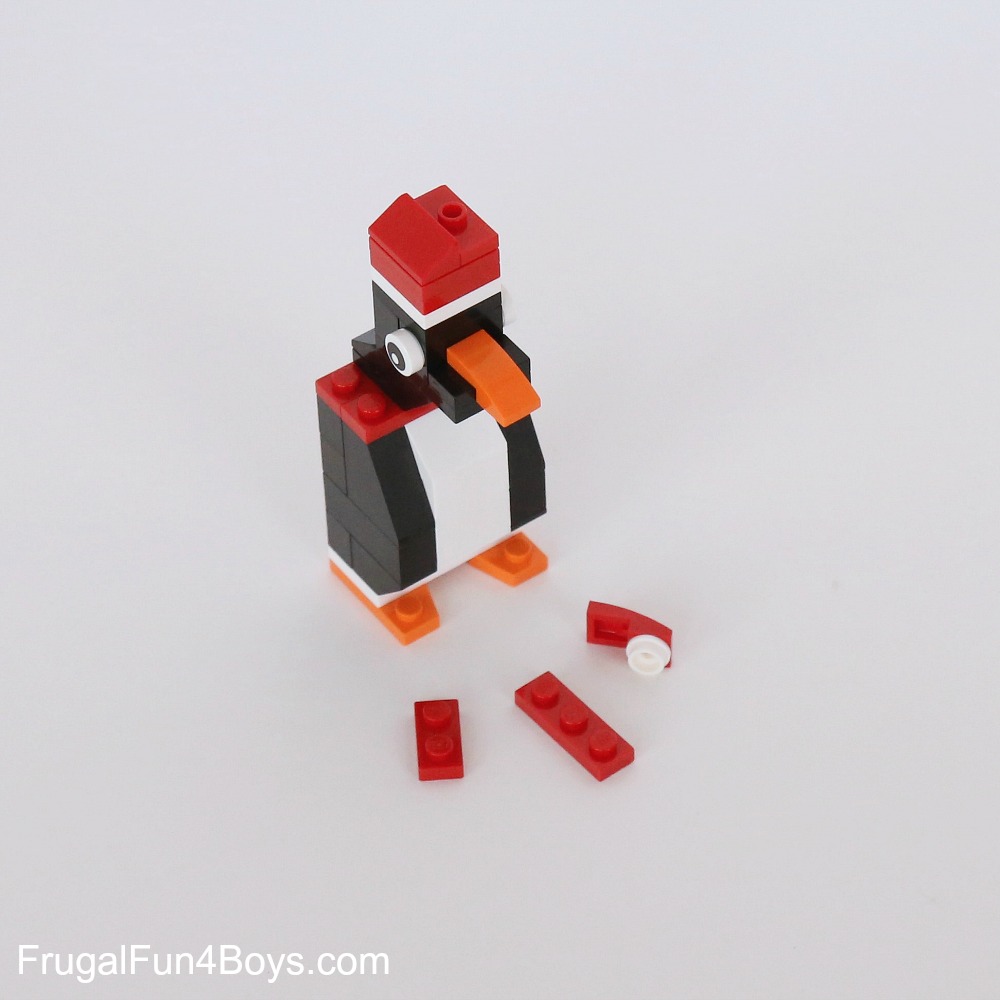
Step 10: Attach a 2 x 2 light gray plate with a hole on the end to hold the string. You’ll need to add the string before attaching the brick to the penguin.

The completed penguin is so cute!
You can see our other Christmas projects here:
Five LEGO Christmas Projects – Mini nativity ornament, wreath ornament, gifts, Rudolph ornament, and snow man
Five (More!) LEGO Christmas Projects – Train ornament, nativity set, snowflake ornament, cube ornament, and Rudolph figure
LEGO® is a trademark of the LEGO® group of companies which does not sponsor, authorize, or endorse this site.
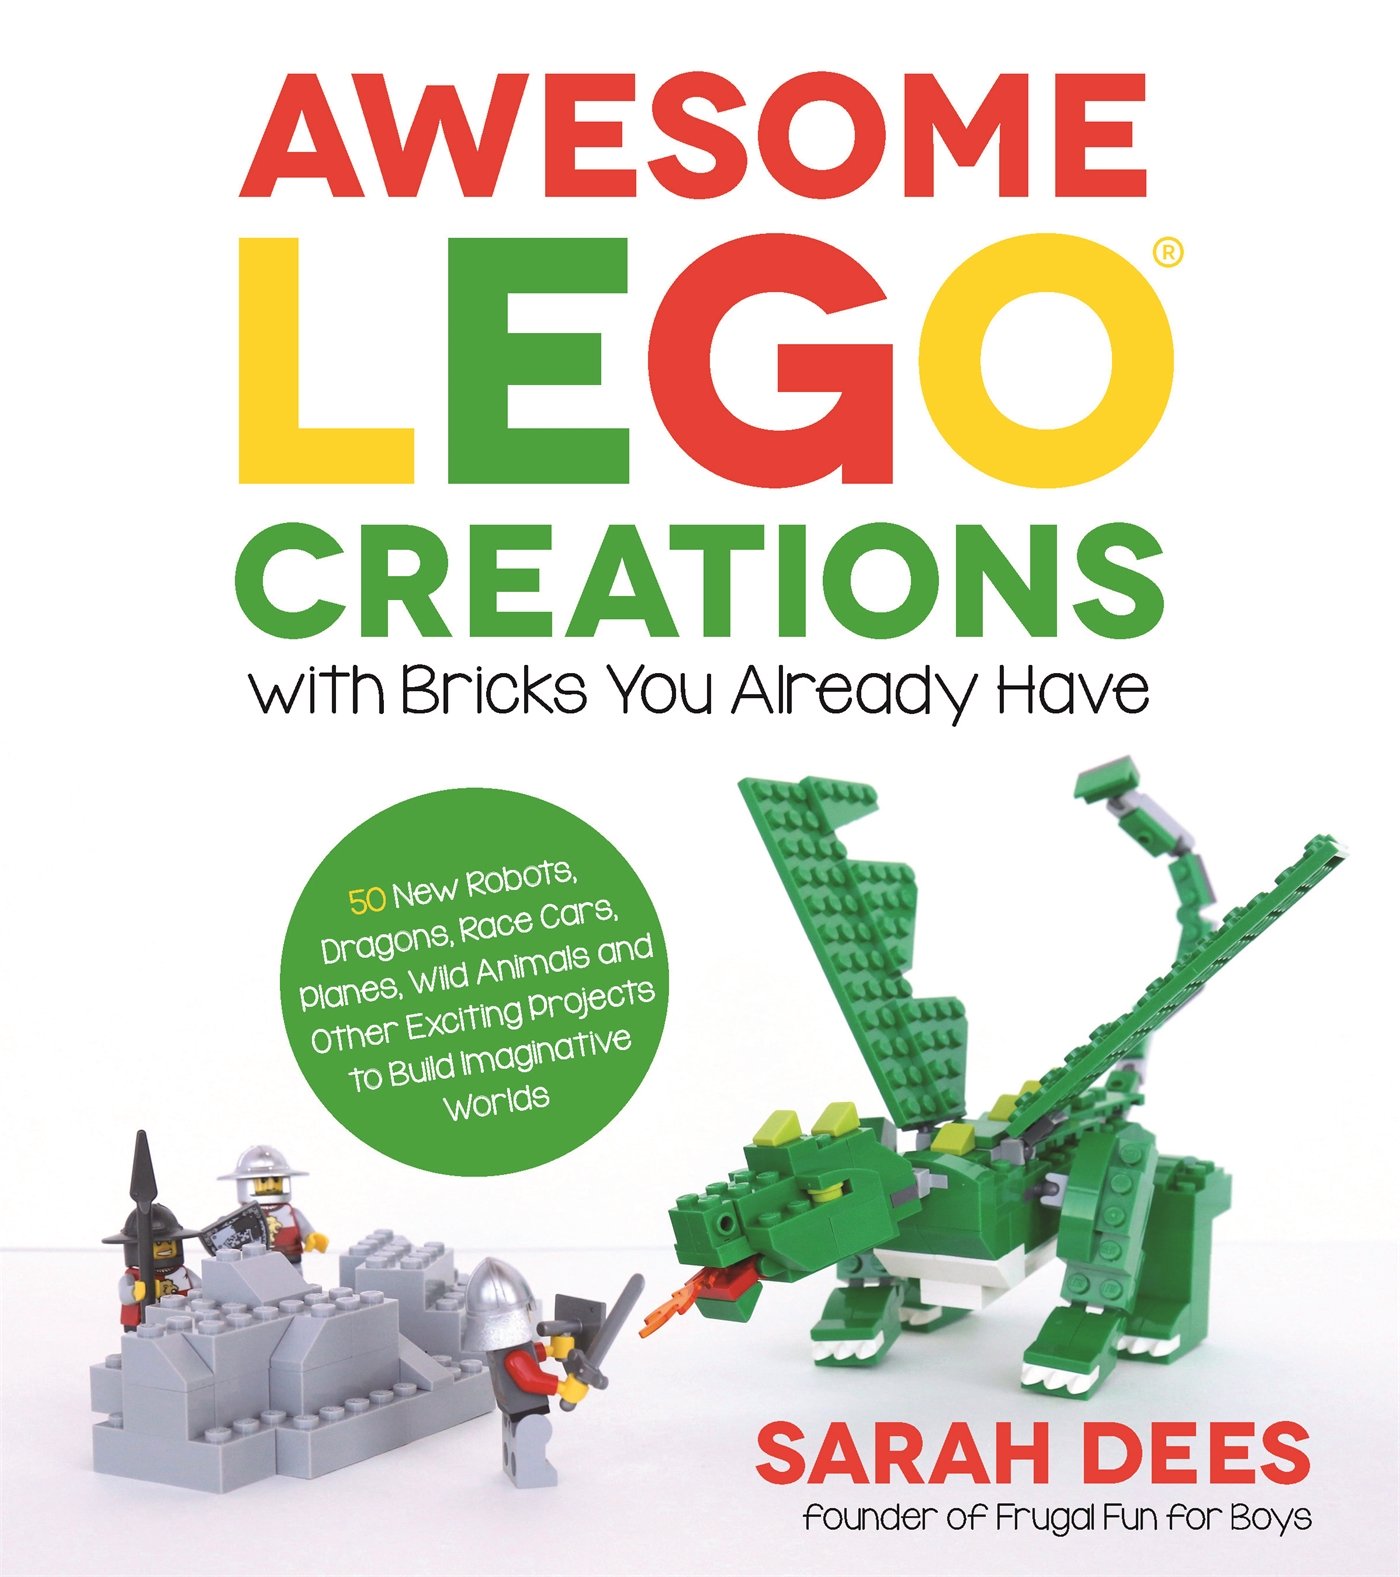
Do your kids love LEGO® projects? Don’t forget that our LEGO® book makes an awesome Christmas gift!
Awesome LEGO Creations with Bricks You Already Have (affiliate link)
50 new projects to build, with instructions! Dragons, race cars, robots, games, machines, and more!
4 Comments
Abbie McMillen Nov 25, 2016
I have made snowflake Lego tree ornaments. Fun and easy, would you like me to send pictures? Also, it seems a shame to have these ornaments fall apart, so I researched the right glue to use. It's Oatey brand all purpose cement available in the plumbing section of your hardware store. A tiny bit goes a long way, apply with a toothpick, and an adult should do this. It actually melts the plastic a little to bond it. I'd suggest building the ornament, taking it apart, and rebuilding it with glue. Let me know if you want to see the snowflakes.
Jill Nov 25, 2016
I'd love to see snowflakes!
JOscelyne Dec 1, 2016
Is there a printable for the instructions?
Sarah Dec 6, 2016
No, unfortunately there is not a printable version of the instructions.
M. J. Bratton Dec 7, 2018
I could not find a spot to click "Buy Now" for the e-book.
Sue Dec 4, 2023
Hi, I love this! I wonder if you have advice for buying the Lego pieces for a project like the penguin. I don't want to spend a billion $ to get the pieces for that. I don't know if we would have all of the pieces at home. Thanks!
Sarah Dec 8, 2023
We love ordering individual bricks from BrickLink.com! Here's a post that explains how to use BrickLink: https://frugalfun4boys.com/how-to-buy-individual-lego-pieces/
Post a Comment