
Make some adorable LEGO® jars that look just like your favorite LEGO® minifigures! These painted jars are easy to make, and they are perfect for birthday party decorations, organizing school supplies, or for decorating a LEGO® themed bedroom.
I did a lot of research for this project, and I tried a couple of methods. So in the instructions below, I’ll share a few different approaches and the pros and cons of each.
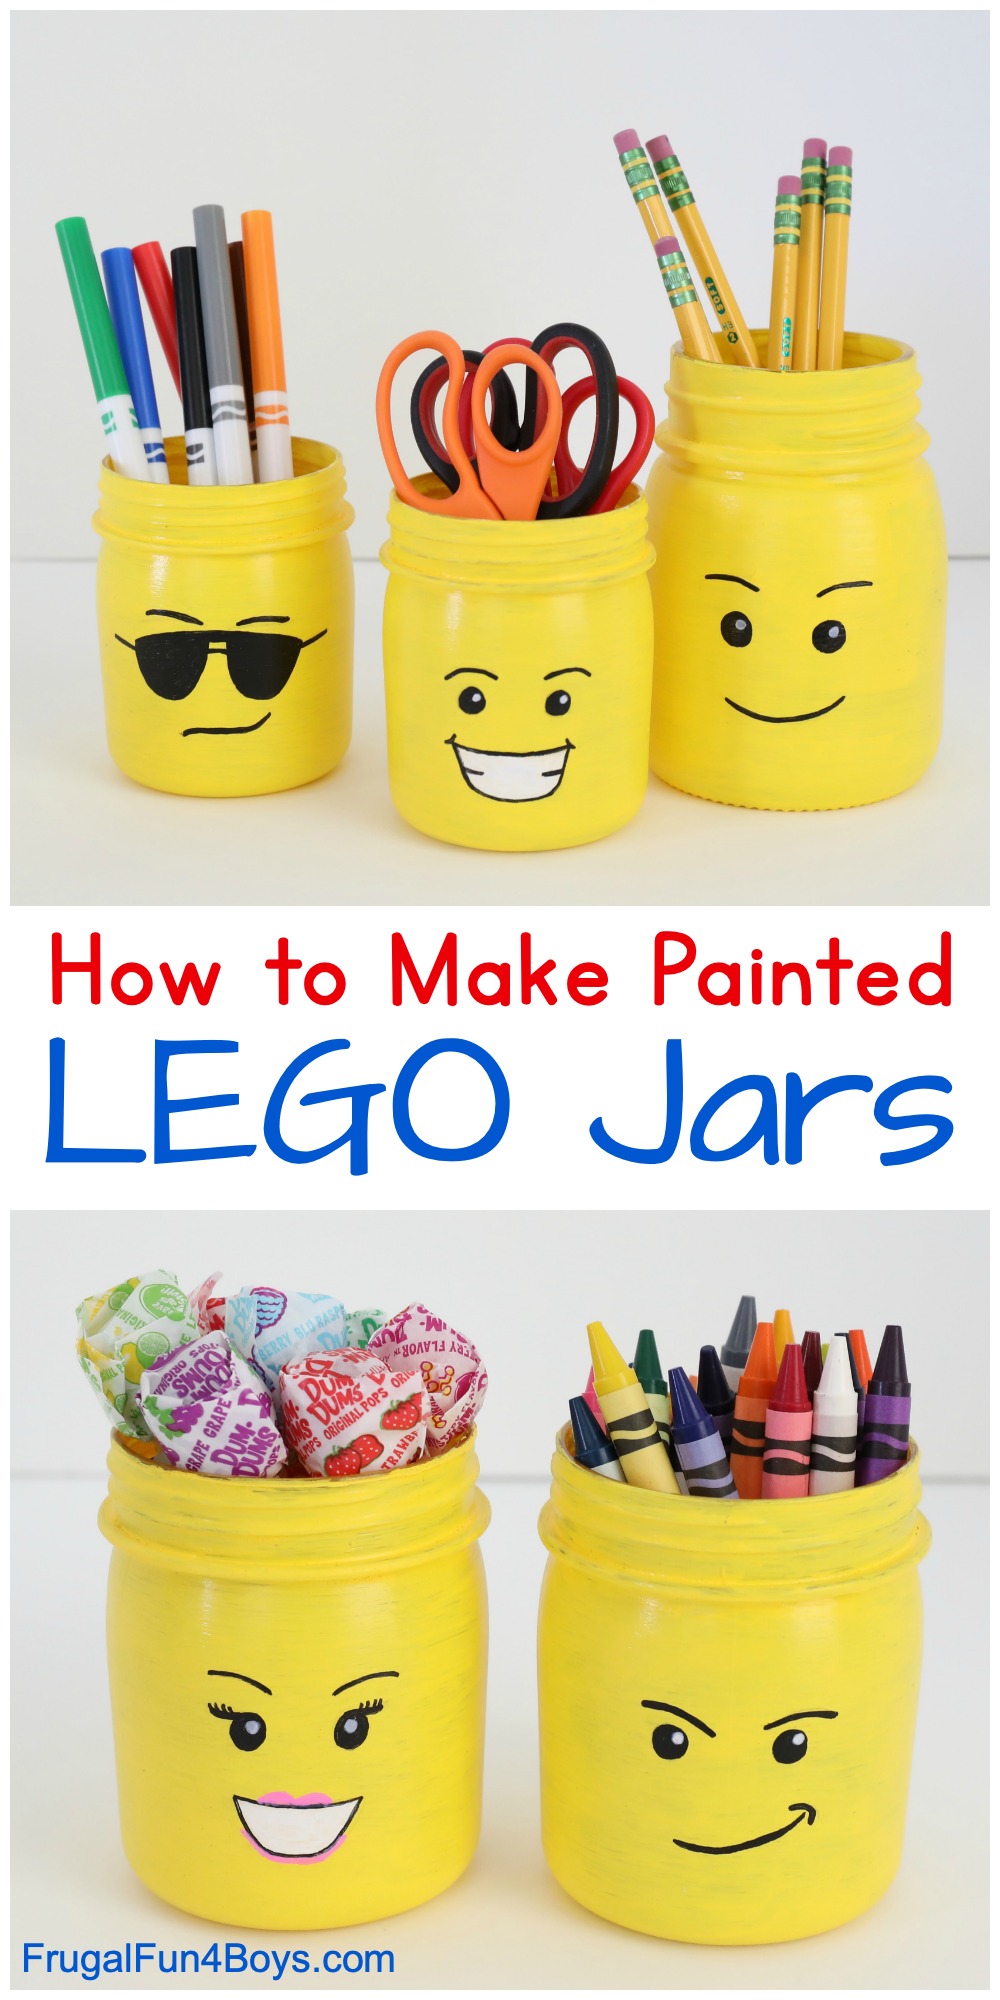
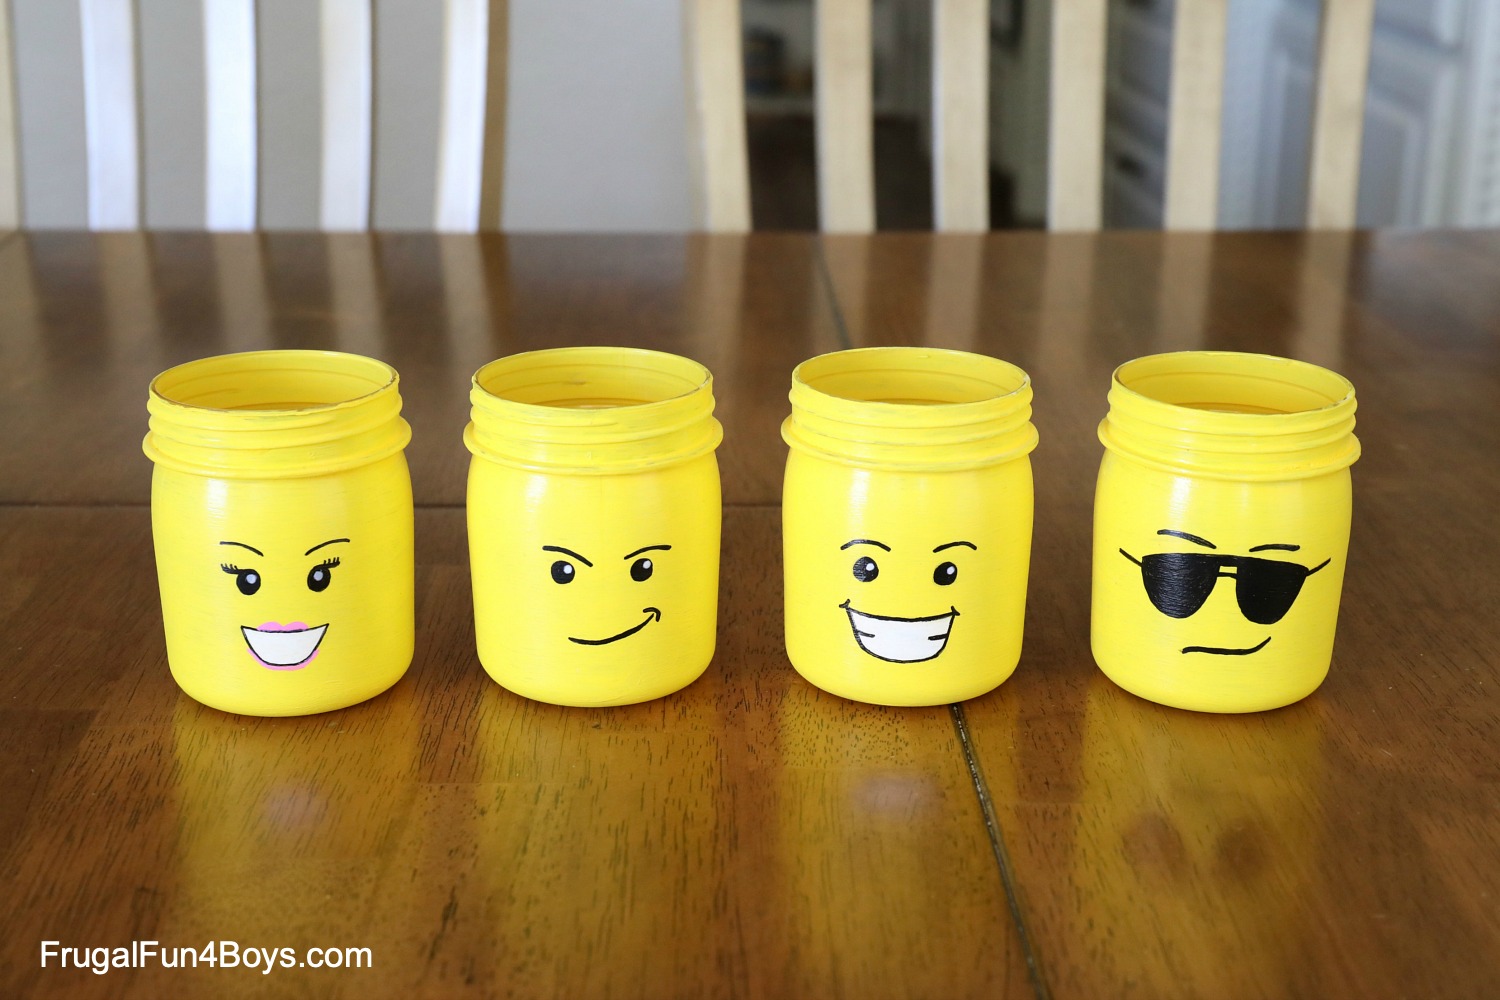
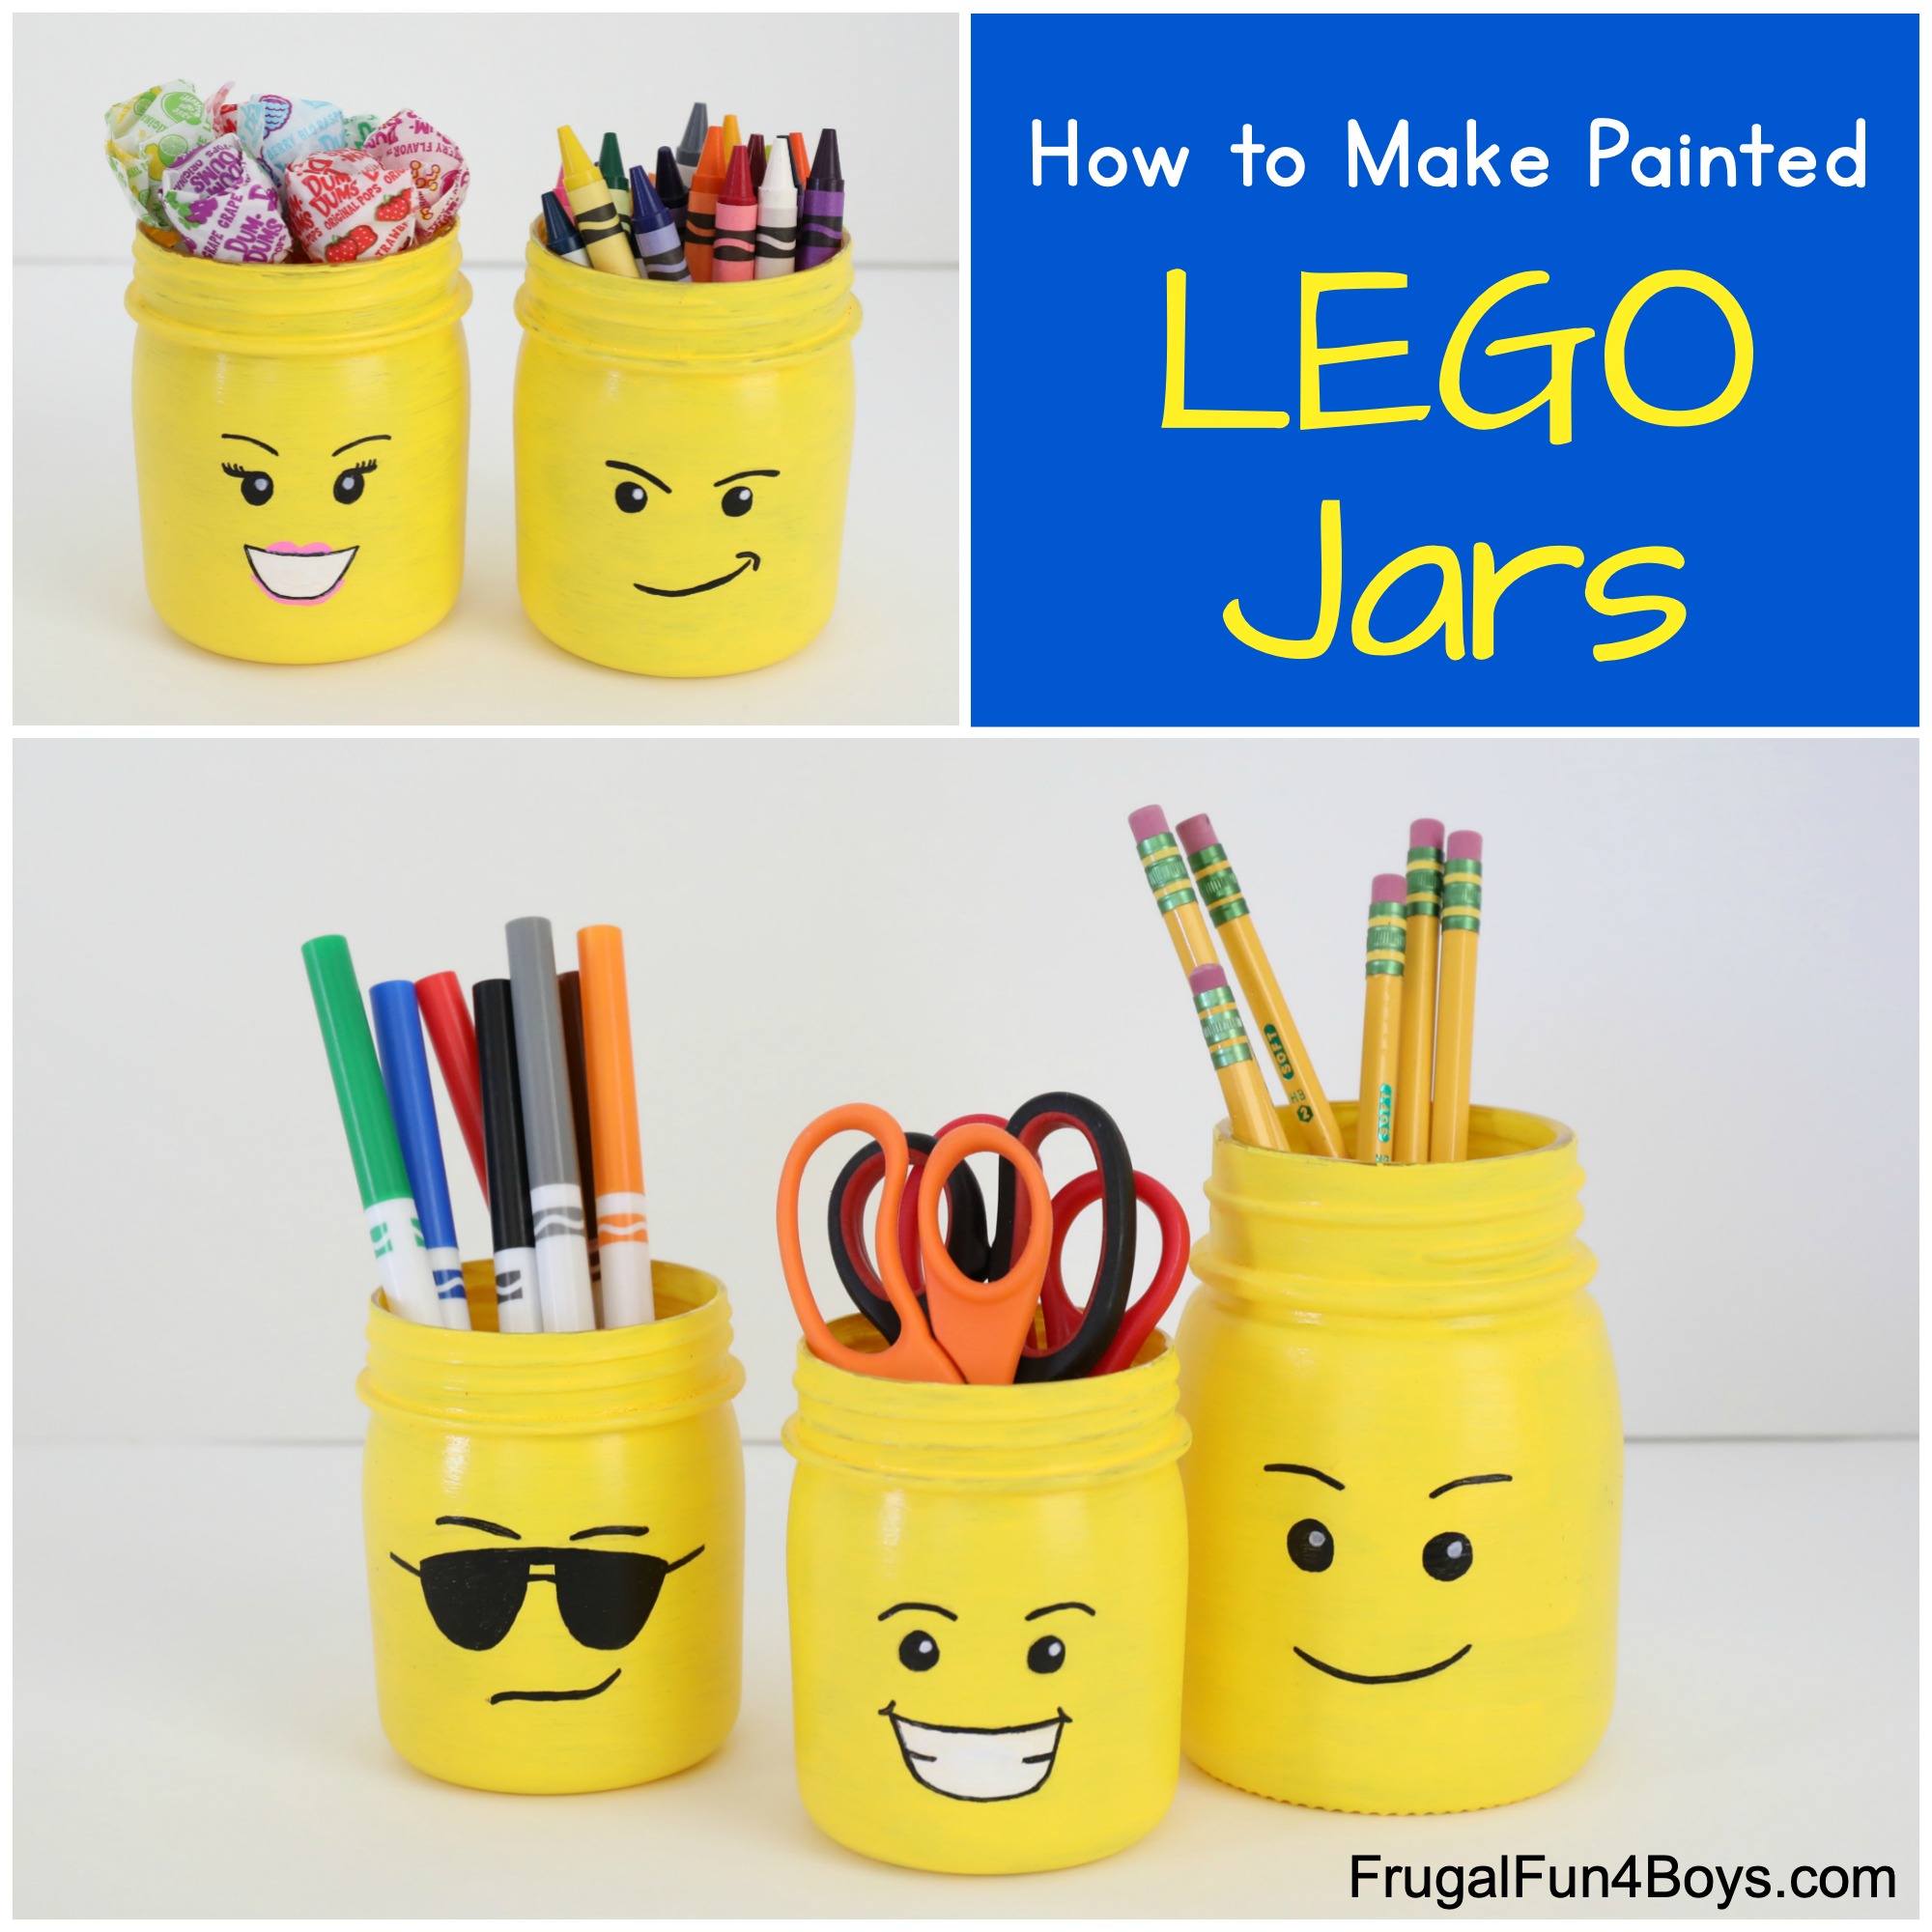
Aren’t they so cute? The jars just make me smile sitting there on our table!
Supplies Needed:
- Jars – either glass or plastic. I used both.
- Yellow paint – either acrylic paint or spray paint. We’ll discuss down below!
- Oil-based Sharpie paint markers – black, white, and pink
- A paintbrush – I used a foam brush.
- Polyurethane spray to seal the paint
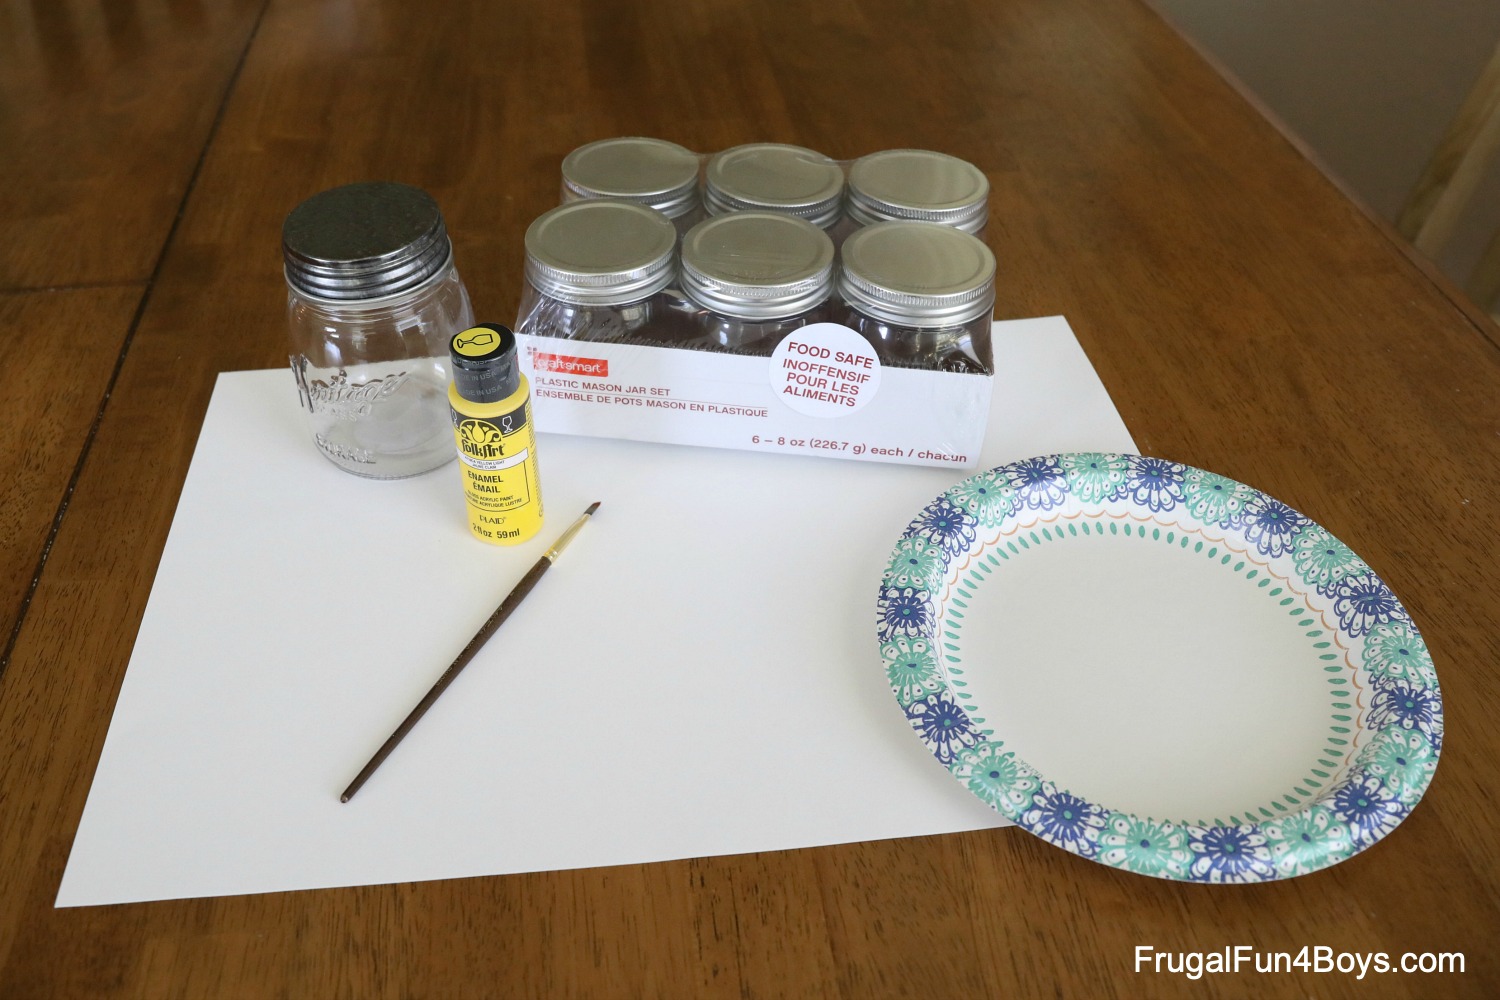
I found a pack of small plastic jars at Michael’s, and they were just perfect! I cannot find my receipt, but I am almost positive they were $5.99 for 6. I also painted a small glass mason jar. Hobby Lobby has better selection on glass jars, just FYI.
Acrylic Paint vs. Spray Paint
There are lots of painted LEGO jars on Pinterest, so I investigated the options. Many people like to spray paint their jars – here’s a good tutorial for those. Spray paint is fast and looks nice and neat. If you need a lot of jars, I’d go that route!
However, spray paint is not a good option if you want kids to make the jars. I decided to go with acrylic paint since it’s a kid-friendly option. Keep in mind that you’ll need to do 3-4 coats of acrylic paint. Also, you’ll need to let the paint dry for several hours between coats. If you don’t wait long enough, the brush will start removing the previous coat, which is frustrating. This is true for both glass and plastic jars. If you wait long enough, though, it will be just fine!
Painting the Inside of the Jar vs. Outside
I chose to paint the outside of our jars. Benefits to painting the outside are that it’s easier to draw the face (you can sketch on the paint with a pencil) and you can use the jars for food. Also, you don’t have to worry about the contents of the jar scratching the paint. For example, if you use the jars to store school supplies, scissor tips and pencil points will eventually scratch up the paint.
However, painting the inside leads to a much smoother and more “LEGO® looking” jar.
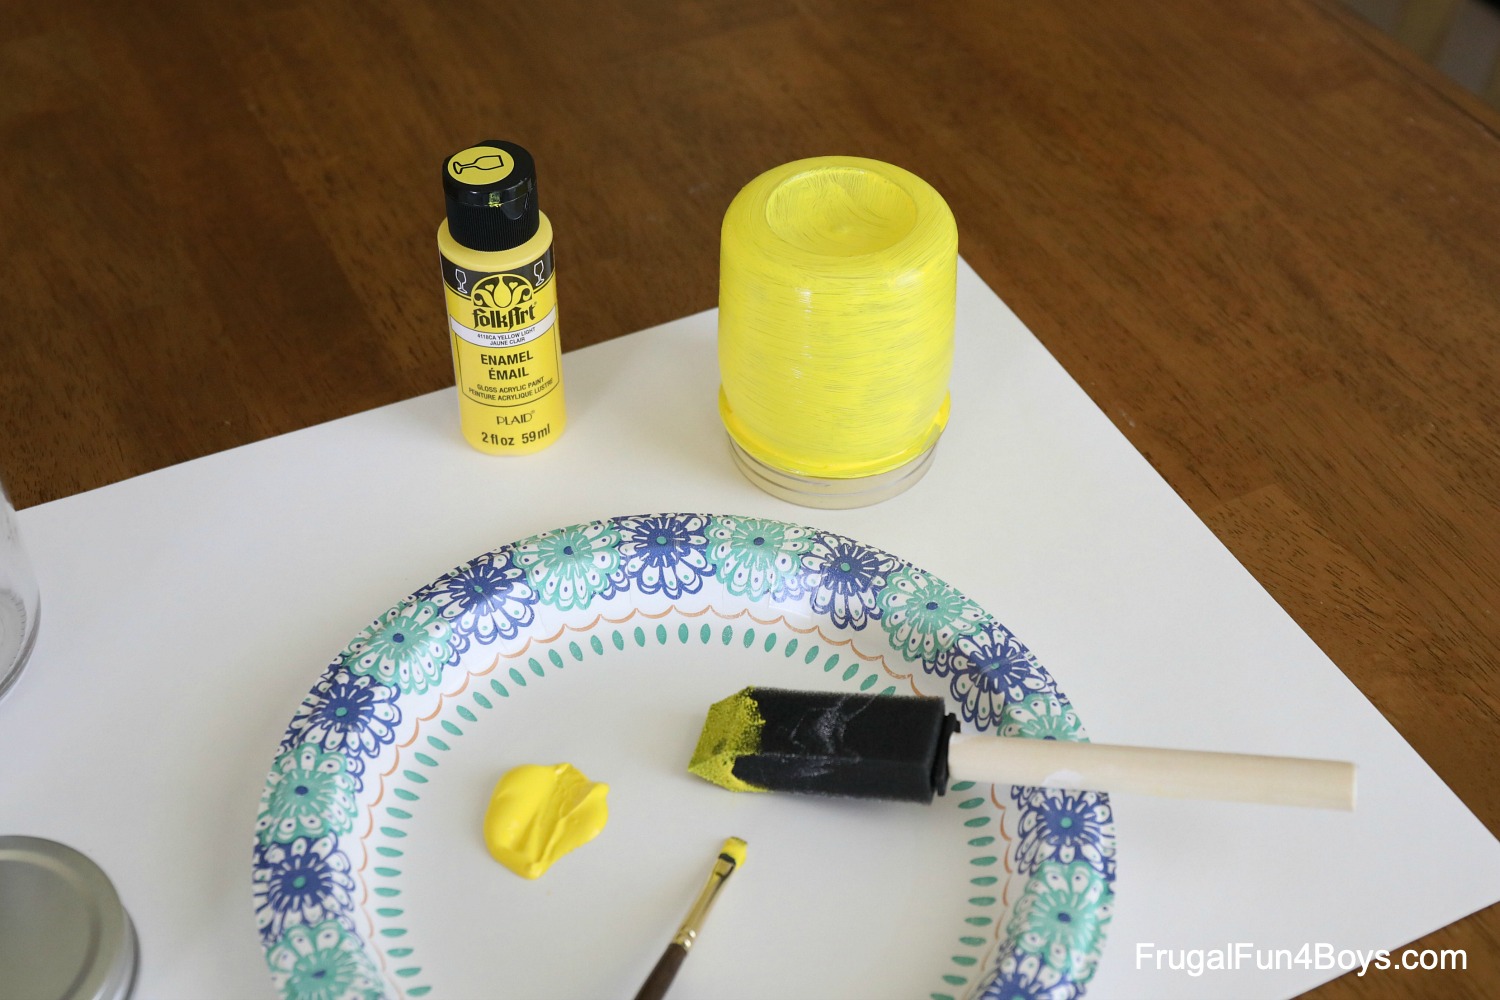
I ended up painting the threads at the top of the jars. If you want to use the lids, don’t paint the threads.
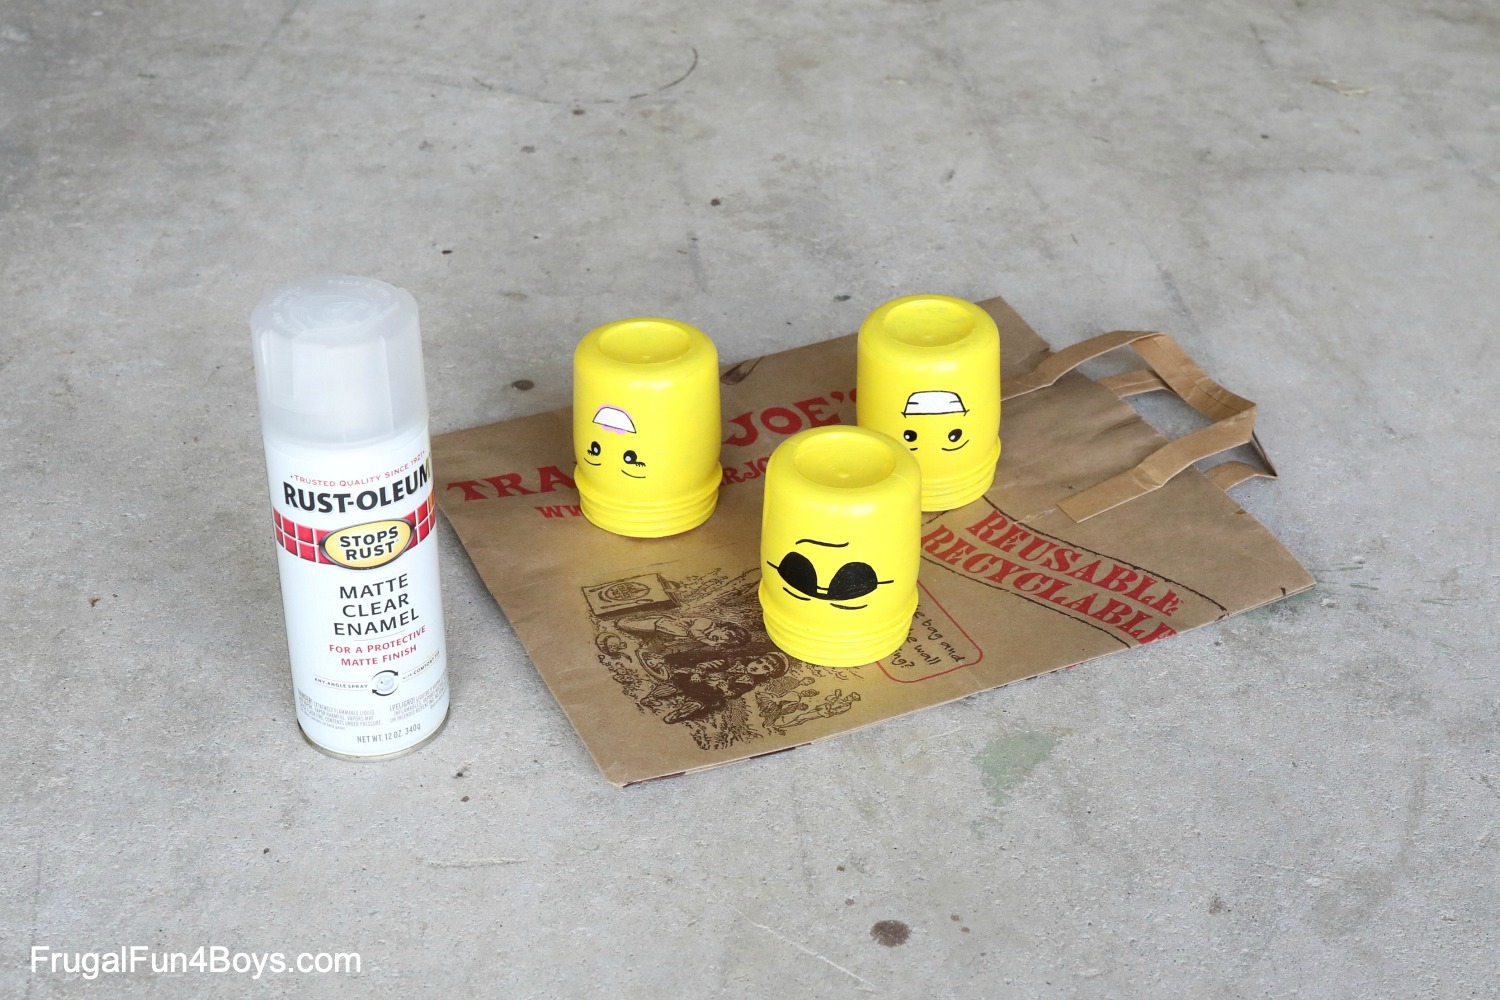
Once the paint is complete, grab some LEGO® heads! Sketch on the face with a pencil.

Then draw the face with oil-based Sharpie paint markers or something similar. Regular Sharpies do not draw well on acrylic paint.

Once the marker has dried, you’ll want to spray your jars with a coat of polyurethane to seal the paint and keep it from chipping.
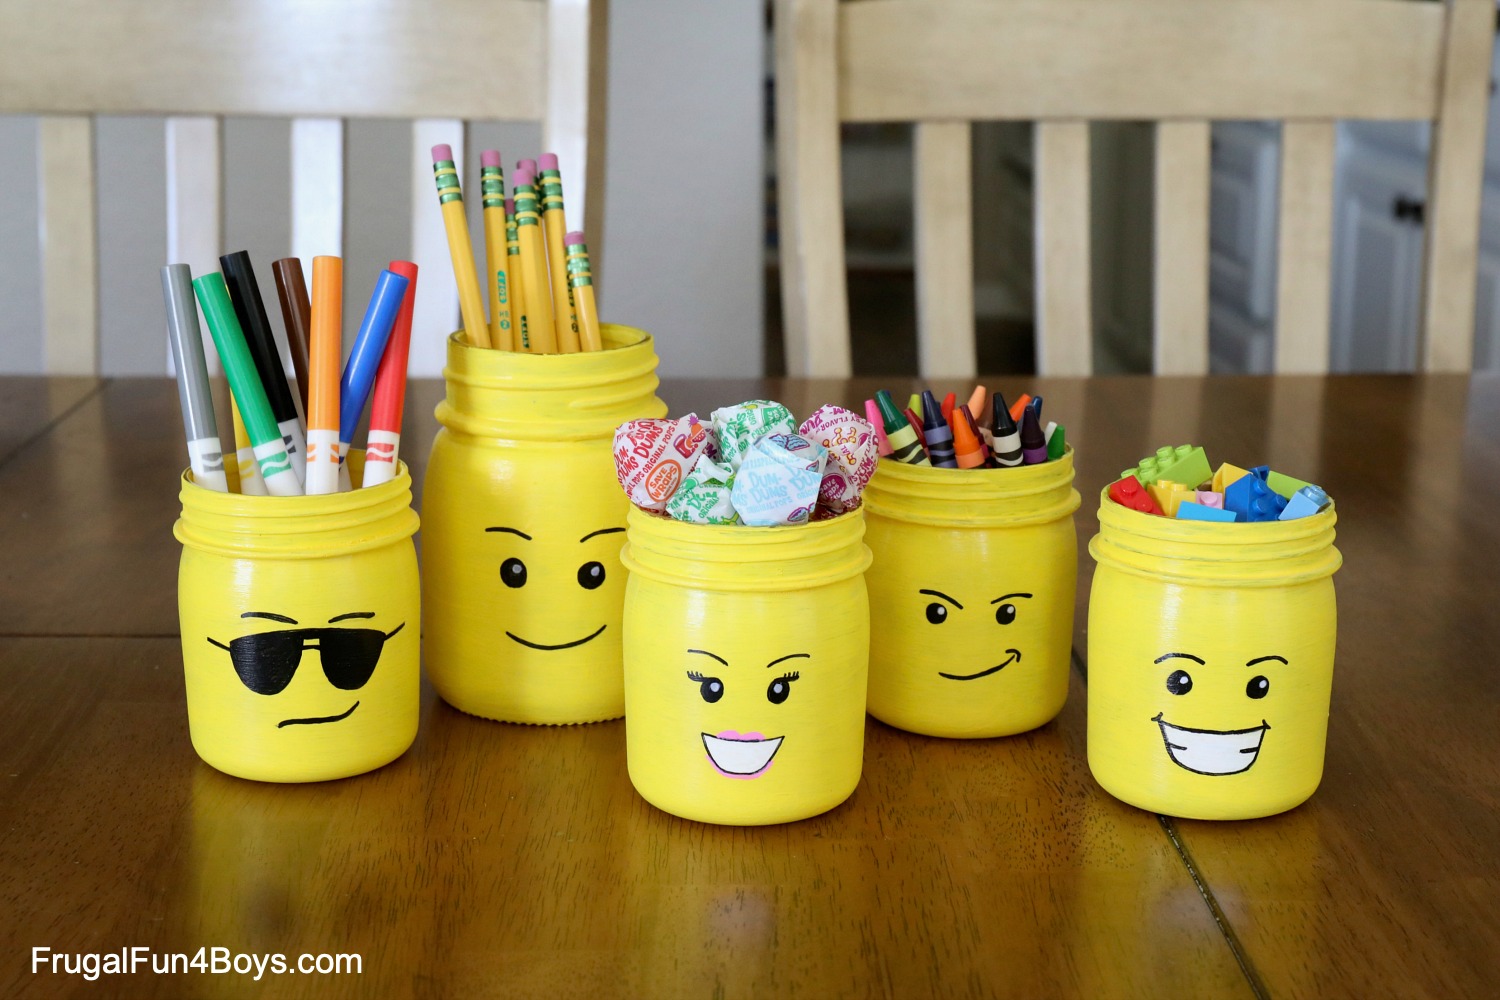
You’ll want to make lots of different faces! So cute and fun.
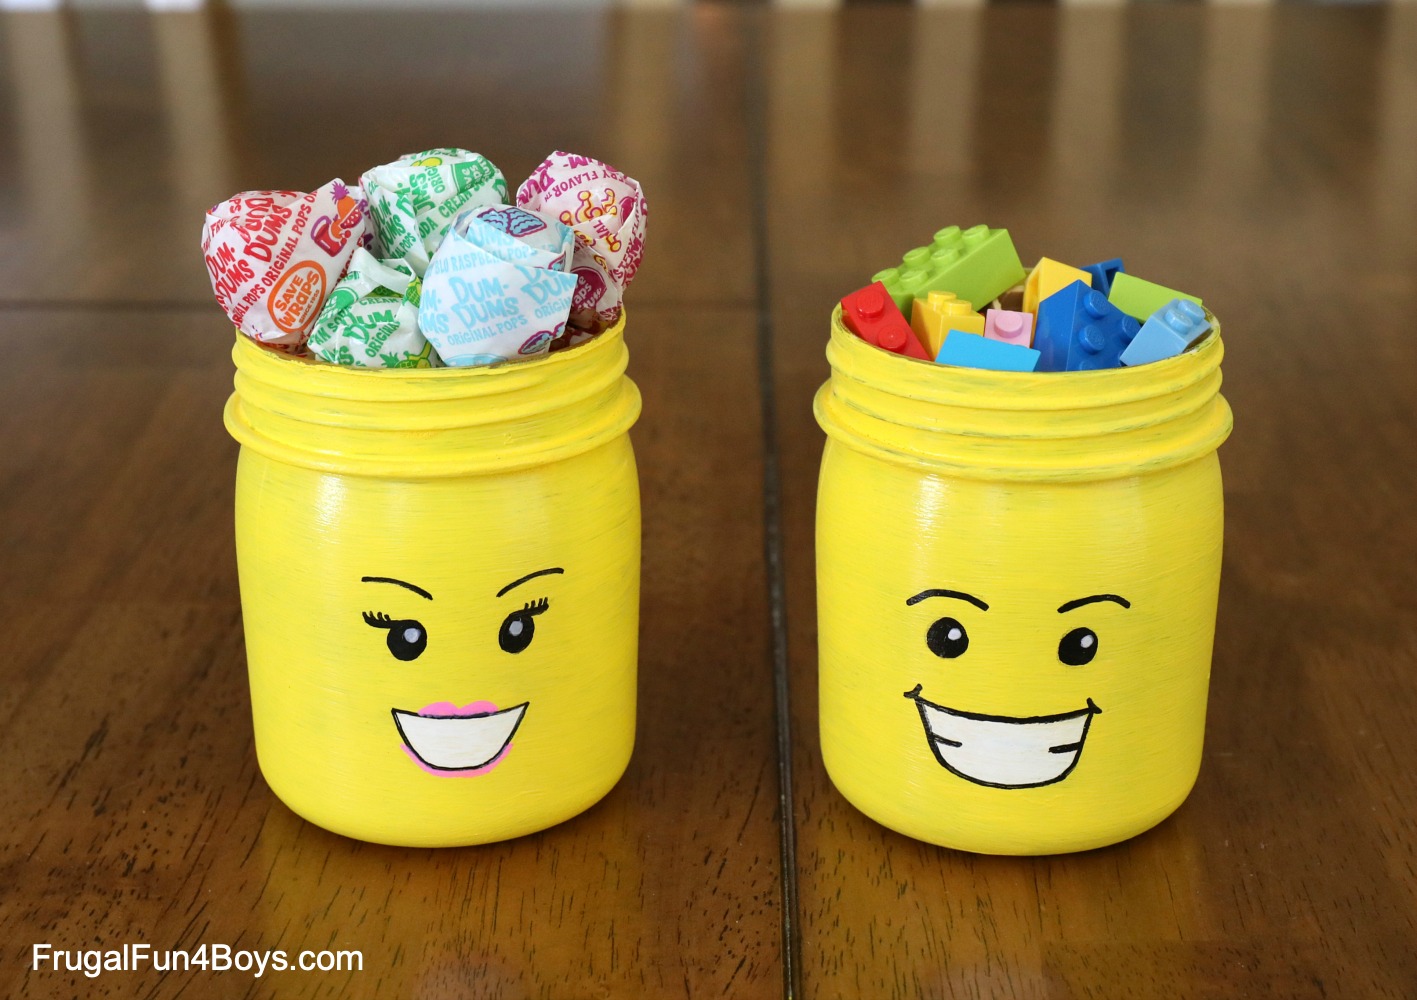
And there are just so many things you can fill them with! Put candy or bricks in them for a LEGO birthday party.
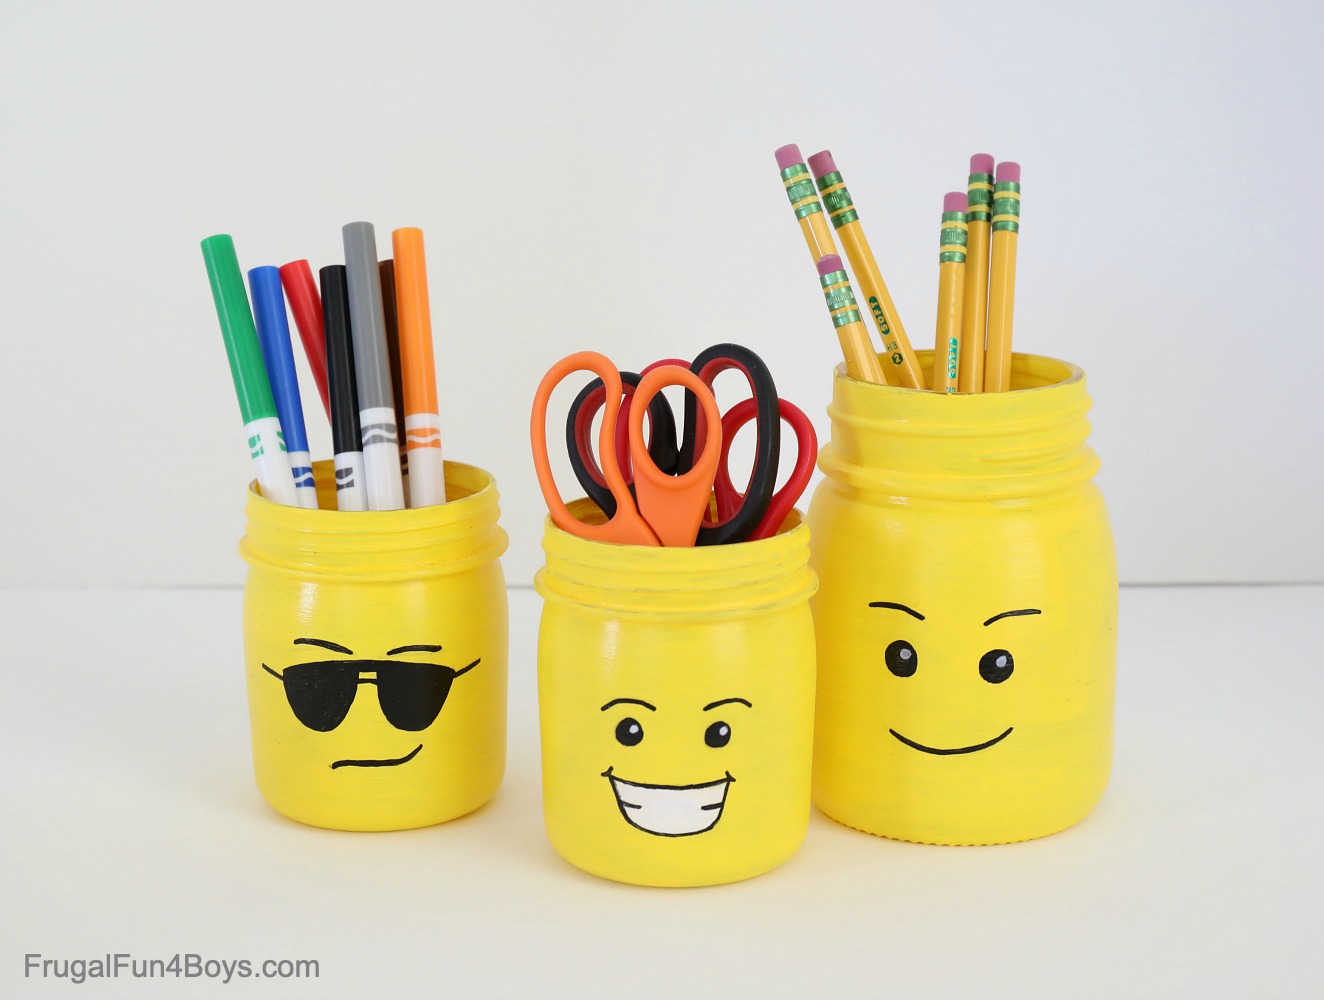
Or use them to organize school supplies.
Need more LEGO craft ideas?
We love making LEGO® crafts!
It’s fun to make LEGO® Painted Rocks that look like minifigures.
Here’s a fun LEGO® Photo Frame Craft.
3 Comments
Aline Jul 22, 2019
So glad it wasn't worse! Rest up and heal well. Many thanks and blessings.
Michelle Jul 22, 2019
I am glad you are on the mend after the car accident. I hope you have a speedy recovery.
Kathryn Jul 7, 2022
Could you use modge podge to seal it instead of the spray?
Post a Comment