
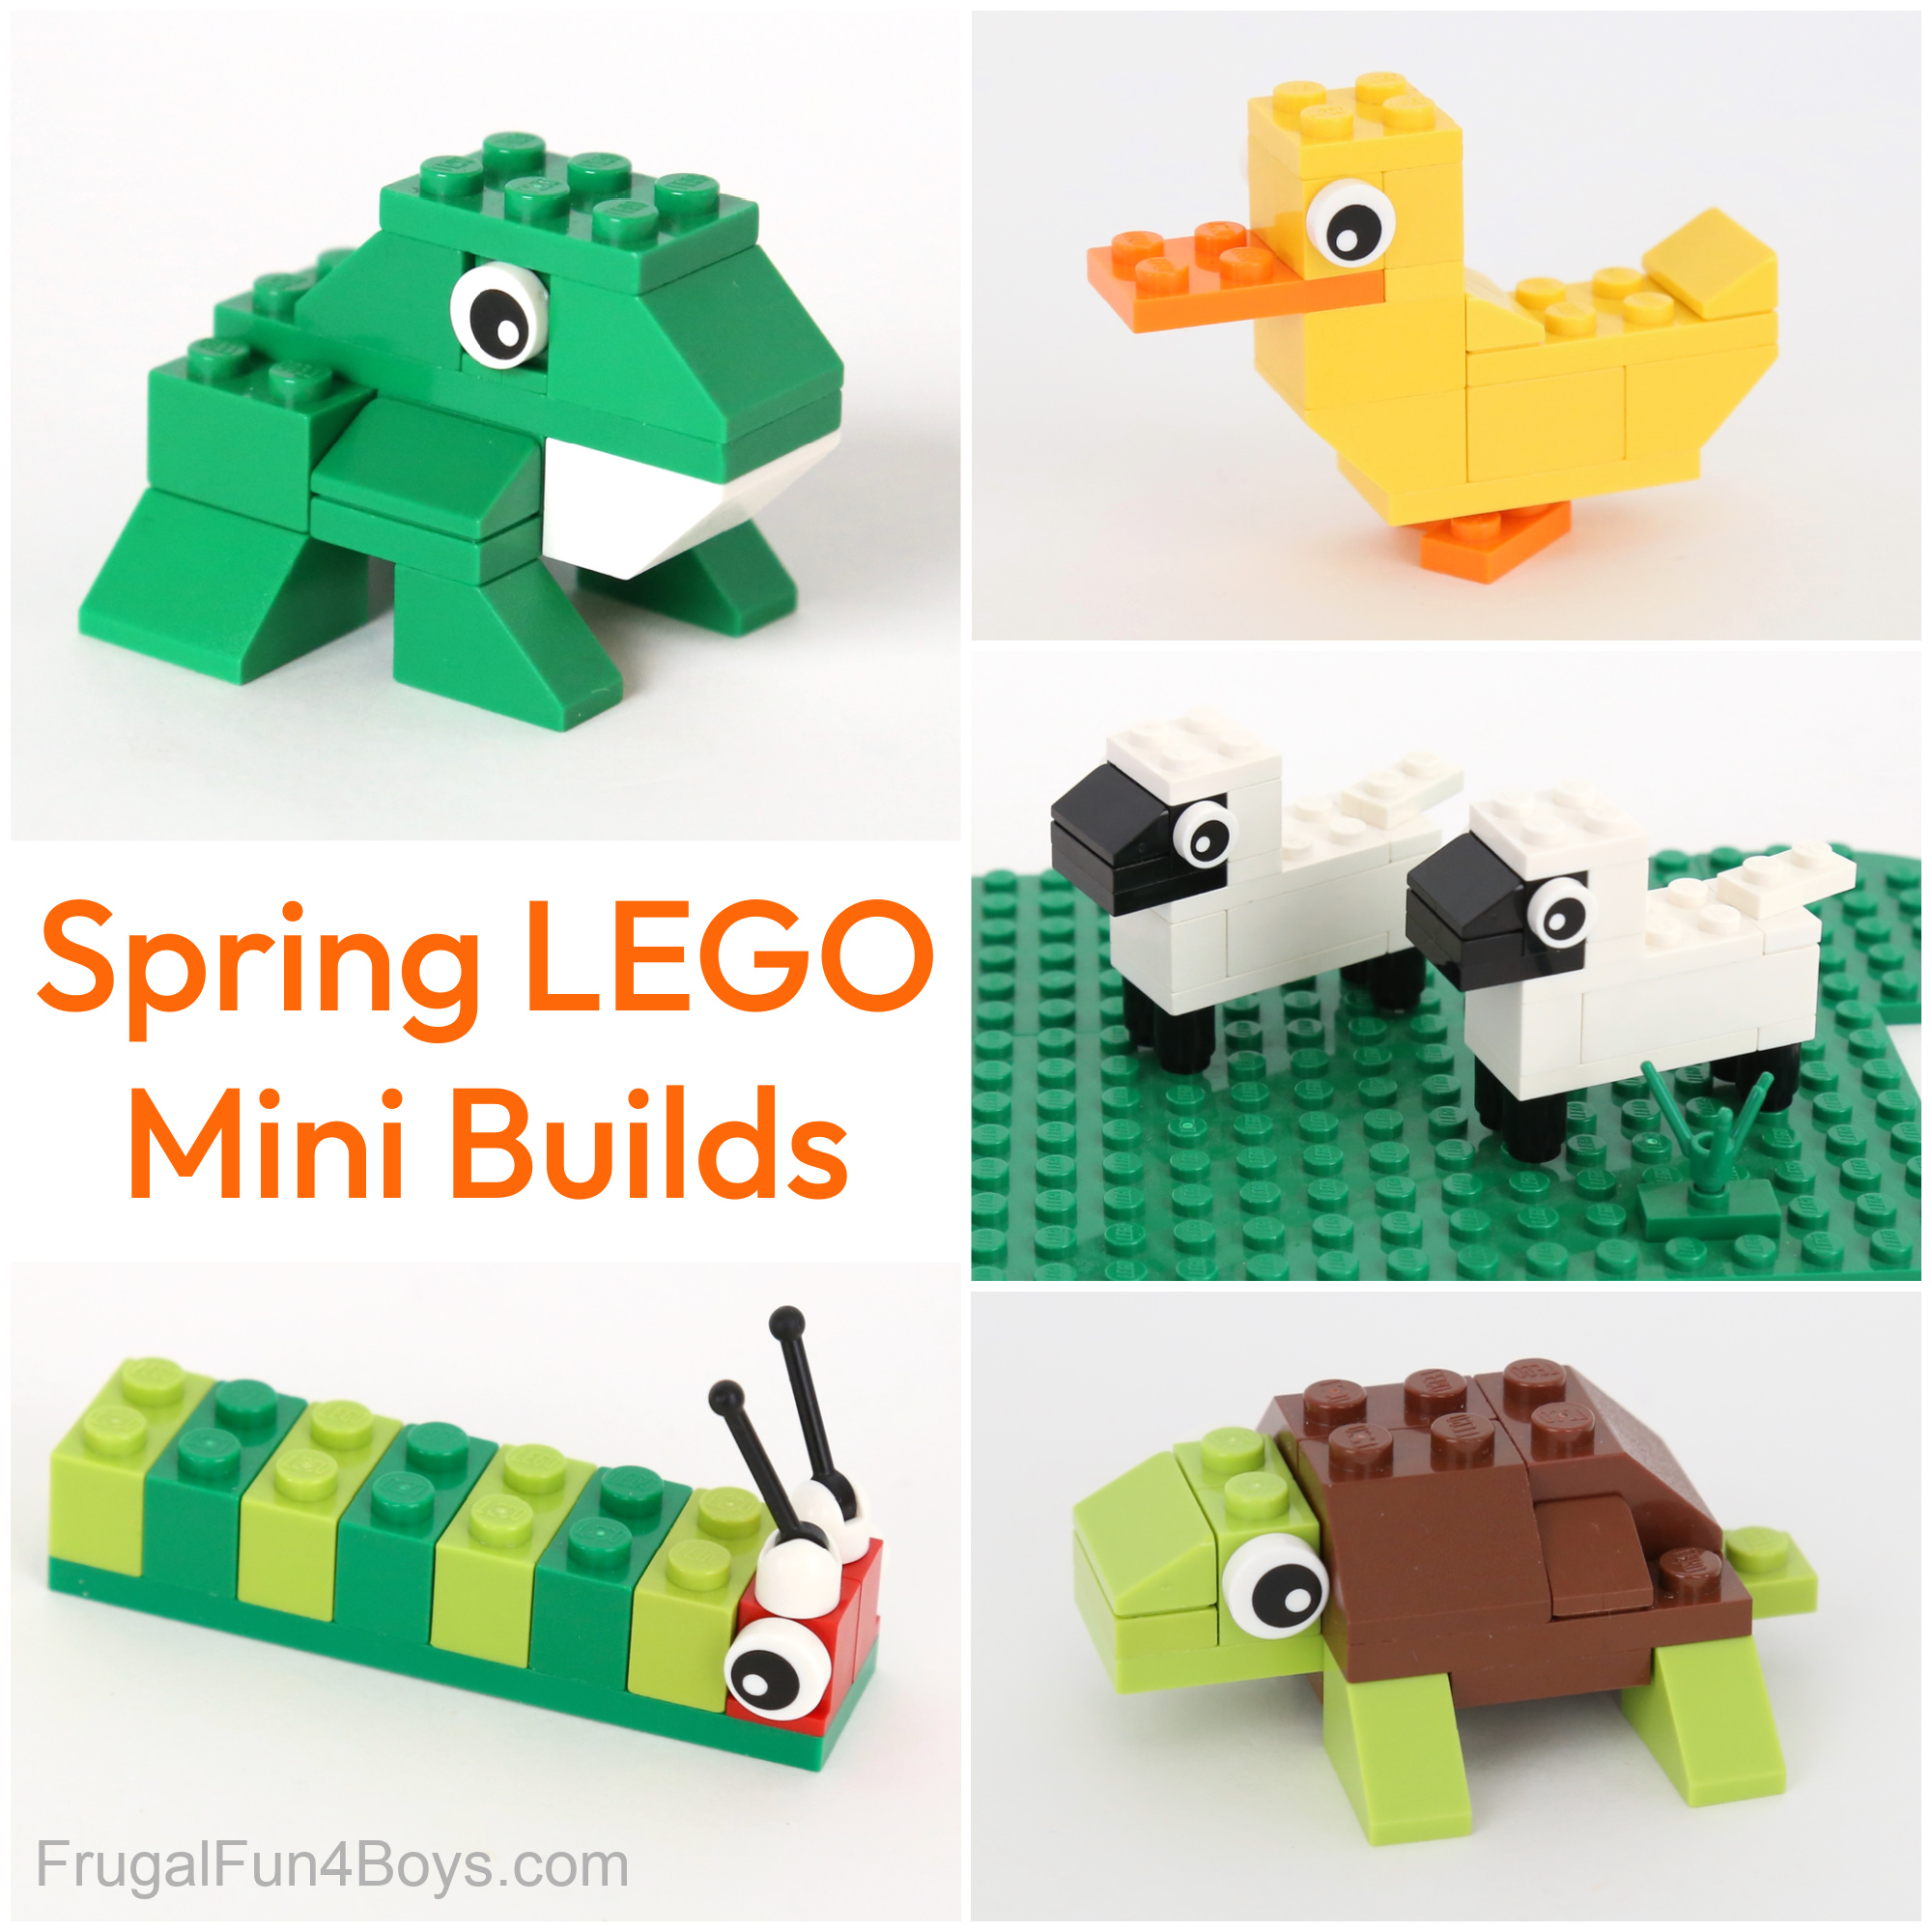
Build adorable mini LEGO animals for spring!
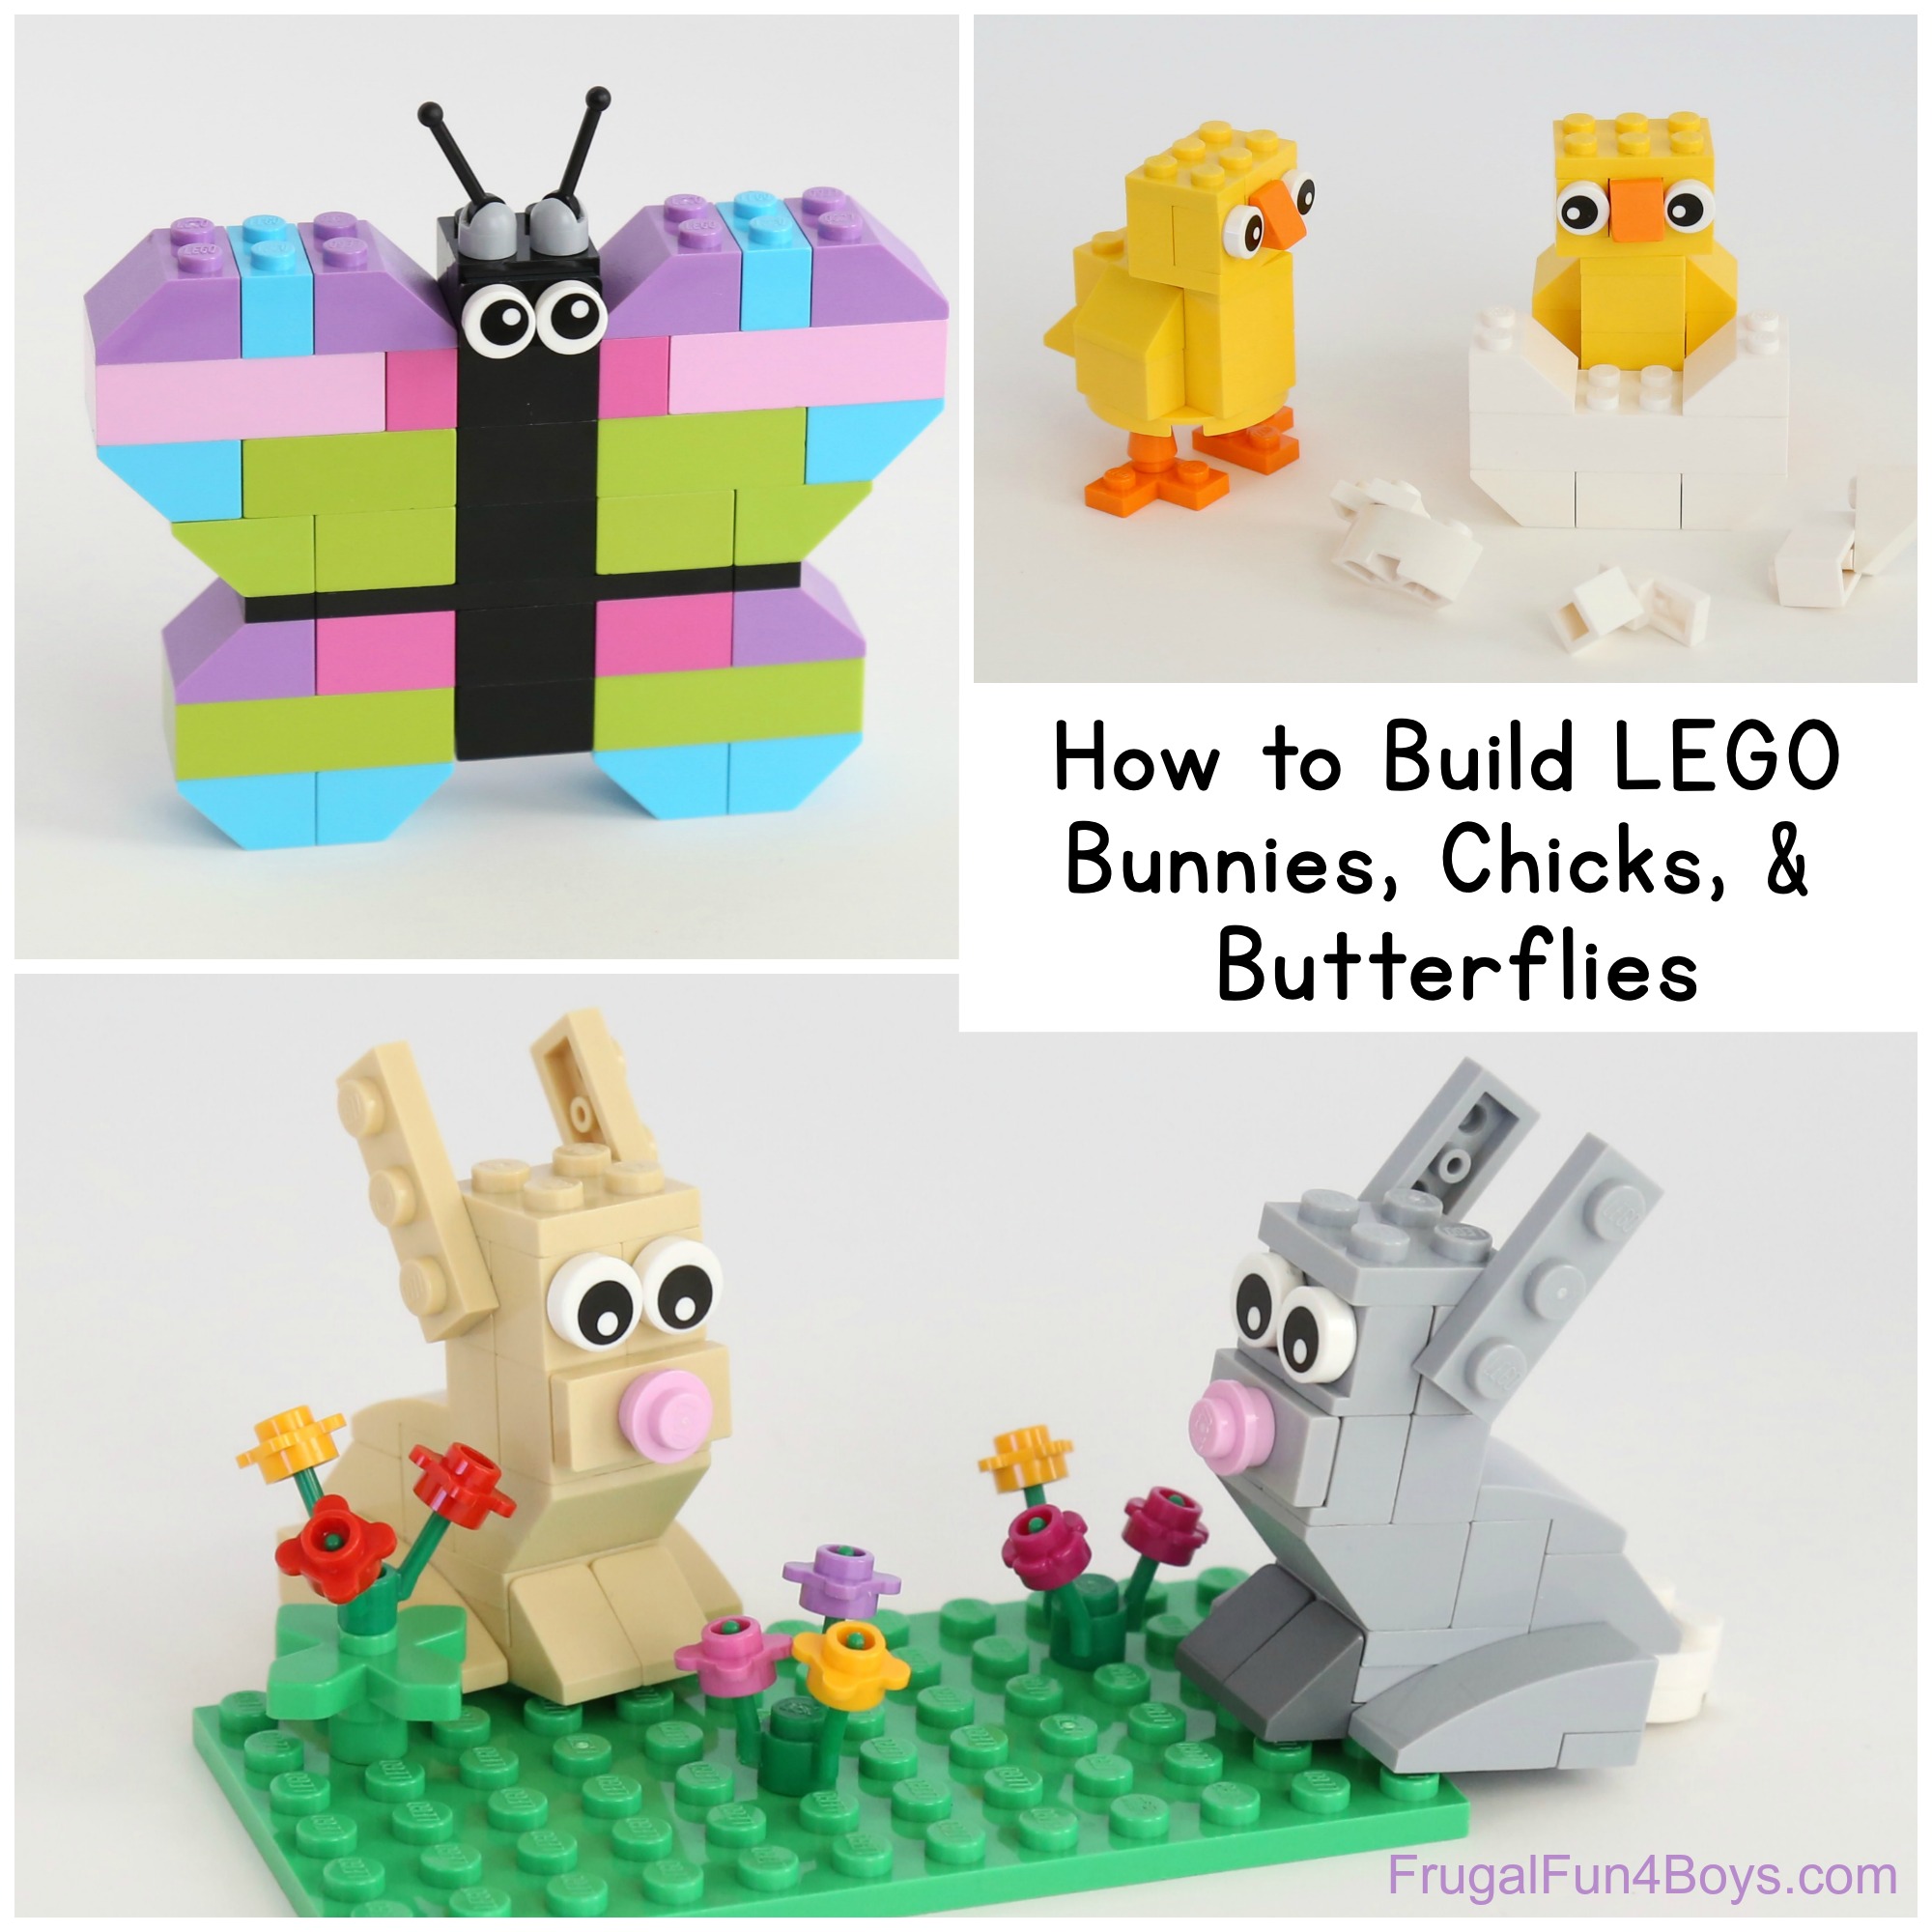
We’ve got building instructions for a duckling, turtle, caterpillar, lamb, and frog. I also have a separate post that has a LEGO bunny, chick, and butterfly. So many fun spring ideas!
There are so many possibilities for things you can do with these LEGO spring animals. They’re super cute on their own, but it would also be fun to build a whole farm with a barn and pens.
Another option is to use these animal mini builds as part of a LEGO Easter egg hunt. There is a parts list for each animal so that you can find the bricks in your stash, or order what you need from BrickLink. Hide eggs with the bricks needed for making these animals! Then let the kids use our instructions for building them.
There are five animals to build. I’ll share a quick parts list with the instructions for each animal. They’re super simple!
If you need eyes, they are easy to order from BrickLink! See them here – 1 x 1 tile eyes.
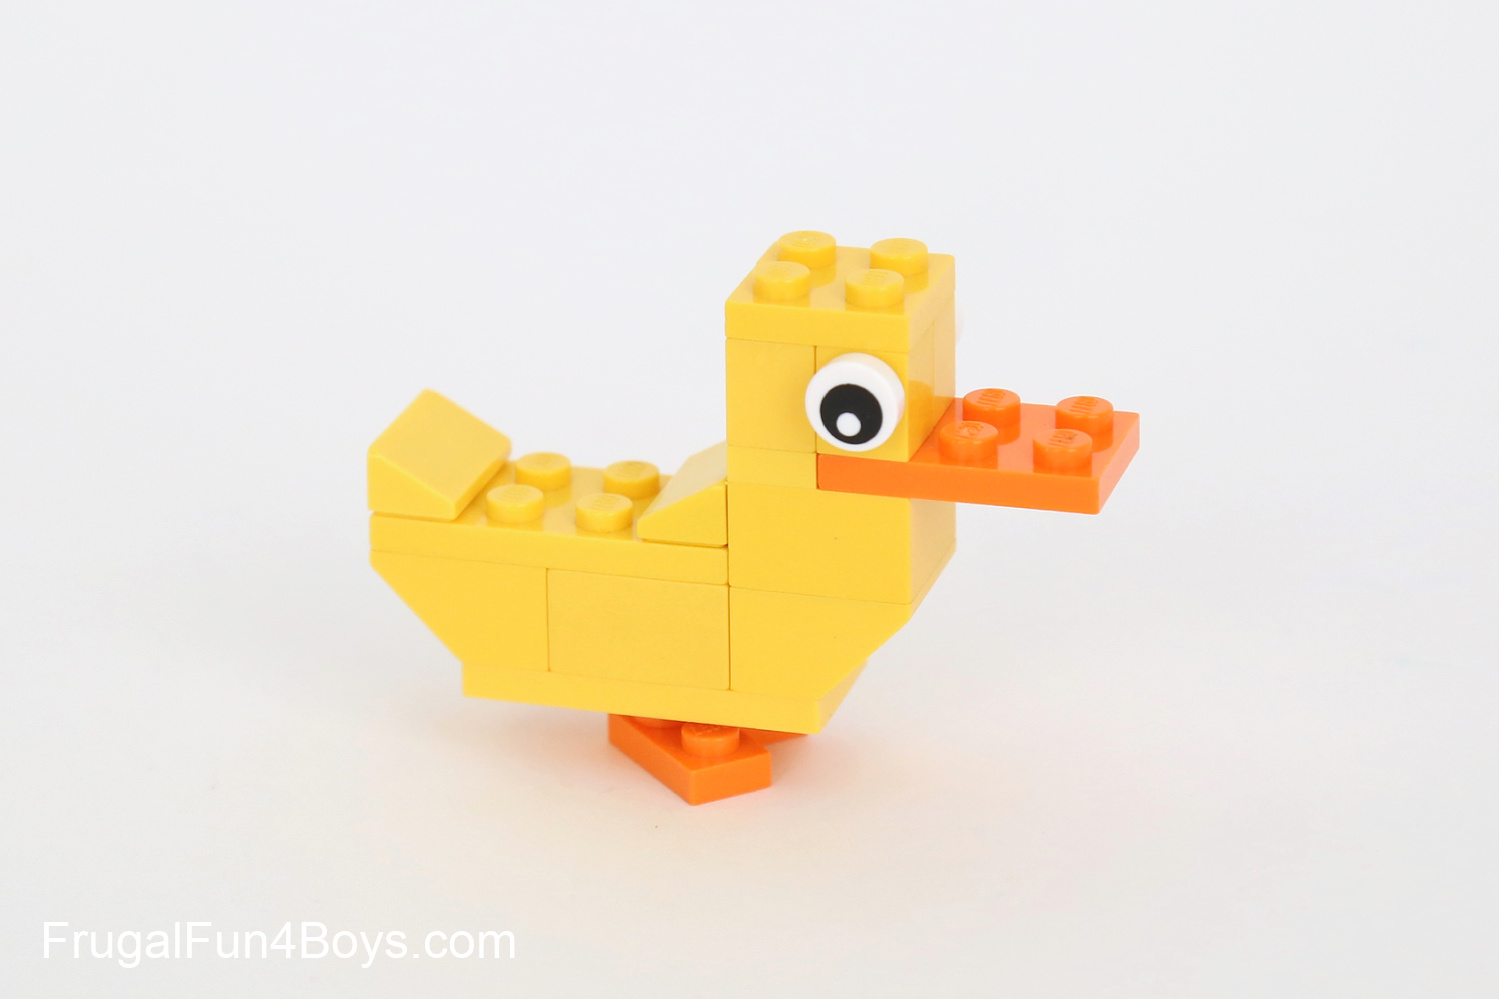
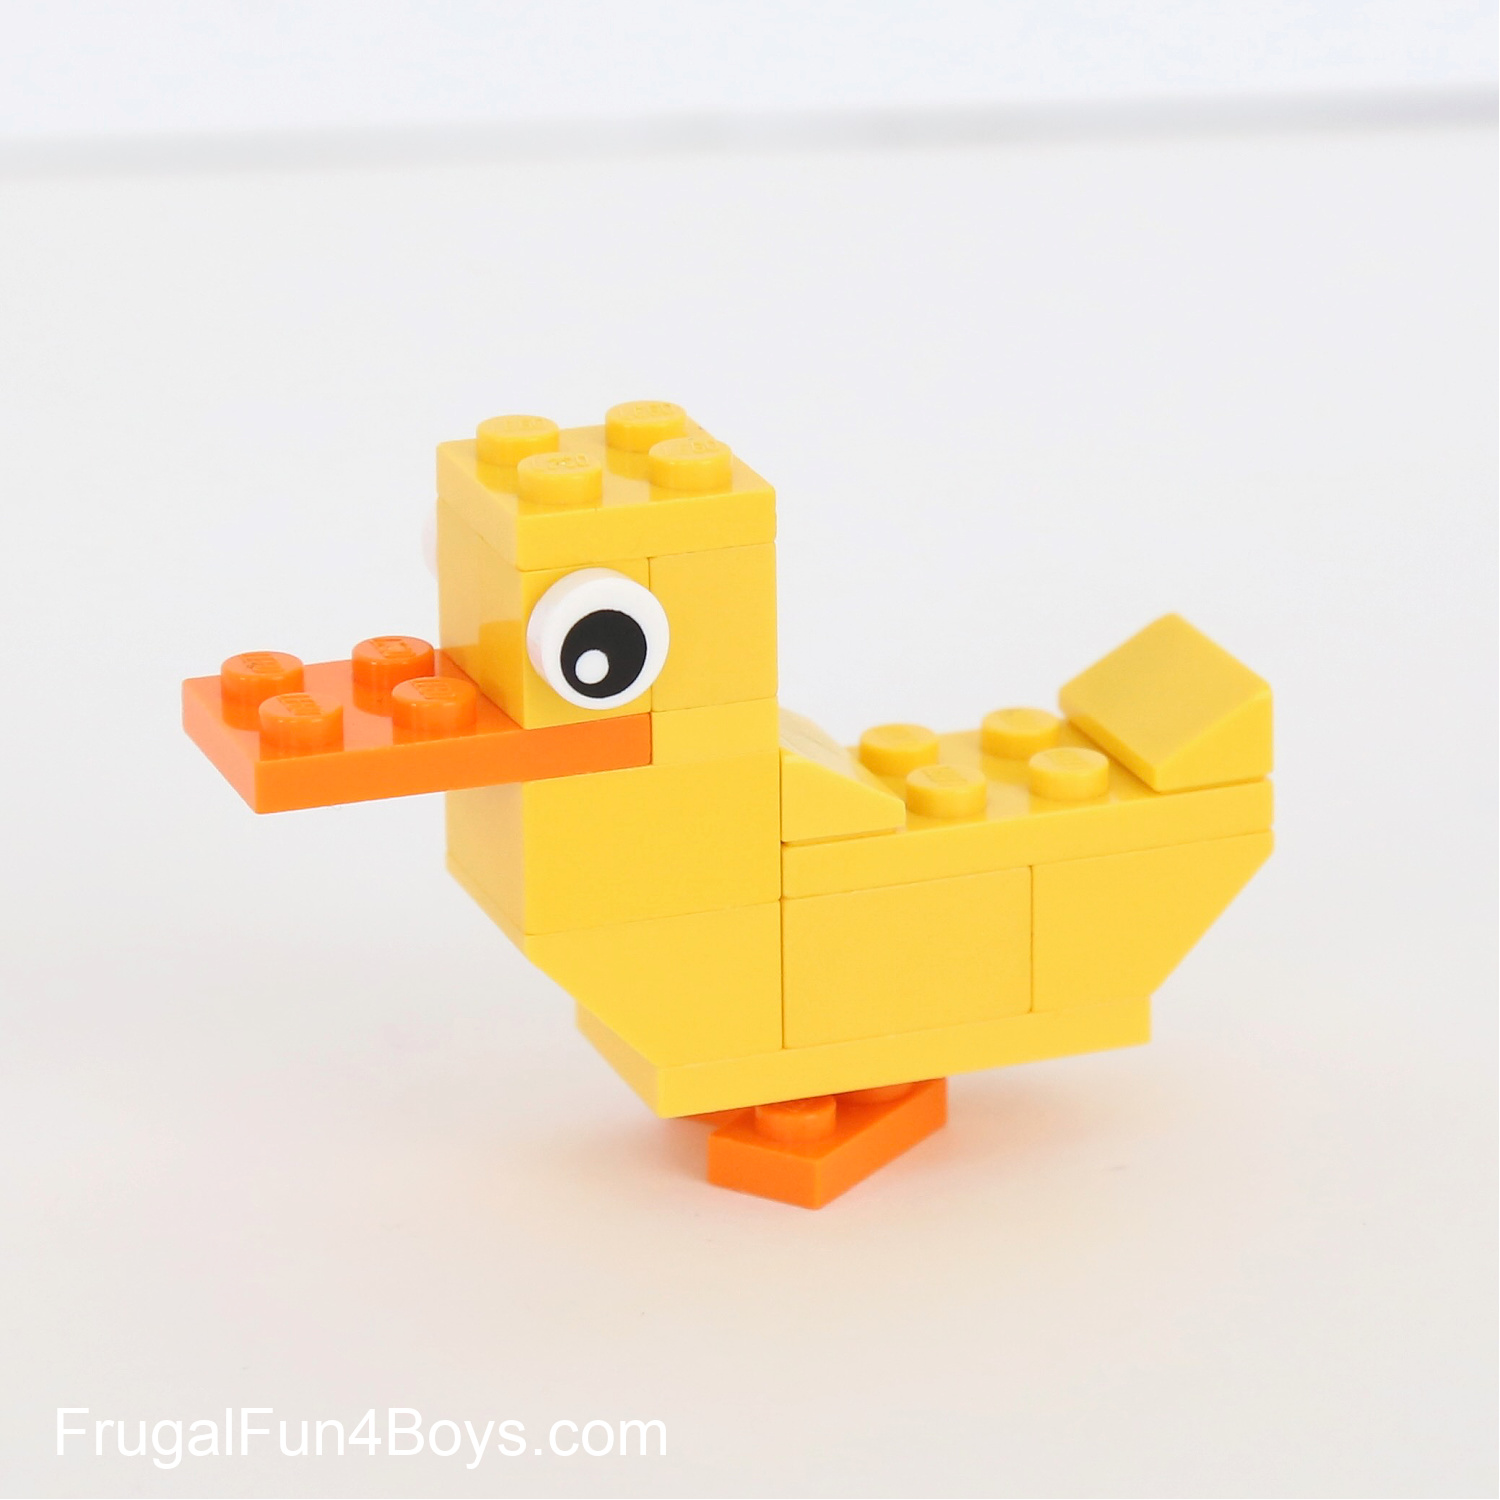
DUCKLING
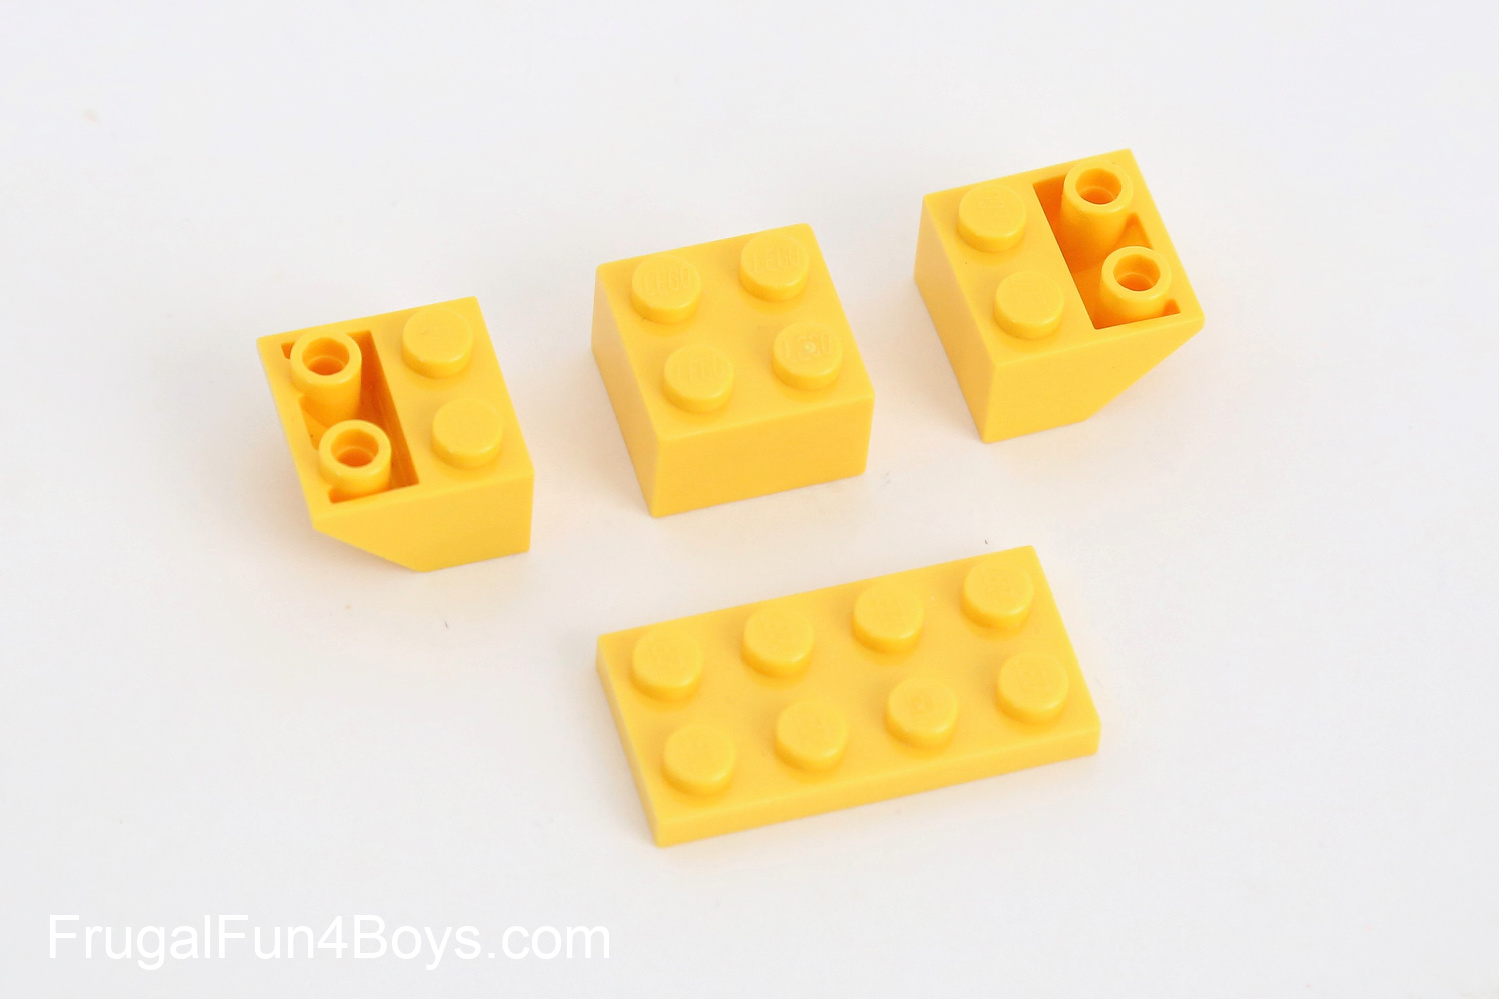
Parts List:
2 – 2 x 4 yellow plates
1 – 2 x 2 yellow plate
1 – 1 x 2 yellow plate
2 – 2 x 2 yellow bricks
1 – 1 x 2 yellow brick
2 – 1 x 1 yellow bricks with a stud on the side
2 – 2 x 2 yellow inverted slope bricks
2 – 1 x 2 slopes, 30 degree
1 – 2 x 3 orange plate
1 – 1 x 1 orange round plate
1 – 2 x 2 orange corner plate
2 – eyes
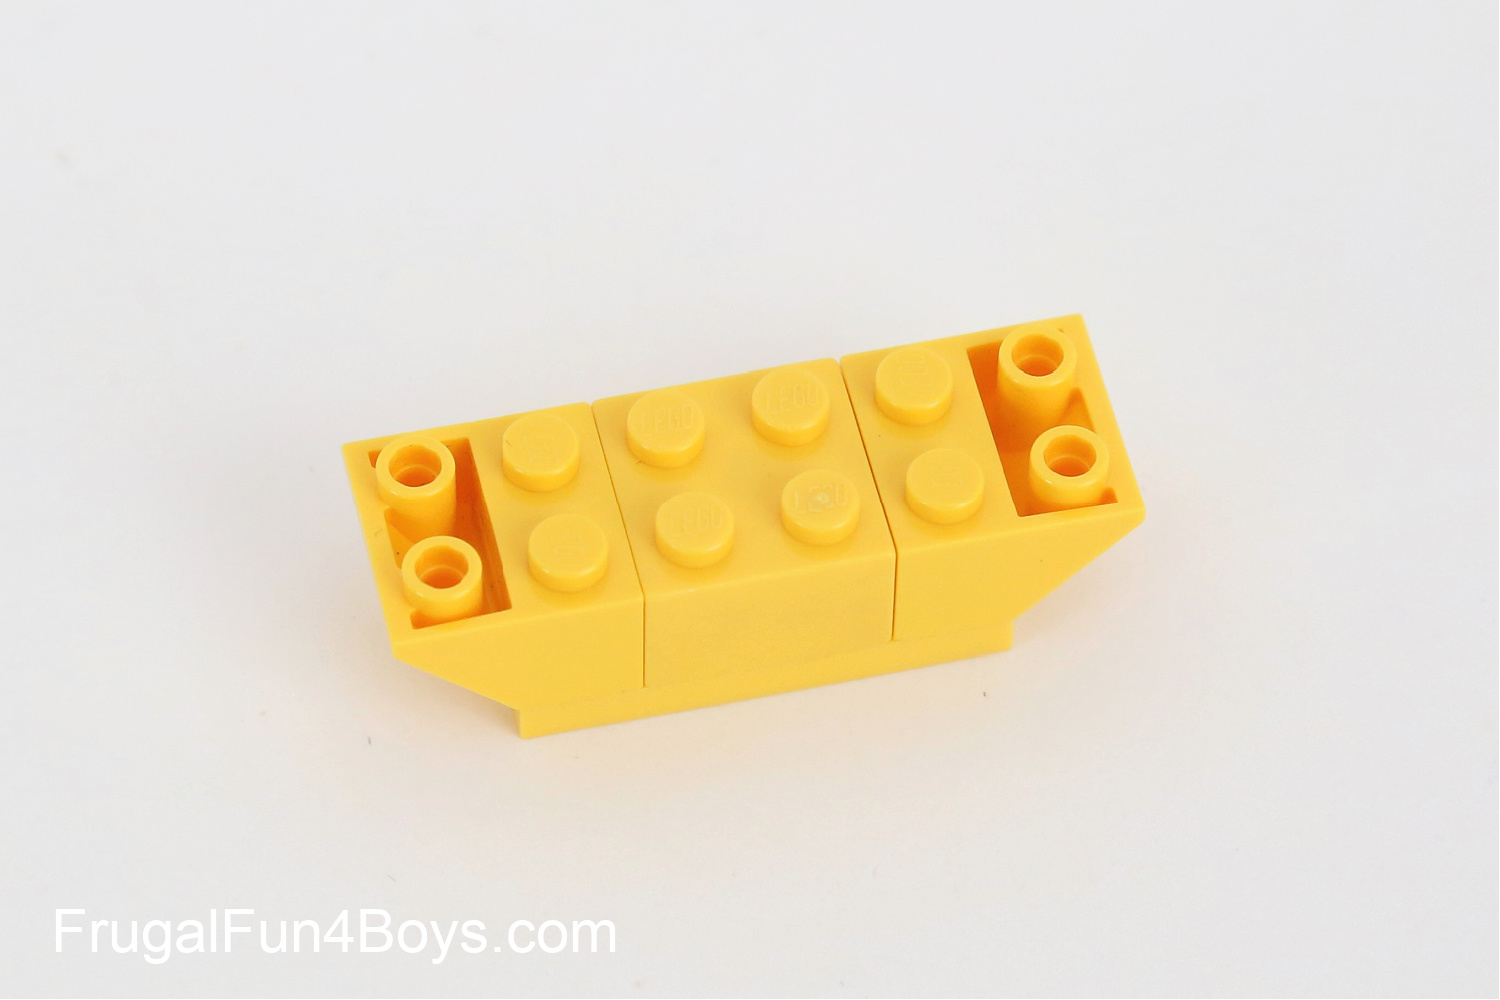
Step 1: Grab a 2 x 4 yellow plate, two 2 x 2 yellow inverted slopes, and a 2 x 2 yellow brick.
Step 2: Attach the three bricks to a 2 x 4 yellow plate.
Step 3: Add a 2 x 4 plate and a 2 x 2 brick.
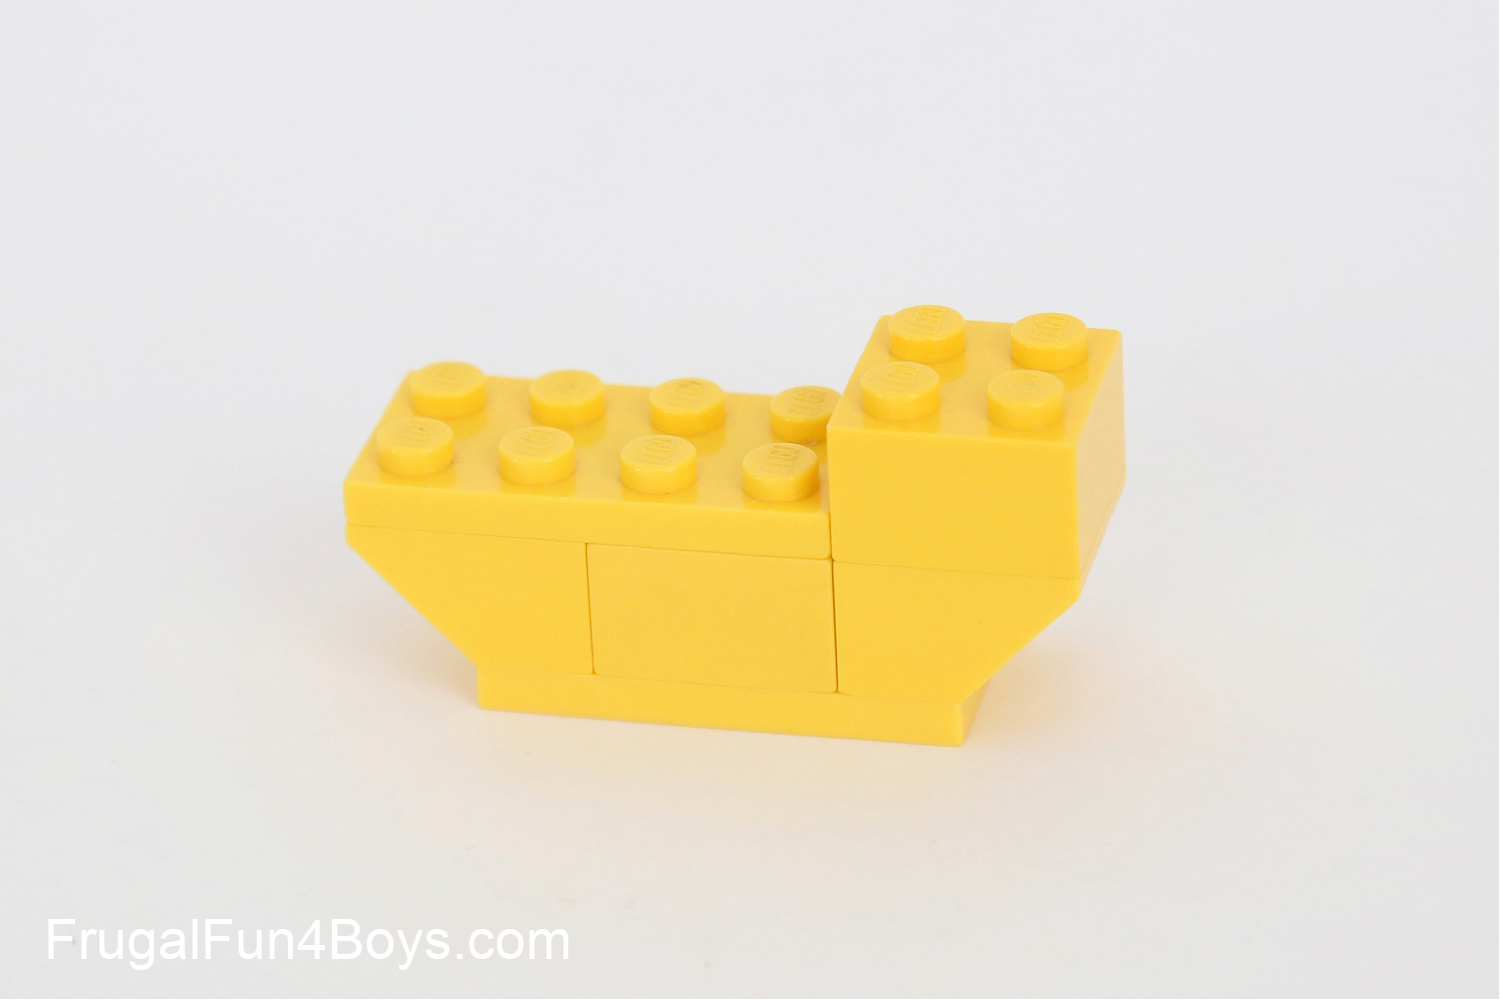
Step 4: Add two 1 x 2 slopes (the smaller 30 degree slopes) to the body. Then start building the head by adding a 1 x 2 yellow plate and a 2 x 3 orange plate.
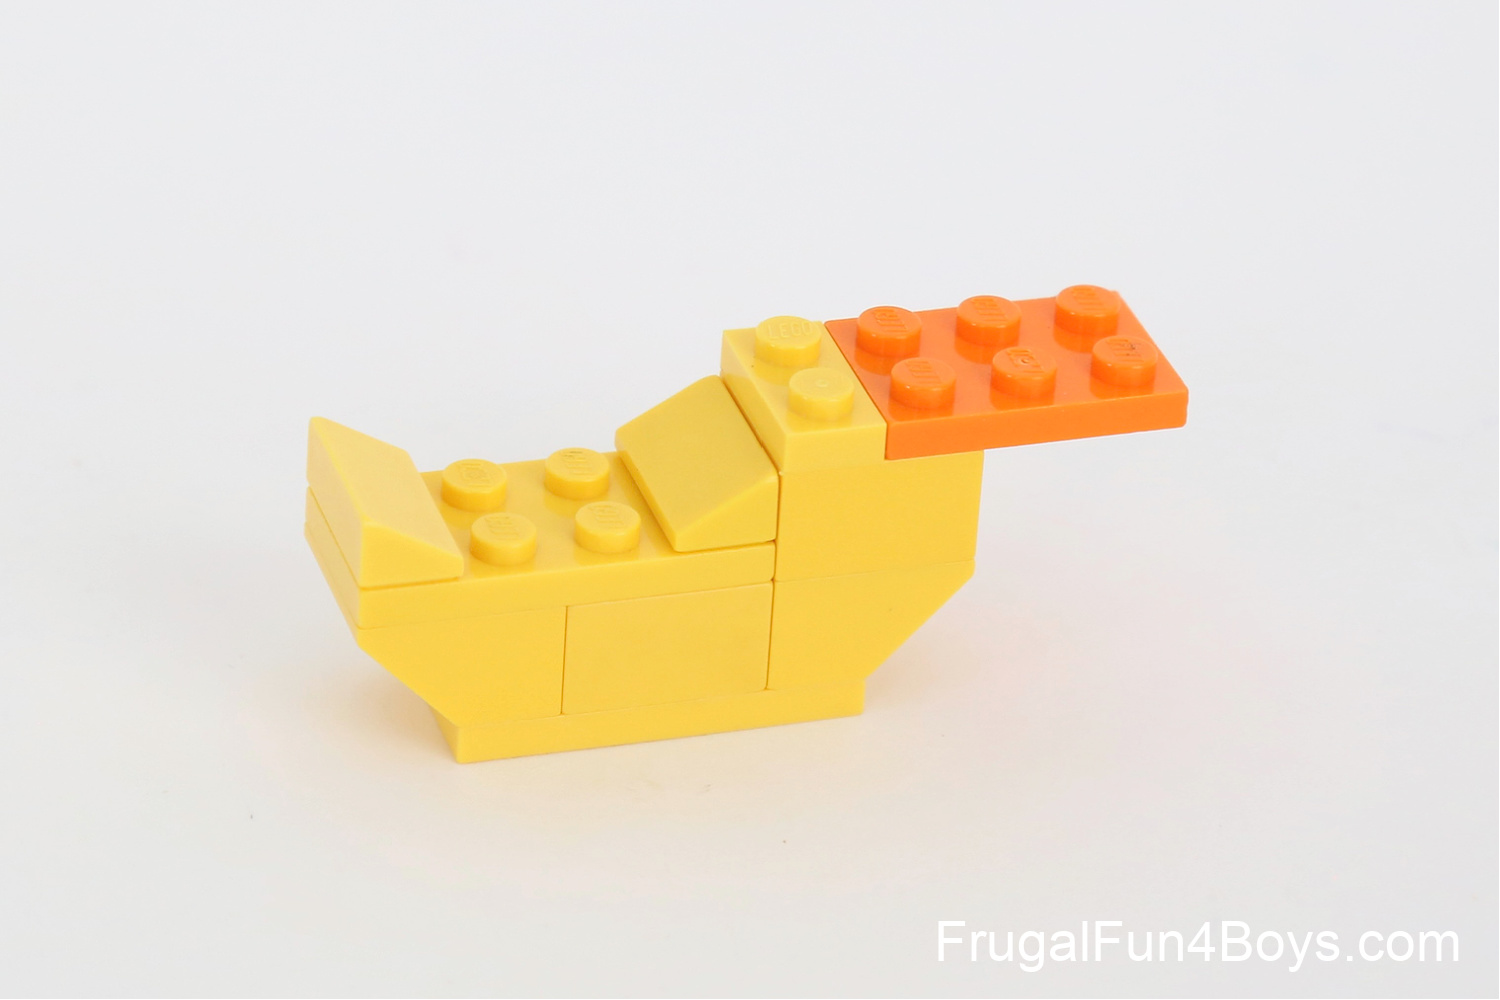
Step 5: Add a 1 x 2 yellow brick and two 1 x 1 bricks with a stud on the side.
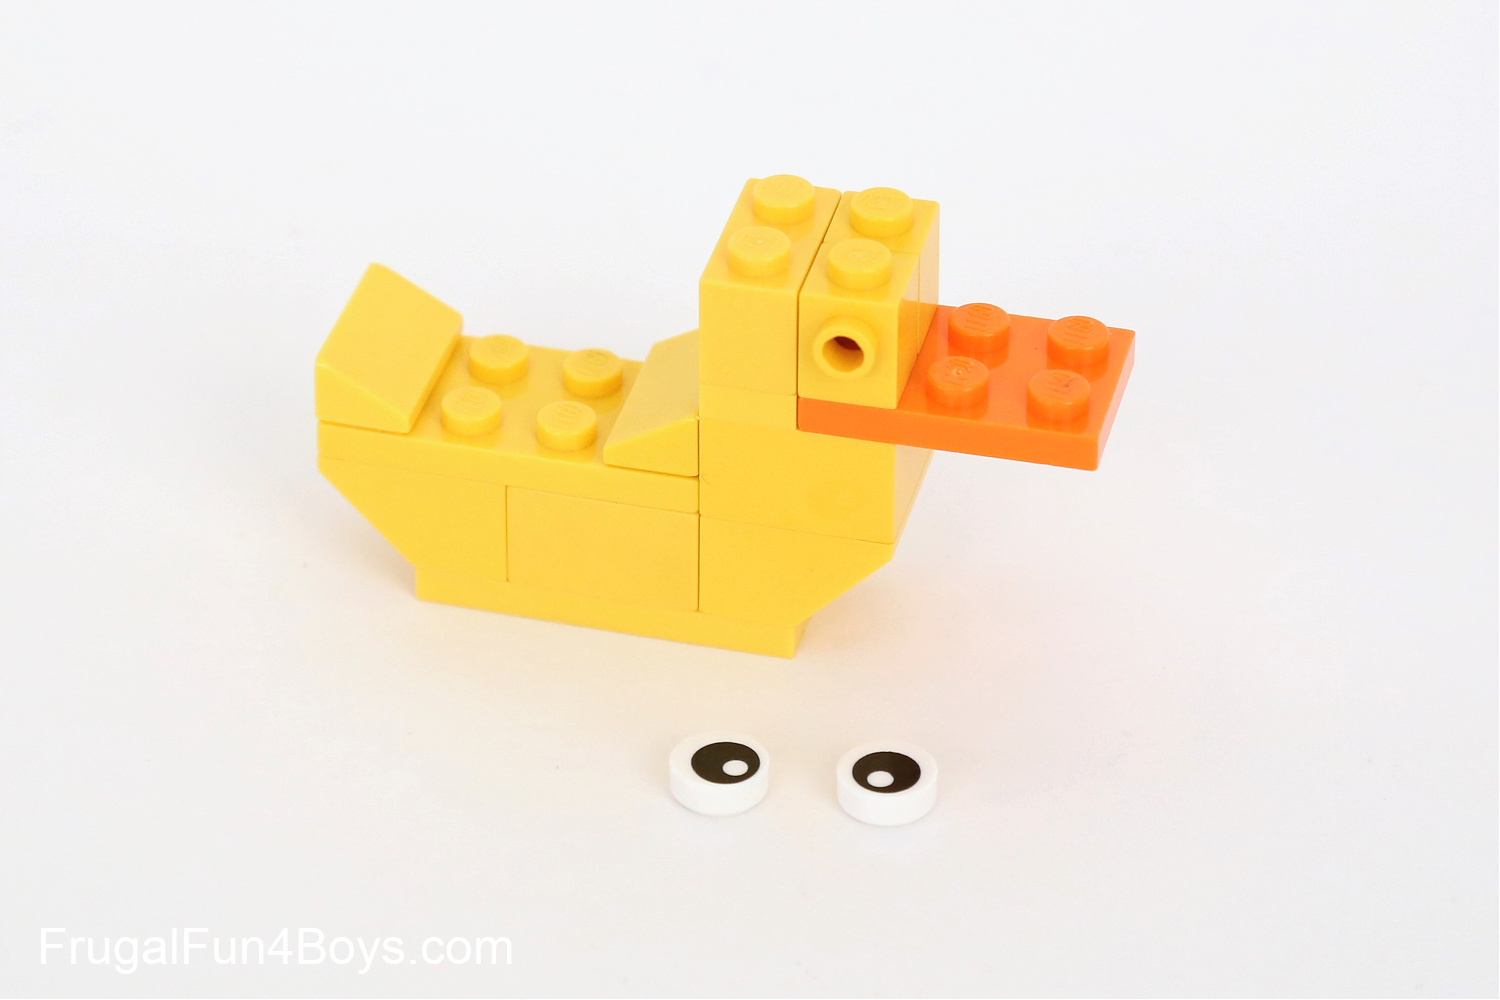
Step 6: Attach the eyes. Then put a 2 x 2 plate on top of the head. Build the feet by attaching a 1 x 1 orange round plate to a 2 x 2 orange corner plate.
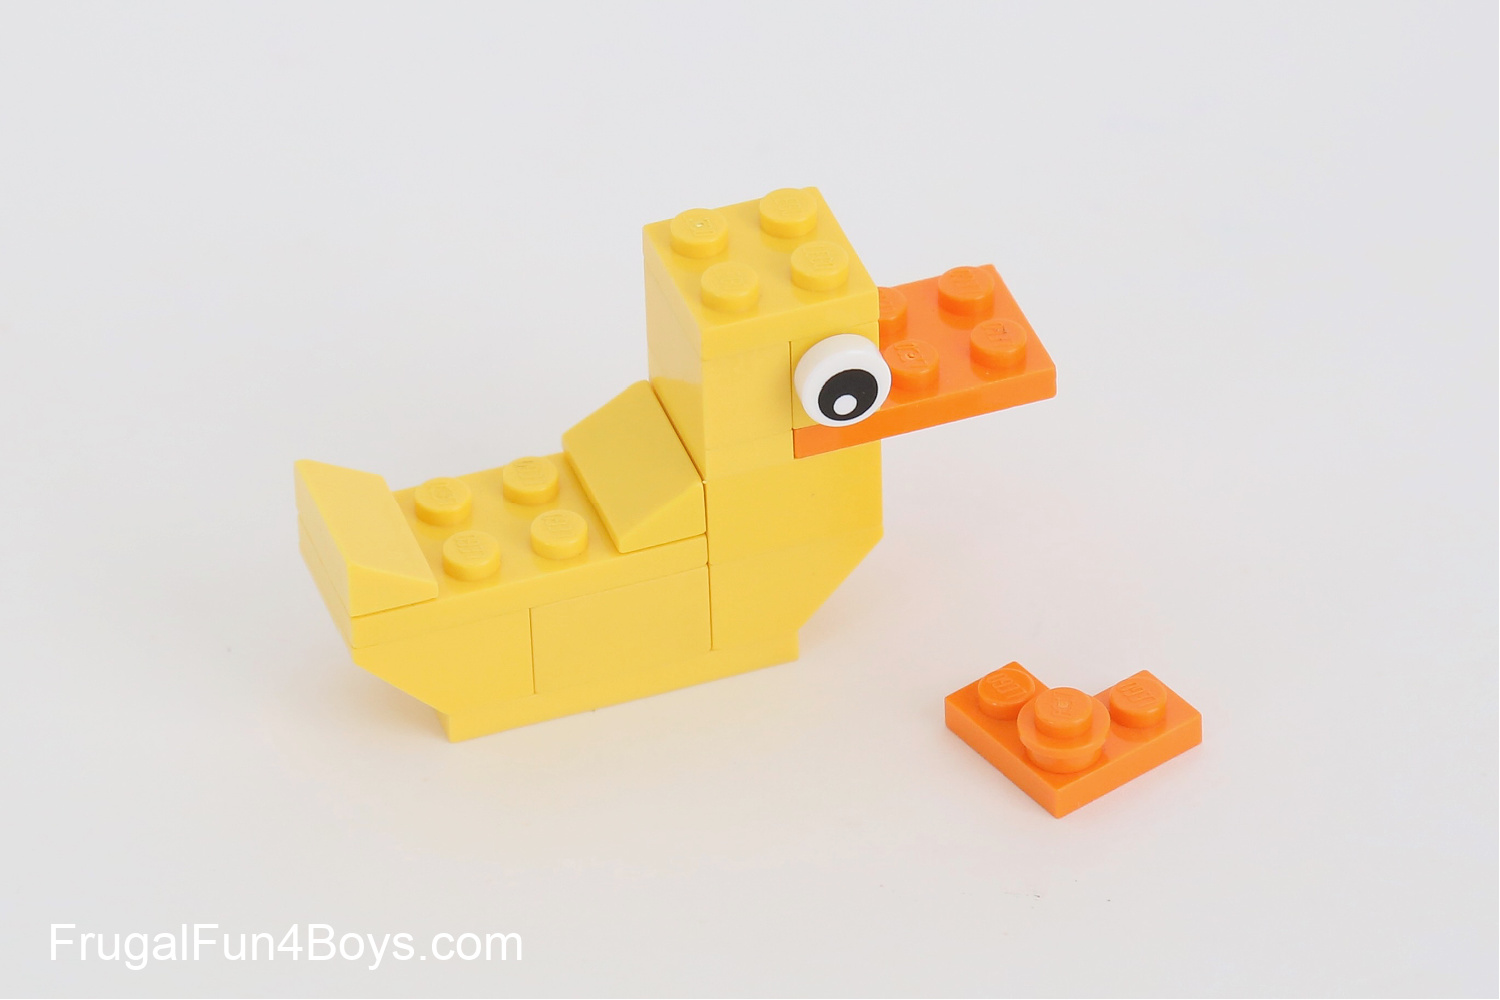
Step 7: Connect the feet to the body and your duck is complete!
How to Build a LEGO CATERPILLAR
This is a one-step build! Just attach all the bricks to a 2 x 8 green plate.
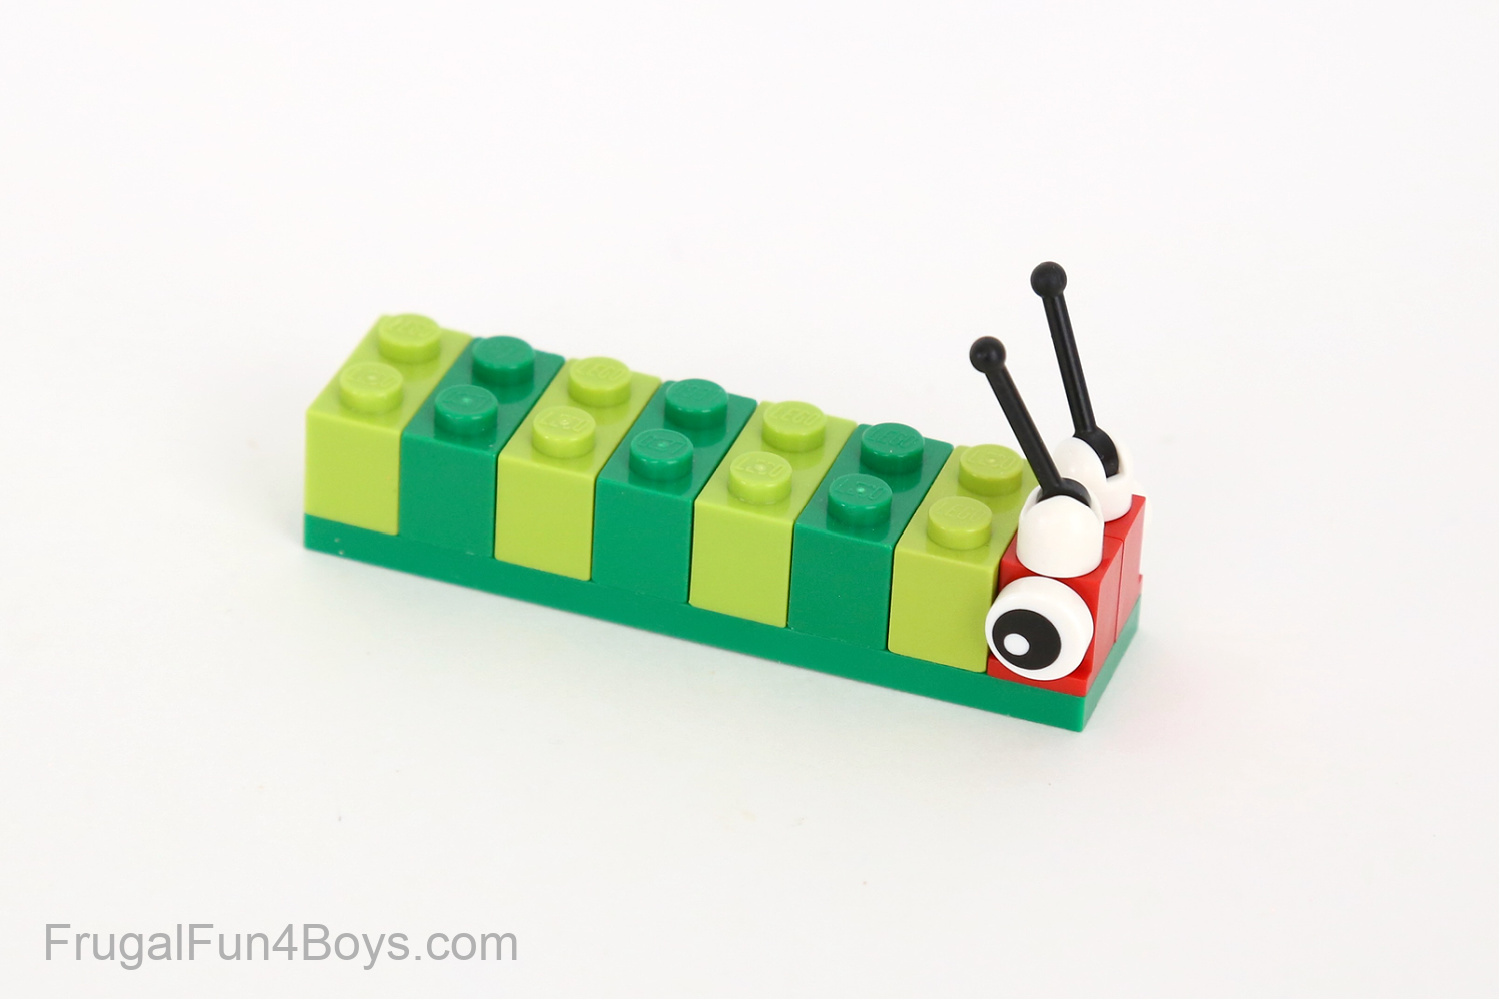
Parts List:
1 – 2 x 8 green plate.
3 – 1 x 2 green bricks
4 – 1 x 2 lime green bricks
2 – 1 x 1 red bricks with a stud on the side
2 – eyes
2 – antennas
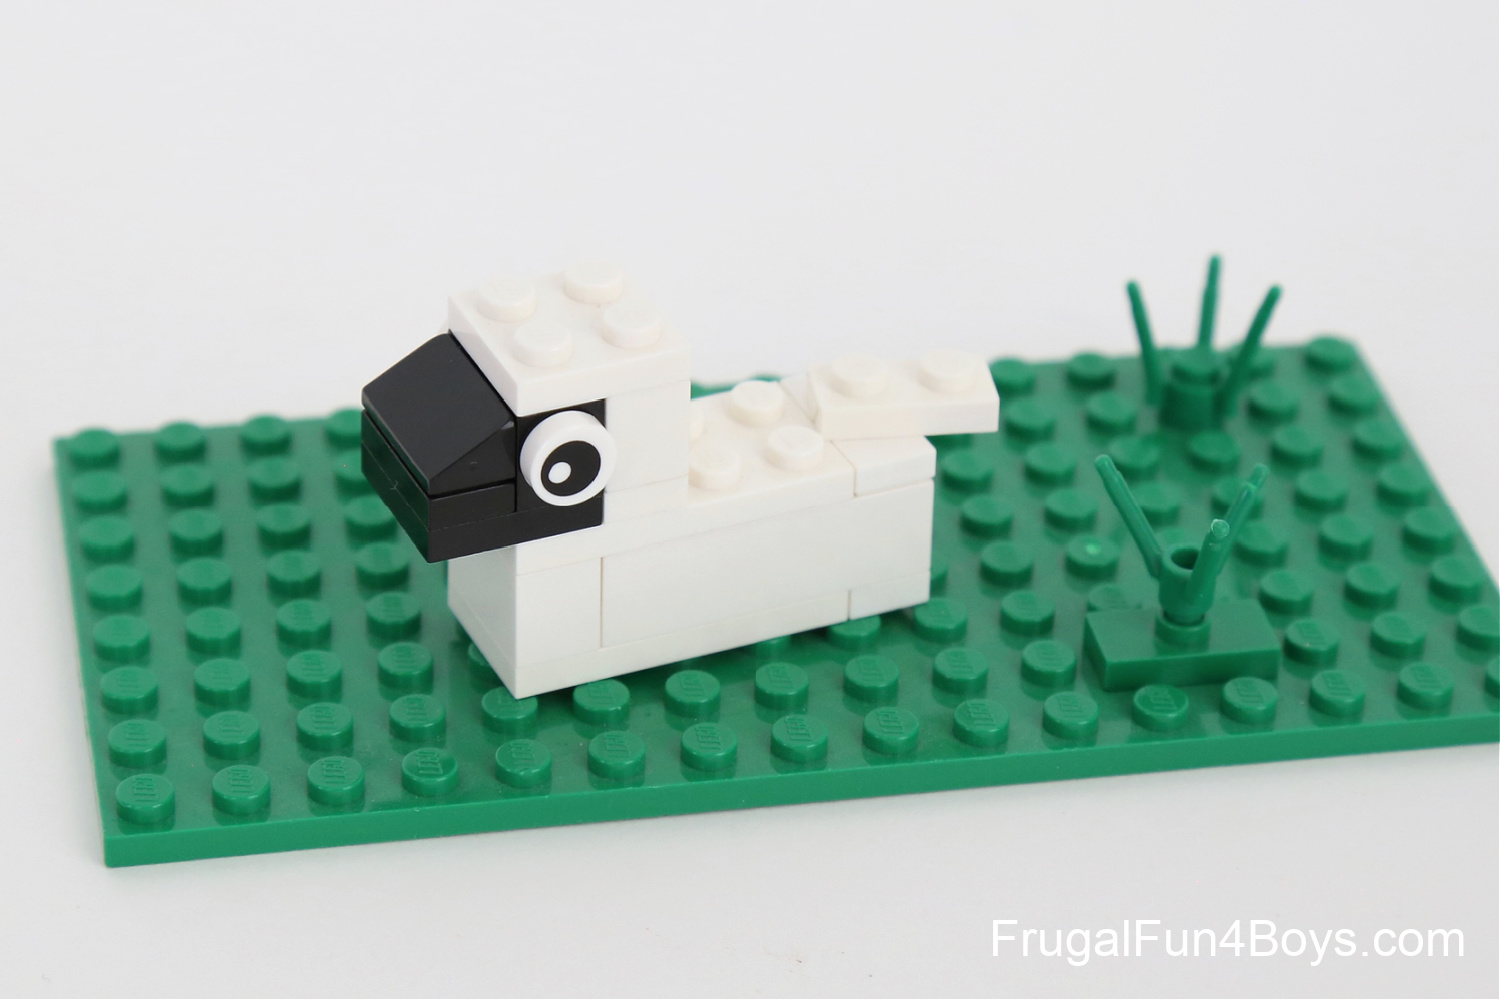
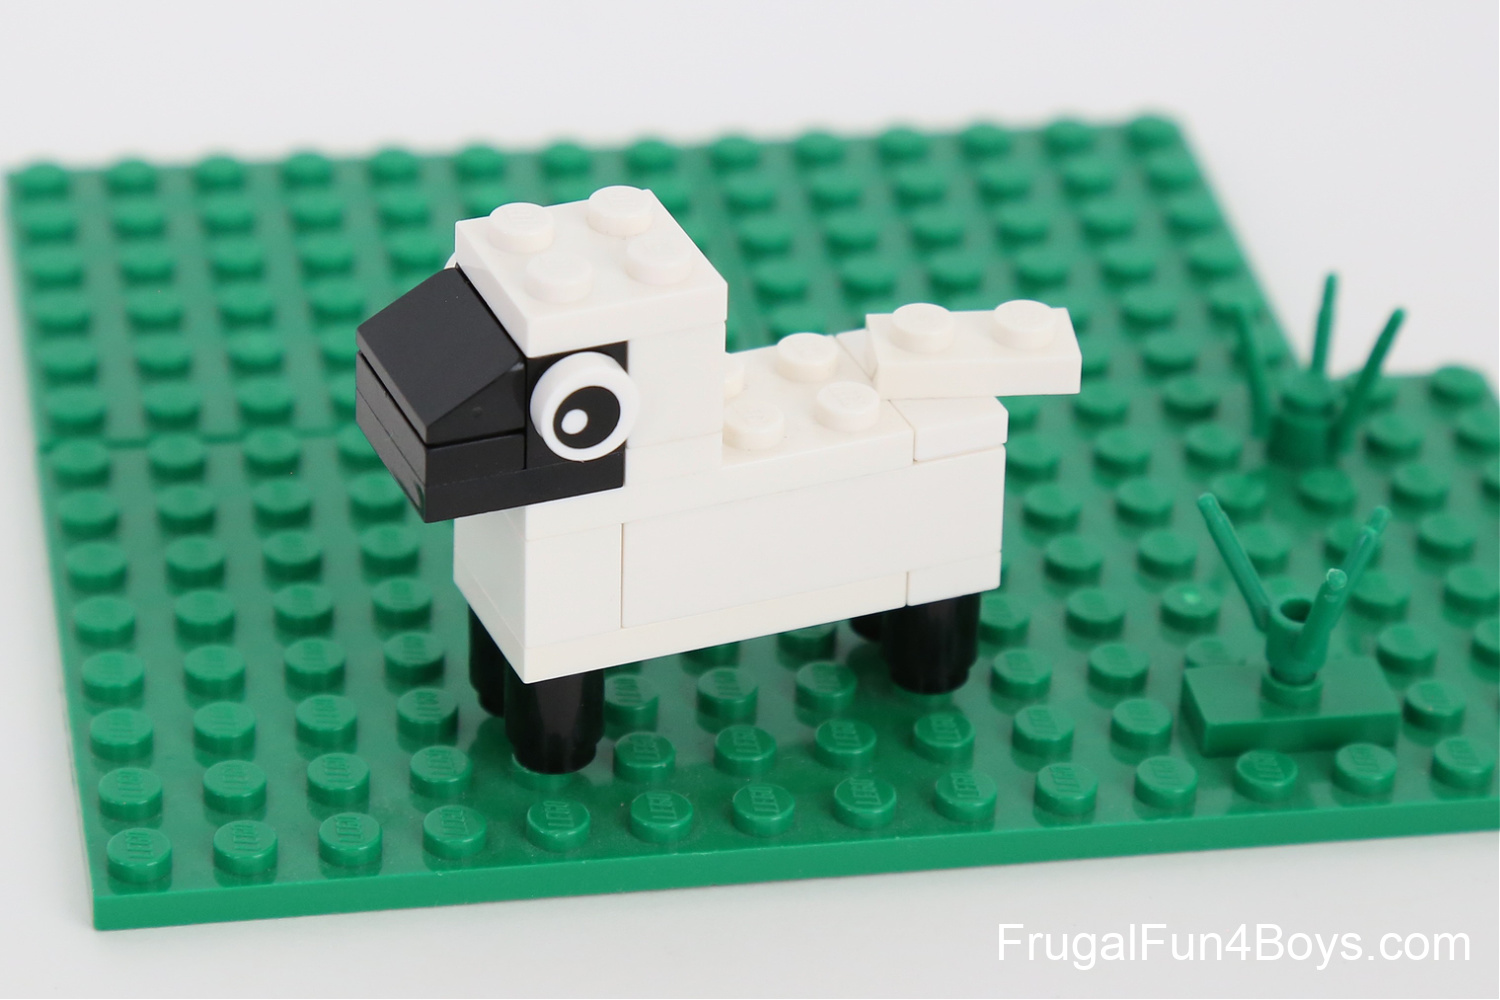
How to Build a LEGO LAMB
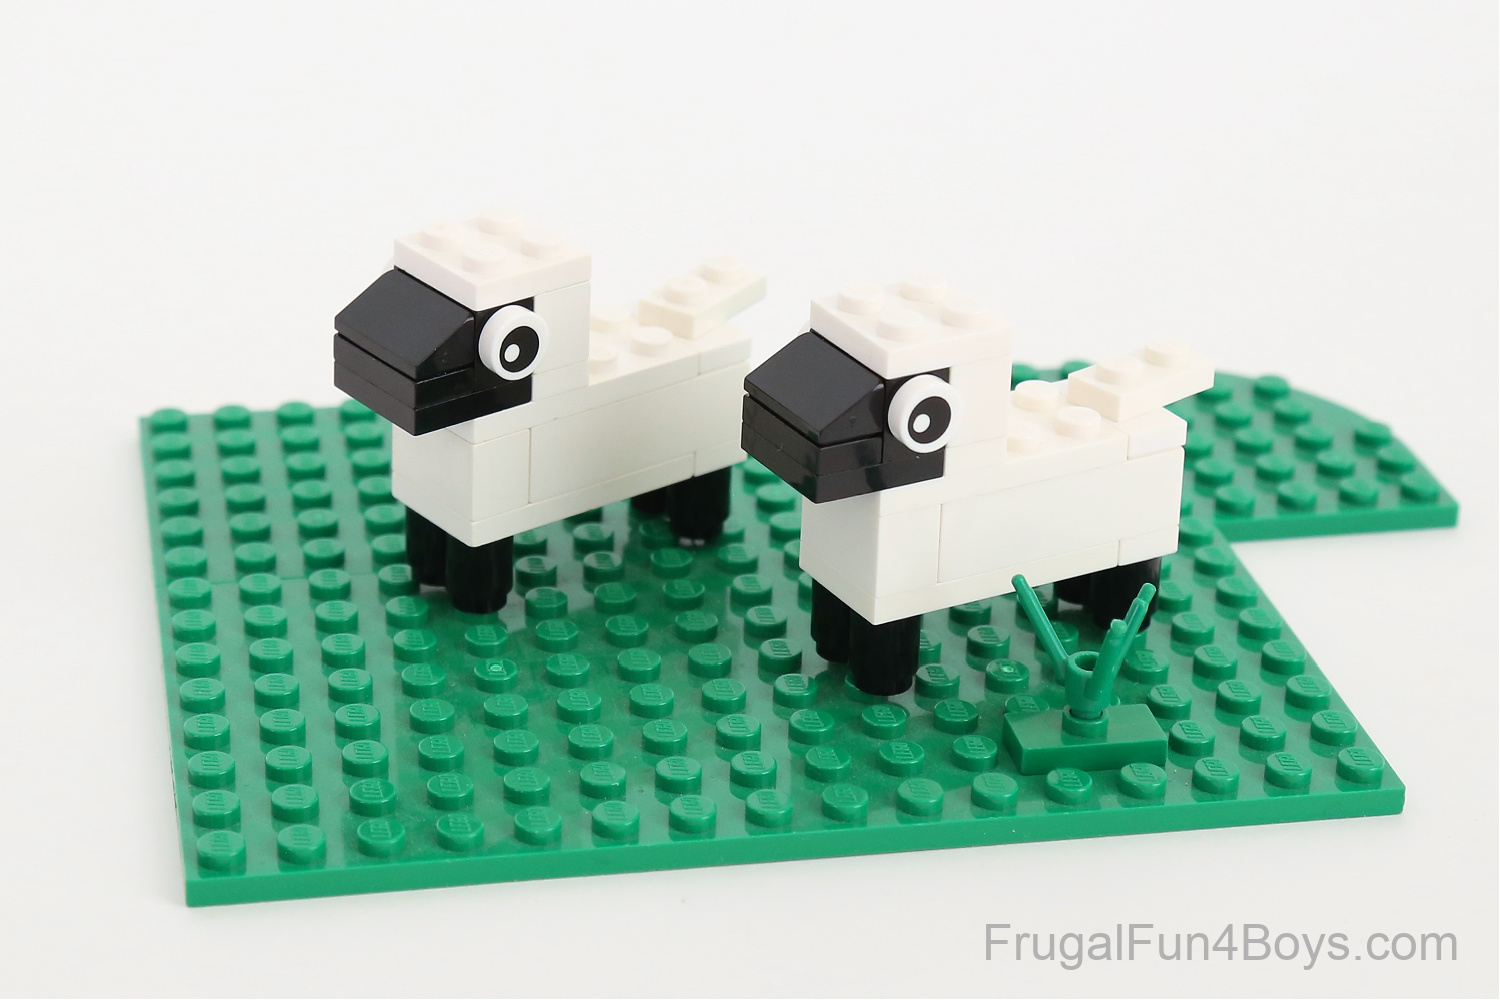
Parts List:
1 – 2 x 4 white brick
2 – 1 x 2 white bricks
2 – 2 x 4 white plates
1 – 2 x 2 white plate
3 – 1 x 2 white plates
1 – 1 x 2 white plate with one stud on top
1 – 2 x 2 black plate
1 – 1 x 2 black plate
4 – 1 x 1 black round bricks
1 – 1 x 2 black slope, 30 degree
2 – 1 x 1 black bricks with a stud on the side
2 – eyes
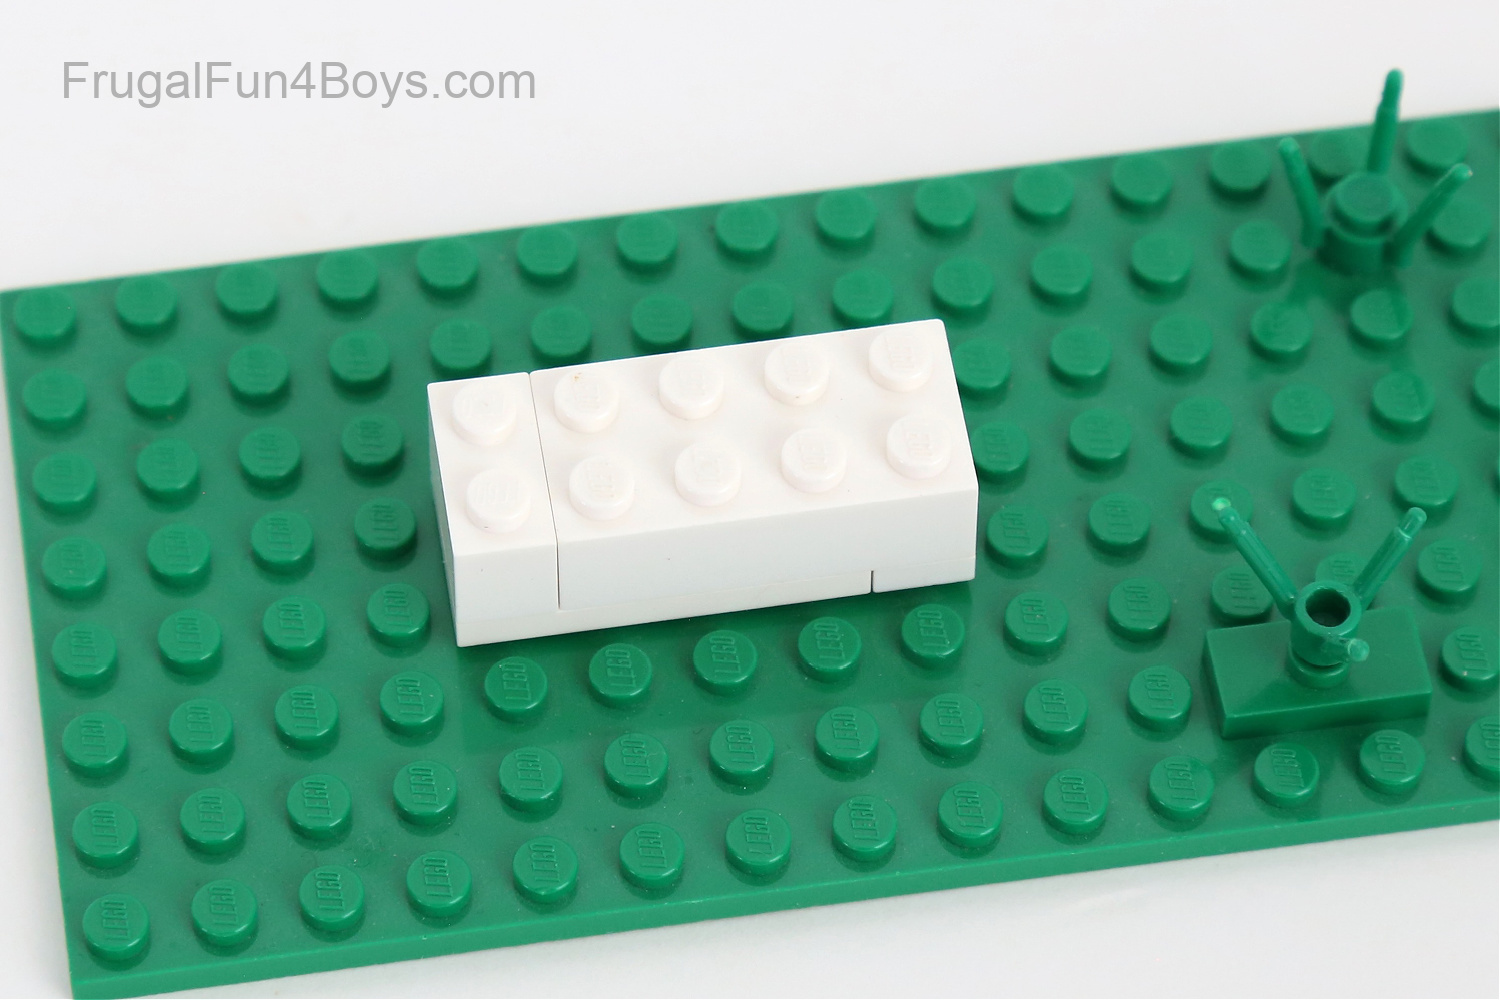
Step 1: Find a 2 x 4 white brick, a 1 x 2 brick, a 2 x 4 plate, and a 1 x 2 plate.
Step 2: Attach the two bricks to the two plates as shown.
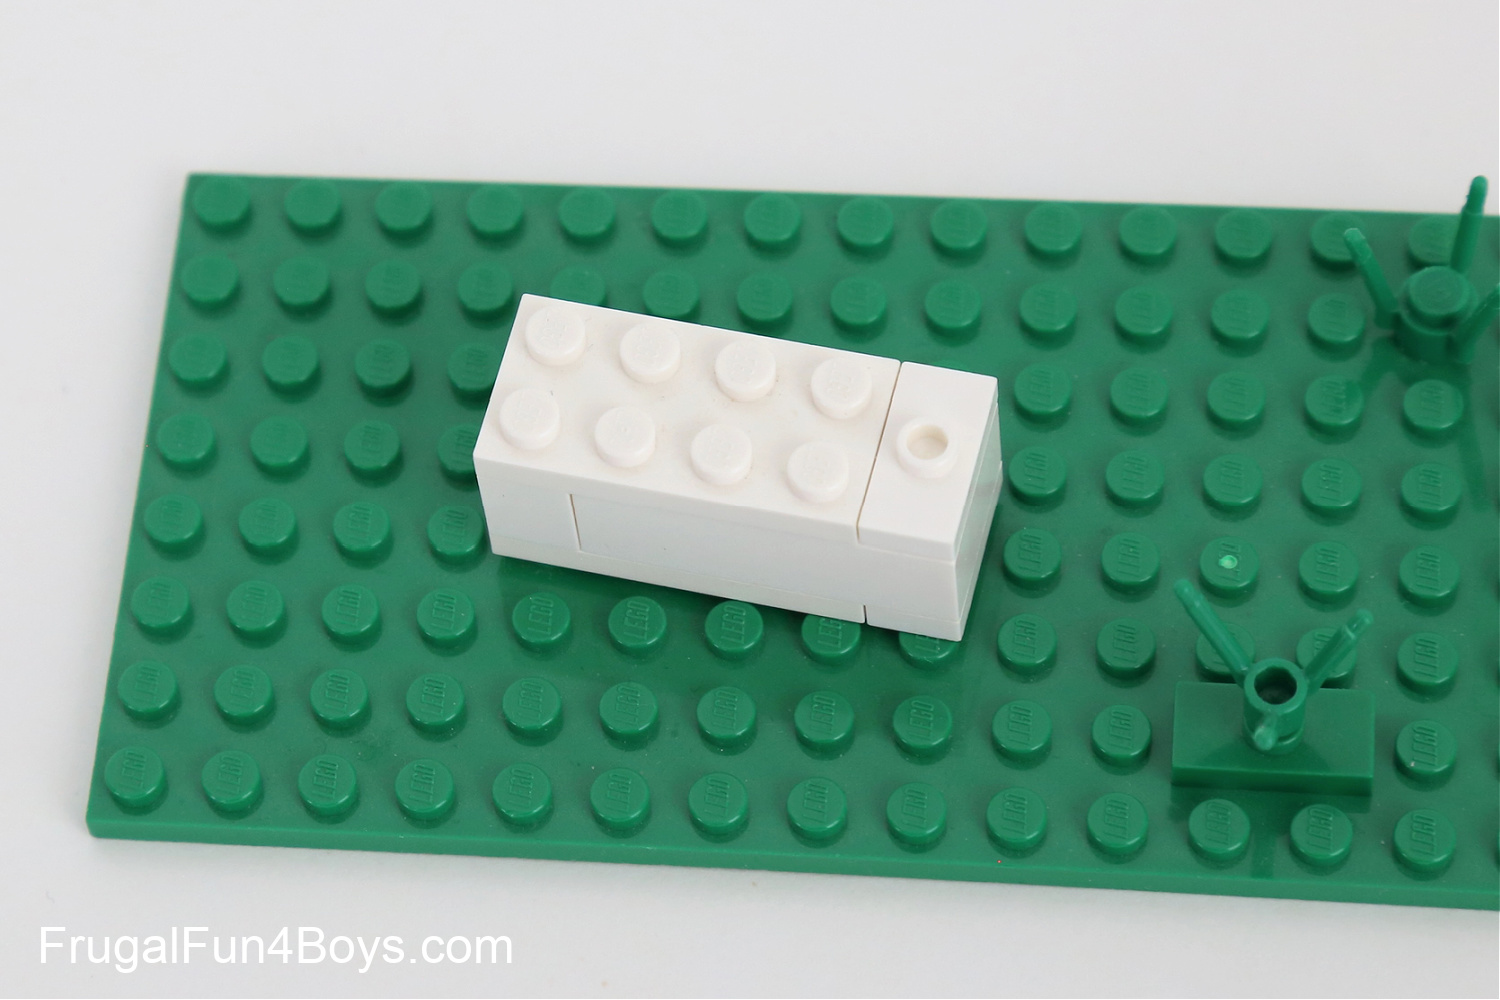
Step 3: Add a 2 x 4 white plate and a 1 x 2 white plate with one stud on top.
Step 4: Start building the head by adding a 1 x 2 white plate and a 2 x 2 black plate.
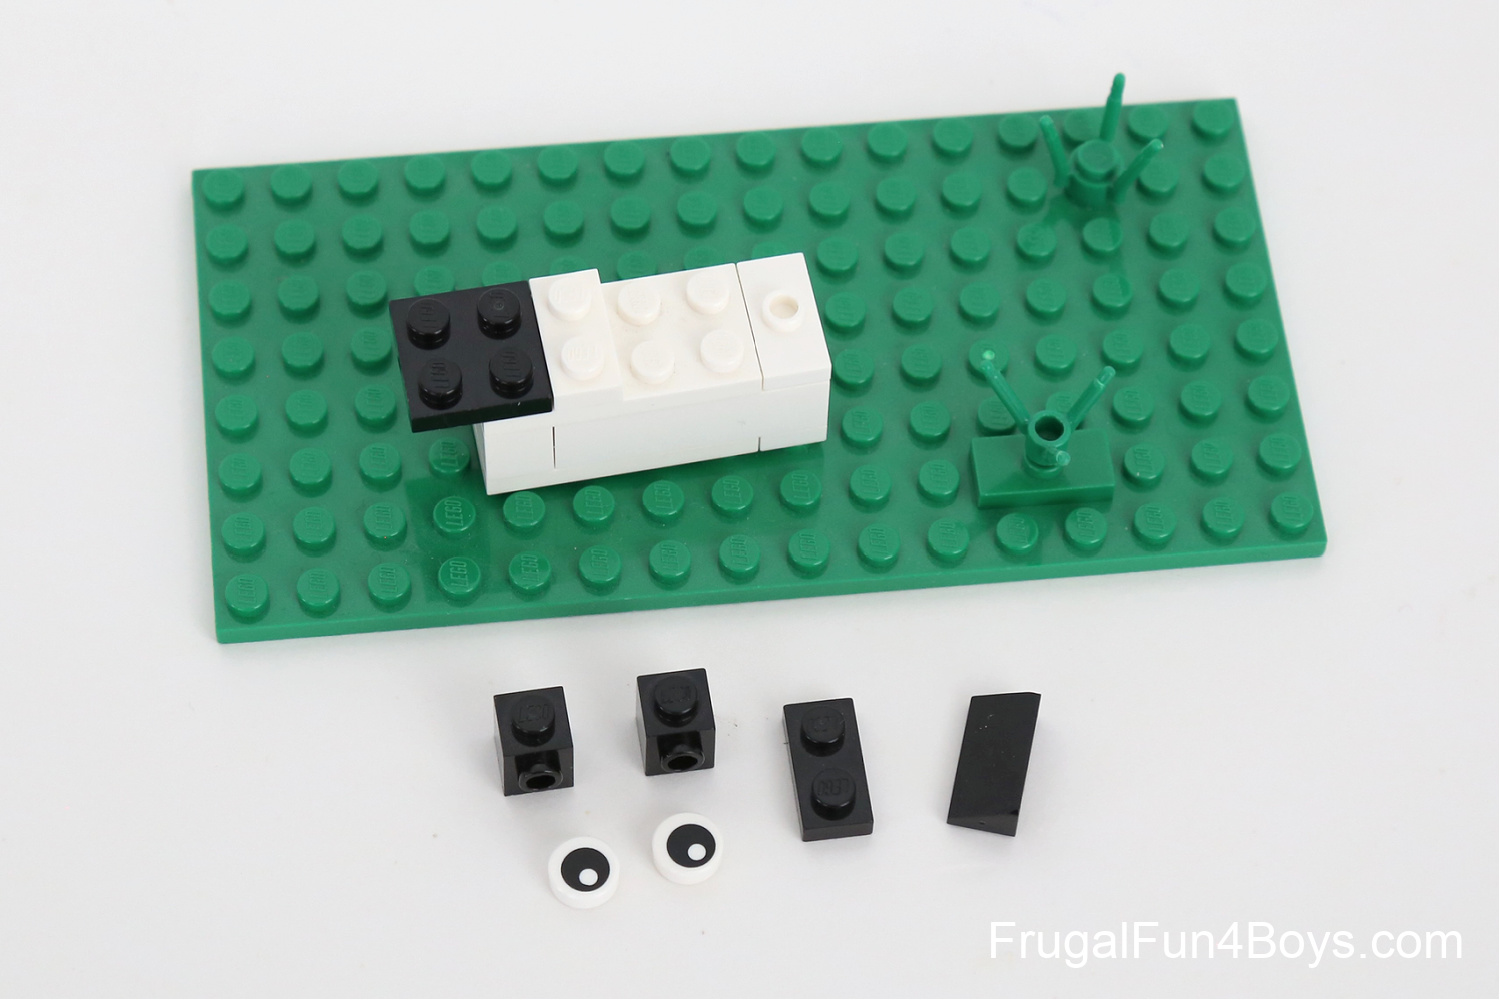
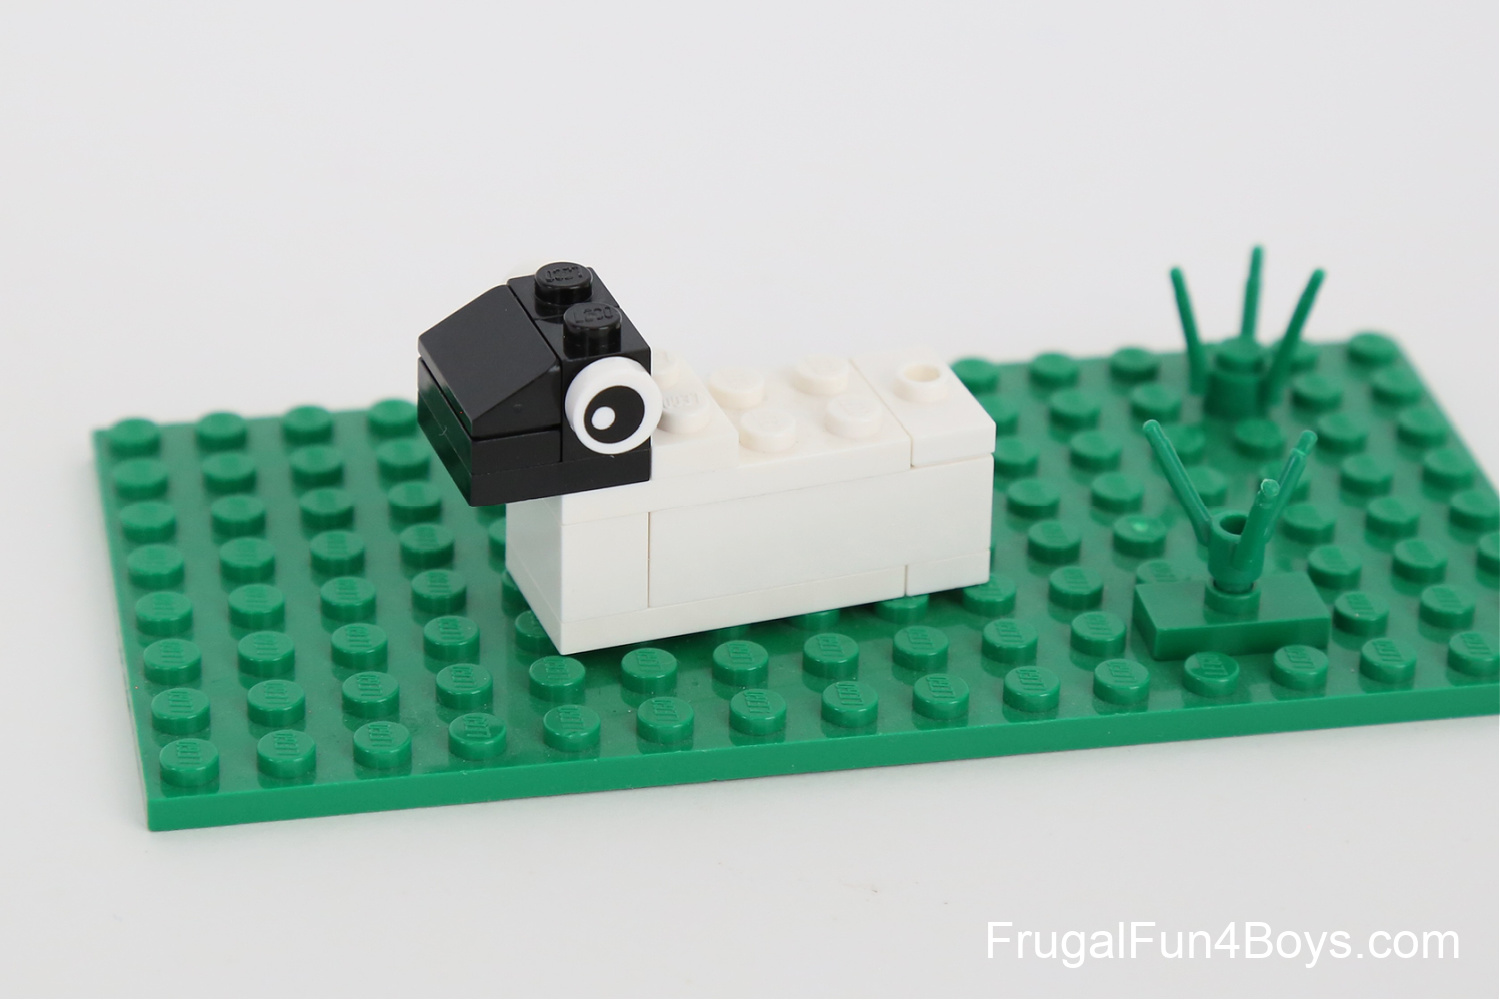
Step 5: Add two 1 x 1 bricks with a stud on the side, and then attach the eyes. Make the nose with a 1 x 2 black plate and a 1 x 2 black slope (30 degree).
Step 6: Place a 1 x 2 white brick behind the eyes and then put a 2 x 2 white plate on top of the head. Add a 1 x 2 white plate to make the tail.
Step 7: Add four 1 x 1 black round bricks for legs and your lamb is complete!
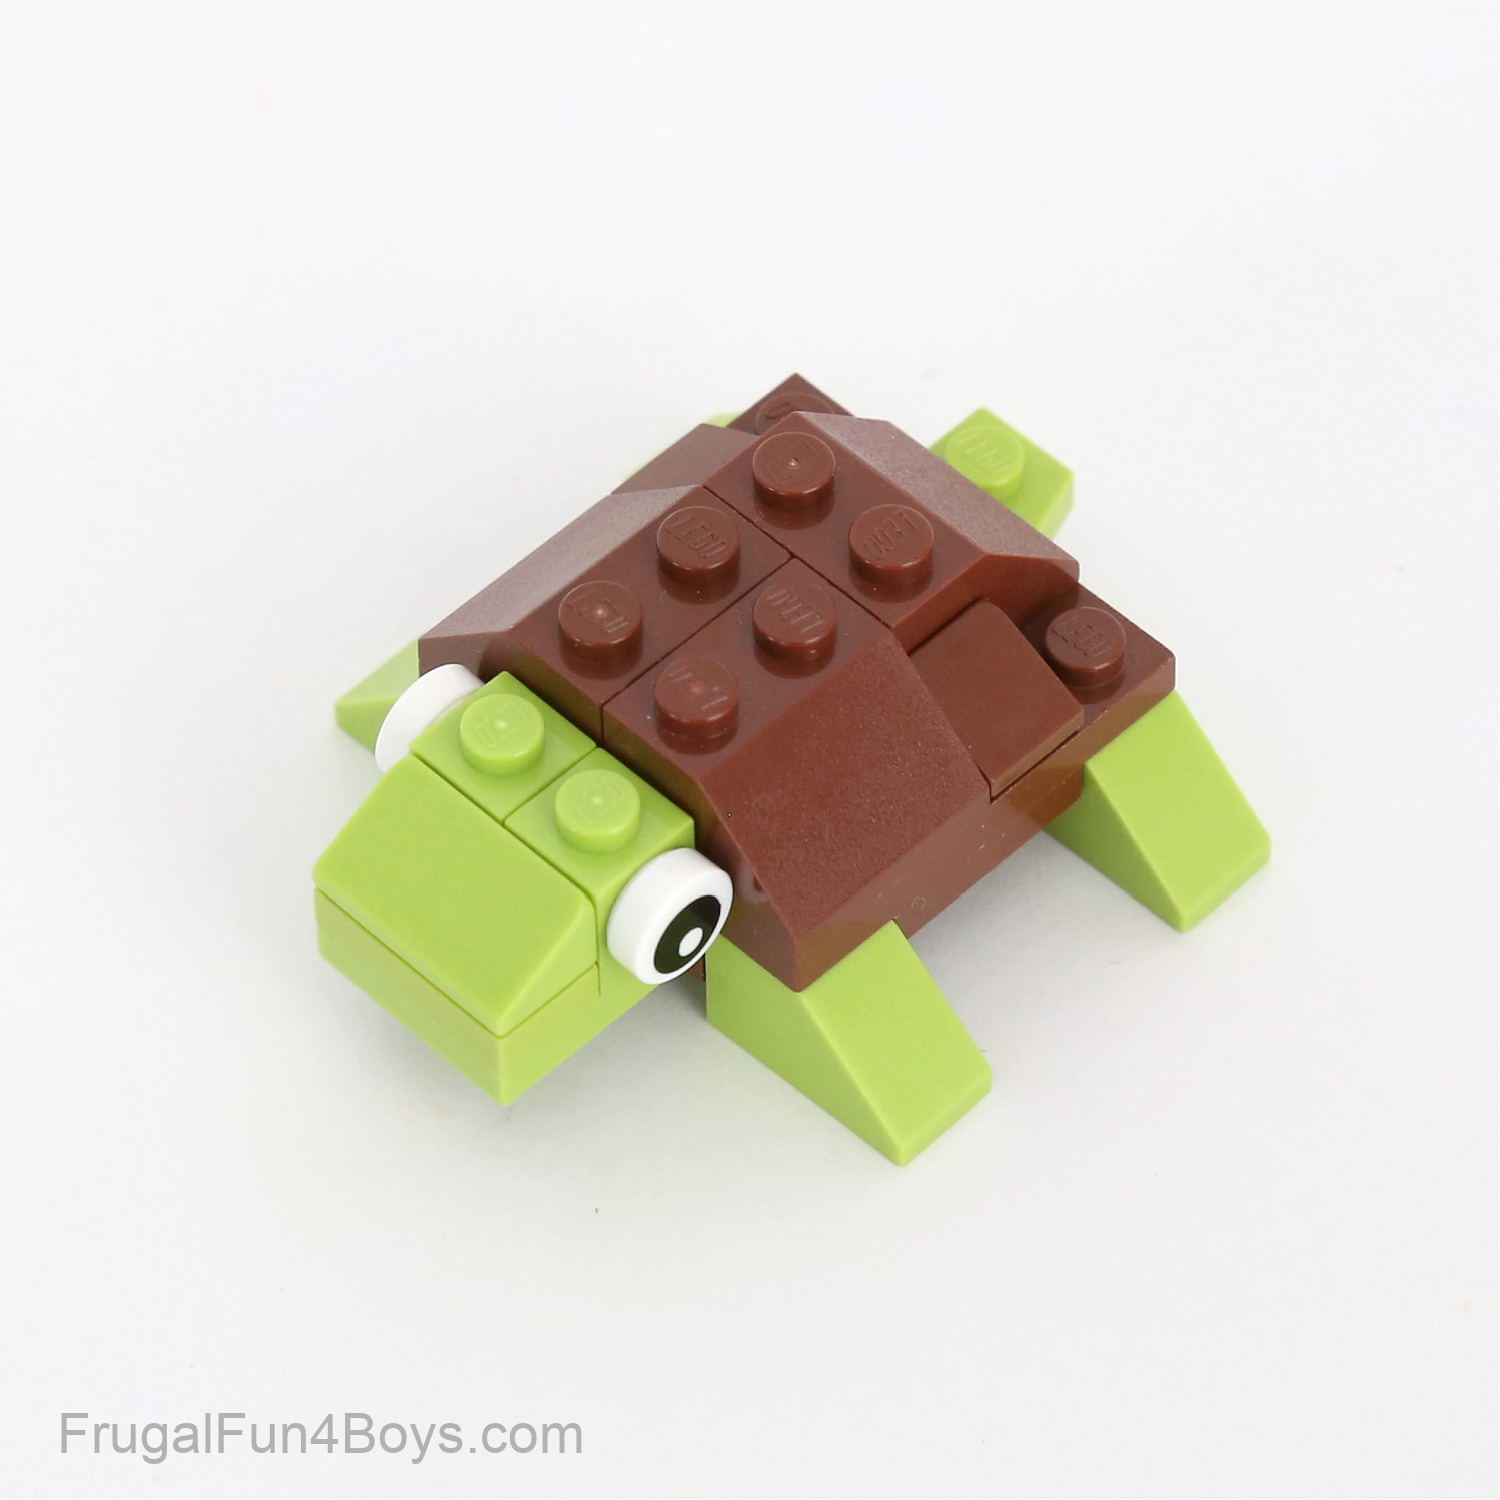
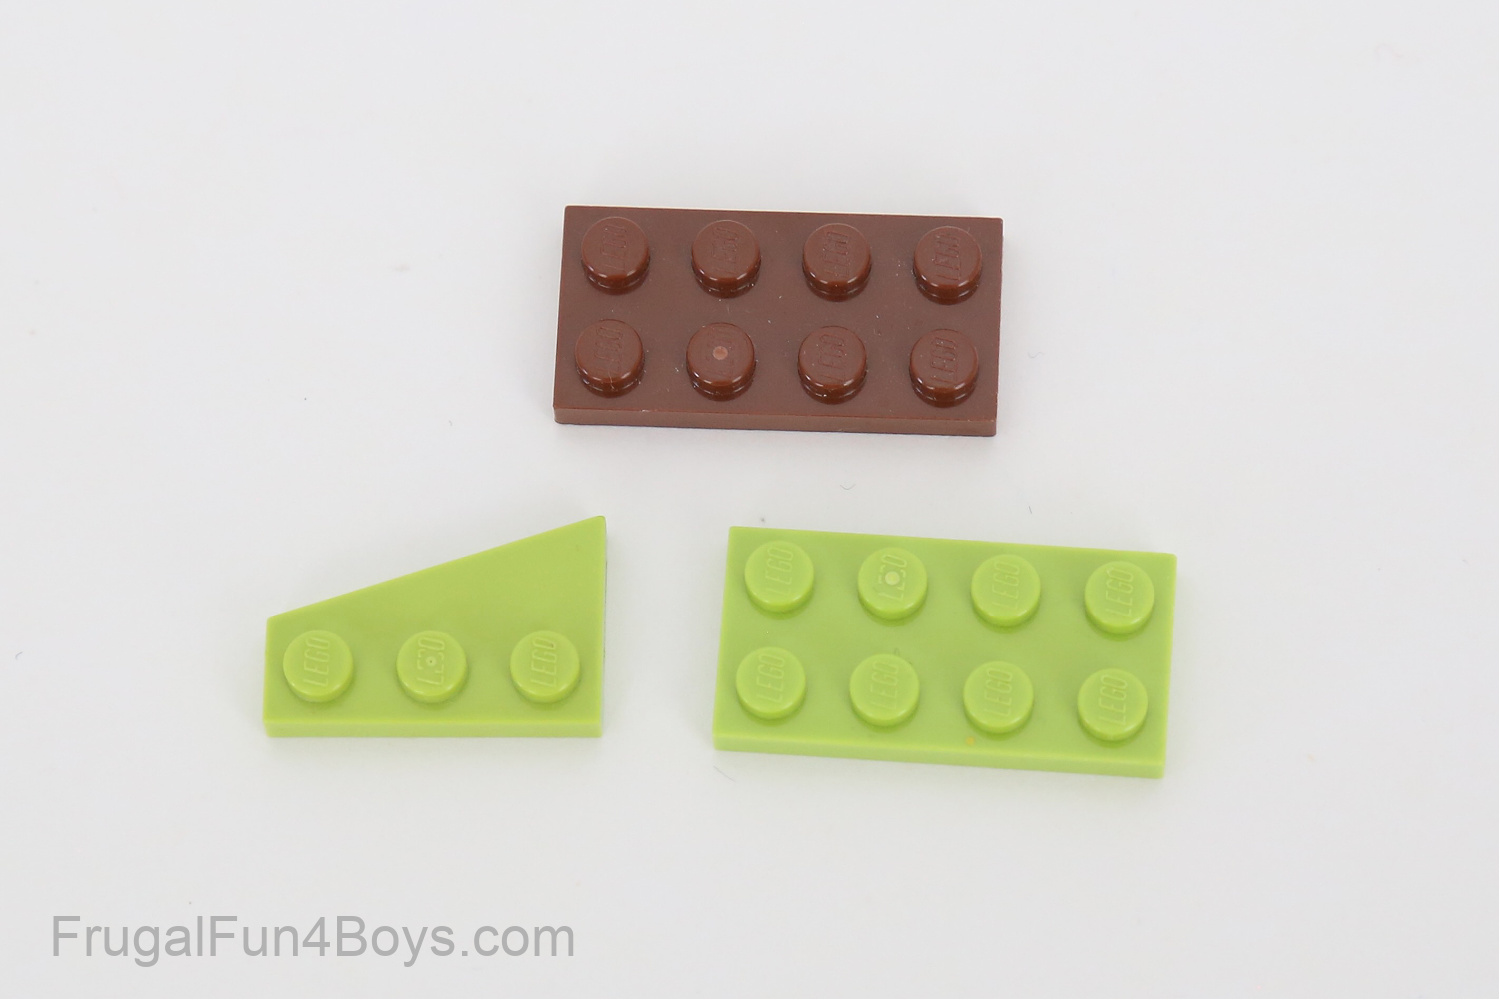
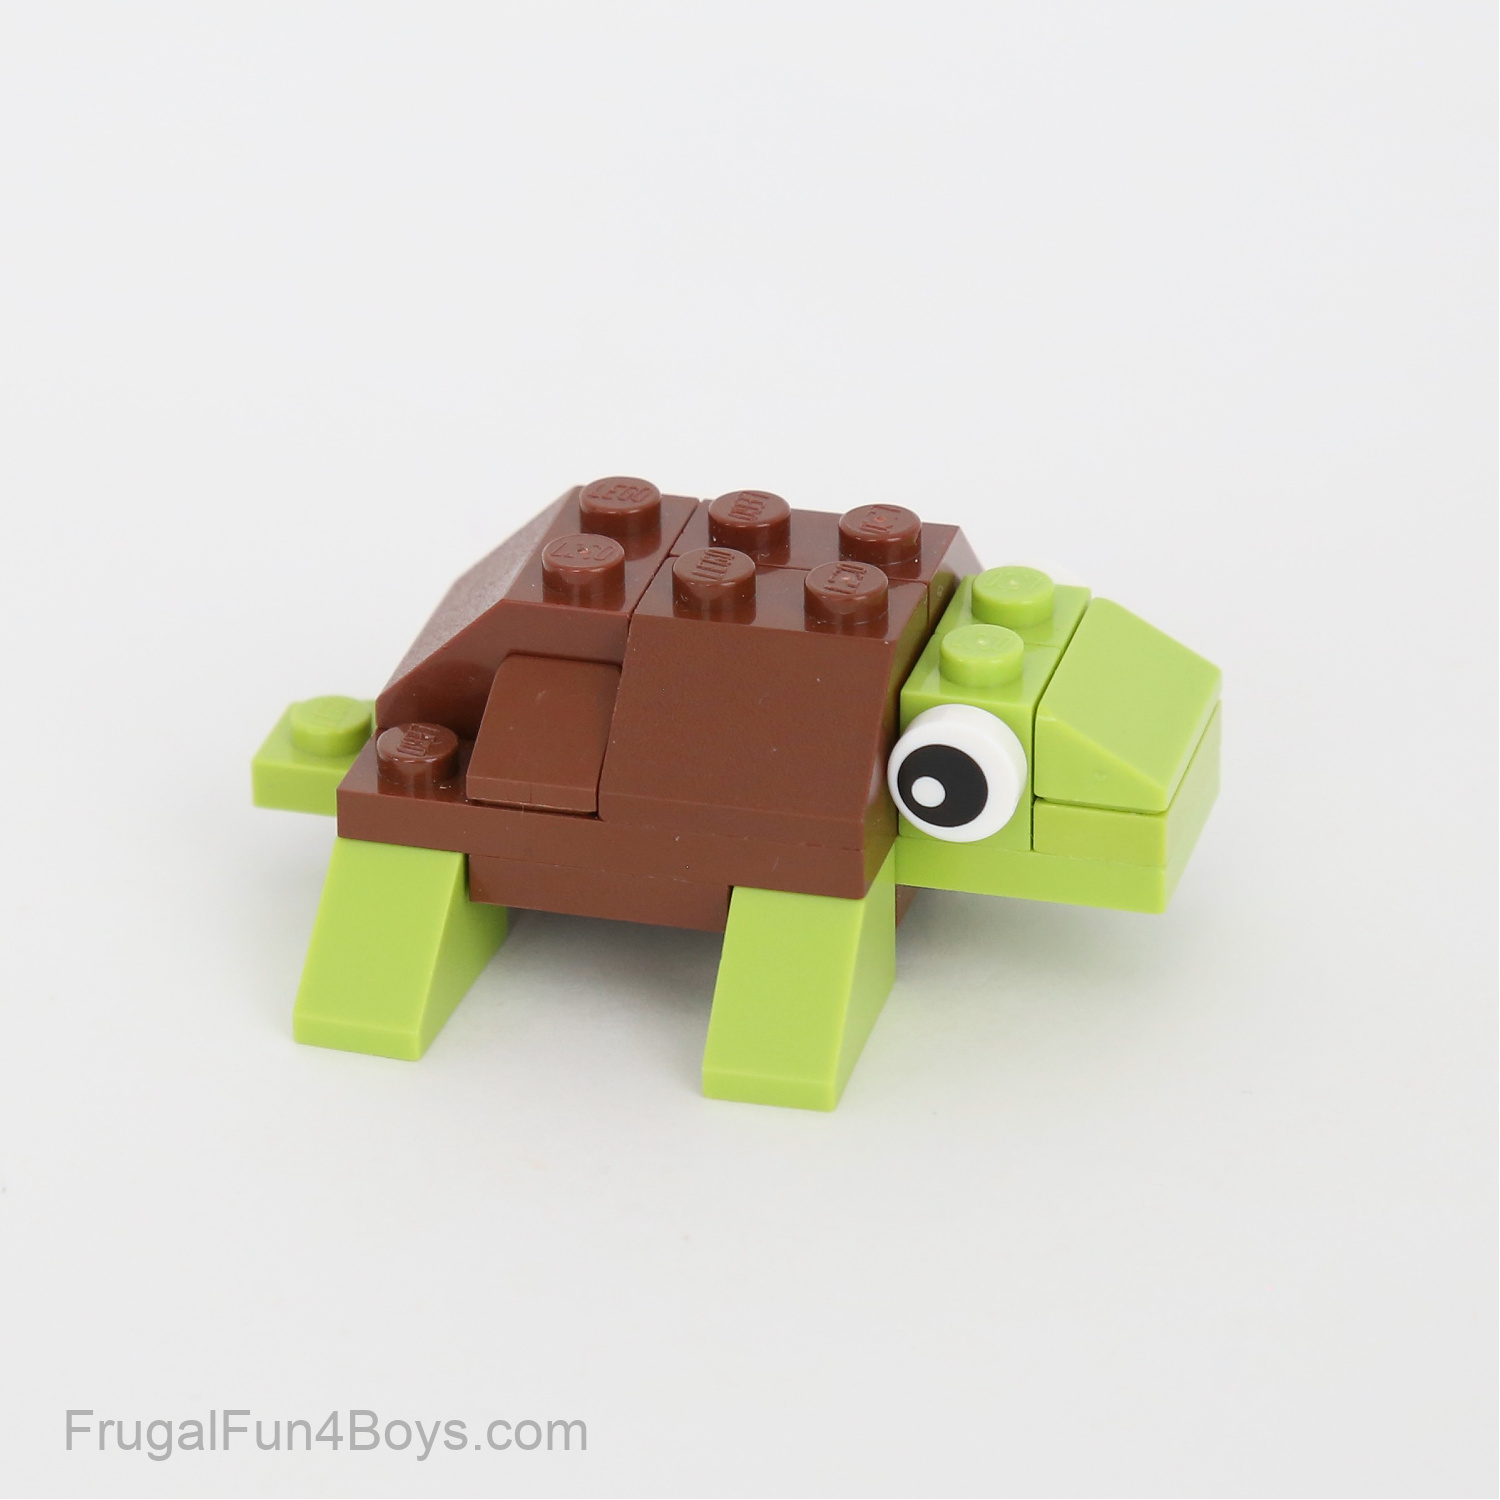
How to build a LEGO TURTLE
Parts List:
3 – 2 x 4 brown plates
3 – 2 x 2 brown slopes
2 – 1 x 1 brown slopes, 30 degree
1 – 2 x 4 lime green plate
1 – 2 x 3 lime green wedge plate (either right or left orientation, doesn’t matter)
2 – 1 x 1 lime green bricks with a stud on the side
1 – 1 x 2 slope, 30 degree
2 – eyes
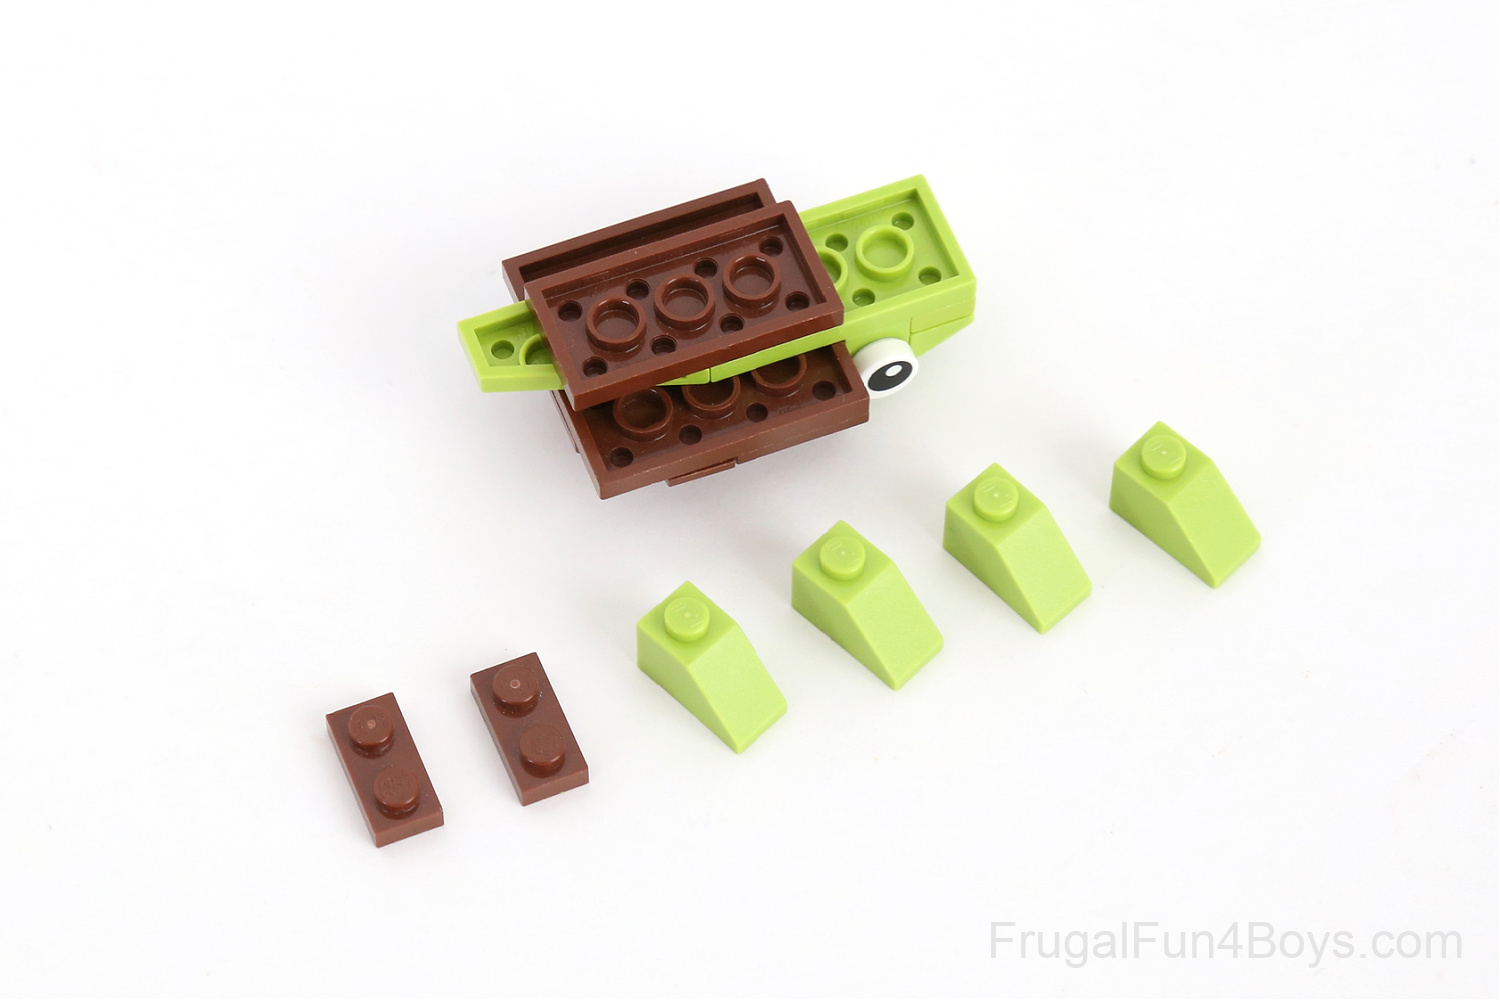
Step 1: Gather the bricks shown for building the turtle’s shell.
Step 2: Attach three 2 x 2 brown slope bricks so that they connect two 2 x 4 brown plates. Or just use a 4 x 4 brown plate if you have one. Then add two 1 x 1 slopes (30 degree).

Step 3: Find a 2 x 4 brown plate, a 2 x 4 lime green plate, and a 2 x 3 lime green wedge plate.
Step 4: Place the two lime green plates on top of the 2 x 4 brown plate as shown. Then find two 1 x 1 lime green bricks with a stud on the side, a 1 x 2 lime green slope (30 degree), a 1 x 2 lime green plate, and two eyes.
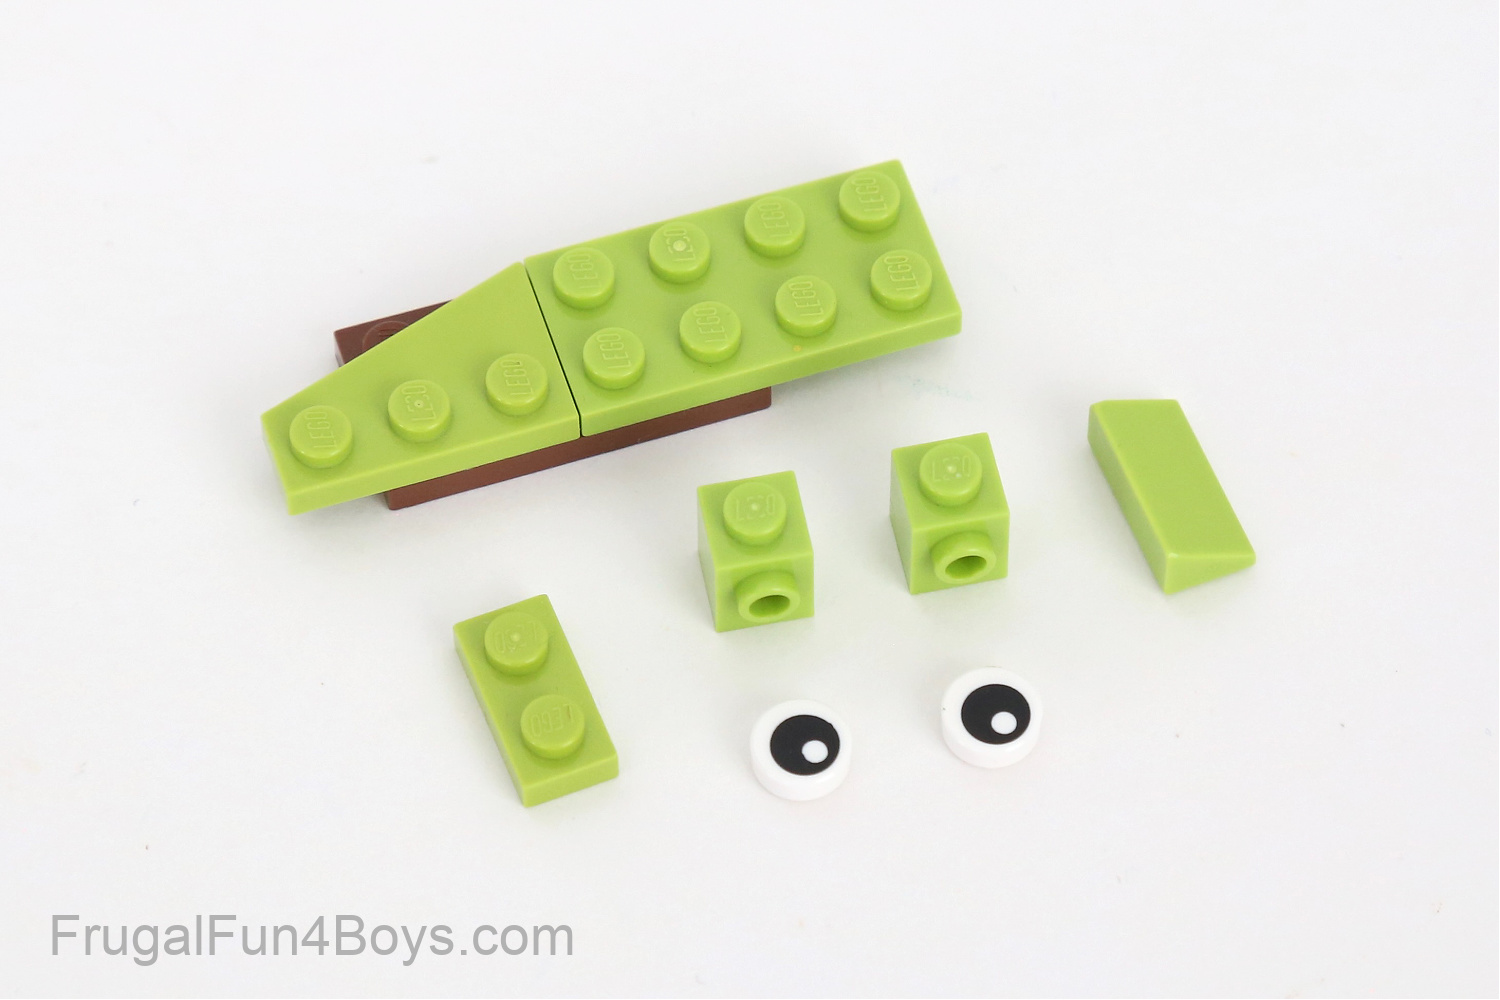
Step 5: Build the head by placing a 1 x 2 plate and a 1 x 2 slope on the front. Then add two 1 x 1 bricks with a stud on the side. Attach the eyes.
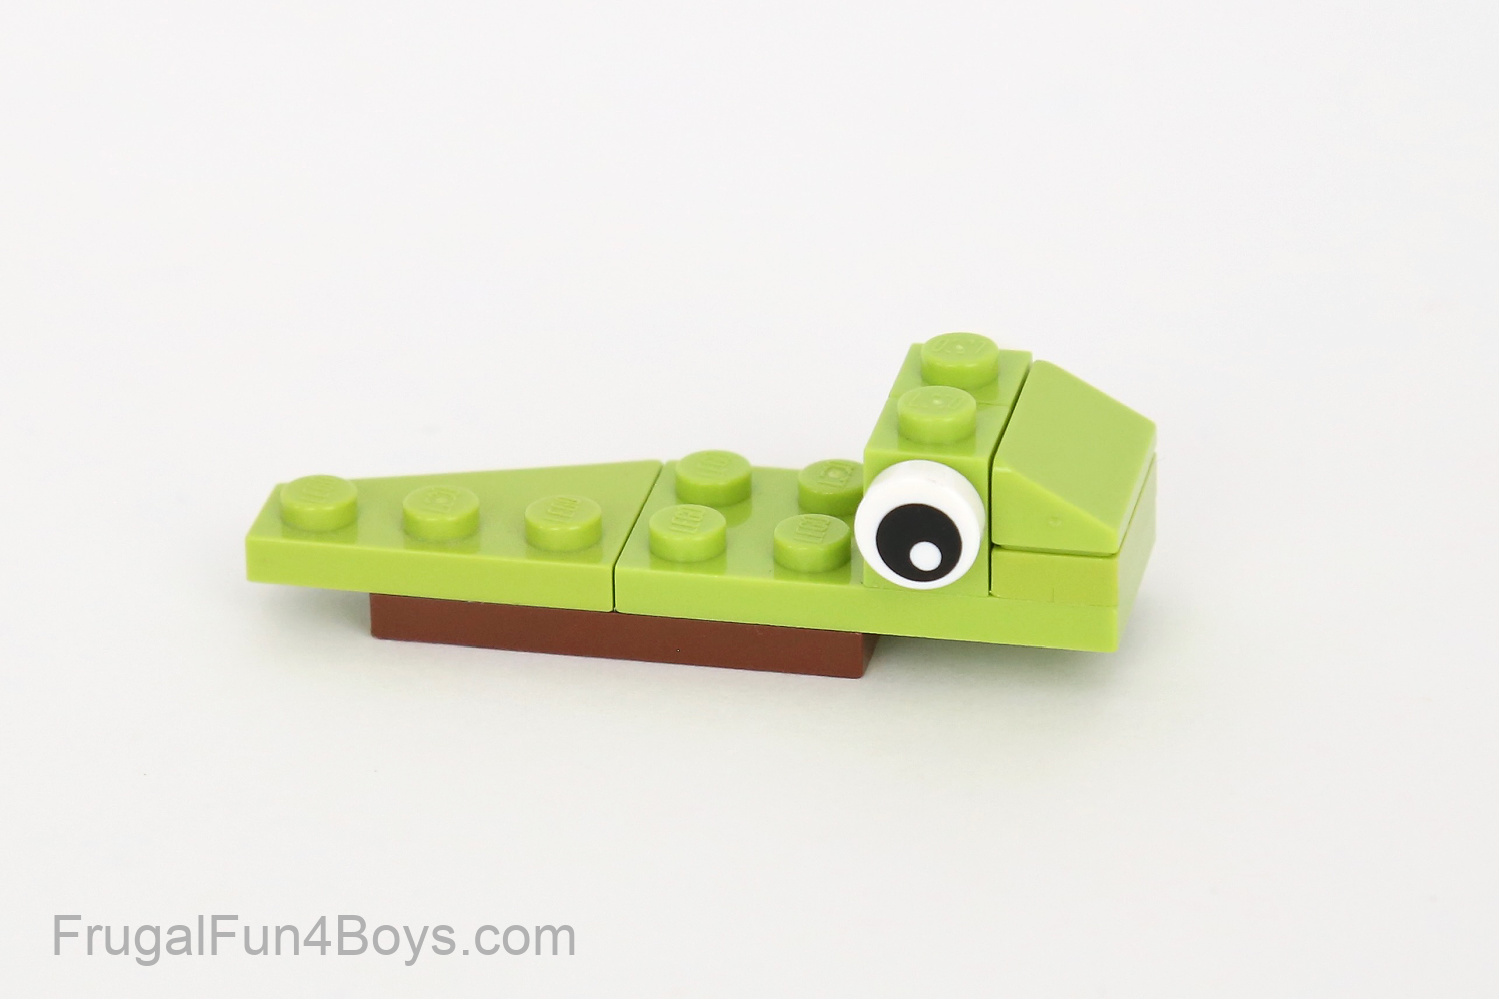
Step 6: Attach the shell to the body.
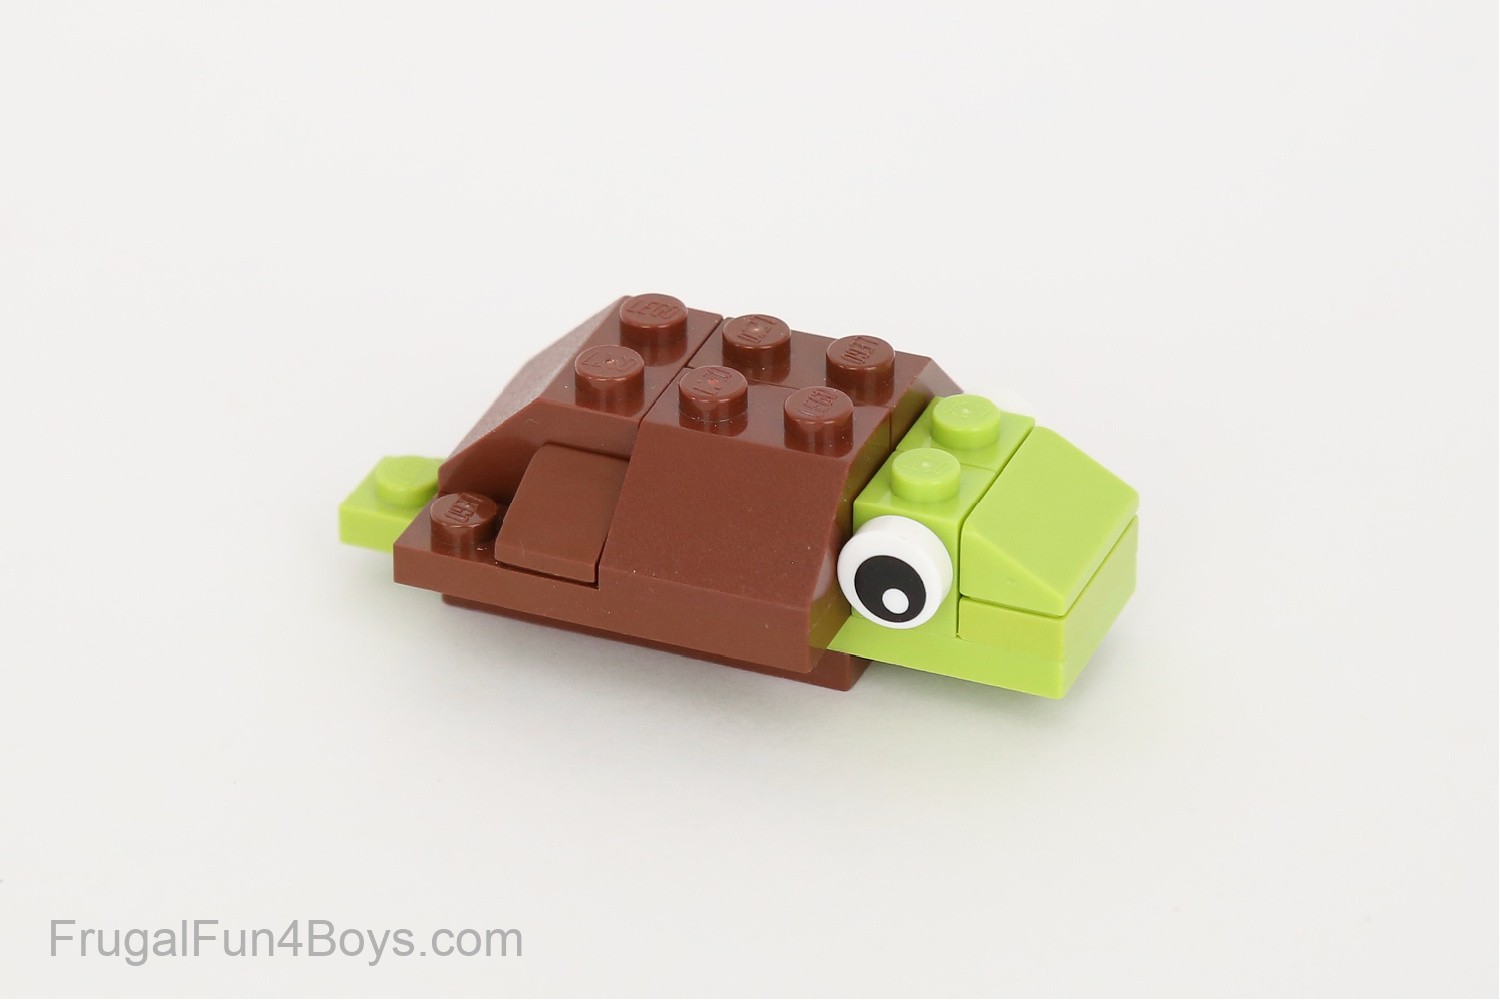
Step 7: Turn the turtle upside down. Then find two 1 x 2 brown plates and four 1 x 2 lime green slopes.
Step 8: Place one brown 1 x 2 plate on each side. Then add the feet and your turtle is complete!
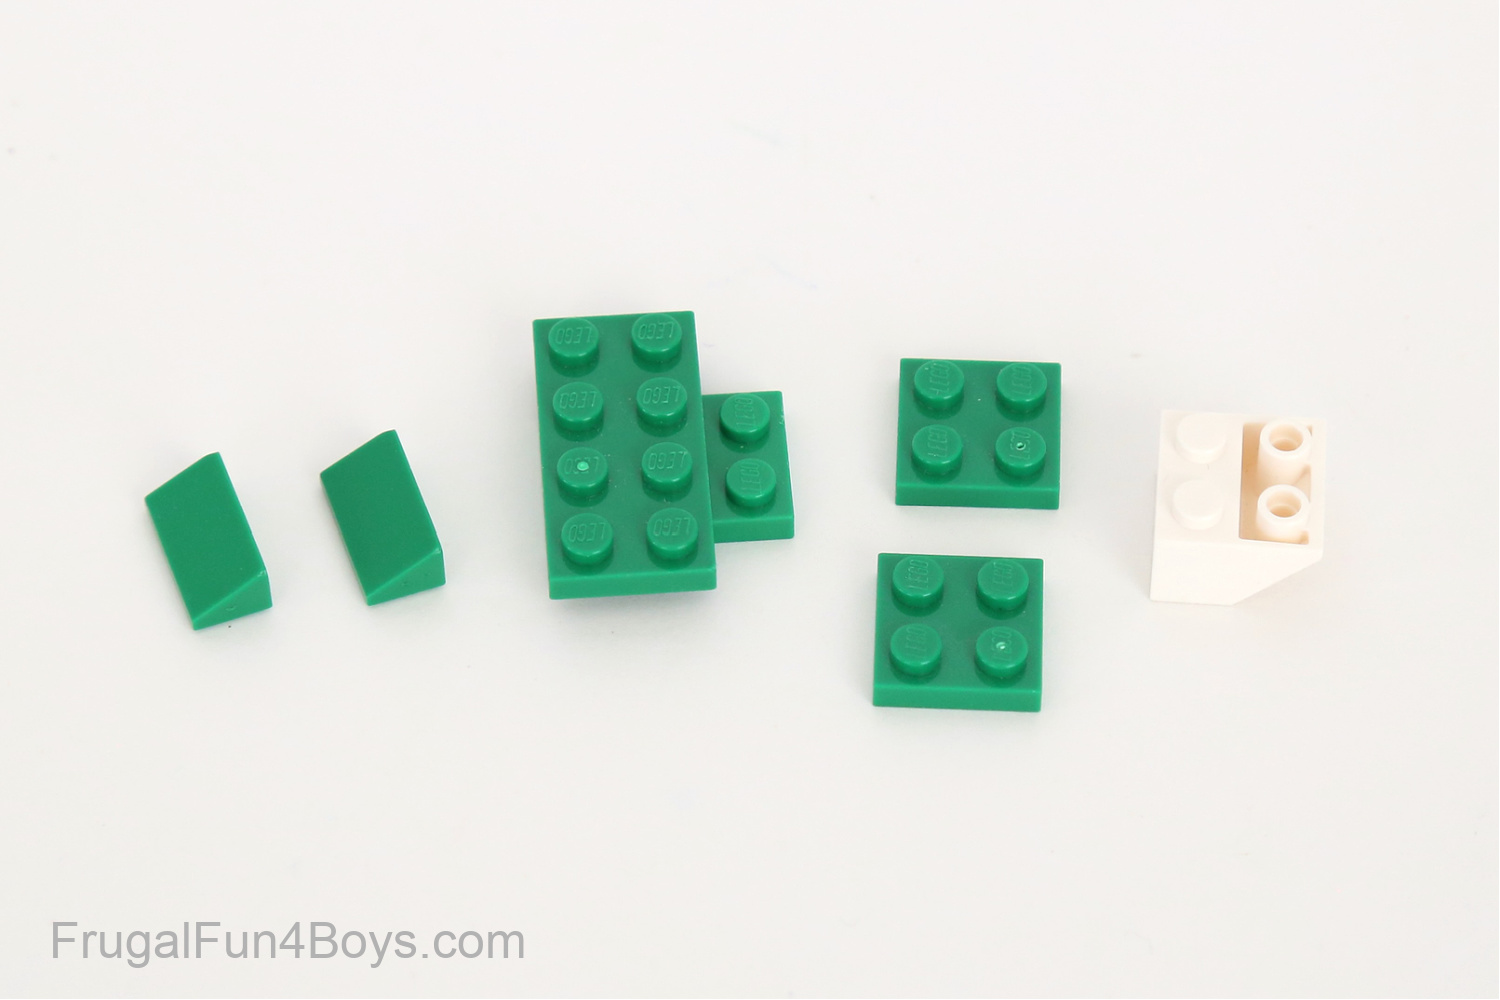
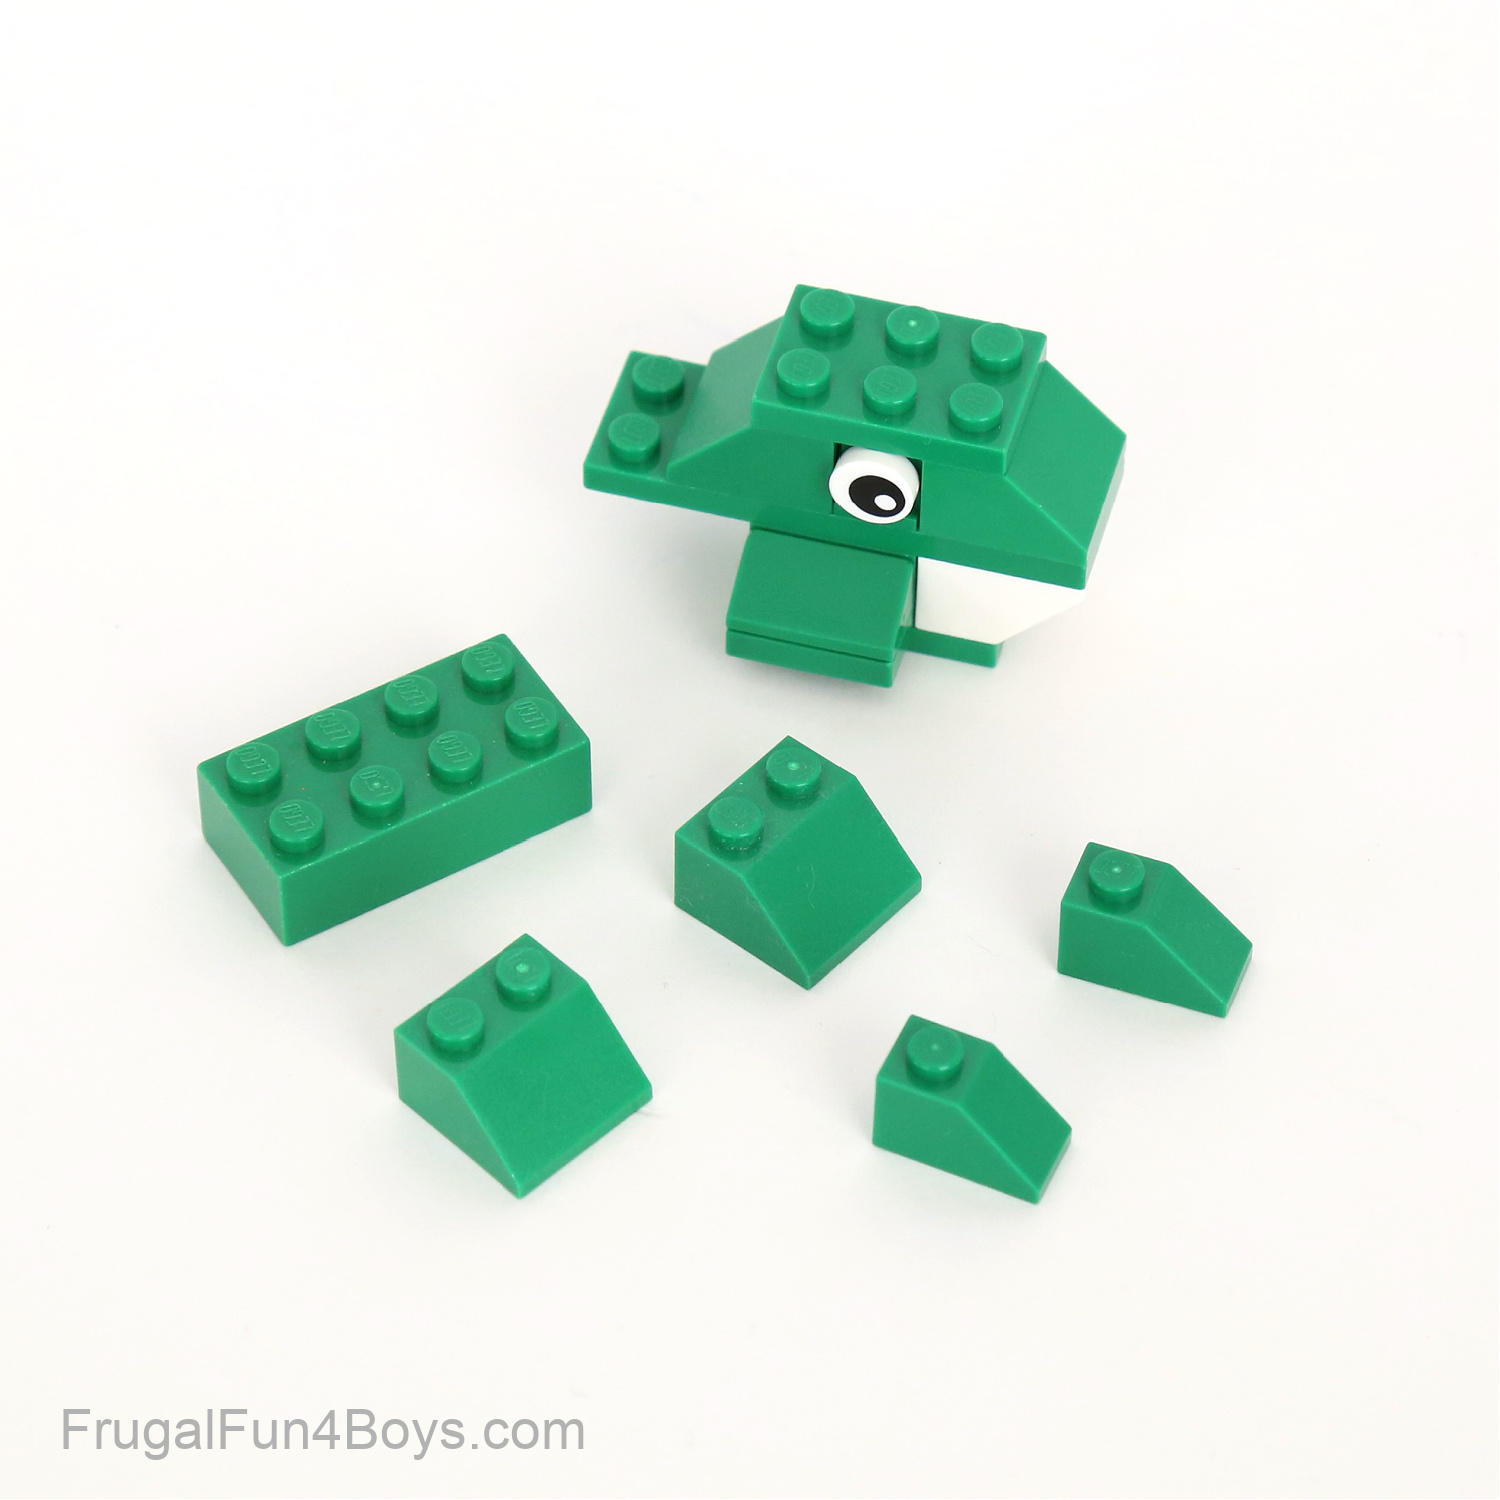
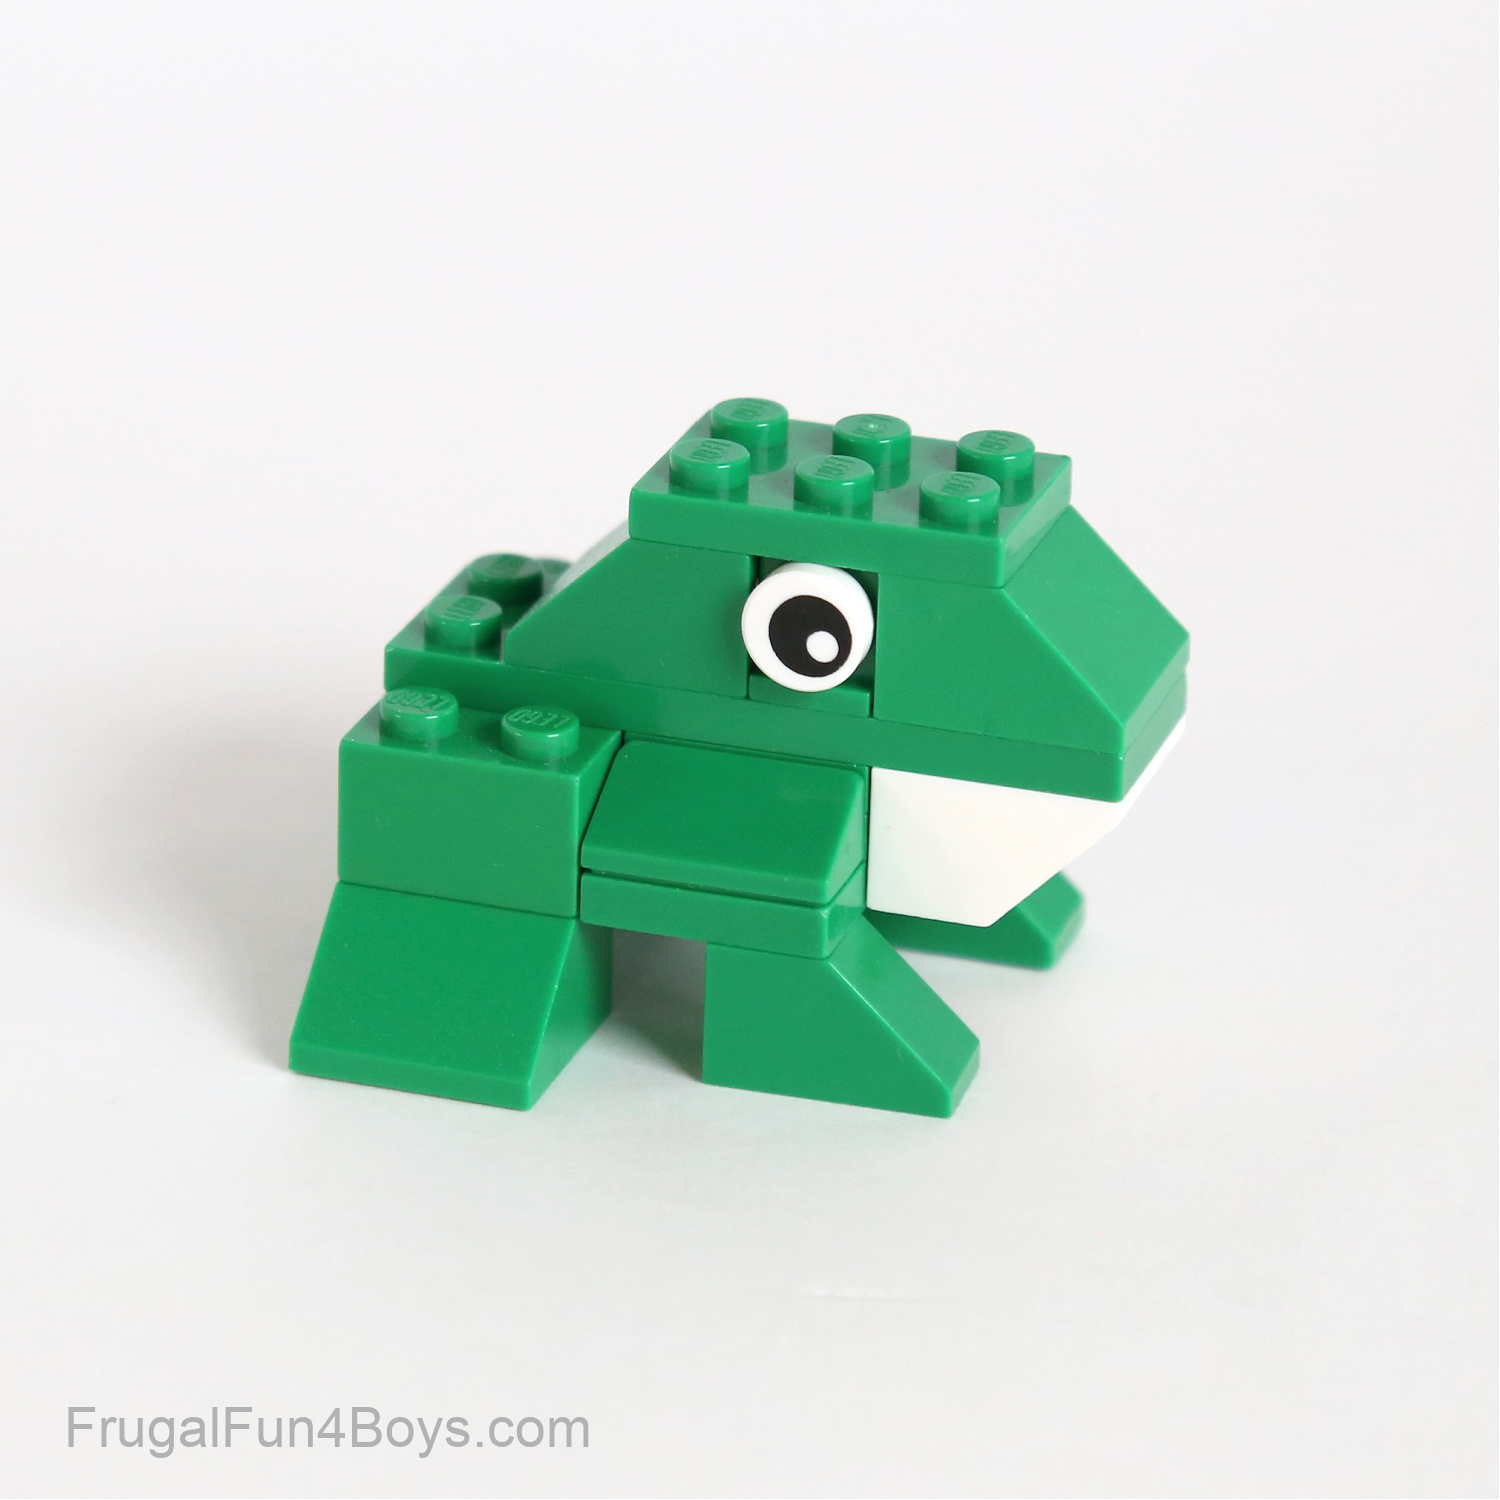
How to Build a LEGO FROG
Parts List:
1 – 2 x 4 green brick
4 – 2 x 2 green slopes
2 – 1 x 2 green slopes
1 – 2 x 6 green plate
1 – 2 x 4 green plate
2 – 2 x 3 green plates
2 – 2 x 2 green plates
2 – 1 x 1 green bricks with a stud on the side (these are the headlight type but either kind will work)
2 – 1 x 2 green slopes, 30 degree
1 – 2 x 2 white inverted slope
2 – eyes
Step 1: Gather the bricks shown.
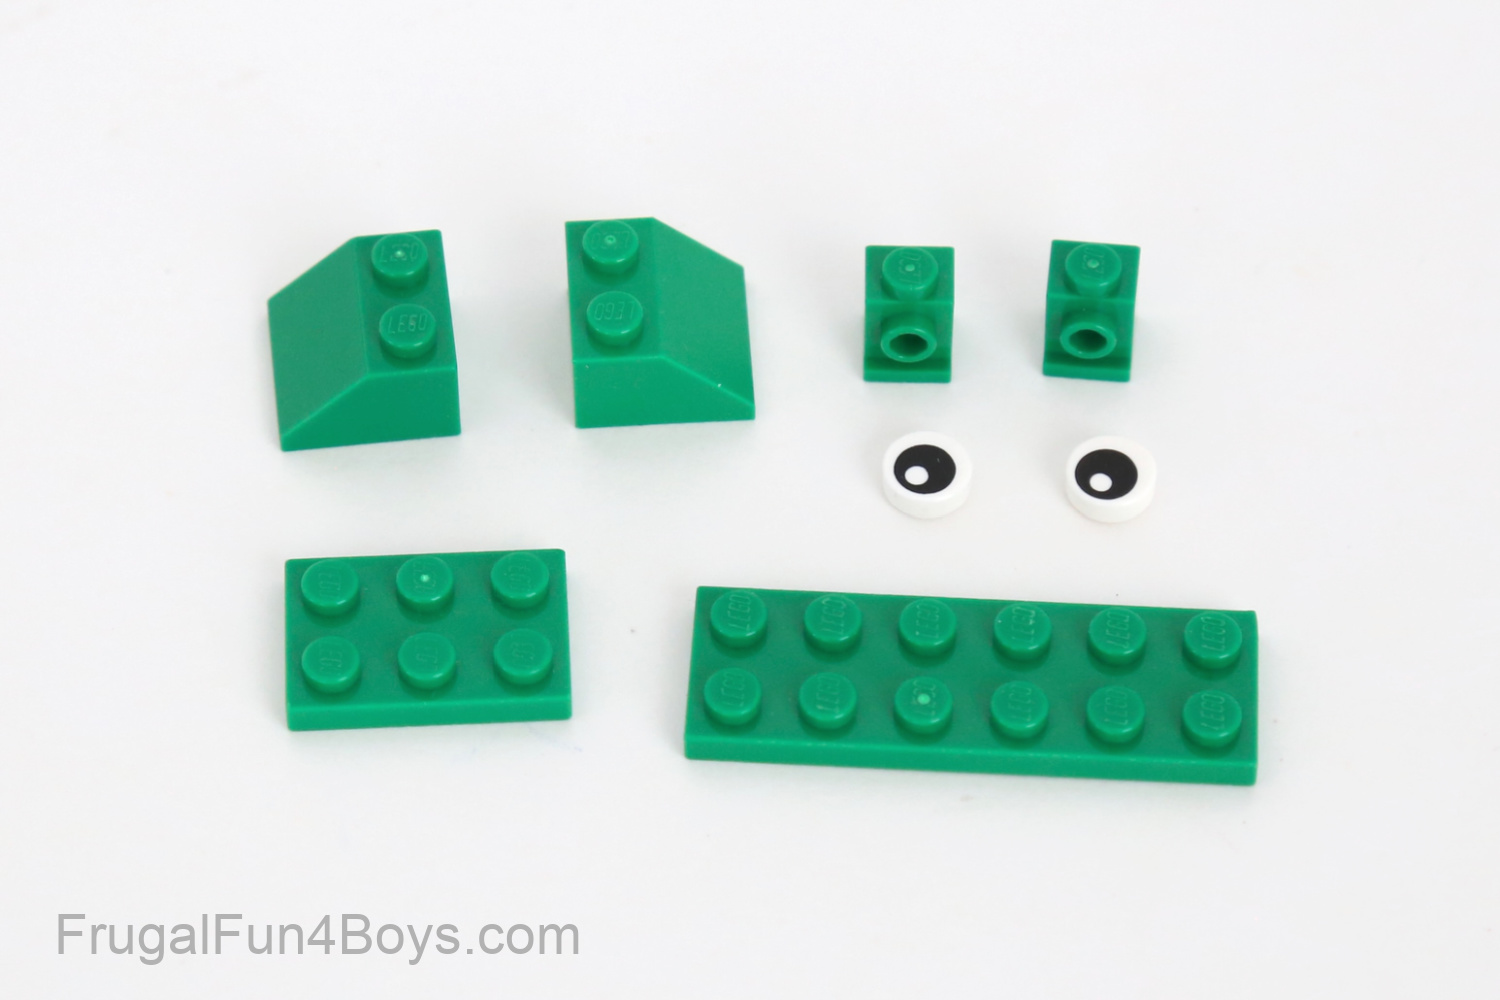
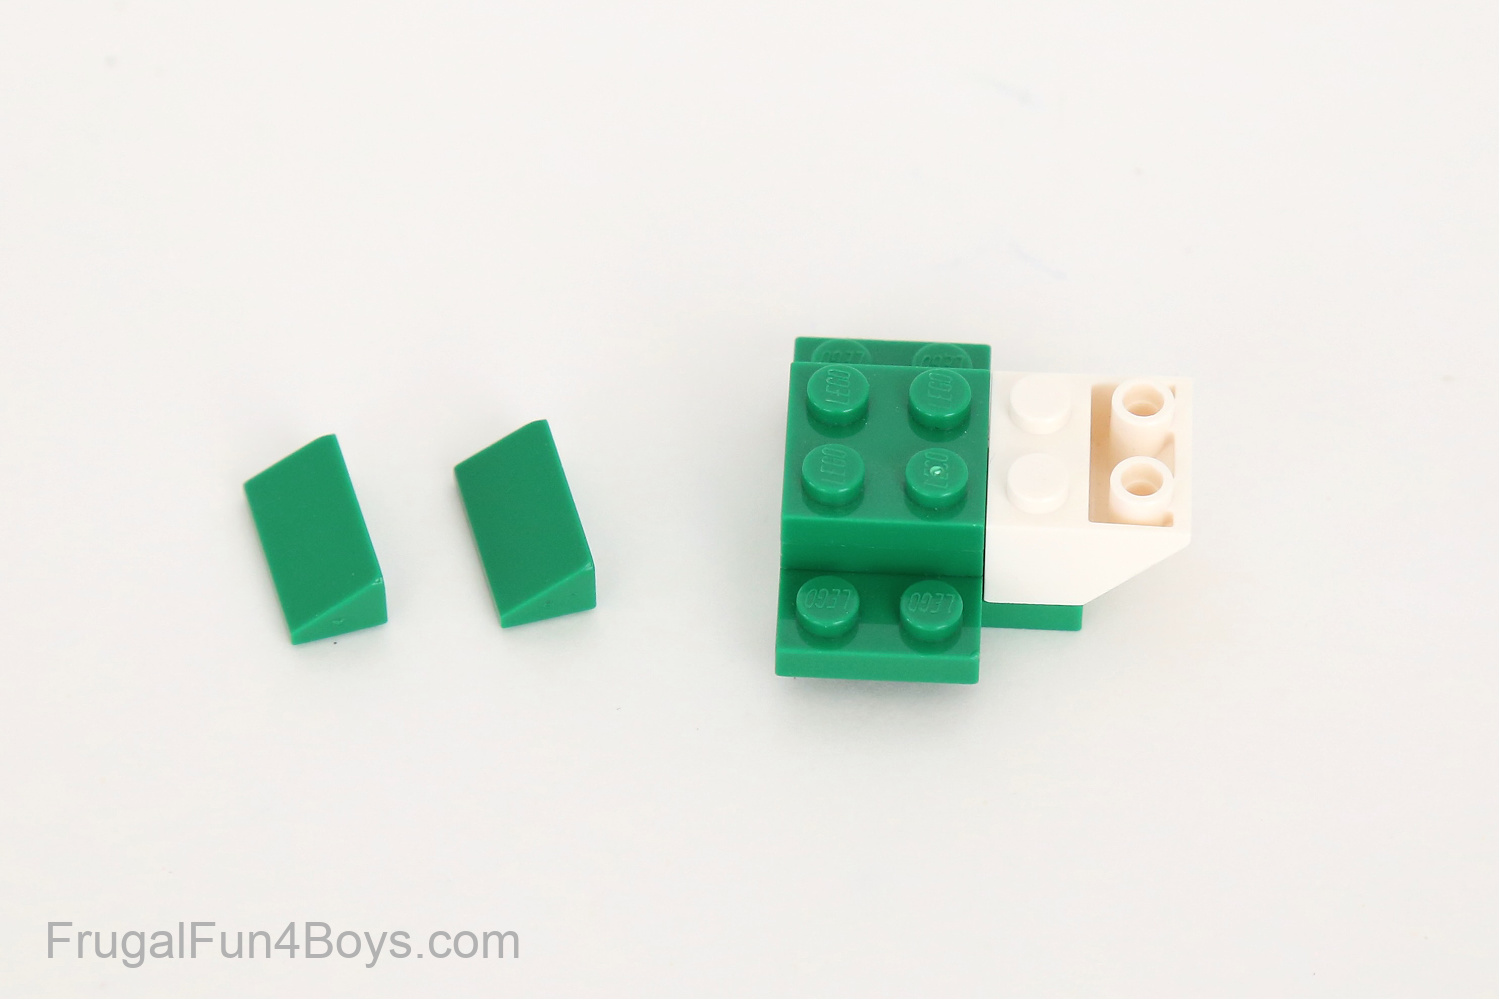
Step 2: Attach two 2 x 2 green slope bricks to the 2 x 6 plate, with the eyes in between. Each eye is attached to a 1 x 1 green brick with a stud on the side.

Step 3: Find the bricks shown for building the frog’s body.

Step 4: Connect a 2 x 4 green plate to a 2 x 3 green plate as shown.
Step 5: Add two 2 x 2 green plates to the 2 x 4 plate. Then place a 2 x 2 white inverted slope next to them.
Step 6: Place one 1 x 2 green slope (30 degree) on each side.
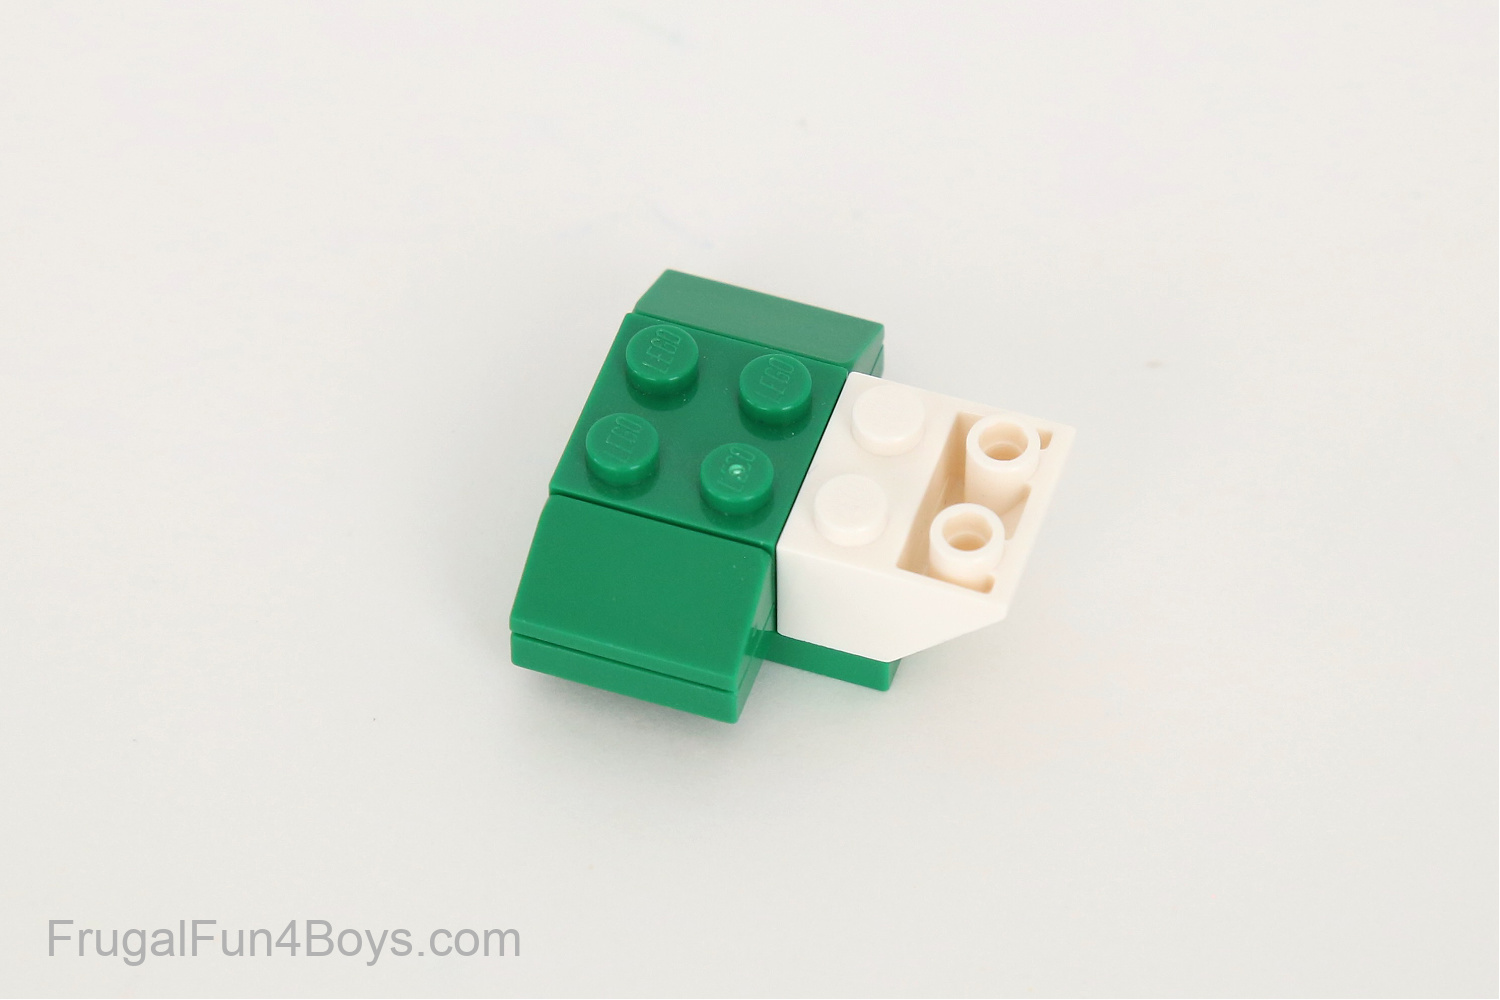
Step 7: Attach the frog’s head to the body.
Step 8: Find a 2 x 4 green brick, two 2 x 2 green slopes, and two 1 x 2 green slopes.
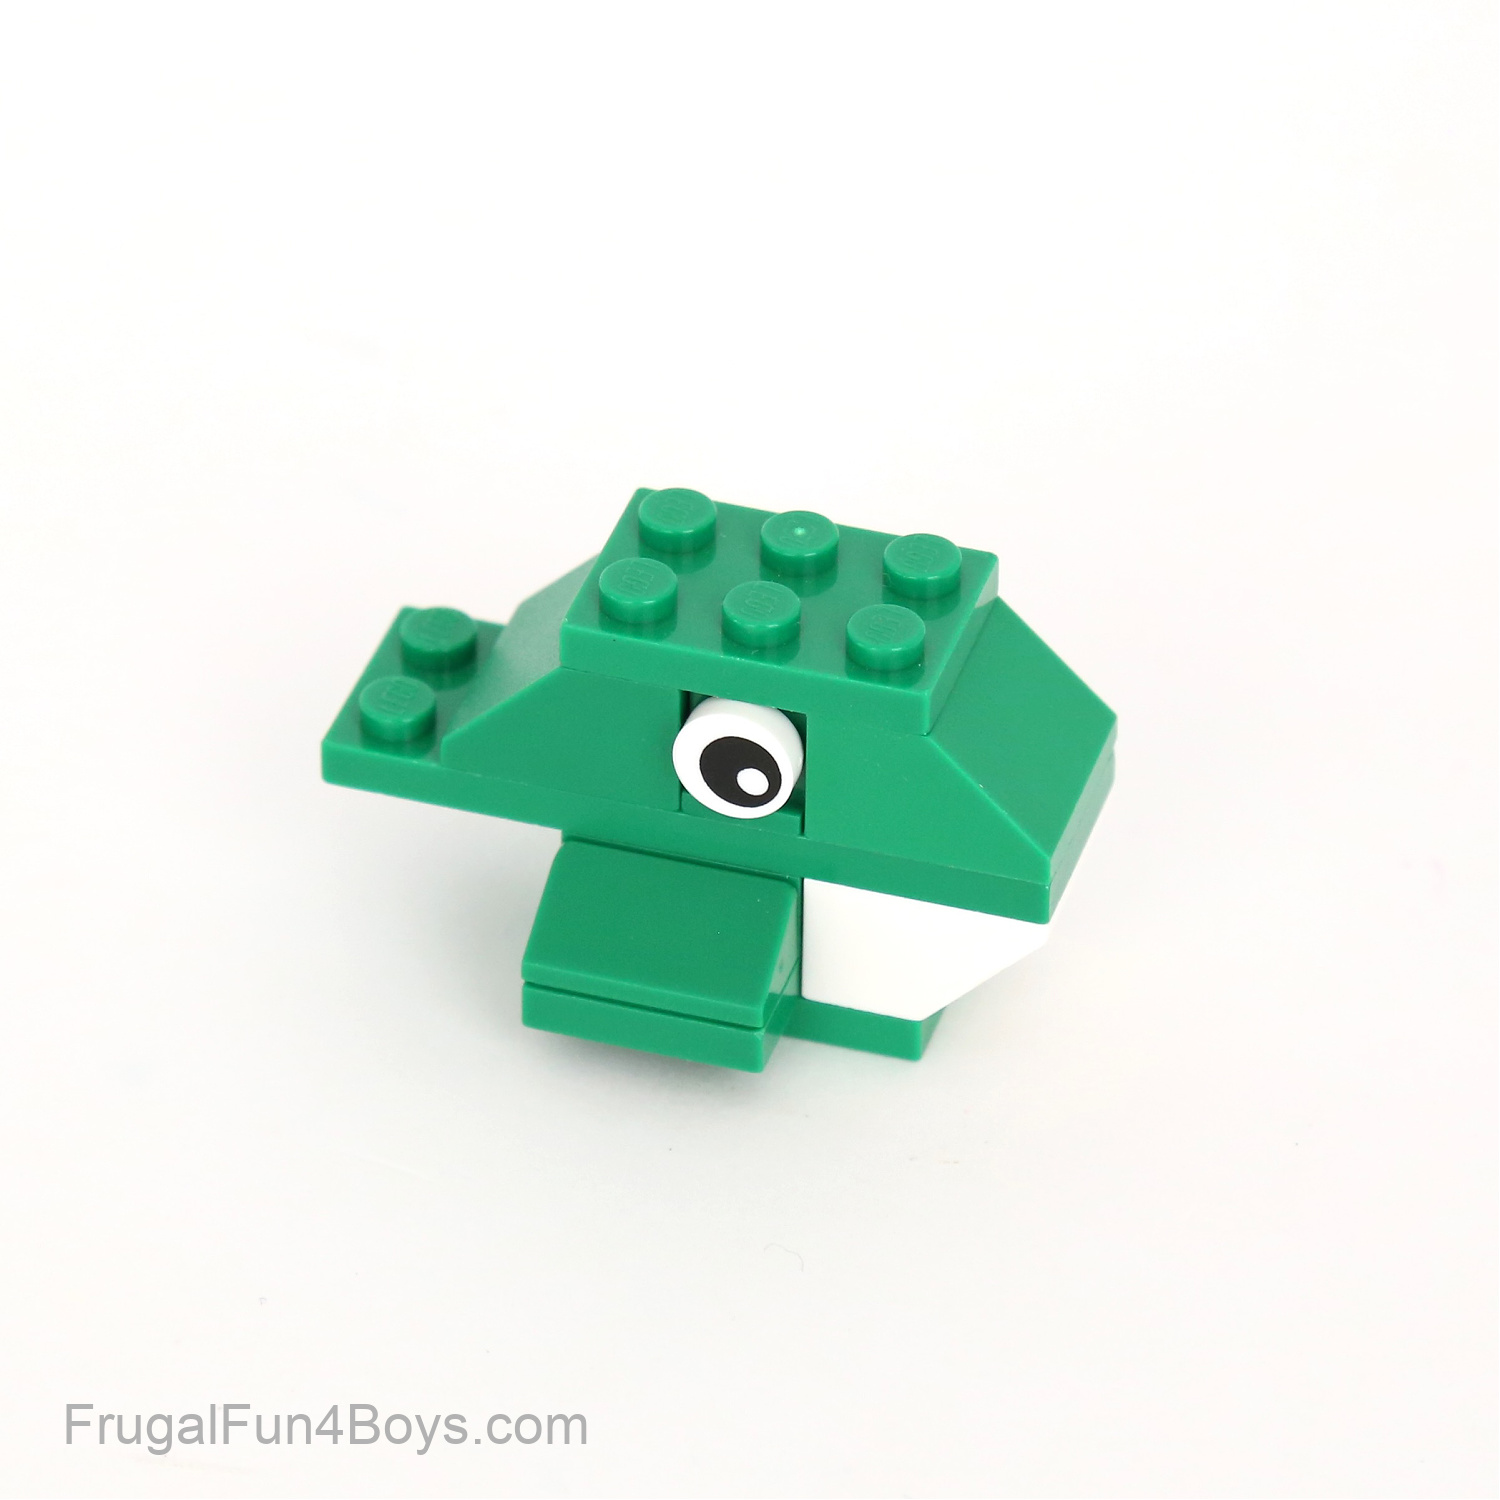
Step 9: Add the 2 x 4 brick to the back of the body. Then attach the feet and your frog is complete!
Want more Spring LEGO Ideas?
Head over to print our LEGO Spring Mosaic Building Cards. There are 8 different designs to build!

Here are building instructions for LEGO Spring Ideas including bunnies, chicks, and a butterfly!
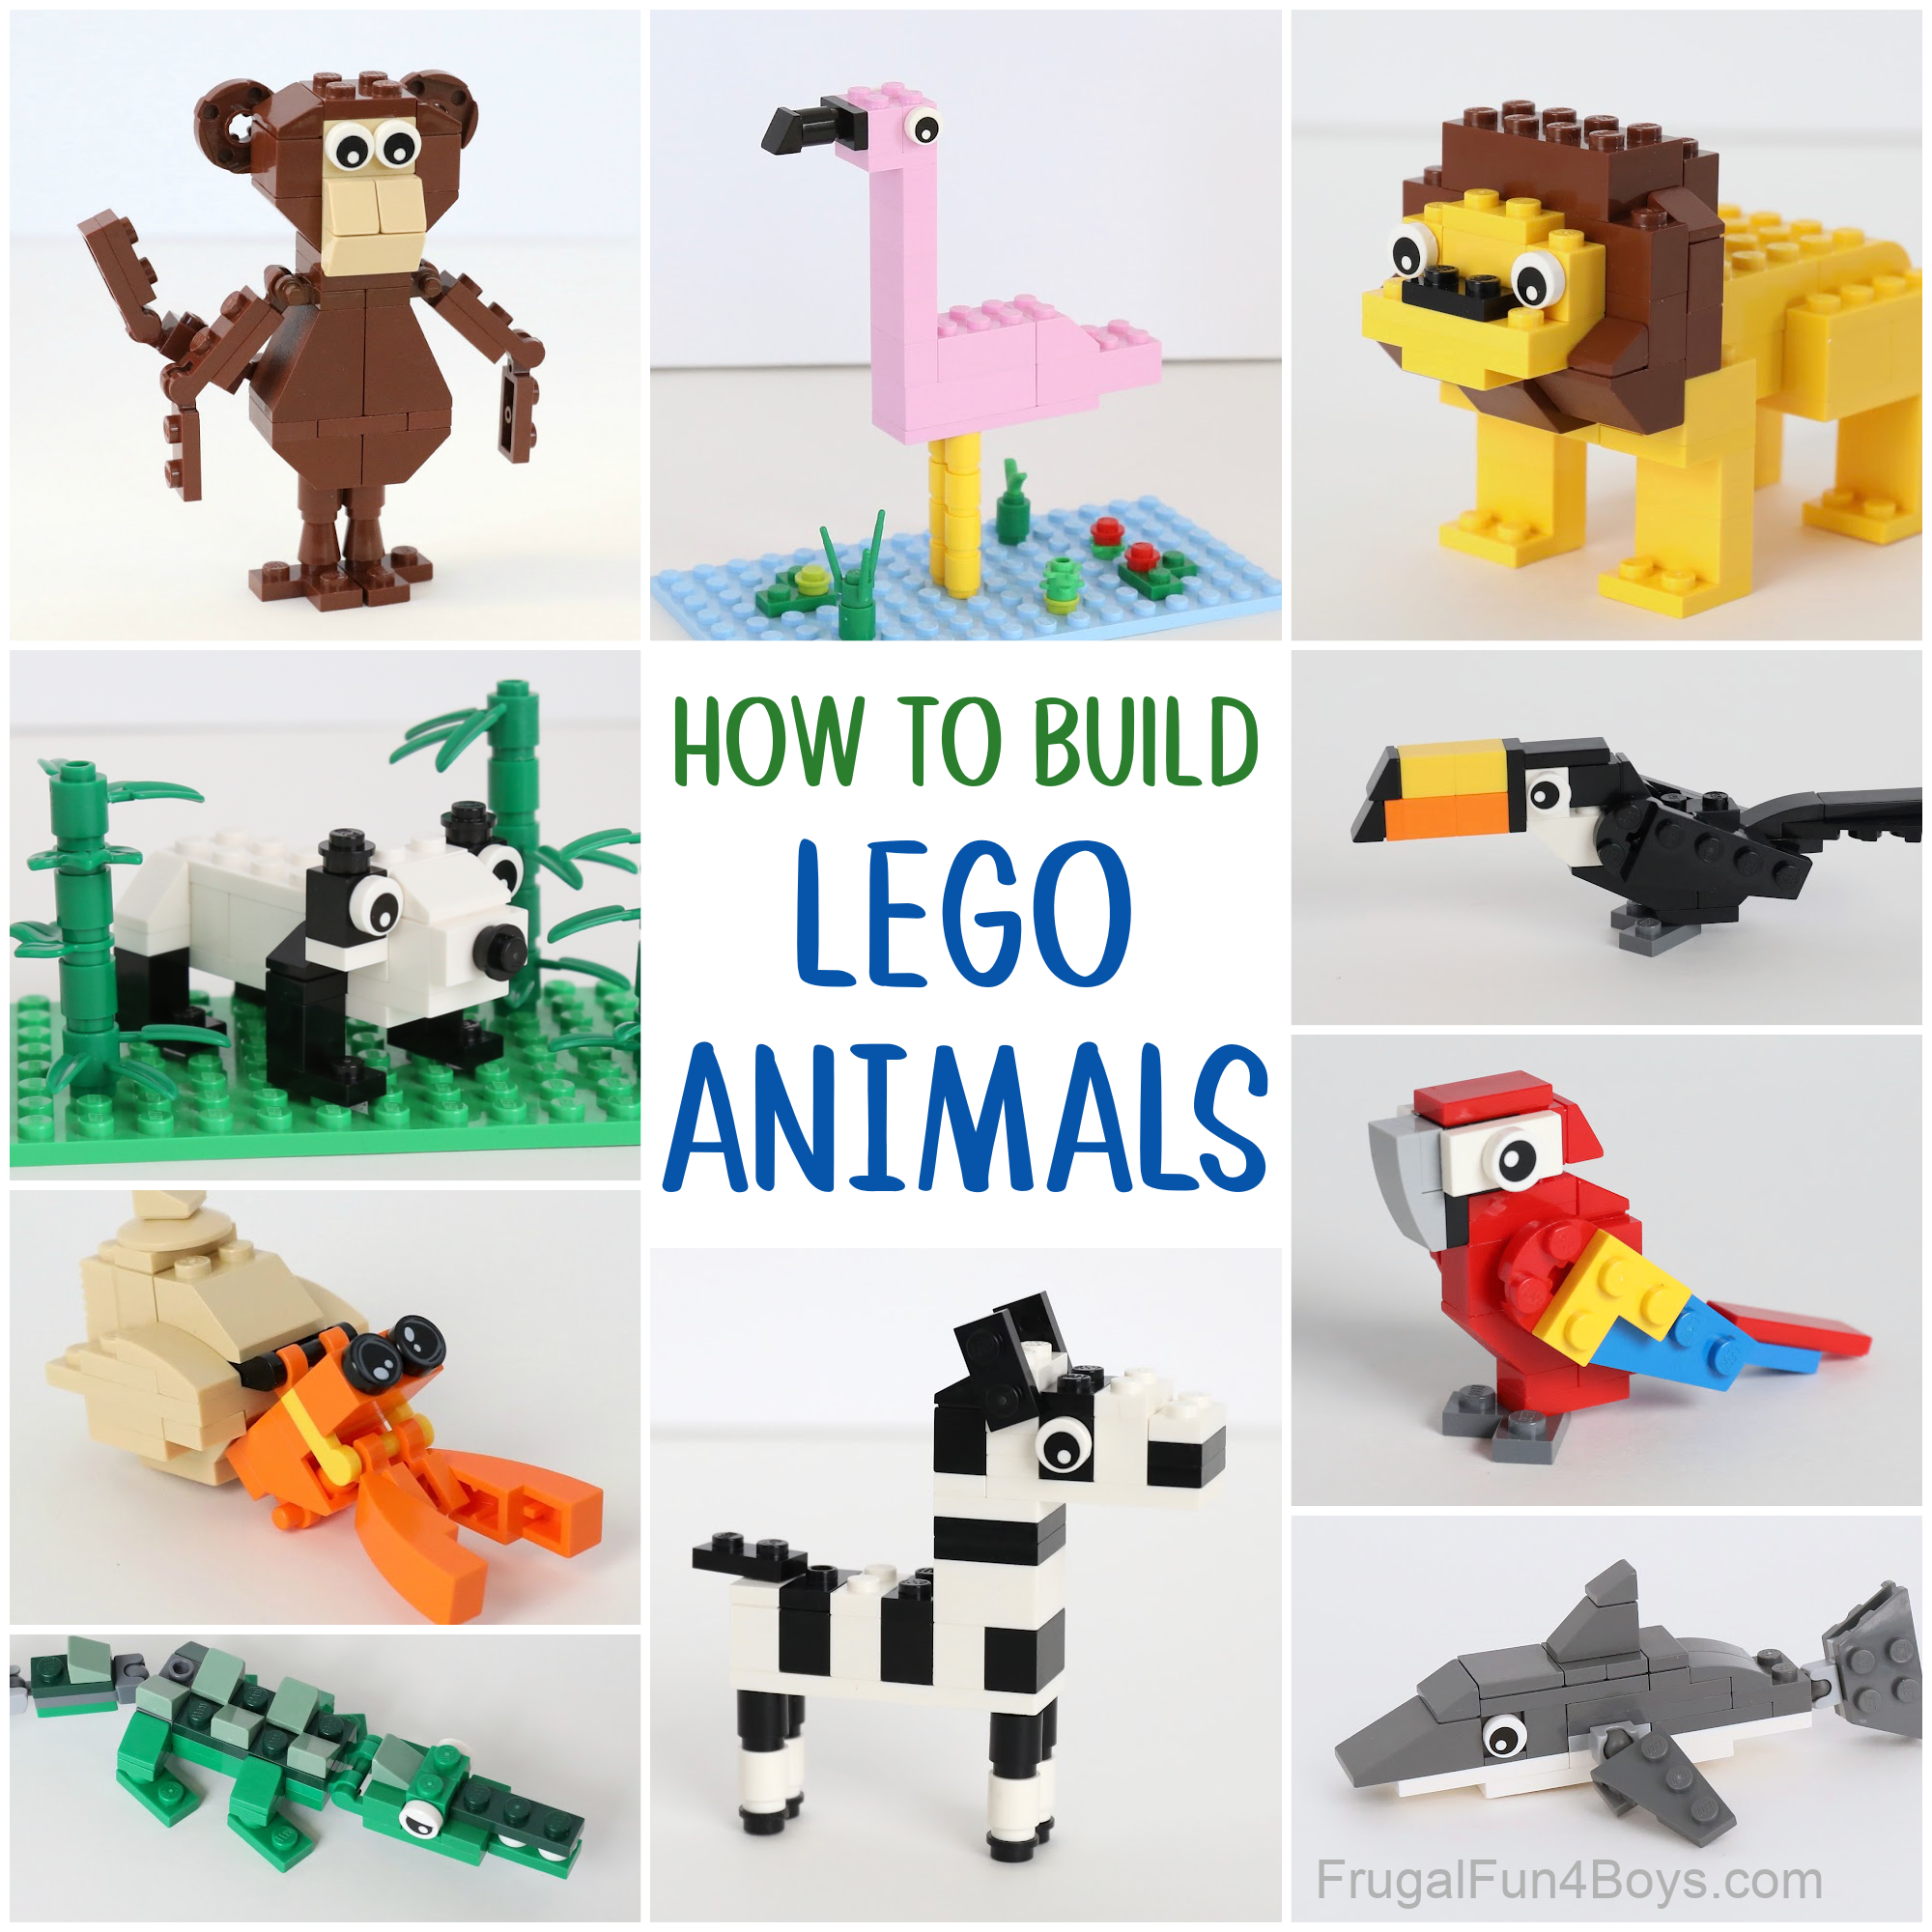
We also have more LEGO Animal Instructions here – How to Build LEGO Animals
There are tons of zoo animals in this collection!
1 Comments
Betty May 25, 2024
These are all great! Thank you for taking the time to do them and share them, I really appreciate it! We’re gonna have so much fun doing them
Post a Comment