
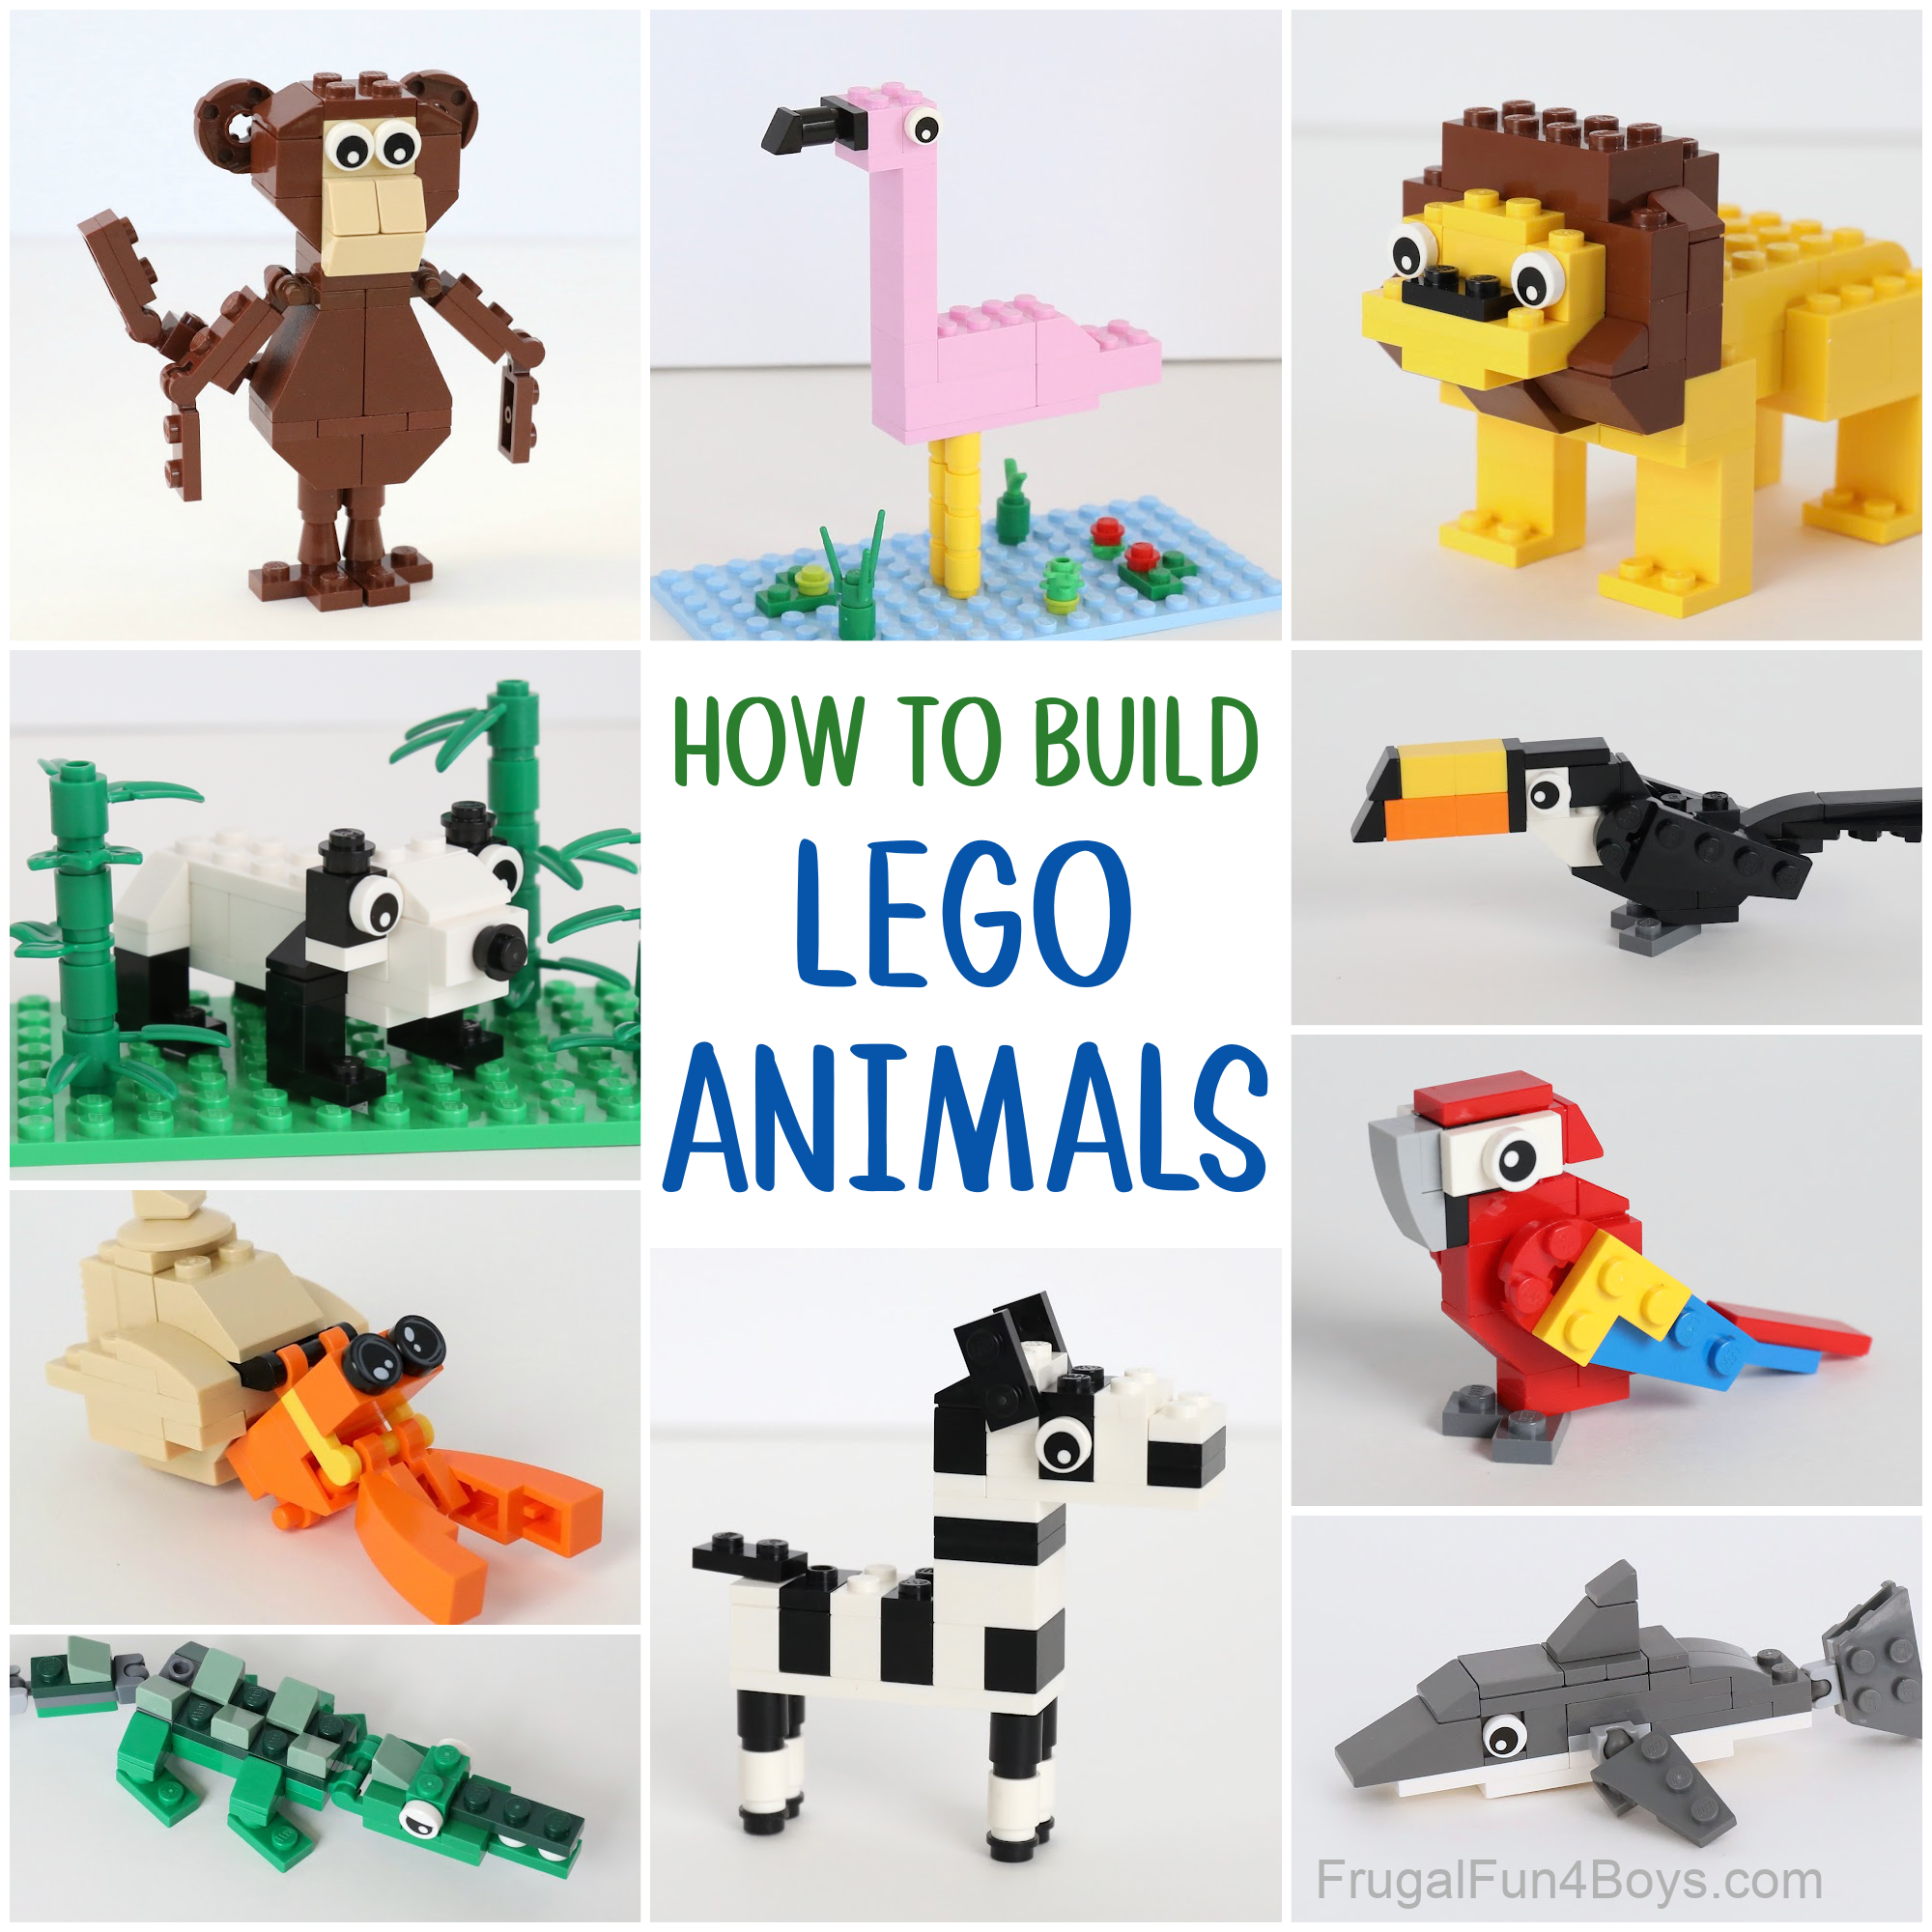
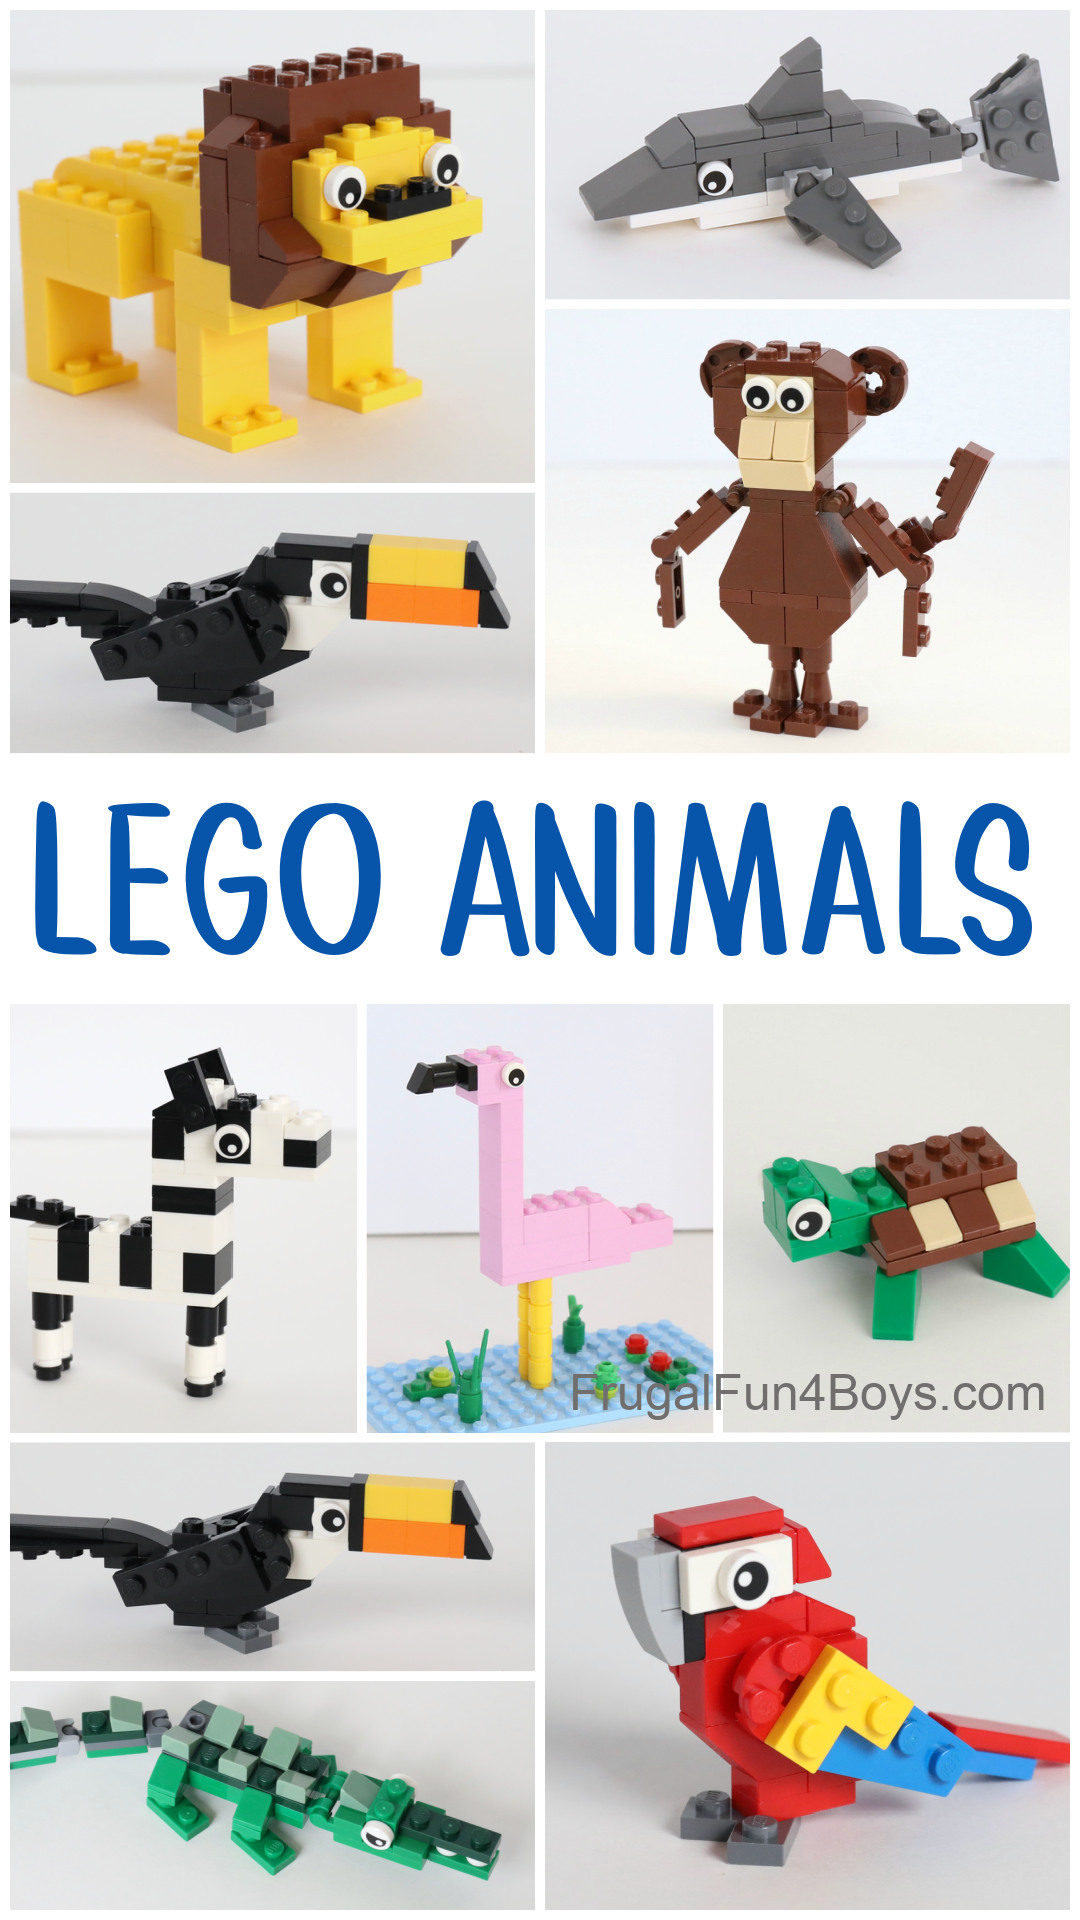
Use your LEGO bricks to build awesome animals! Create your own zoo full of LEGO animals, or just build a few favorites. Our family loves animals, and we love designing LEGO versions. We’ve got building instructions for a monkey, parrot, shark, lion, zebra, and more.
None of the animals in this post are LEGO sets. They are all projects that kids can build with the bricks they already have, or you can order bricks to supplement what you have if needed. We order from either the Pick-A-Brick area on LEGO.com or from Brick Link. Here’s a post that will tell you how to order on Brick Link. I prefer Brick Link for ease of use and faster shipping times, but it’s a site with multiple vendors like eBay, so I do recommend reading about it before jumping in and trying to order. The prices on Lego.com are lower in general, but orders can take awhile.
I have LEGO Pet Animals (like dogs, cats, guinea pigs, fish, etc.) in a separate post, so on this page we’ll focus on wild animals.
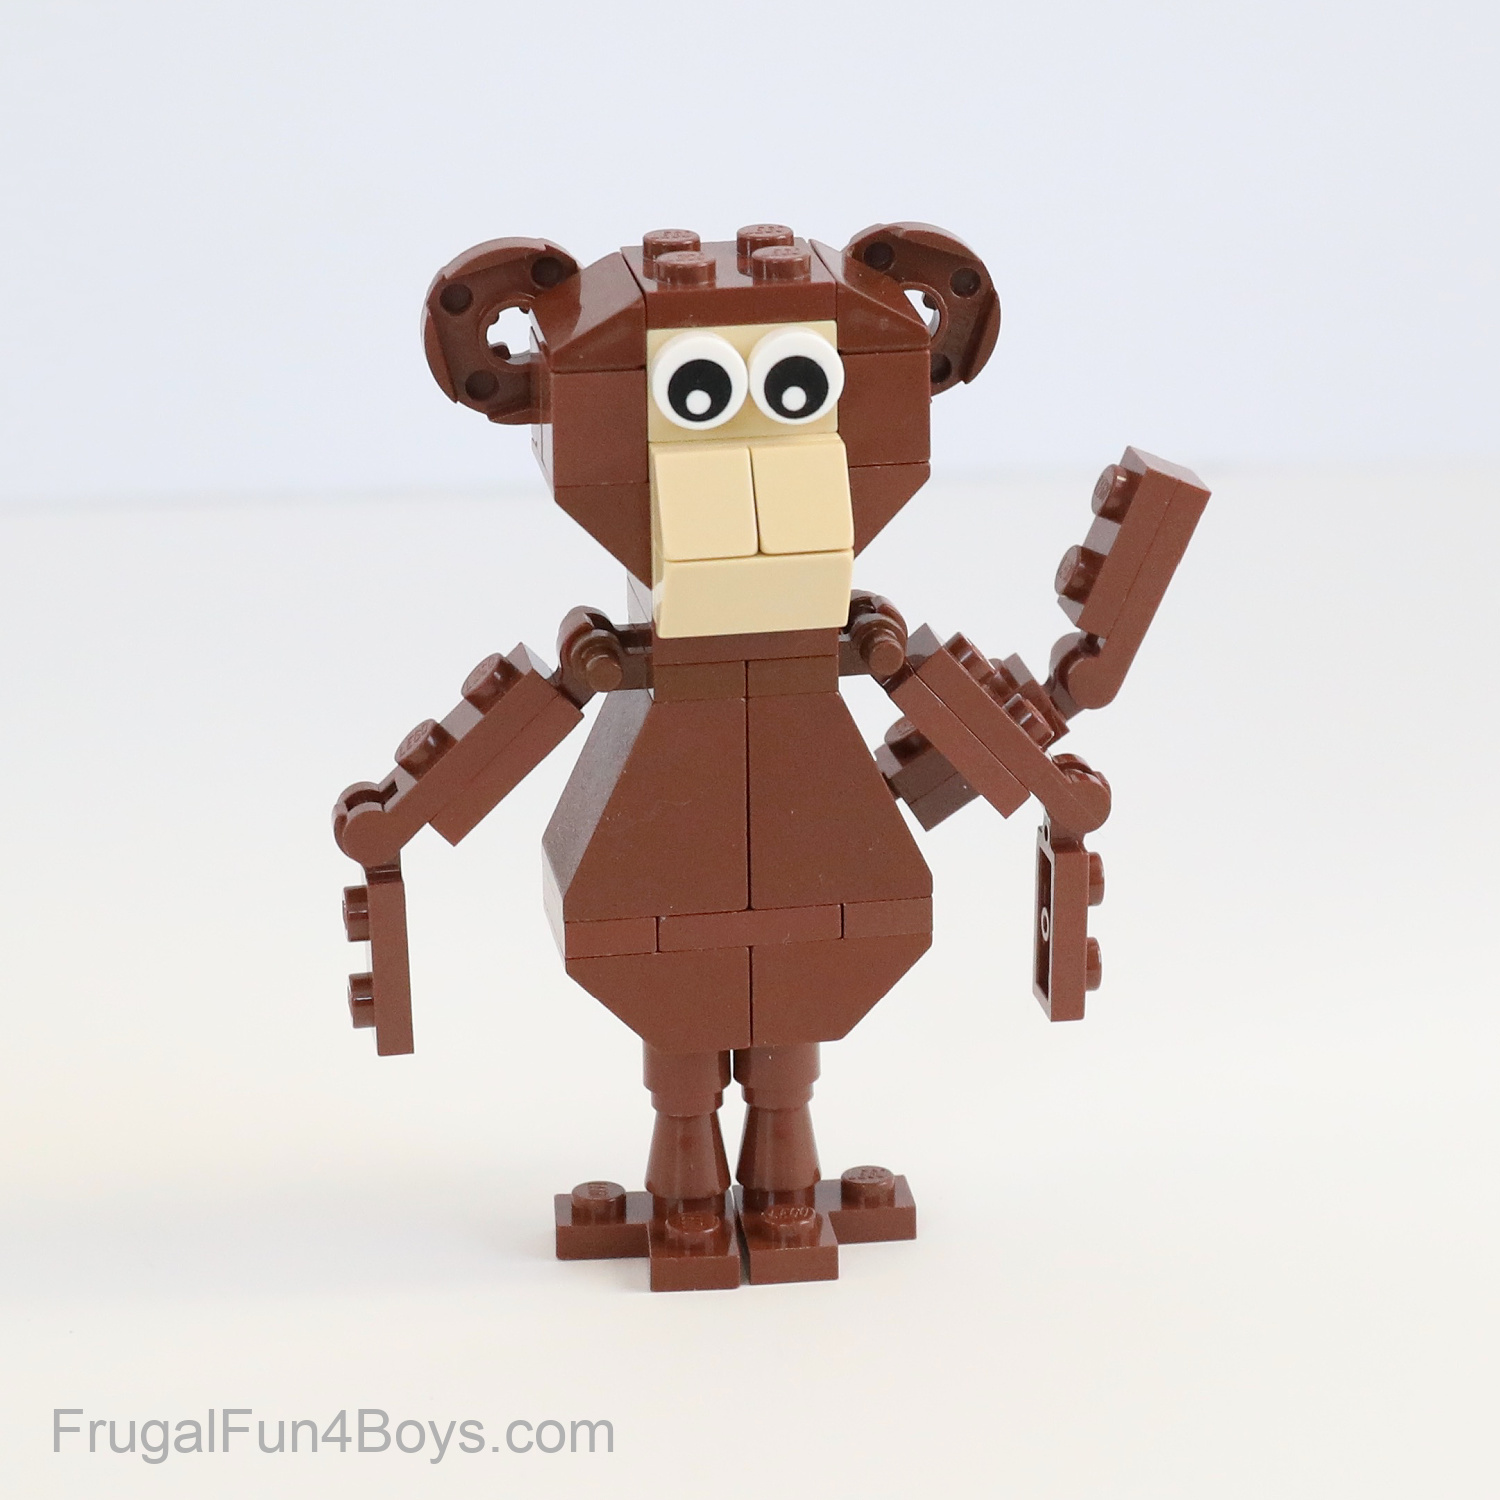
MONKEY
This little monkey might be my favorite out of all these animals, so we’ll start with that! Ha!
You can find full instructions for building the monkey here: Monkey Building Instructions
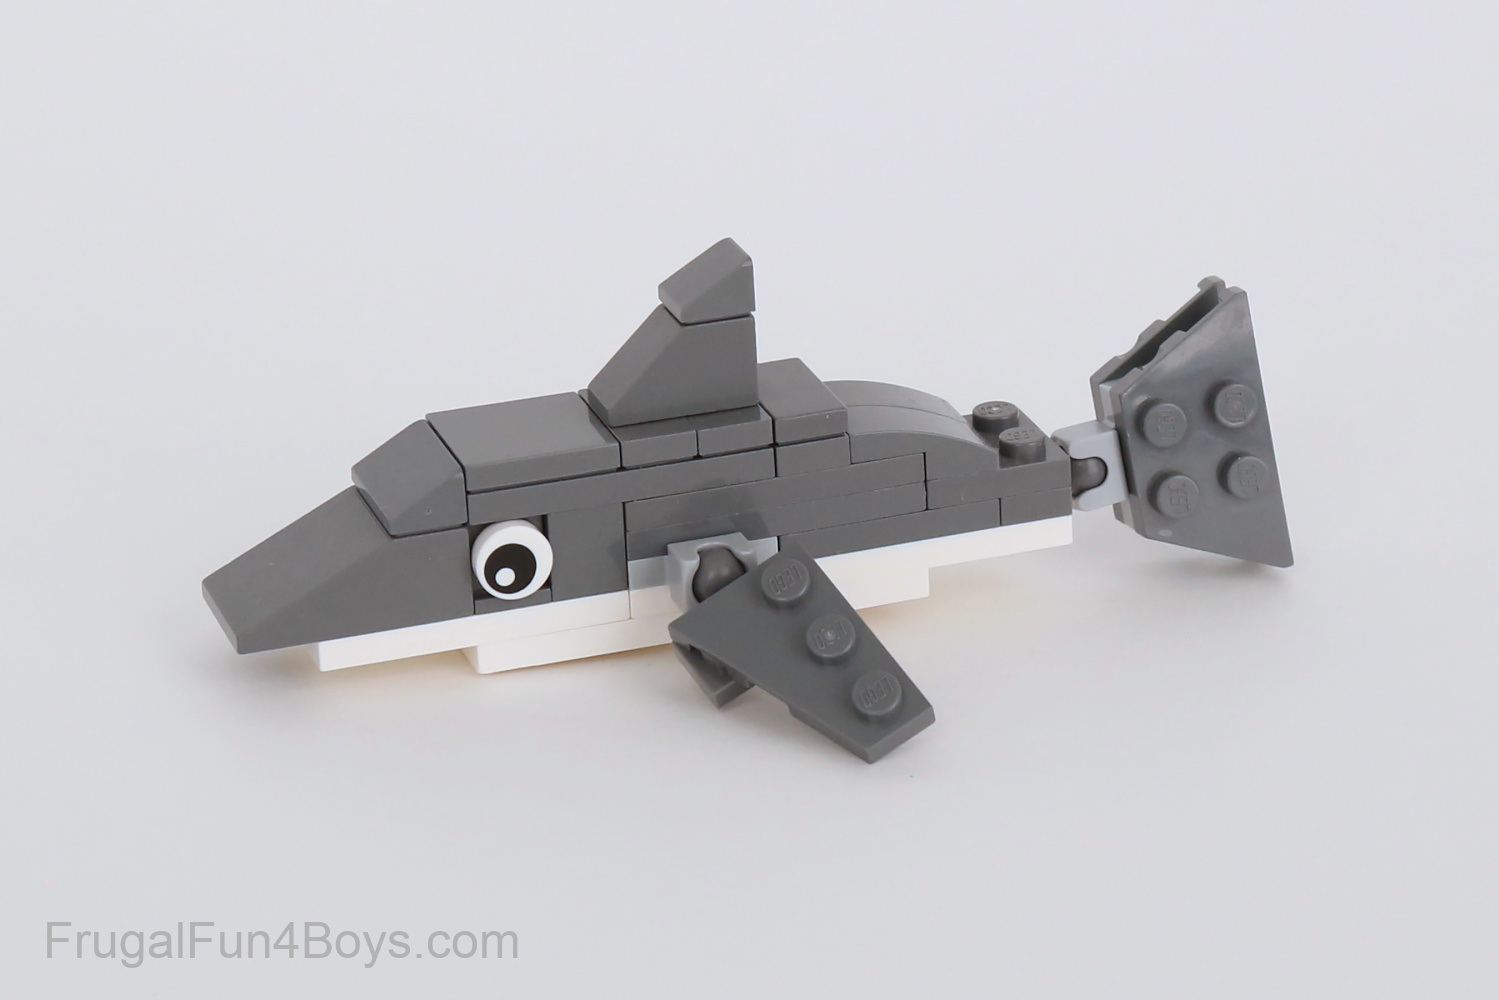
SHARK
Build a cute little shark! You can find full instructions for the shark in this post: LEGO Summer Projects
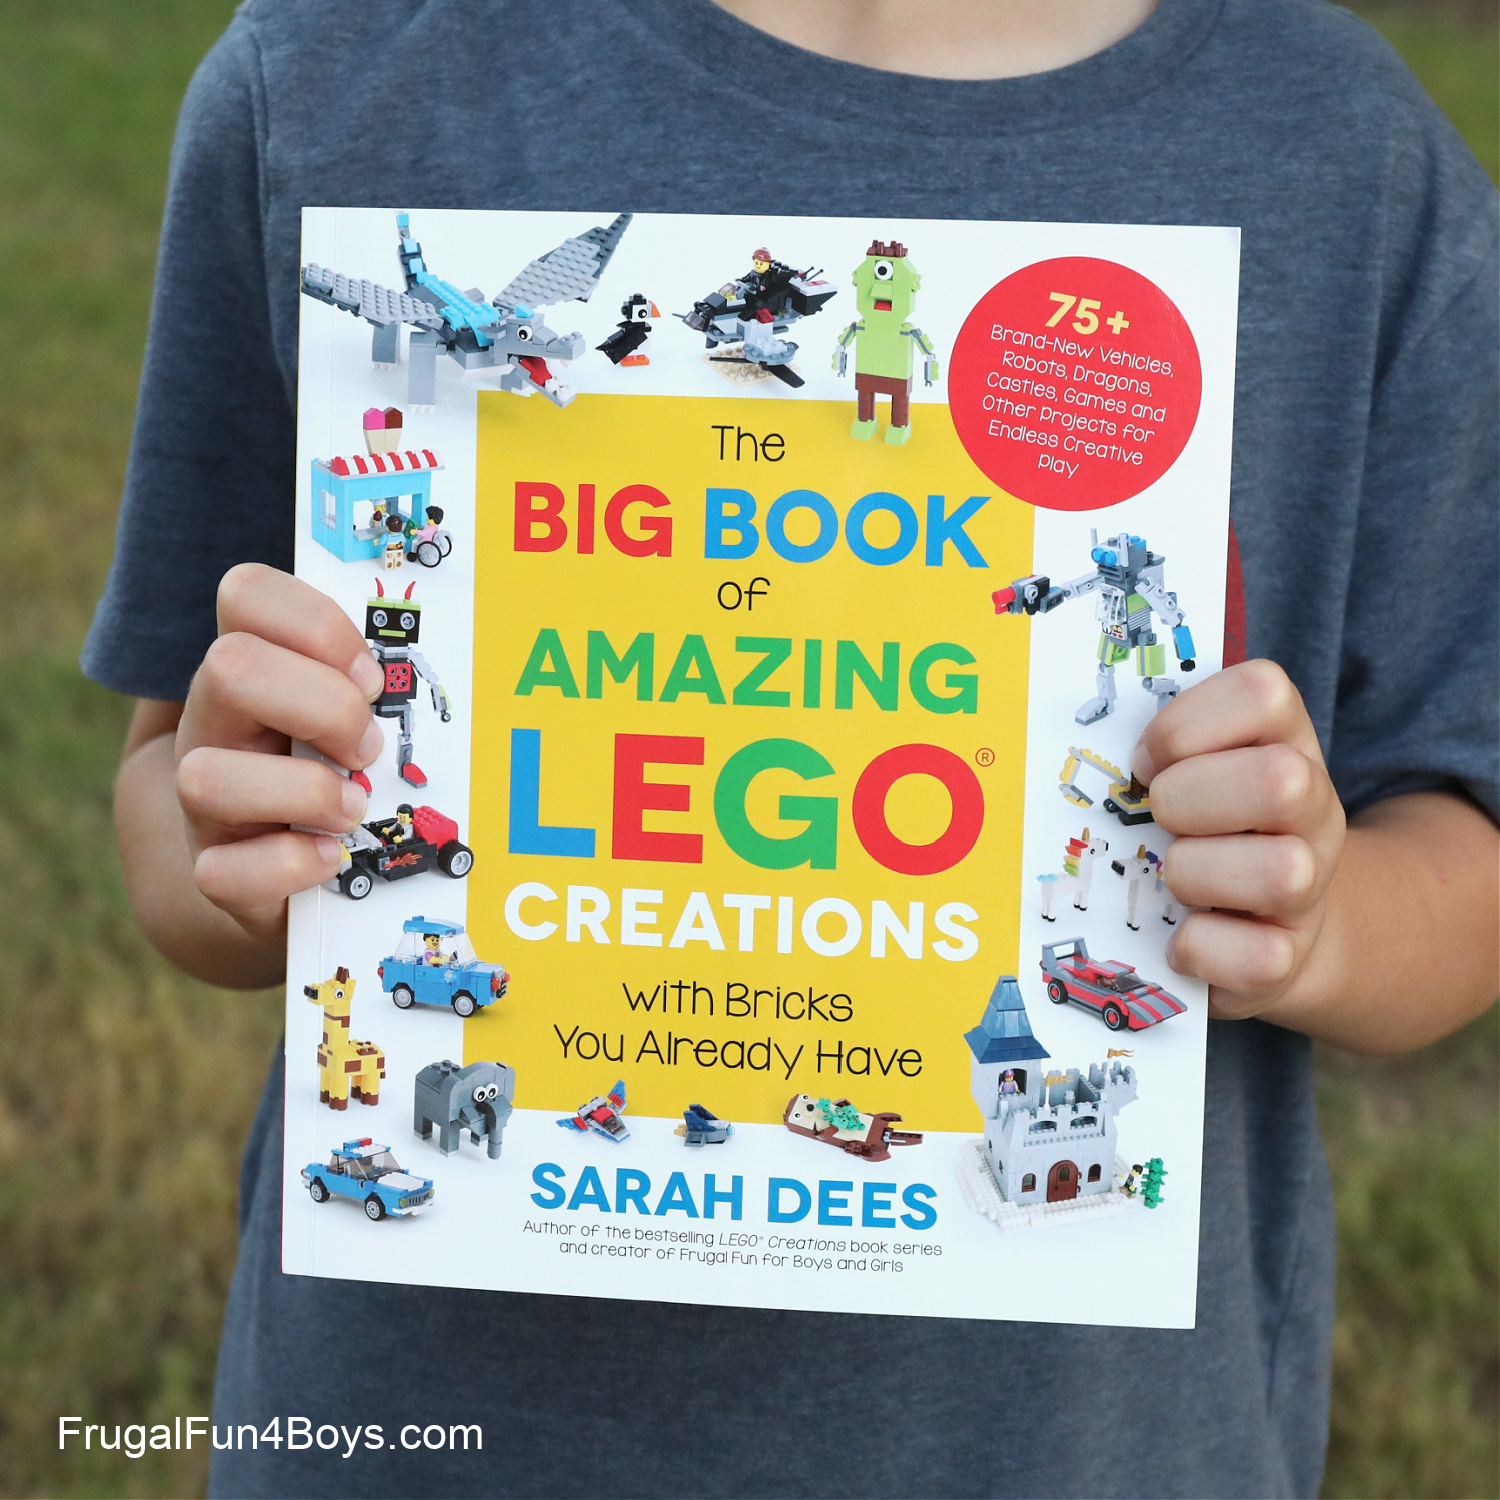
I also gave this shark a small update (posable fins and a slight change to the face) for our most recent book, The Big Book of Amazing LEGO Creations. There are full instructions in the book, plus instructions for TONS more awesome projects!
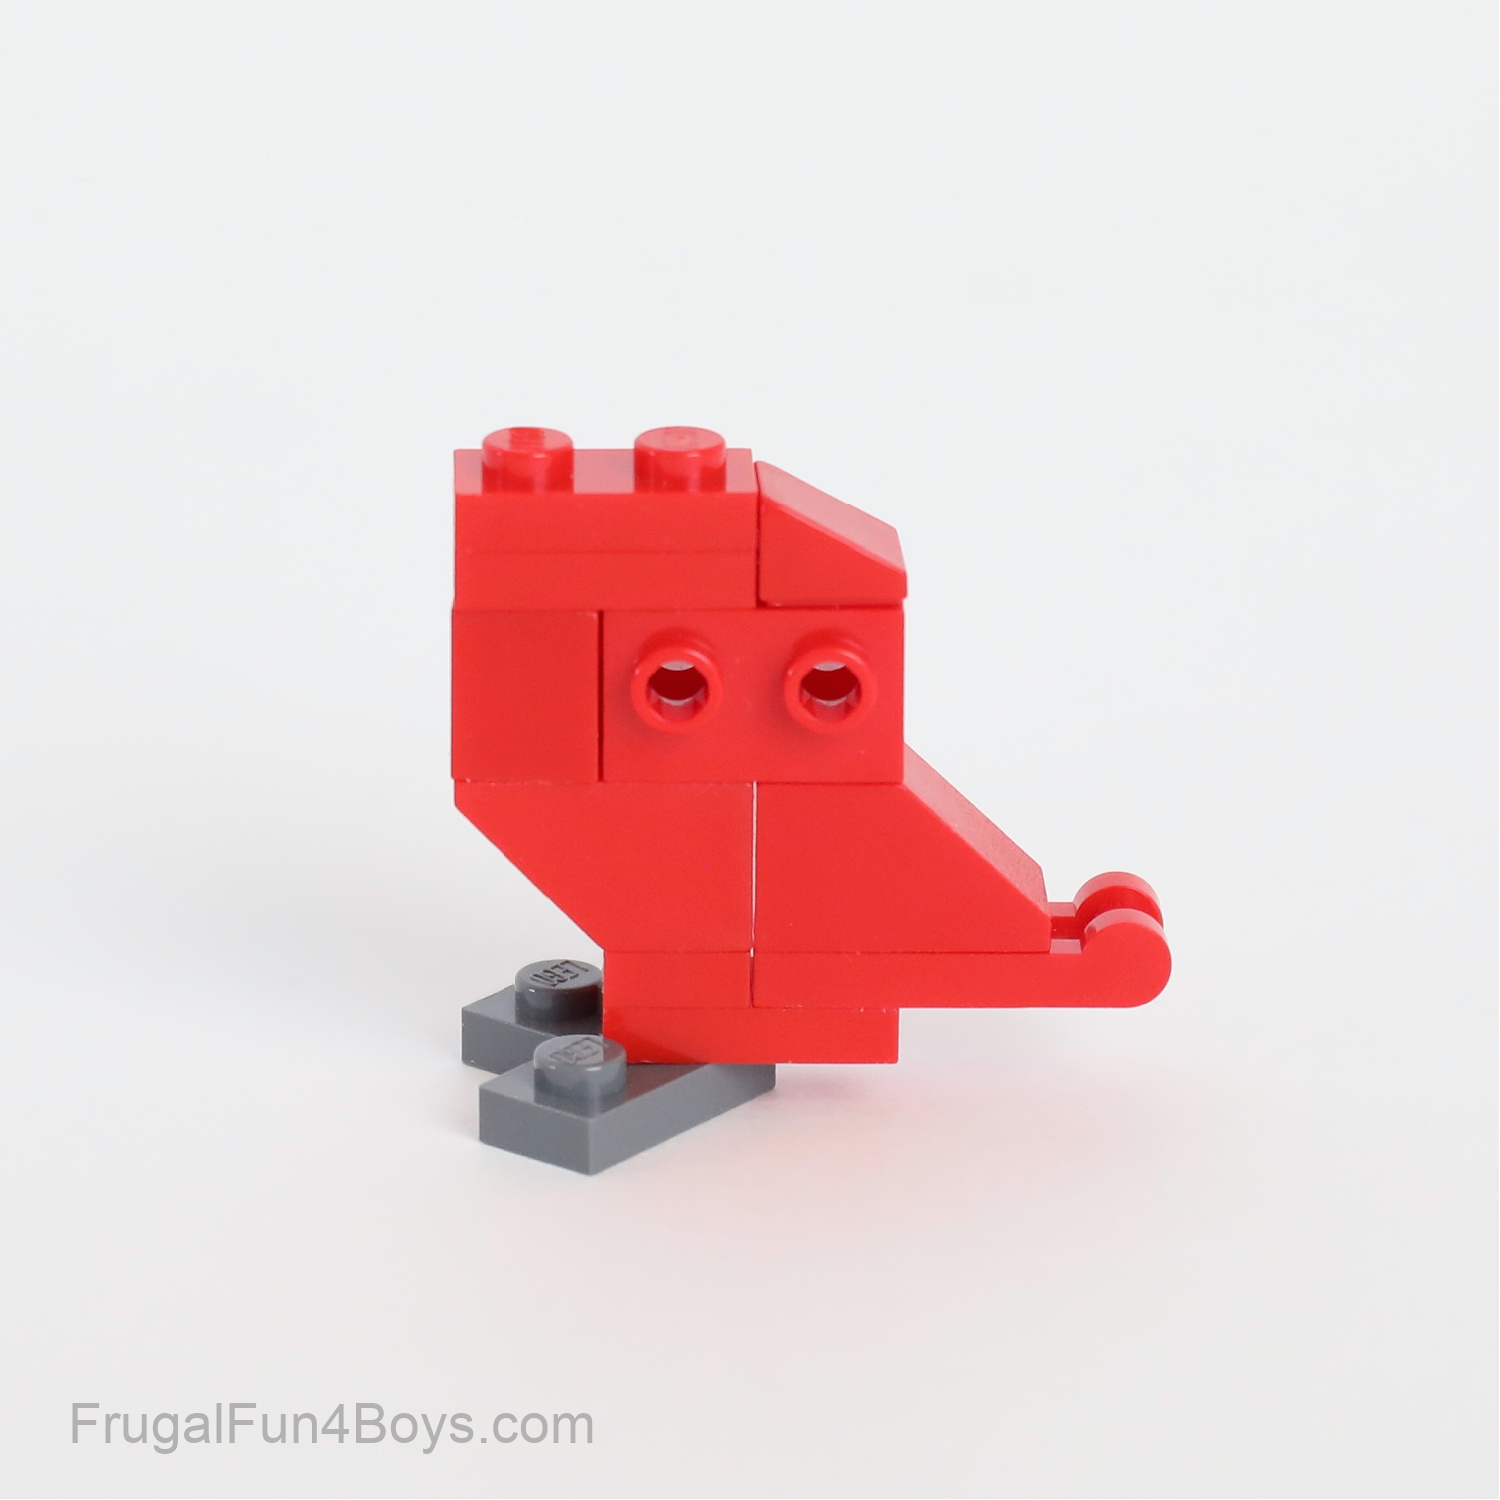
PARROT
This adorable parrot is a new project that my 15 year old son just recently built! So cute.
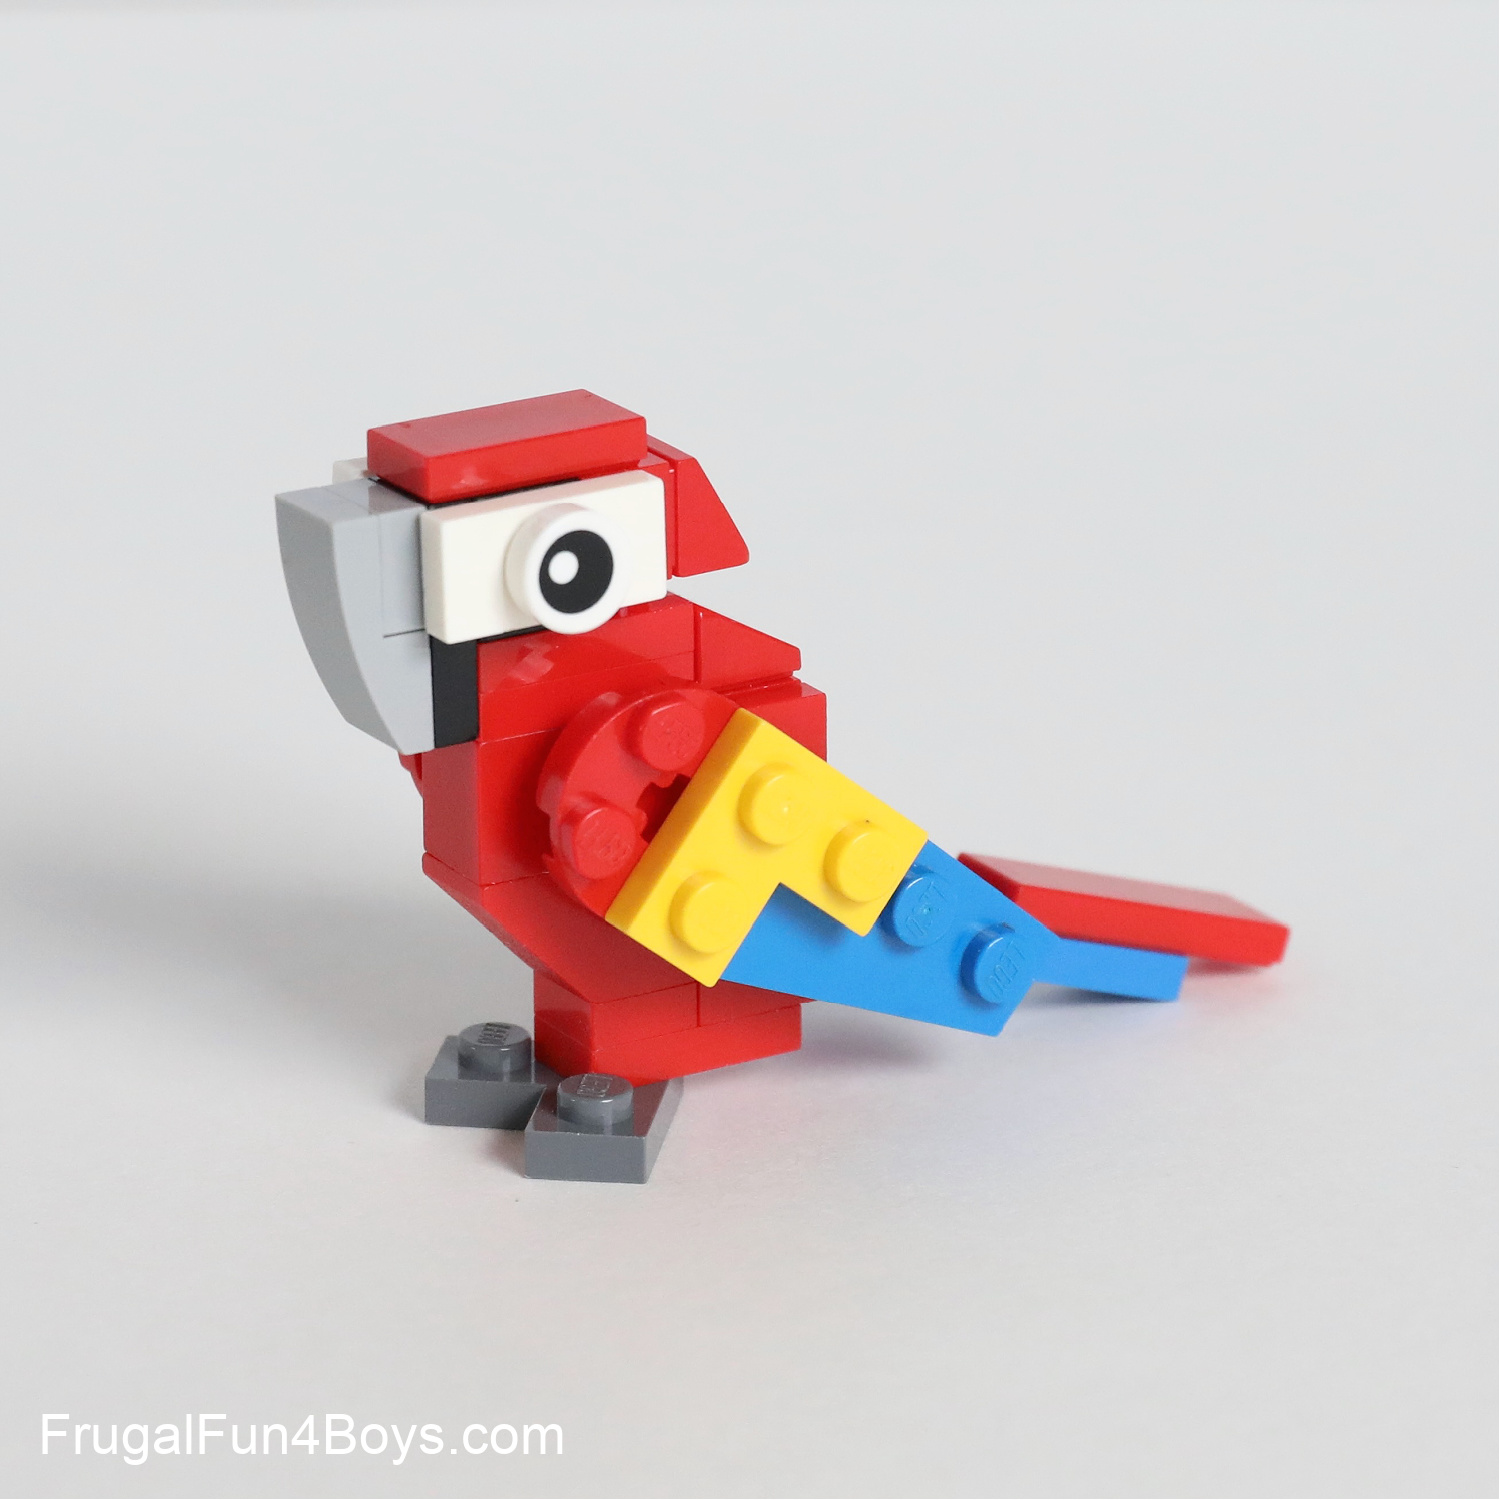
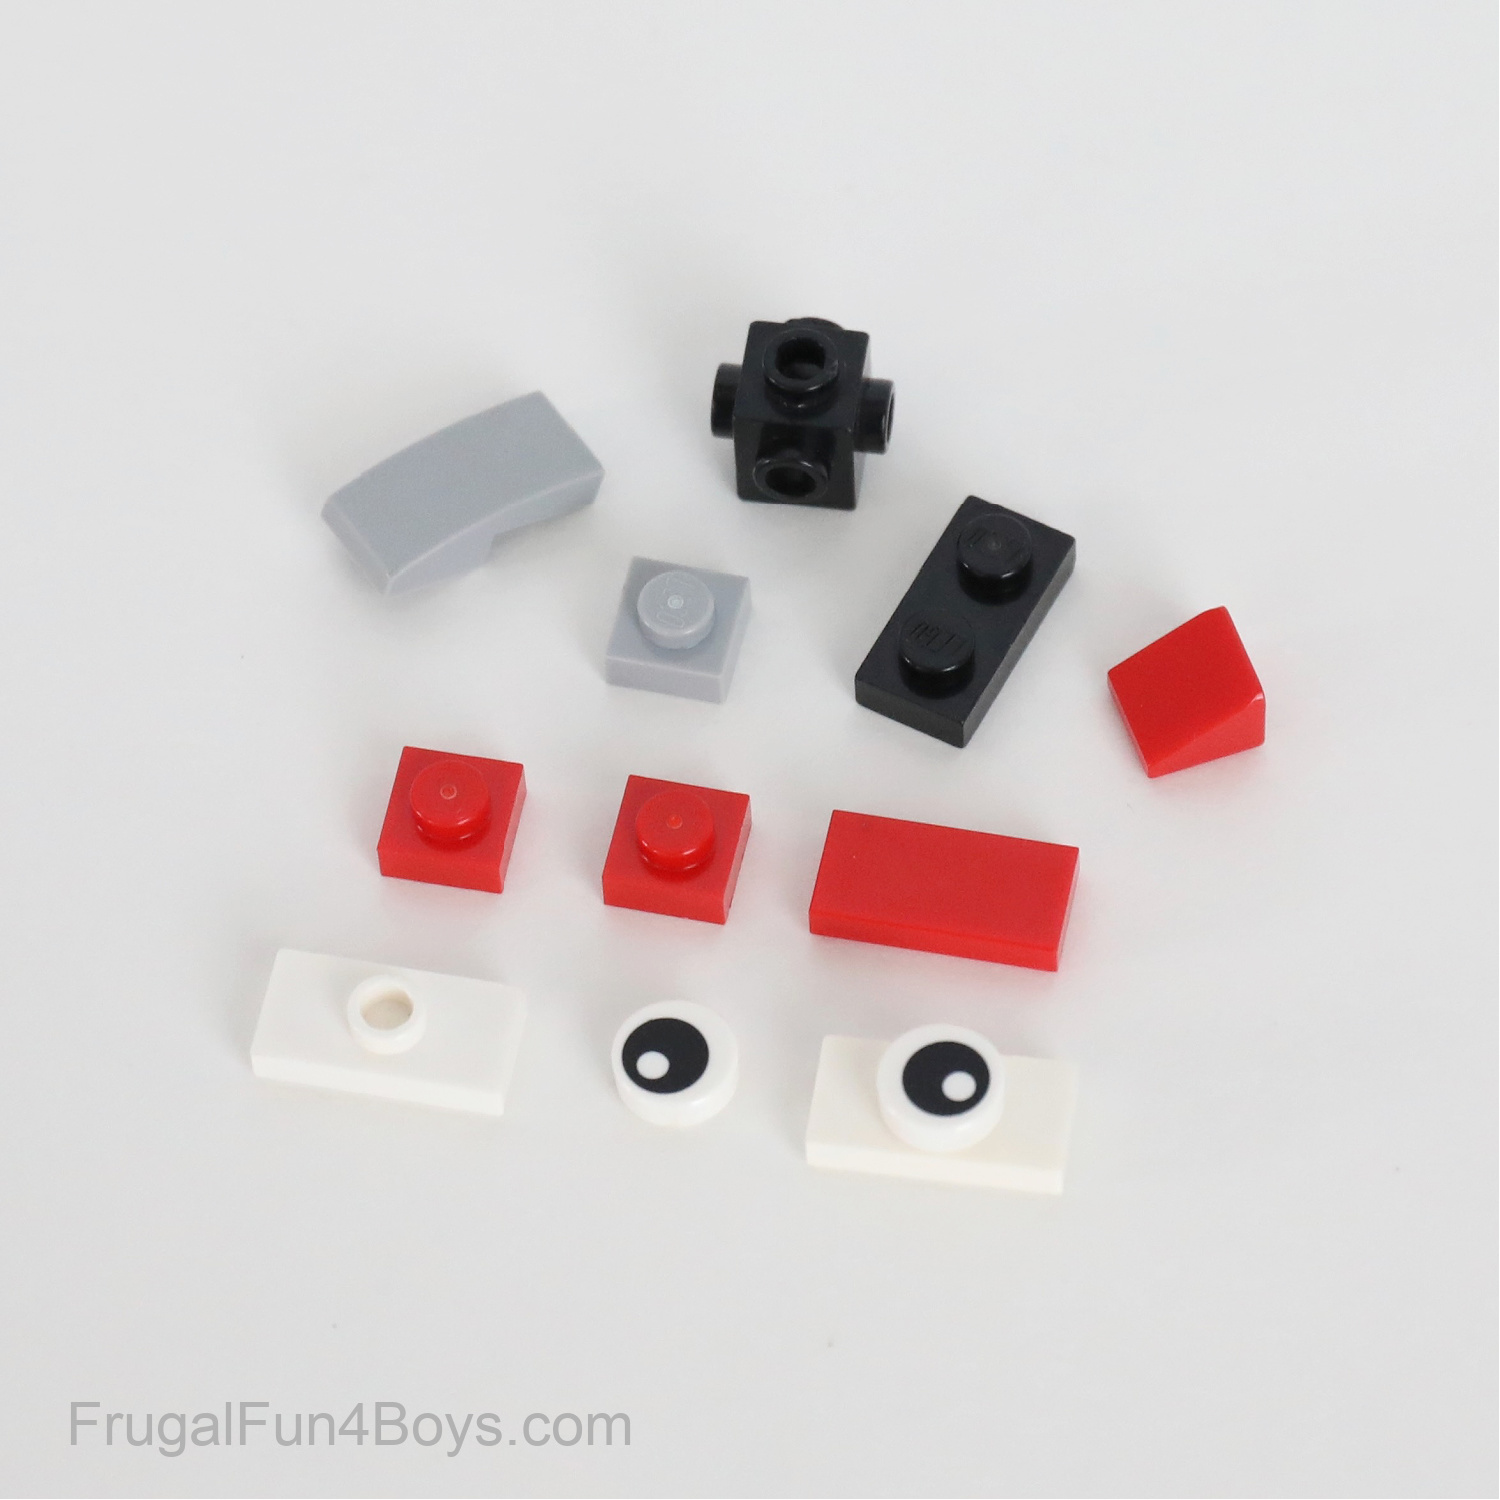
Here’s how to build the body of the parrot.
The red 1 x 2 brick with two studs on the side also has two studs on the other side.
The top of the body has two 1 x 2 plates next to the little 1 x 1 slope. Otherwise, you should be able to see all the bricks used in this step.
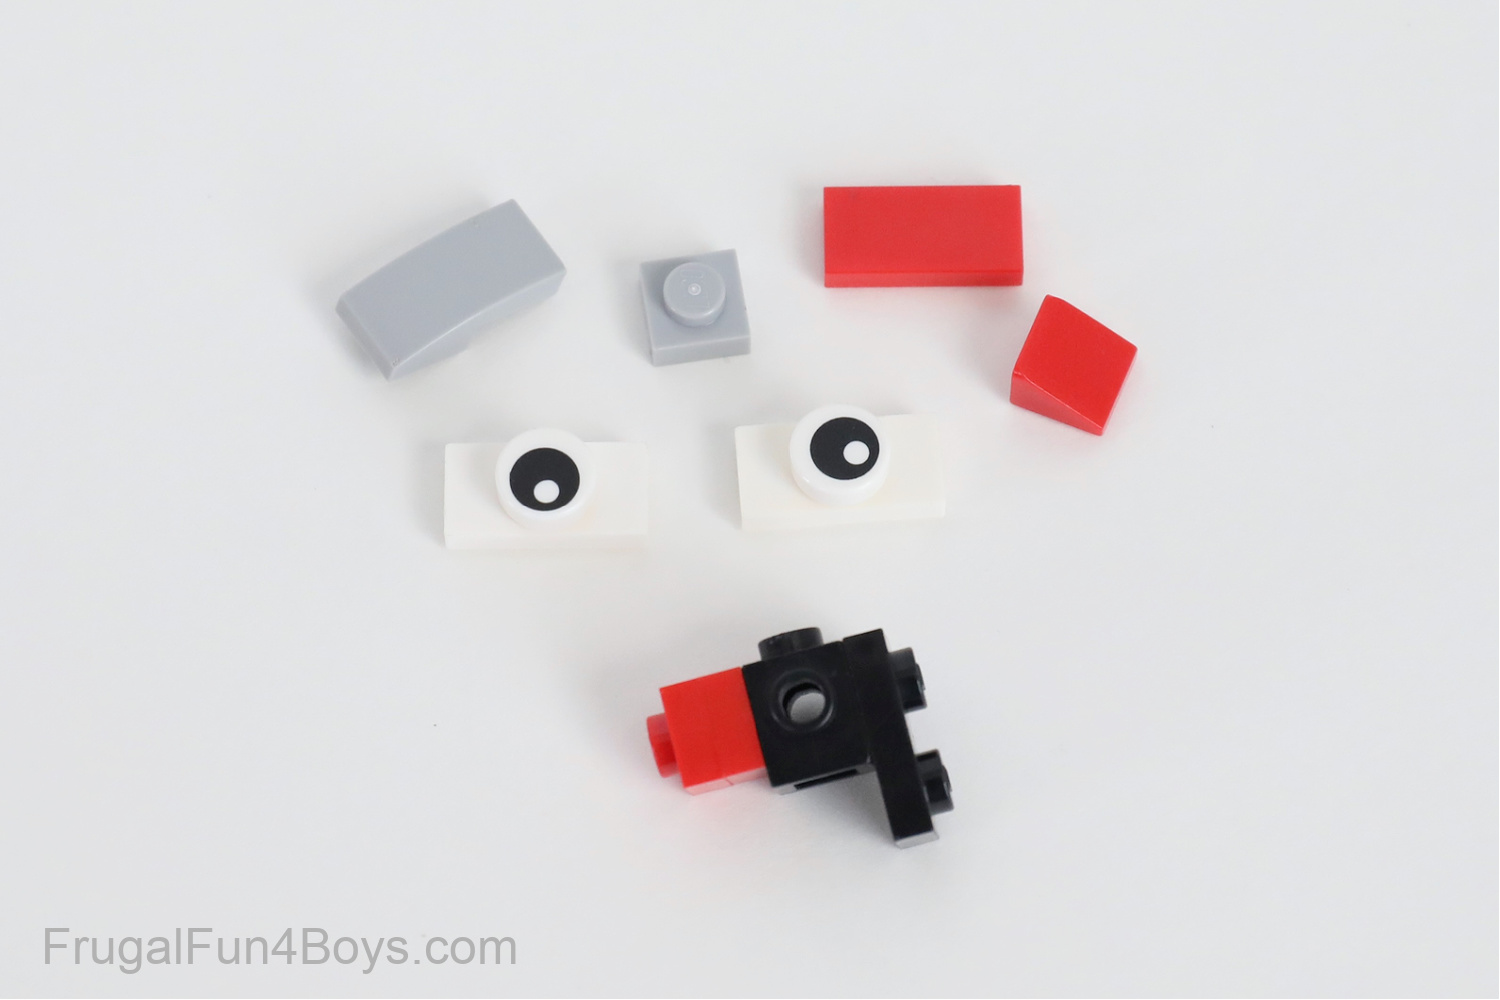
Grab these pieces for the head.
Attach eyes to two 1 x 2 white jumper plates (the plates with one stud on top).
Grab a 1 x 1 black brick with studs on all four sides. Stack two 1 x 1 red plates and attach them to one stud. Then add a 1 x 2 black plate to the opposite side.
Attach a 1 x 1 red slope (30 degree) to the red plates. Then add a 1 x 1 light gray plate and a 1 x 2 light gray curved slop on the other side. Place a 1 x 2 red tile on the top of the head.
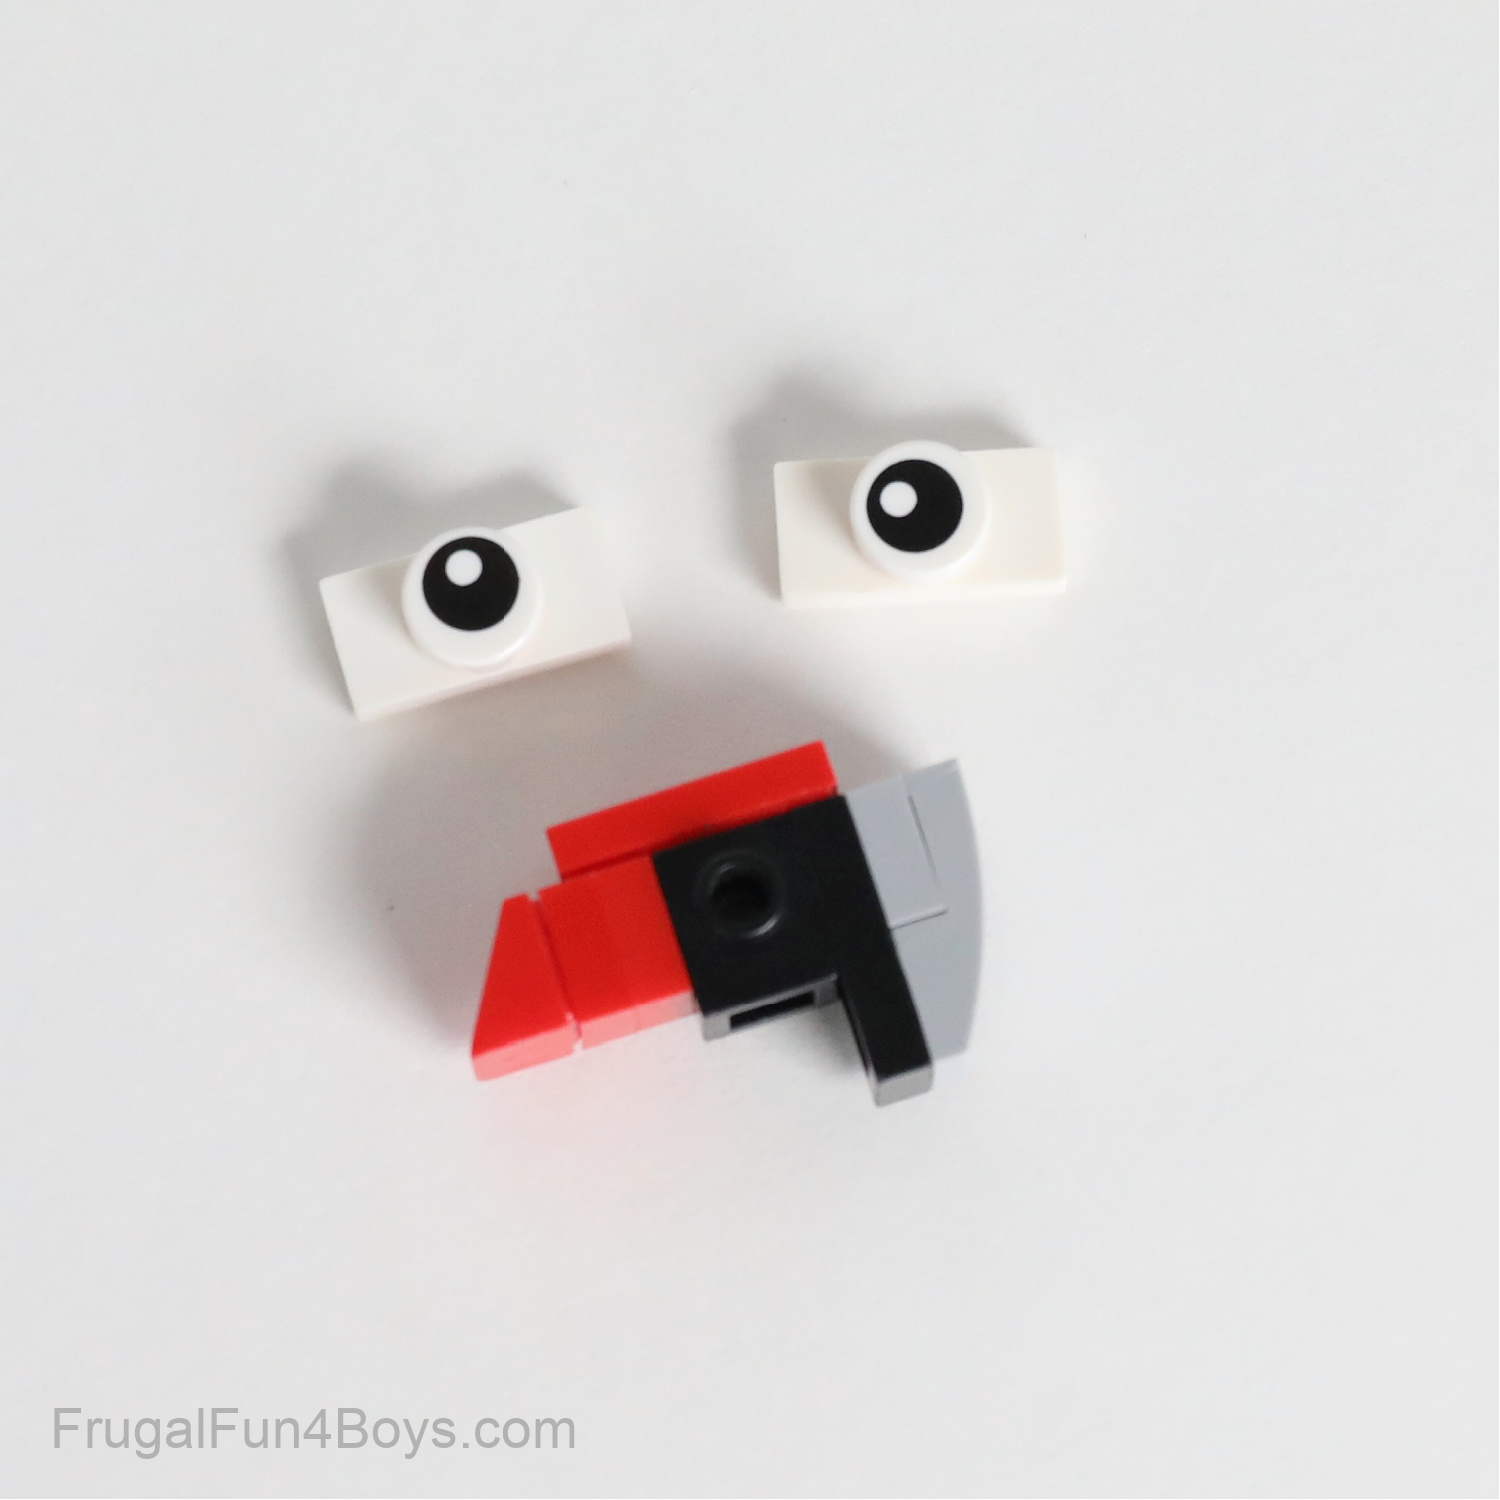
Attach the eyes to the black studs on both sides of the head.

Place the head on top of the parrot’s body. Then add a tail. The tail is a 1 x 2 blue plate with a clip on the end and a 1 x 3 red tile.
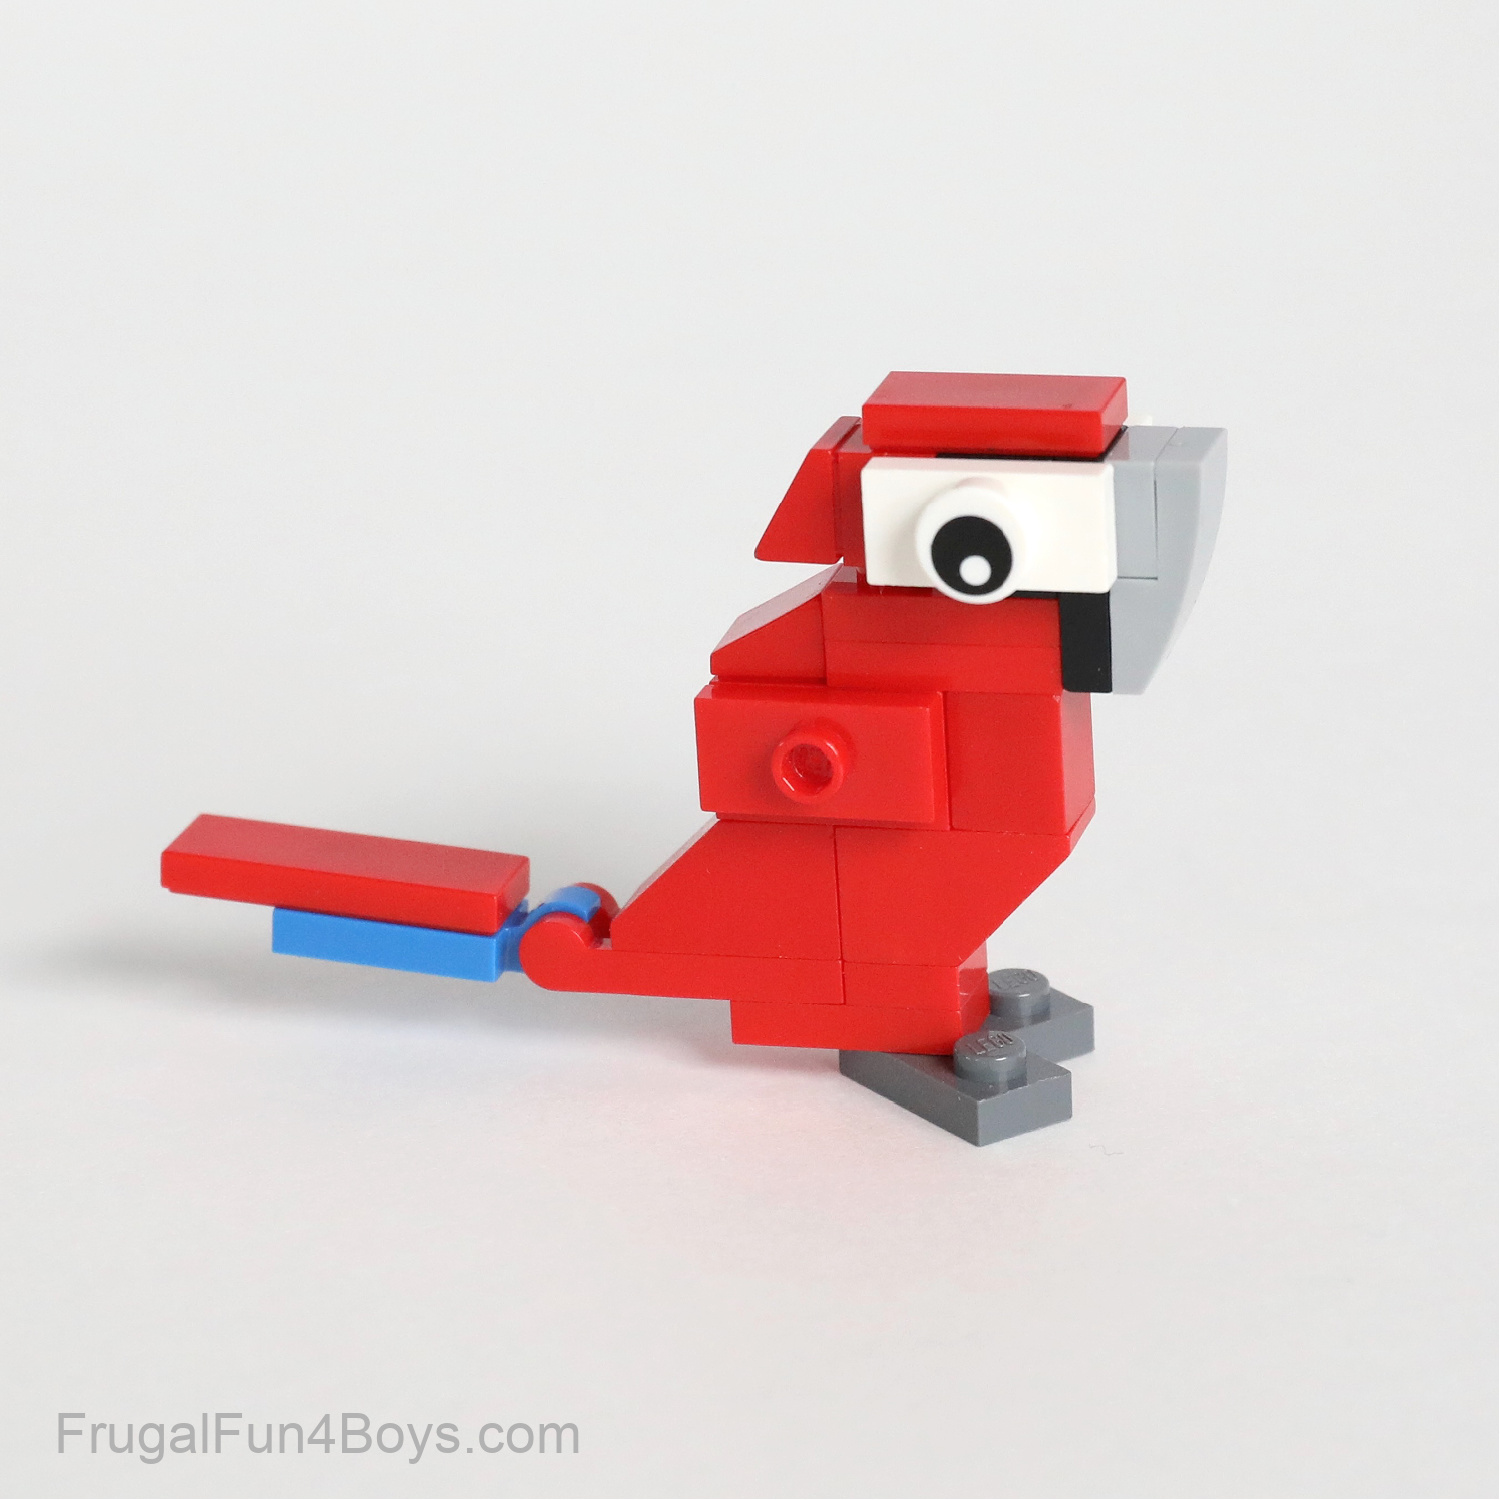
Now you just need wings! Each wing is a 2 x 3 blue wedge plate (note the right and left orientations), a 2 x 2 red round plate, and a 2 x 2 yellow corner plate.

TOUCAN
This is another new project from my 15 year old. I love it!
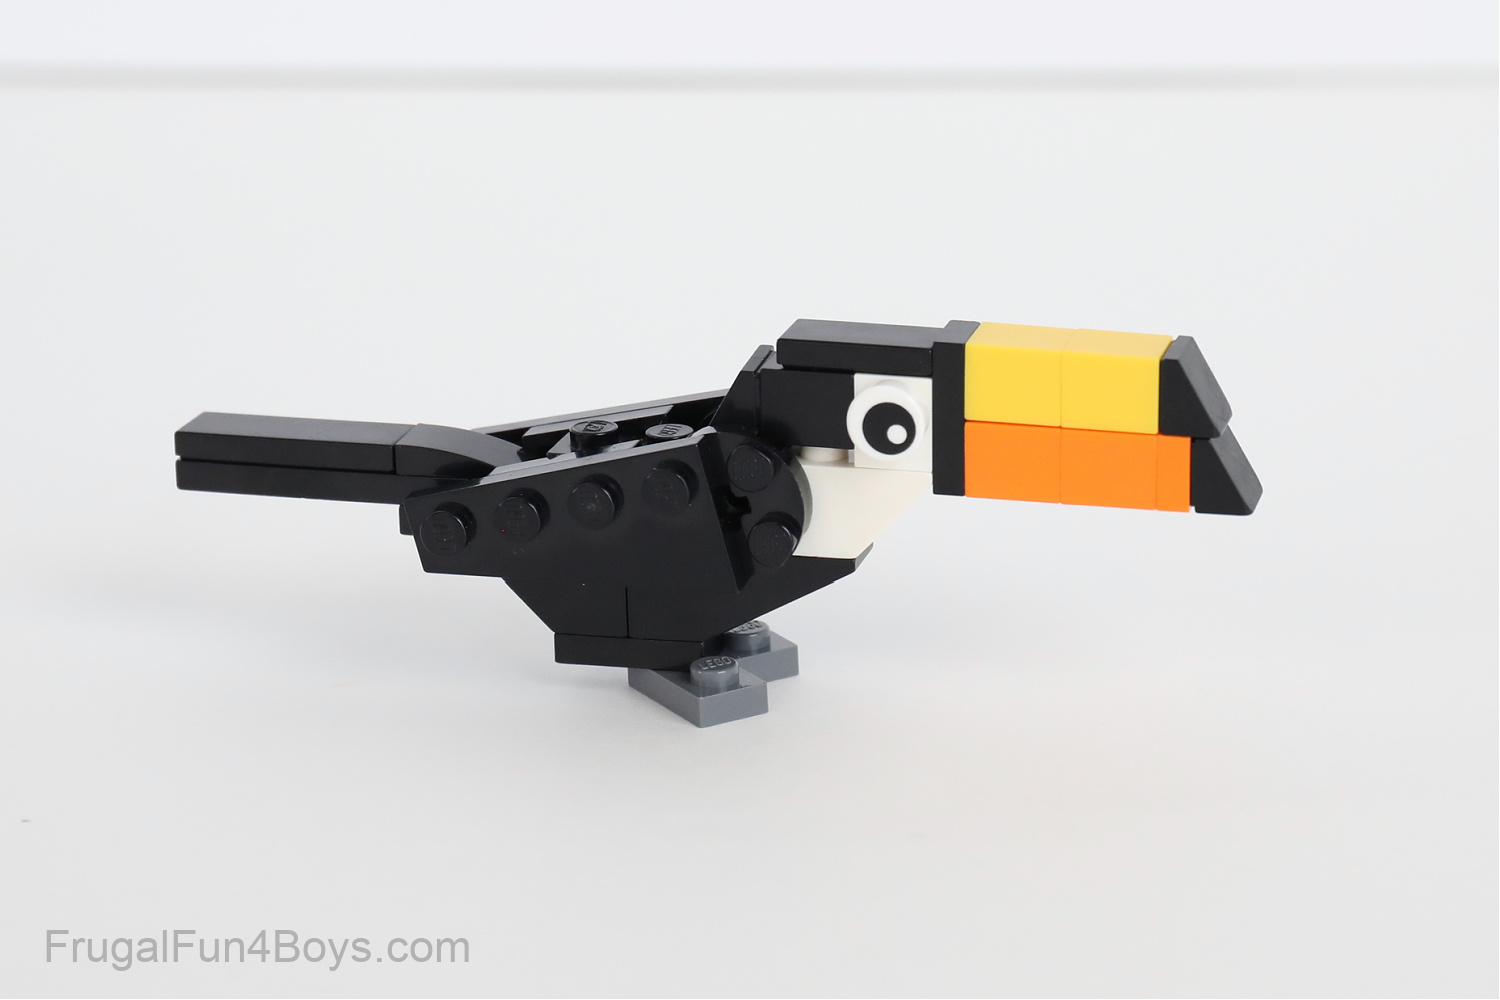
This shows you how the body is constructed.
The eyes, beak, and back of the head are attached to a 1 x 1 white brick with studs on all four sides.
Each wing has a 2 x 4 black wedge plate (note the right and left orientation), a 1 x 2 black plate, and a 2 x 2 black round plate.
LION
This friendly little lion is so much fun to build! It’s another one of my favorite projects.
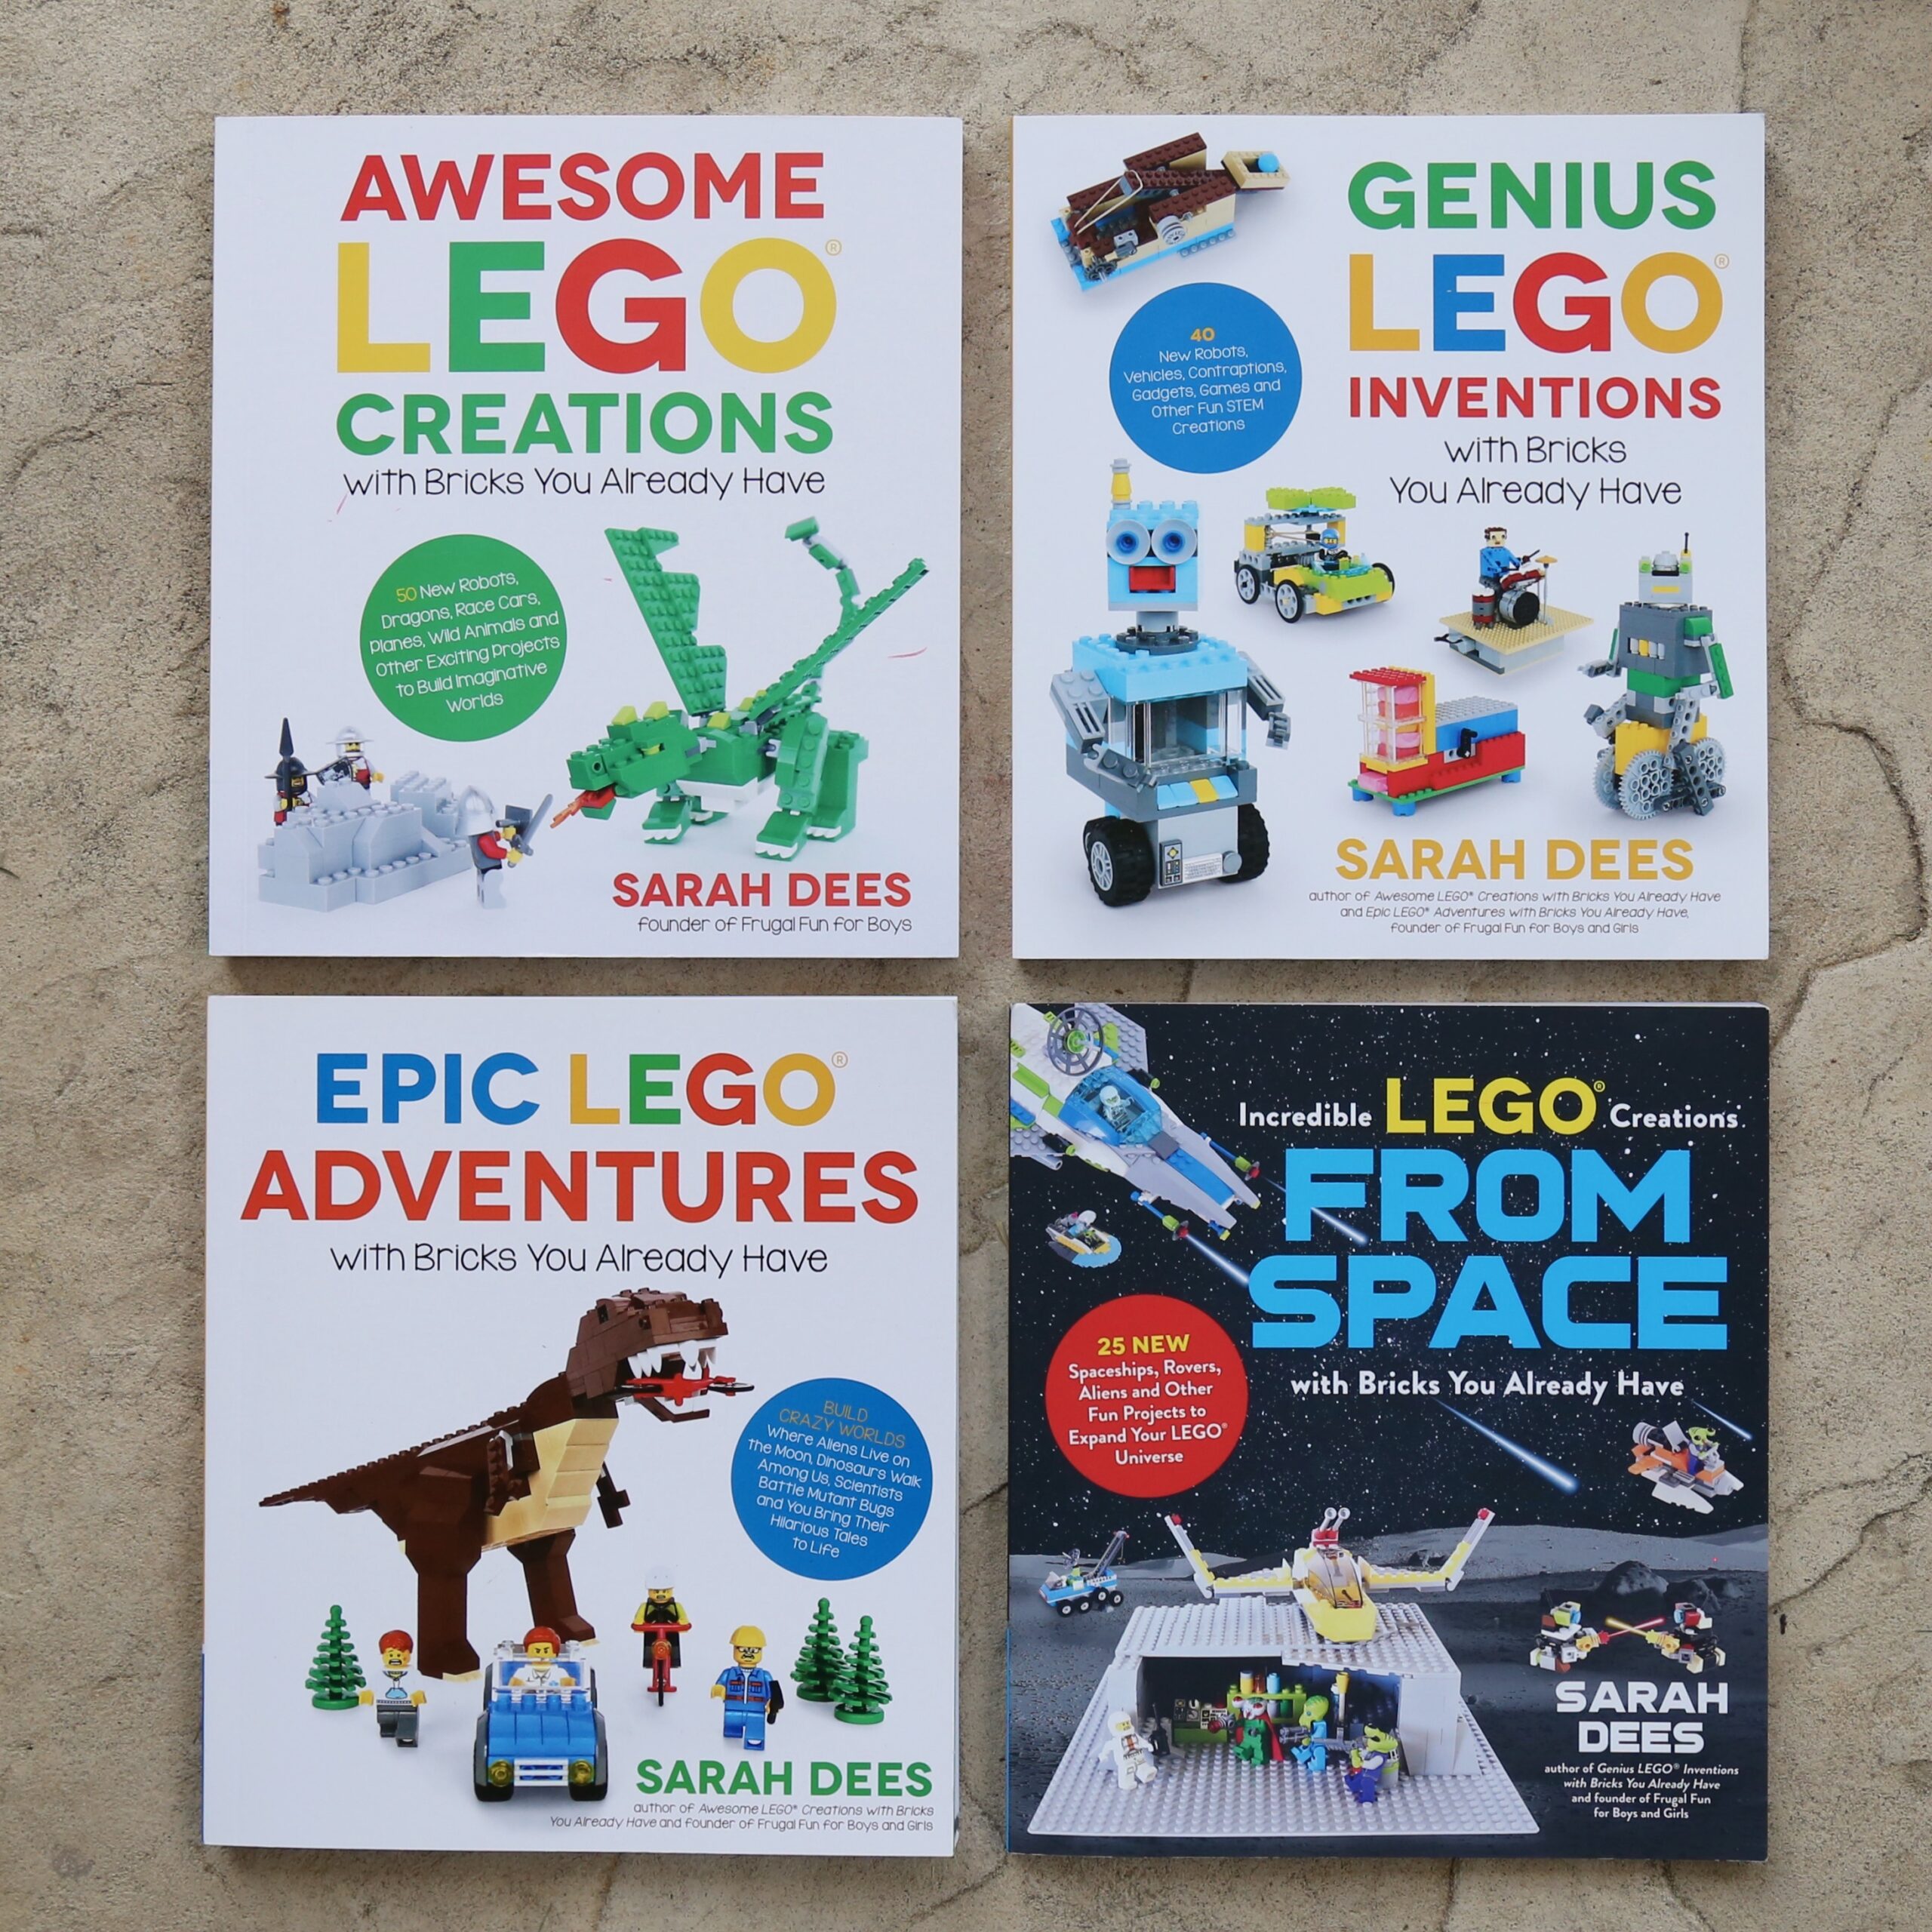
Full building instructions for the lion can be found in our first LEGO book, Awesome LEGO Creations with Bricks You Already Have.
The book also has instructions for a walrus, tiger, alligator, monkey, and more animals. The alligator and monkey in the book are different from the ones shared in this post.
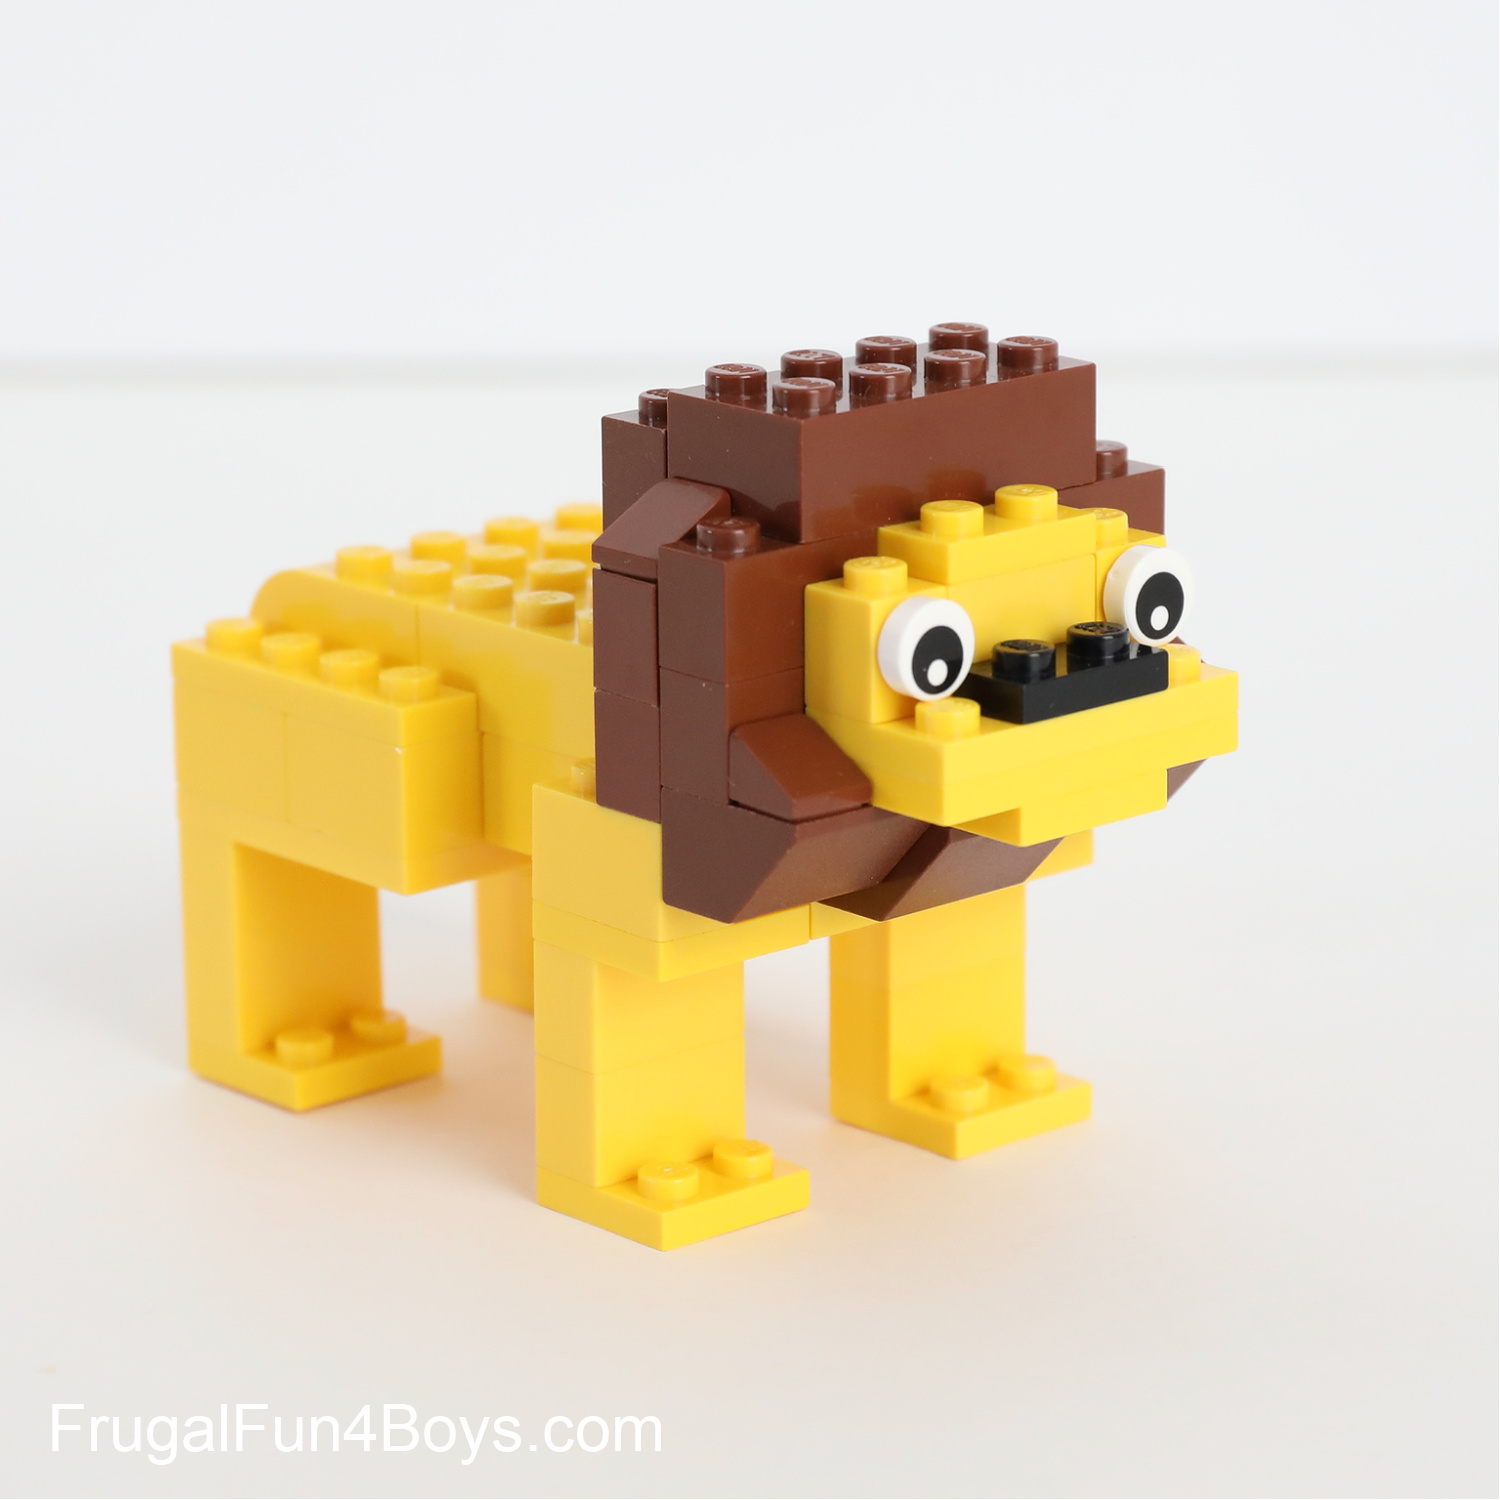
My kids recently complained that the lion doesn’t have a tail. Feel free to add a tail if you want! Ha!

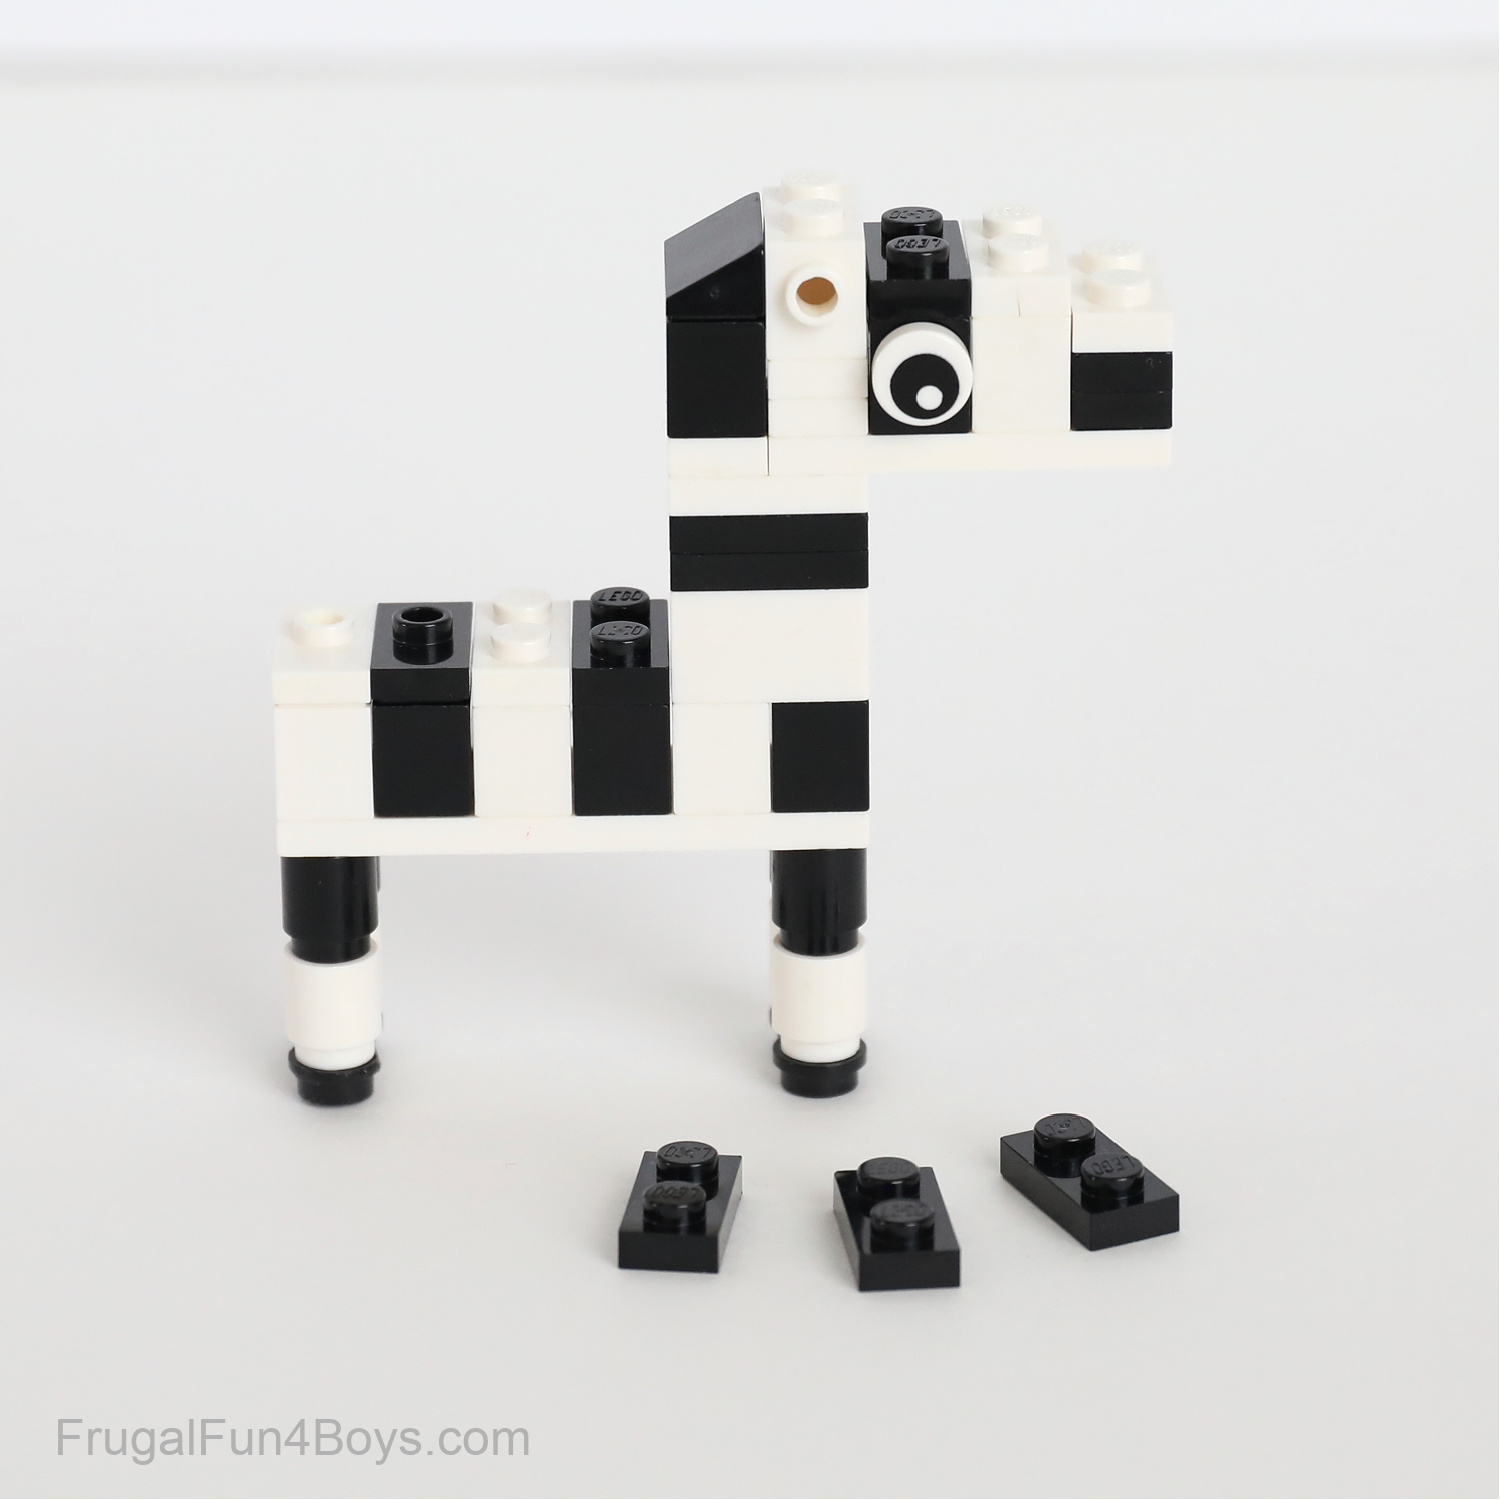
ZEBRA
This is another brand-new project for this post! I built this one, and the kids gave their approval.
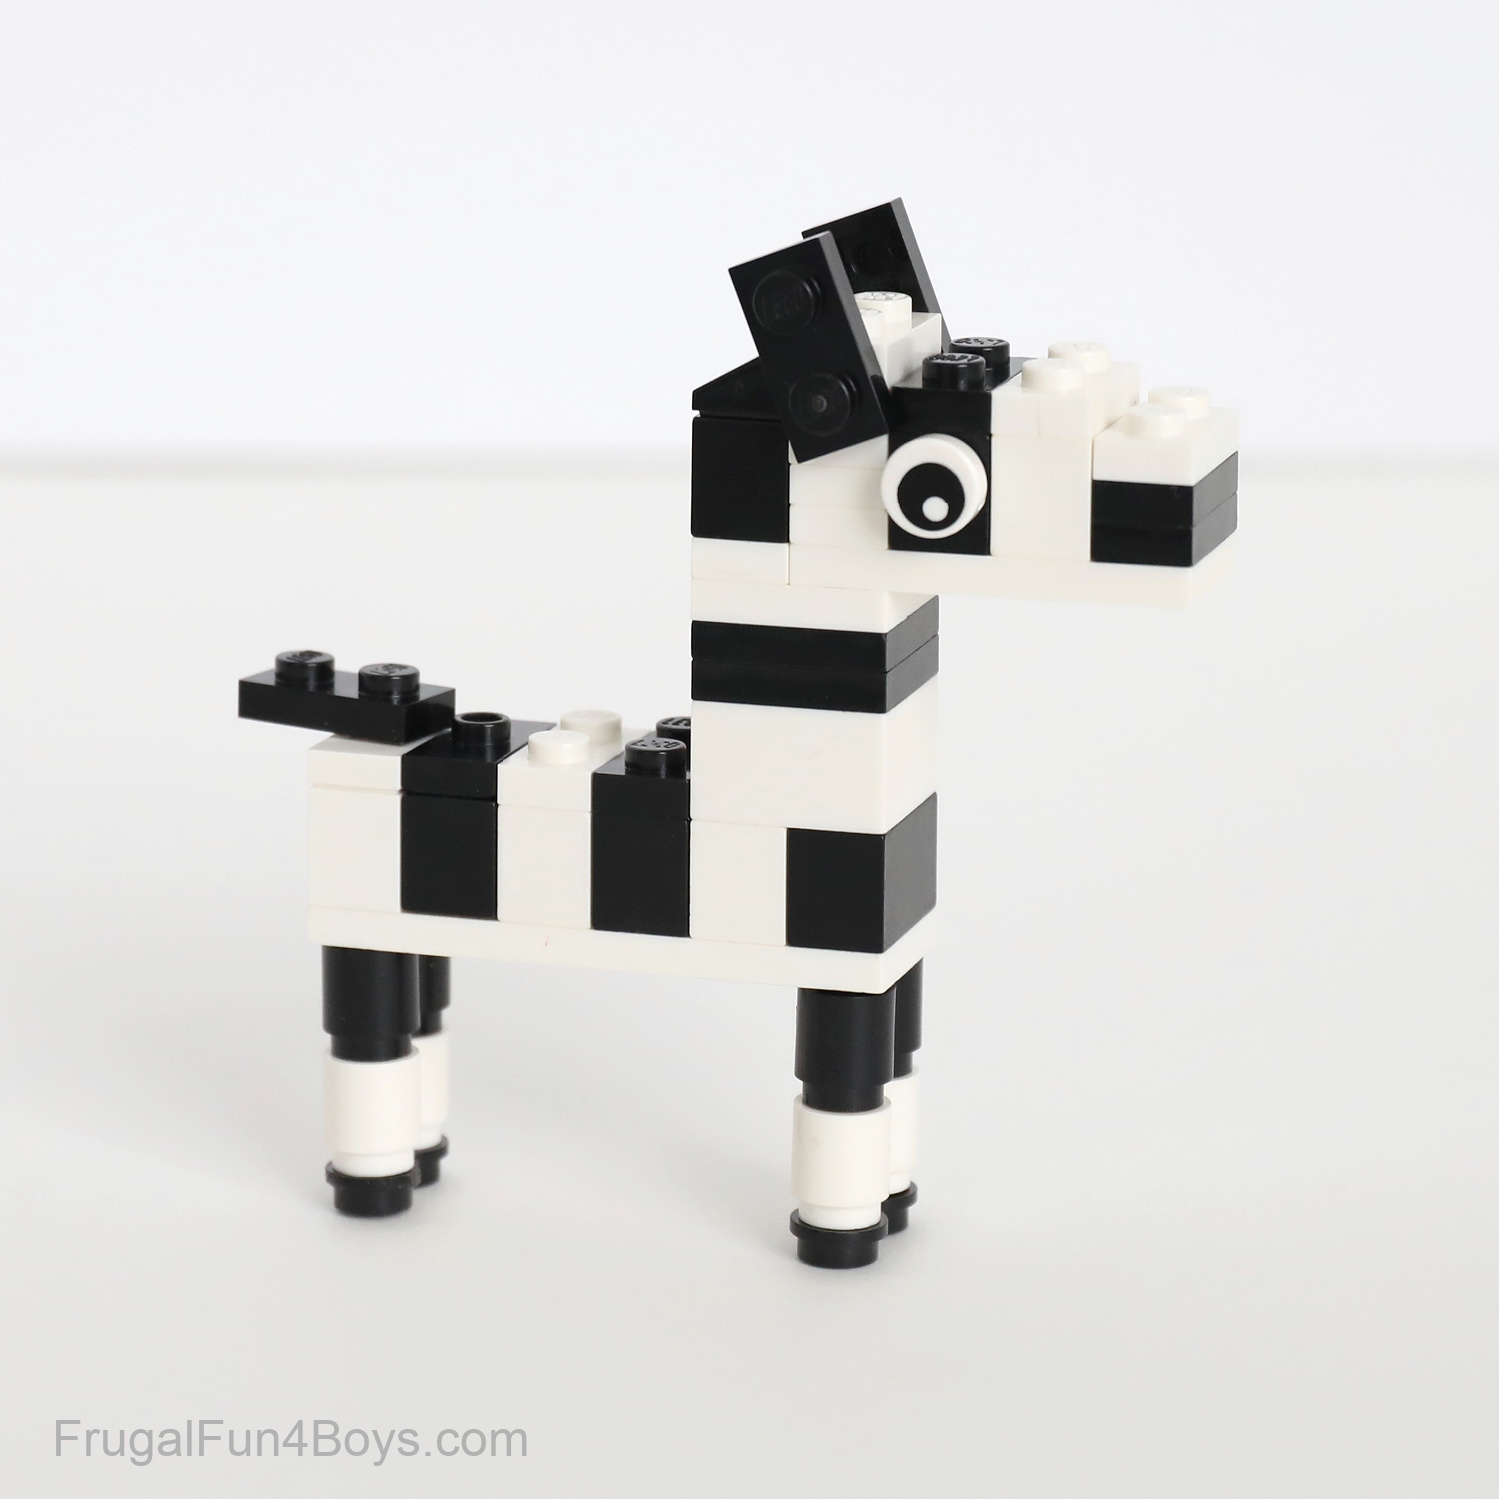
It’s a really simple design, and very similar to our LEGO unicorns. The base of the head is a 2 x 4 white plate (with a 1 x 2 plate right behind it) and the base of the body is a 2 x 6 white plate.
ALLIGATOR
This fun posable alligator is also a new project designed by my 15 year old. You can use any shades of green that you want.
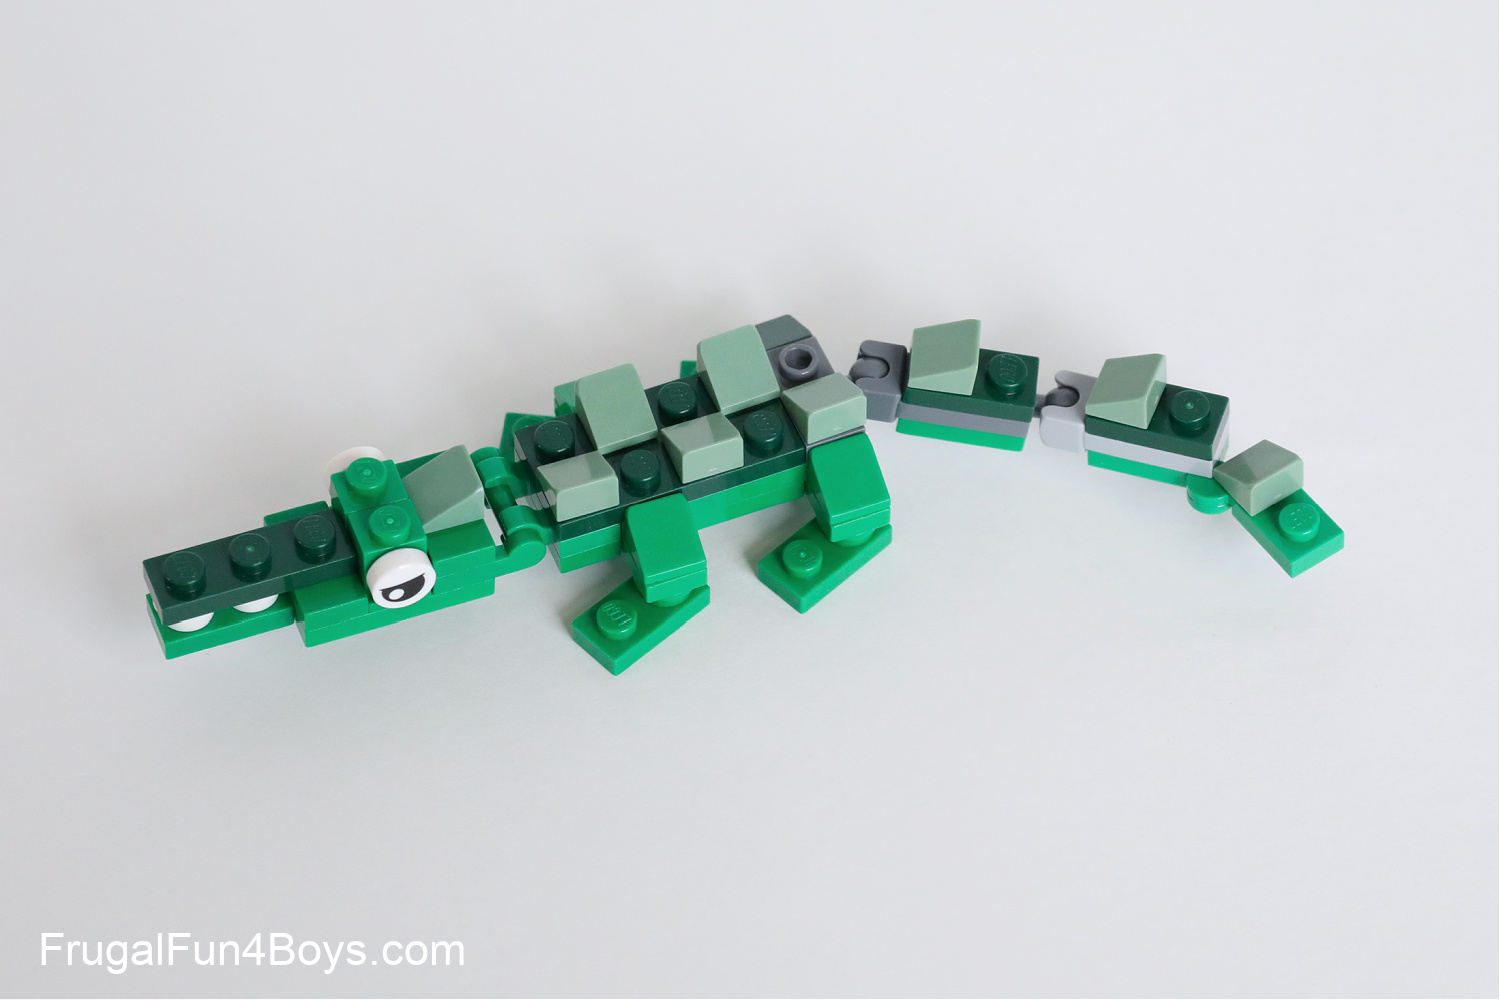
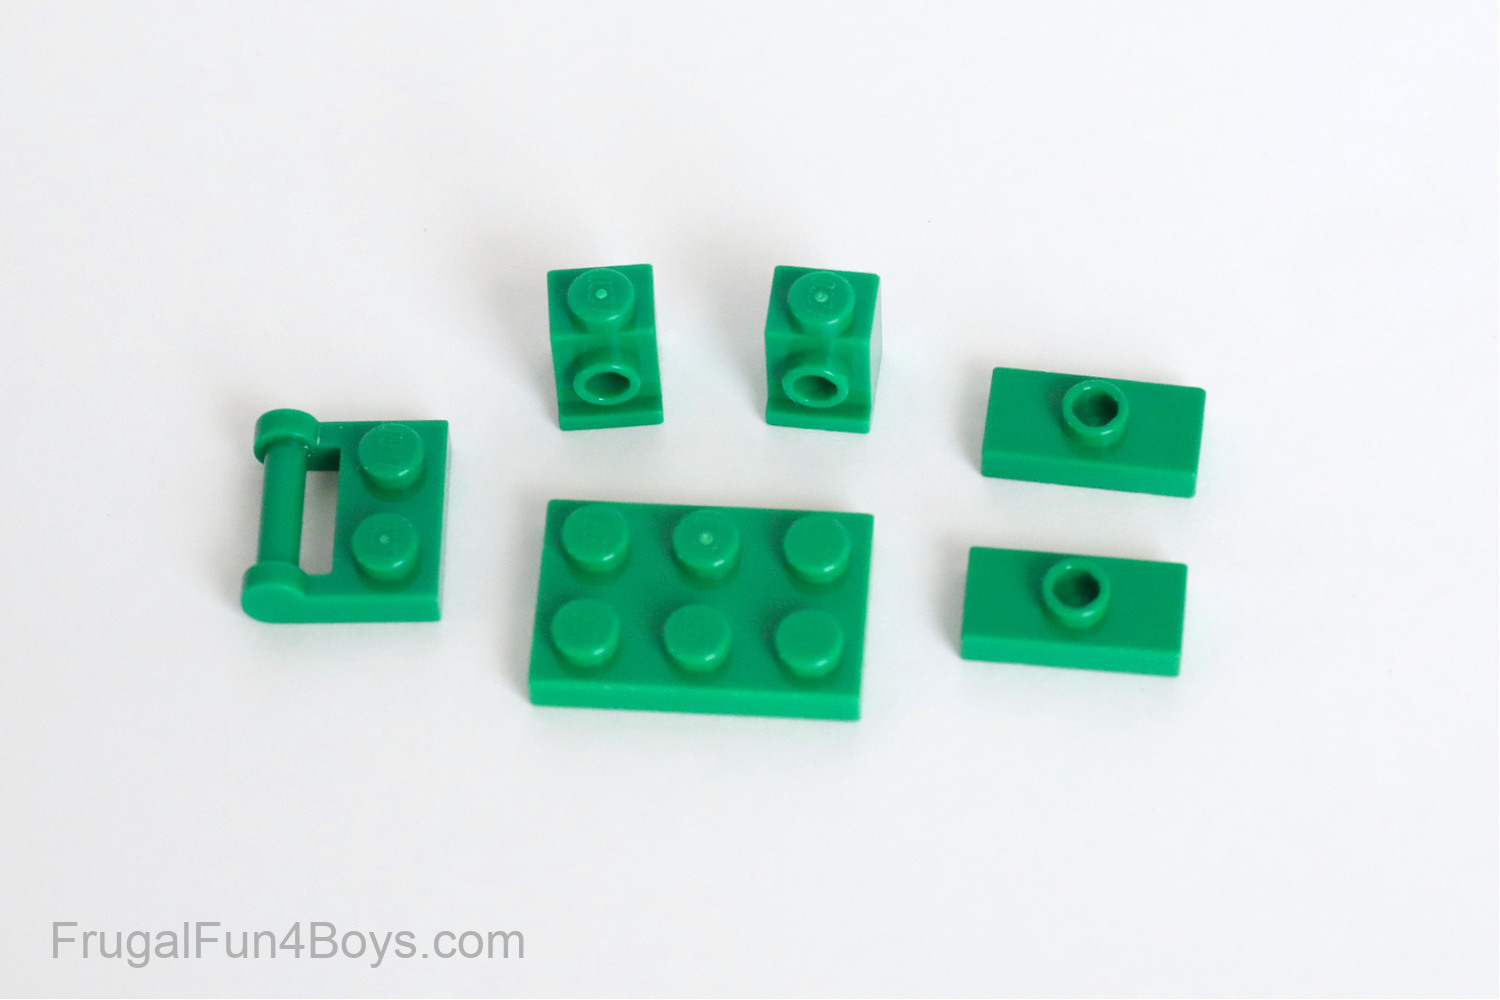
Gather these pieces for making the alligator’s head.
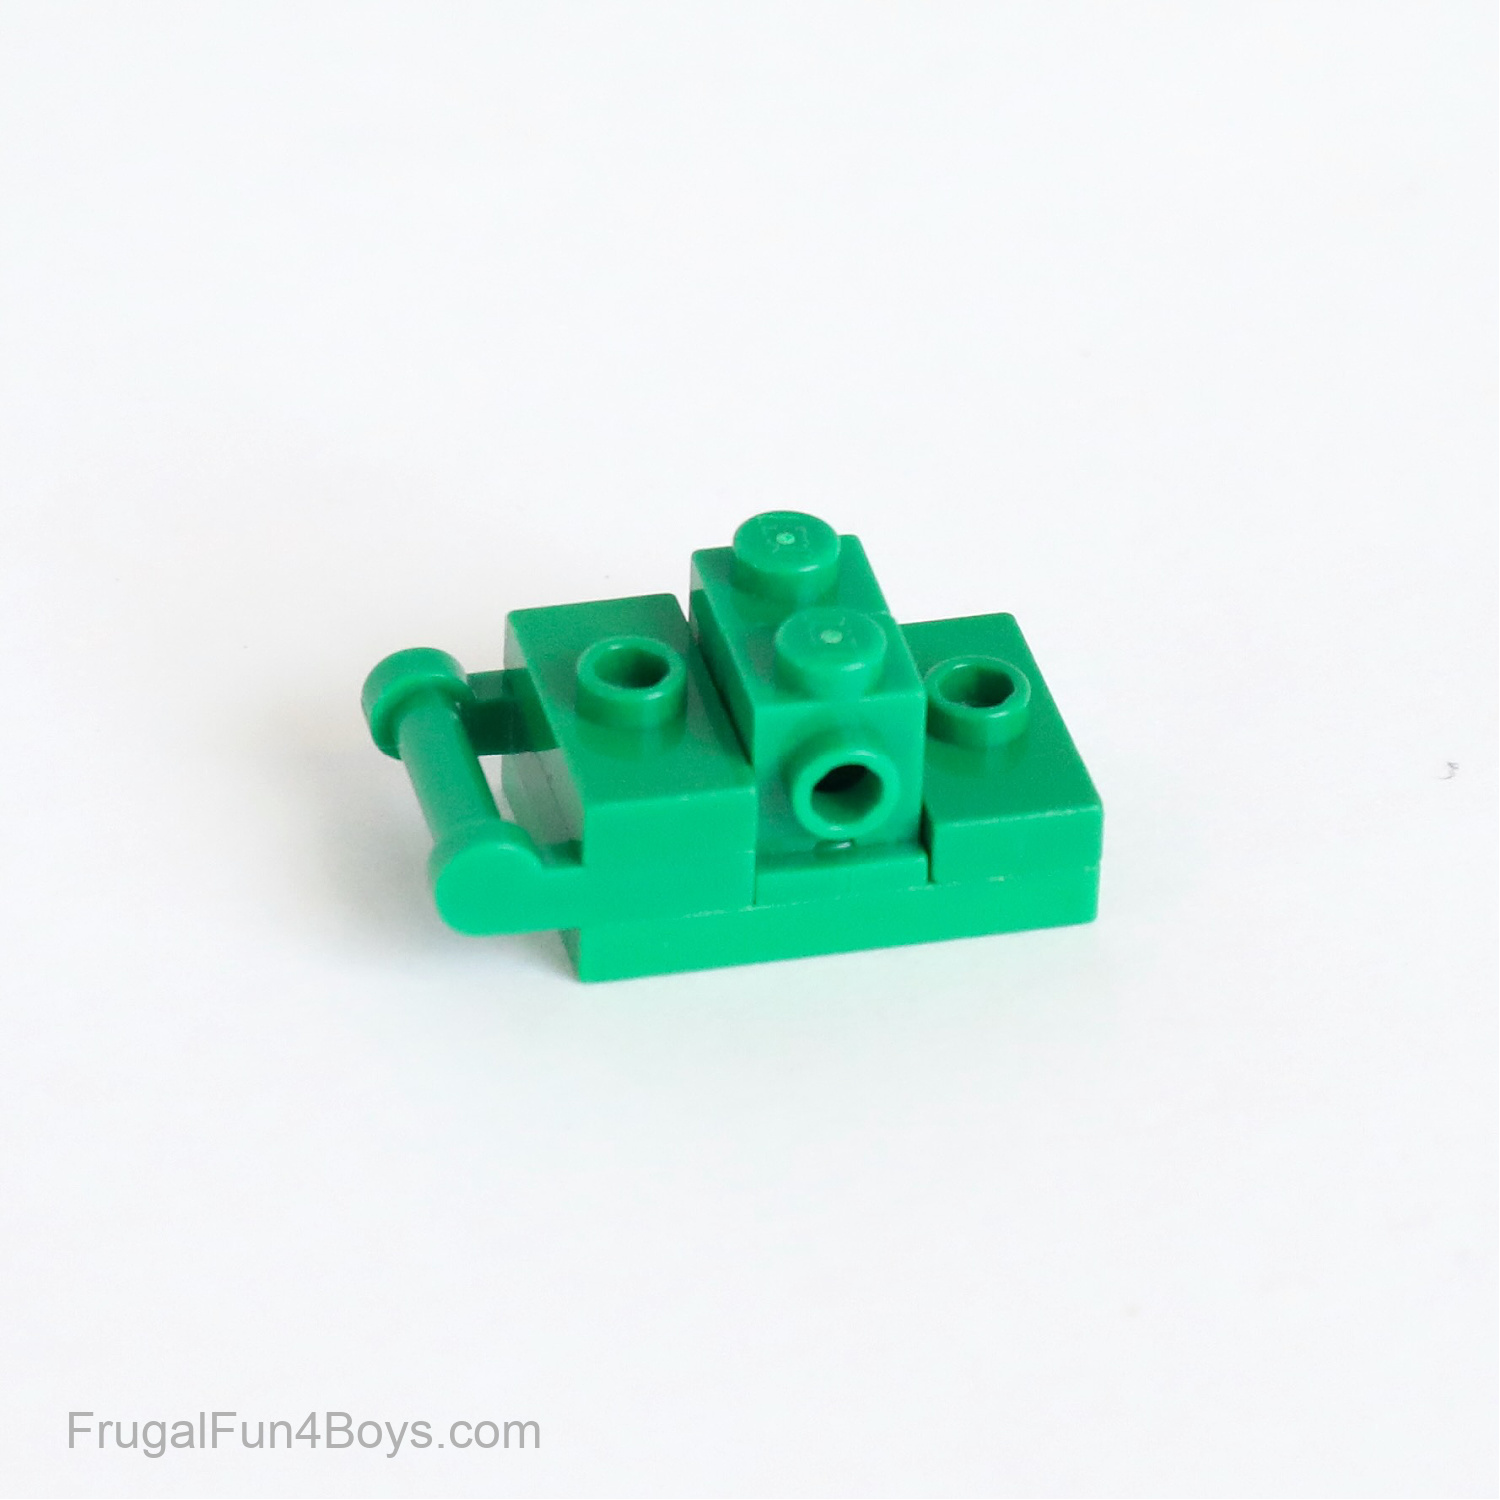
Attach the bricks to a 2 x 3 green plate as shown.
Add eyes. Build the mouth by attaching a 1 x 3 green plate to the head. Add two 1 x 1 white round plates and a 1 x 2 green plate. Small 1 x 1 slopes make great spikes on the alligator!

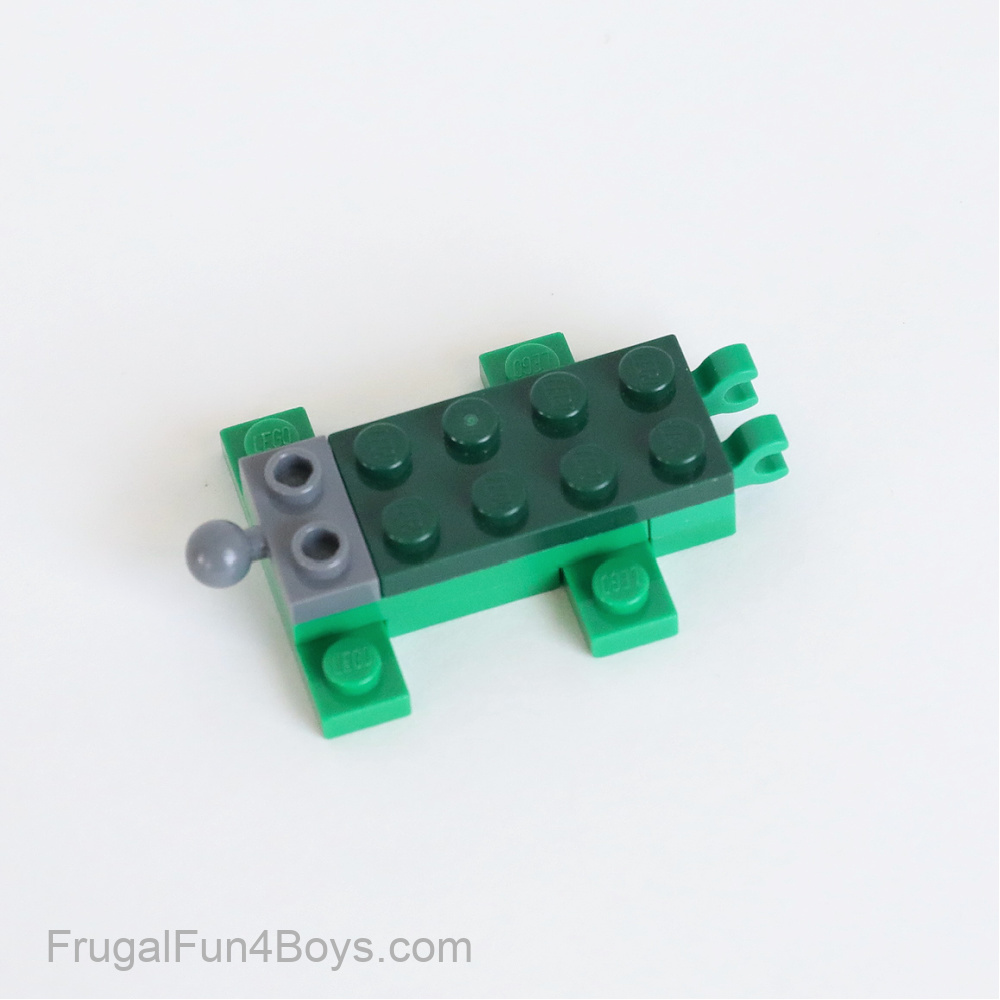
Here’s what the body looks like.
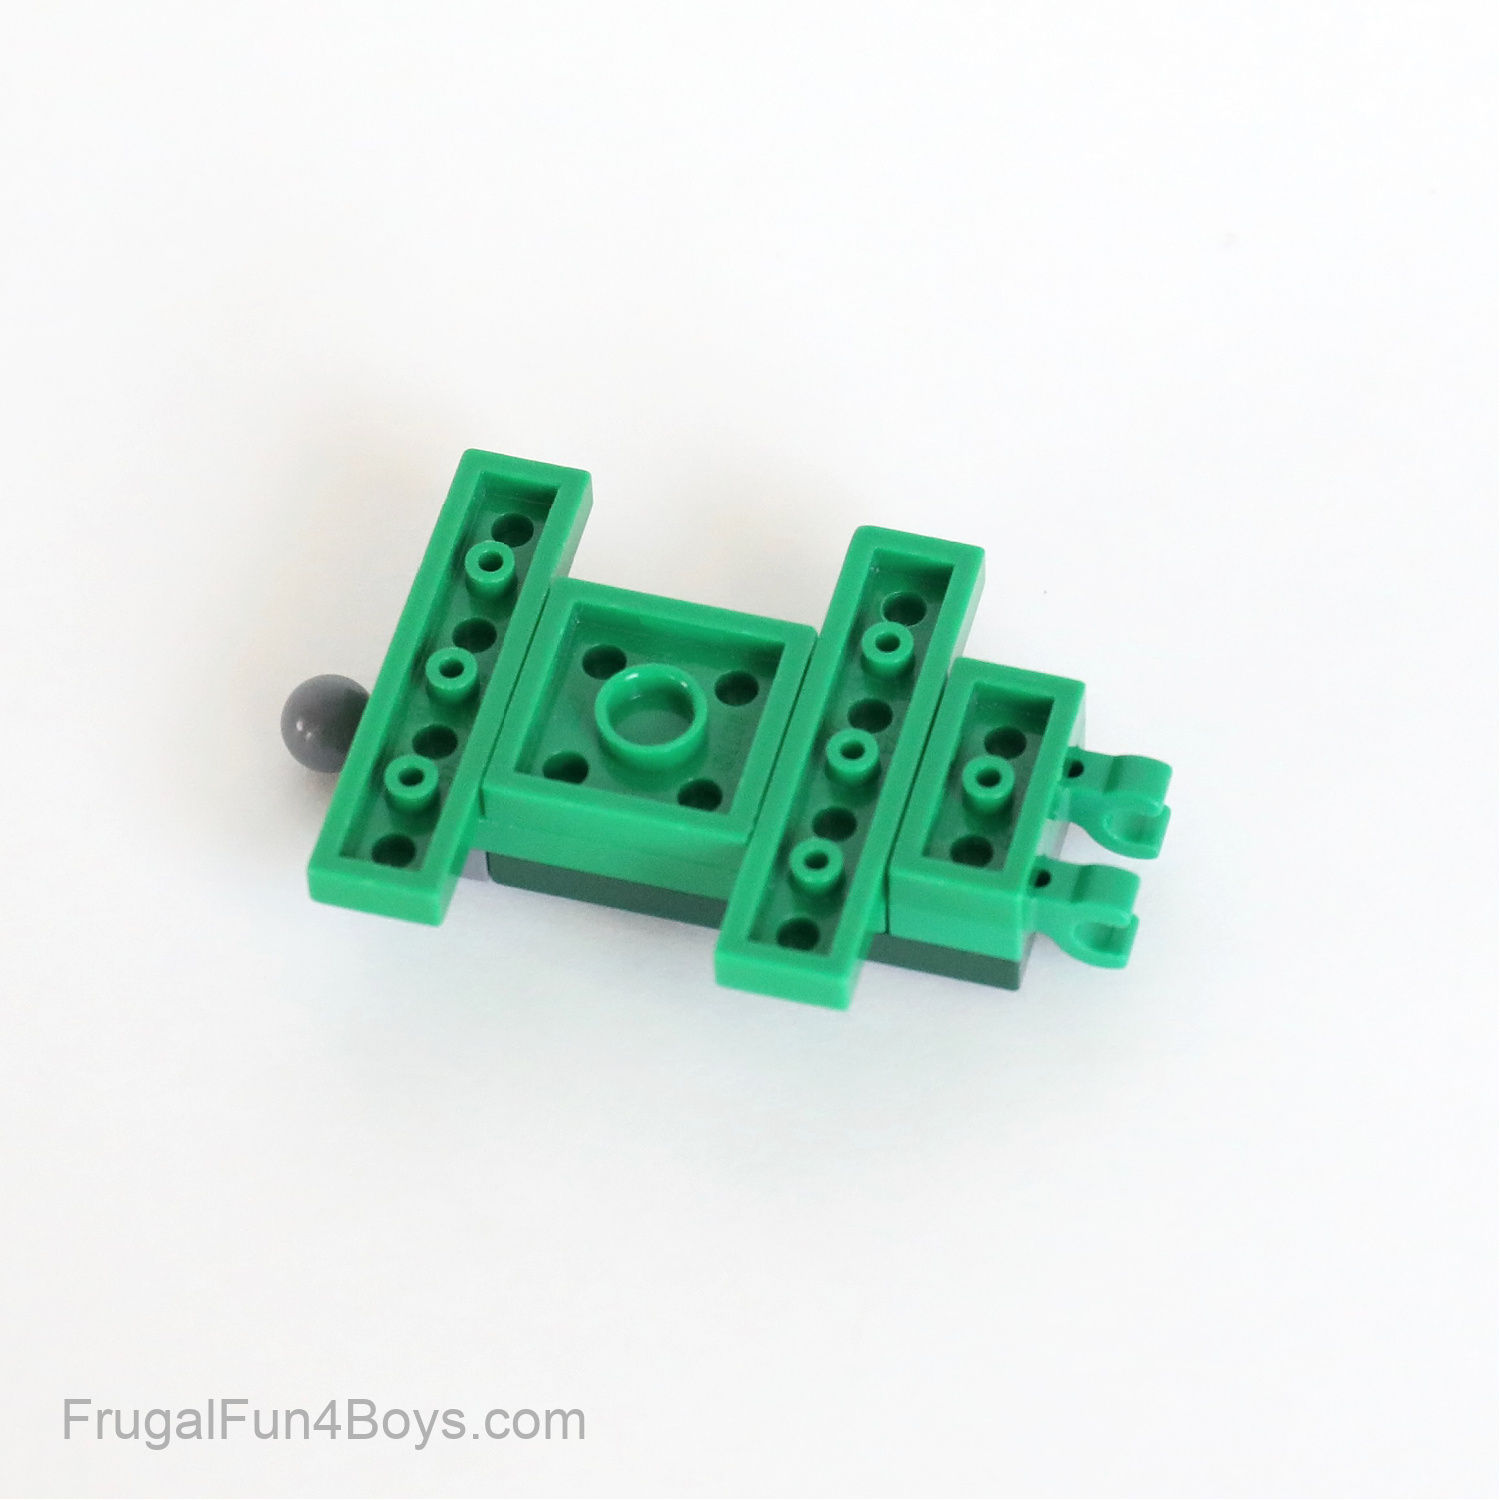
This view of the underside should help as well.
Add spikes to your alligator if you want. Each leg/foot is made from one 1 x 1 green round plate and one 1 x 2 green plate.
If you have ball and socket joints, use those for building a tail.

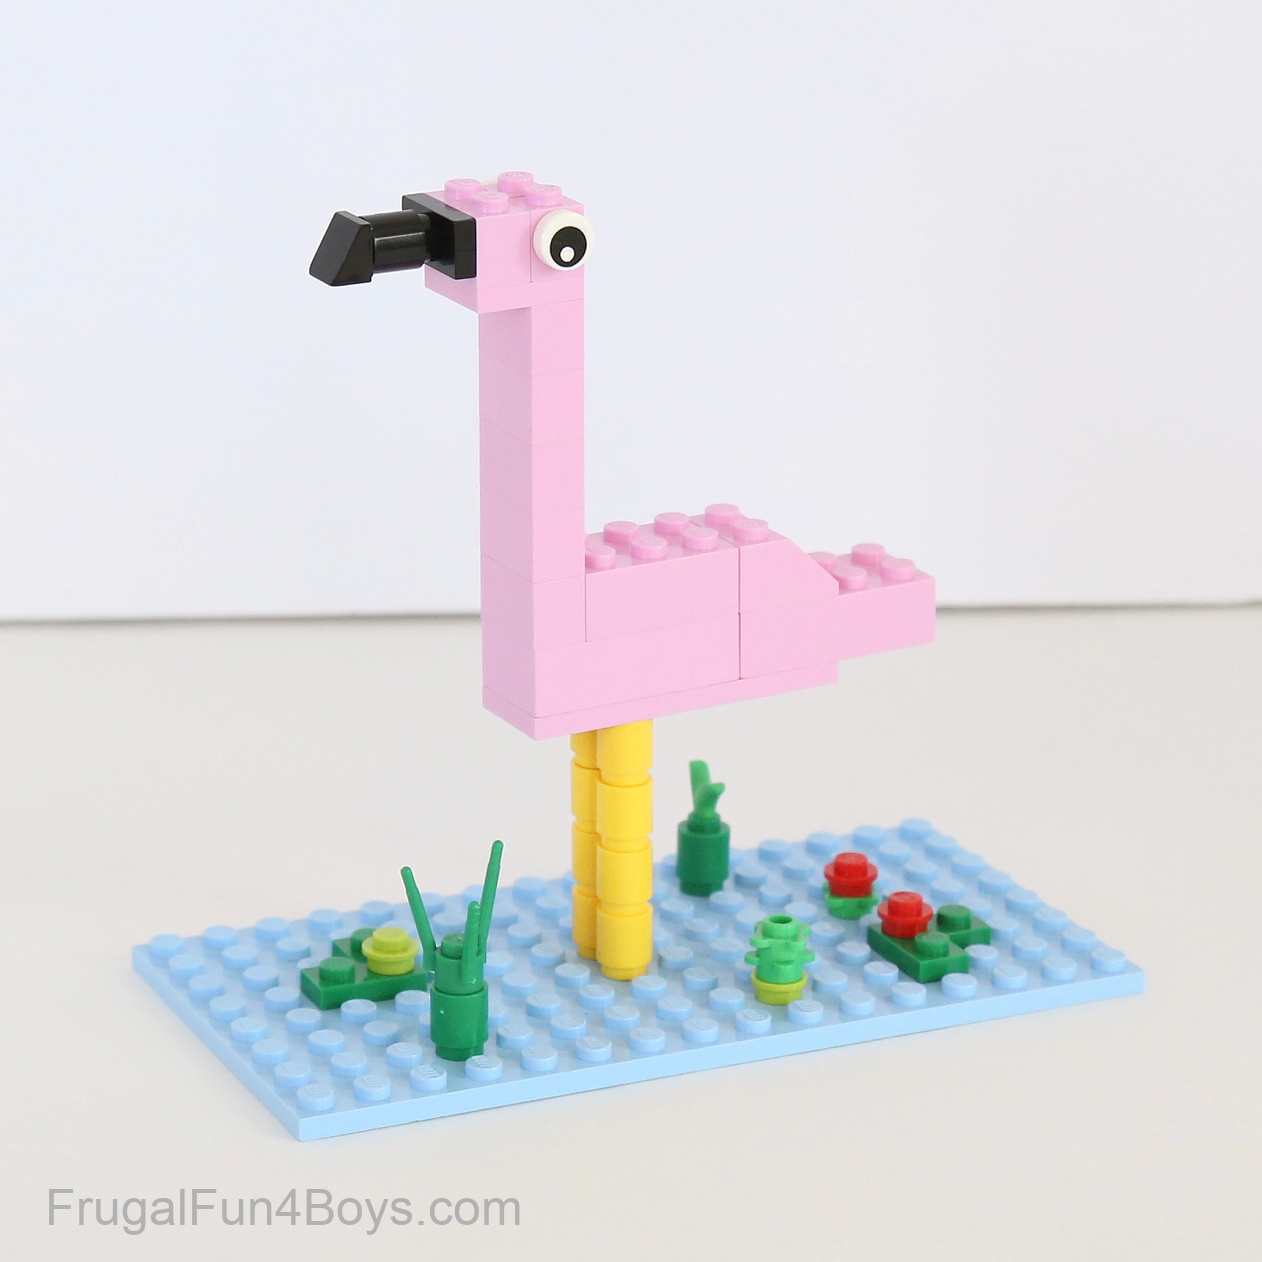
FLAMINGO
Here’s a simple flamingo to build if you have enough pink bricks! Start with a 2 x 6 plate for the base of the body. It’s fun to make the flamingo look like she’s standing in the water.
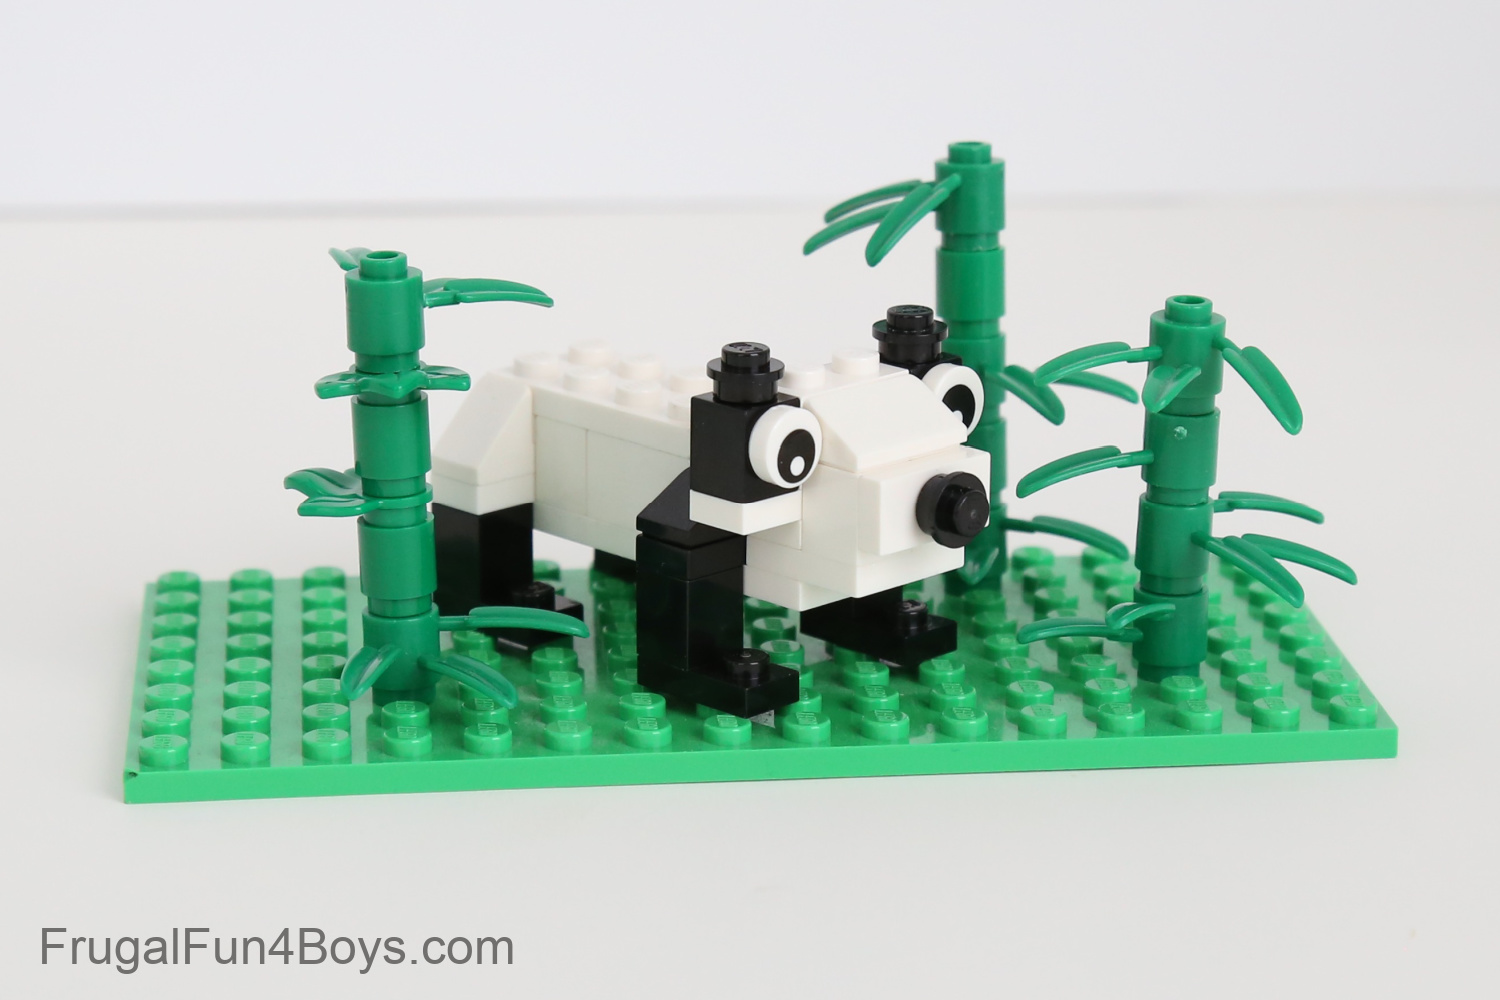
PANDA
See instructions for a mom and baby panda here!
Disclaimer: this project was very early on in my LEGO work. I have it on my to-do list to update the instructions! They’re not the best.
However, you CAN find updated instructions for the baby panda in our newest LEGO book, The Big Book of Amazing LEGO Creations.
MORE LEGO ANIMALS
Here’s Part 2 of our LEGO Animals. Make a bear, raccoon, kangaroo, chameleon, and more.

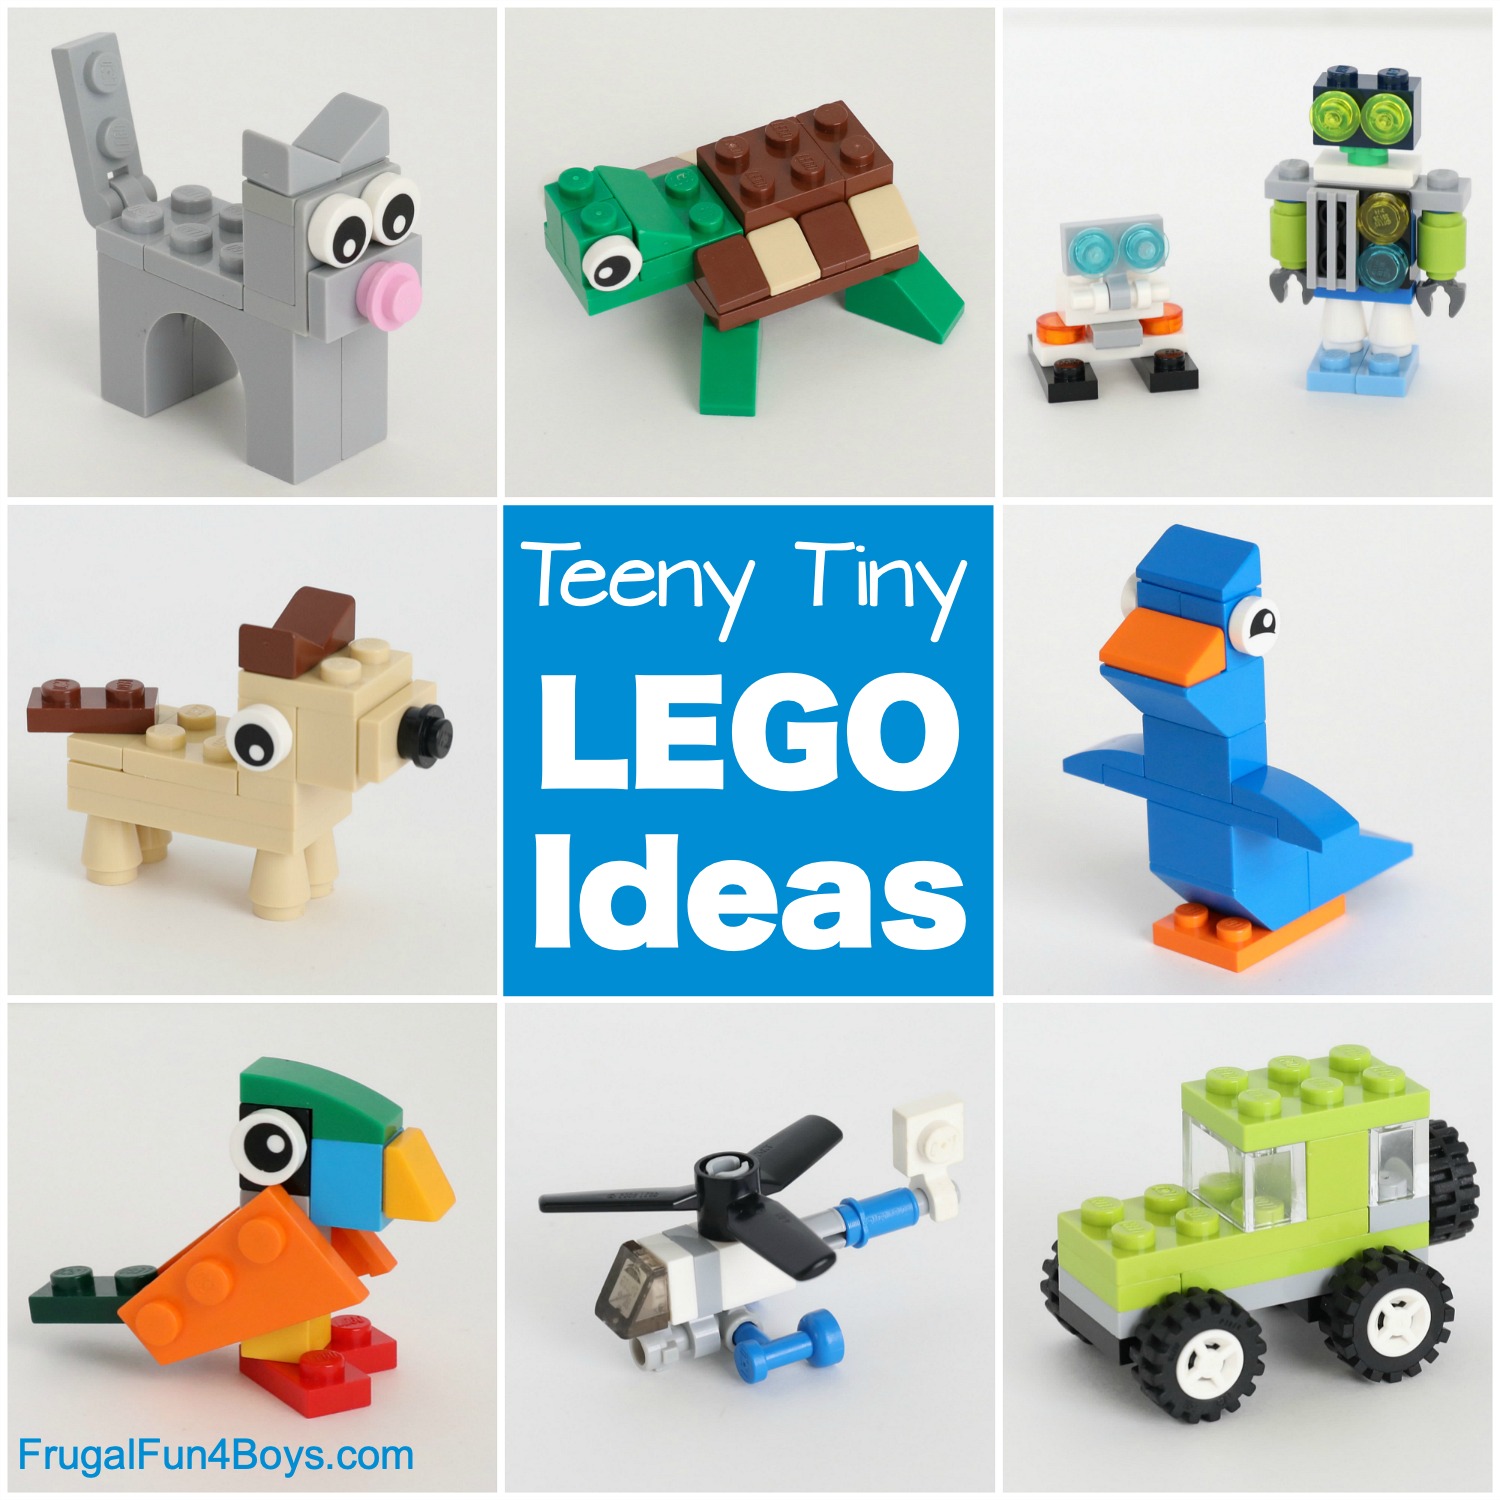
Here are some fun Tiny LEGO Animals! Build a tiny cat, dog, parrot, eagle, and turtle.
Do you prefer print instructions? Our LEGO project books are PERFECT! Plus, they contain hundreds of projects that are NOT on our website.
The majority of the content in our books is unique to the books.
The Big Book of Amazing LEGO Creations has a whole section on animals.
Awesome LEGO Creations with Bricks You Already Have has a chapter on animals.
Epic LEGO Adventures with Bricks You Already Have has instructions for LEGO dinosaurs.
See information about all 5 LEGO books here: LEGO BOOKS
0 Comments
Post a Comment