
This water filter science experiment is the perfect addition to any earth science unit!
It’s easy to do, and students of all ages will enjoy this science activity. I would recommend this experiment for students ages 10+ to do mostly on their own. It would be perfect for middle school. However, younger kids from first grade on can benefit from this experiment with some adult help!
It’s good to be reminded what it takes to get dirty water clean! Having access to clean water is something we should not take for granted. We should also consider what we are adding to the water in our community.
Before doing this experiment, I watched a few videos and read a few articles online to see how others have approached this water filter science experiment. Then we conducted the experiment more than once and adjusted our procedure along the way.
This process reminded me of two things that I really want to share with you all:
- There is a LOT of fake science on Instagram and YouTube (and probably TikTok too but I’m not on there).
- Conducting experiments is far more valuable than watching a video of someone else carrying out the experiment.
Now, please hear me out a minute on that second one. Videos absolutely have their place. There are times that you won’t be able to get the supplies needed or don’t have the time or skill to set up a certain lab. My point is simply that watching videos removes the student from the scientific process. They become outside observers rather than experimenters. They also miss out on the opportunity to develop skills in following directions, scooping, pouring, measuring, cutting, taping, and building scientific apparatuses.

How to Do the Water Filter Science Experiment
When I began researching this experiment, I quickly found that most people follow roughly the same process.
The first video that I watched showed someone pouring very dirty water into a filter they had made in a bottle, just like ours. The water quickly ran through the filter and came out crystal clear!
After carrying out this experiment multiple times, I can confidently say that that video HAD to have been rigged.
The reality is that it takes several minutes for the water to go through the filter. Maybe 10-15 depending on how thick your filtering layers are.
Also, it’s a challenge to get the water completely clear.
However, this experiment still has so much value for students. We learned so much! And there are several variables that you can modify to create a true experiment (rather than a simple demonstration).
Supplies Needed for Making a Water Filter:
- A plastic bottle – we used a 1.25 liter soda bottle
- Fine sand
- Coarse sand
- Gravel
- Cotton balls
- Charcoal
- A utility knife
- Three craft sticks
- Tape
- Jar or glass (optional)

We used a 1.25 liter soda bottle, and it worked well. A 2 liter bottle is fine too, but just keep in mind that if your bottle is larger, you’ll need more of all the supplies to fill it.
I used my kitchen strainer to separate our play sand into fine sand and coarse sand.
My husband used a hammer to crush some charcoal. Barbeque charcoal is fine to use! Just make sure it’s not the type with lighter fluid already added.
How to Set up Your Filtration Bottle:
I will show you the apparatus we built, and then explain why we switched to a glass instead.
Cut 3-4 inches off the bottom of your bottle.
Then use craft sticks to attach the upside down bottle to the bottom of the bottle as shown. We taped the craft sticks in place.

Once we started the water filtration experiment, our bottle ended up falling over and breaking the sticks (due to user error!), so we ended up switching to just having the bottle upside down in a glass.
I really do like this setup, though, and if you’re doing this with a class it will save you from having to have a bunch of glasses or jars.
This water filter uses different materials to trap the dirt particles in the water.
Start with cotton balls in the bottom of the jar. Then add a layer of crushed charcoal. The charcoal will absorb impurities in the water, and the cotton filters out some of the smallest particles.
NOTE: While you may be able to filter out a lot of dirt from your water, this filtering process will NOT get rid of bacteria or viruses in the water. Don’t drink the water you filter unless you boil it first!

Here’s how we built our layers.

Kids will probably be very curious about why we’re using dirt and rocks to make water clean! The gravel will trap the largest particles in the dirty water. Then the sand will filter out smaller particles. The charcoal will absorb impurities in the water, and the cotton will filter out some of the smallest particles.
Now it’s time to test your filter!
Pour some muddy water into your filter.

It will take several minutes for the water to start dripping out the bottom of the bottle! This is not an instant process. The water must seep through each of the layers.
Here’s the water we collected the first time using our filter:

I still wouldn’t want to drink that, but we were all really impressed with how much dirt we filtered out.
Here’s what happened when I took the water from the glass and poured it back through the filter a second time:

Much cleaner!
I ran the water through 4 more times, but interestingly enough it didn’t ever appear to be any cleaner after that second trip through the filter.
So then we tried building a new filter to see if a fresh filter would make the water clear.
It didn’t make a difference!
This seems to be as clean as we can get our water with our filter. The type of play sand available here in Texas stains hands and feet a brown color. So I’m wondering if the sand in our filter was part of the problem.
Add Variables to Make This Water Filter a True Experiment
There are a number of things you can vary in the setup of the filter to make it a true experiment!
- Does the dirtiness of the water affect how clean it becomes in the end? If you start with water that is just a little dirty, can you get it to come out clear? (We used REALLY dirty water!)
- Will the filter work more effectively if you increase the thickness of the layers of filtering material? Kids could experiment with increasing the depth of one layer at a time, or they can increase all the layers.
- Will the filter work more effectively if you substitute coffee filters for the cotton material in the bottom of the bottle?
More Earth Science Experiments:
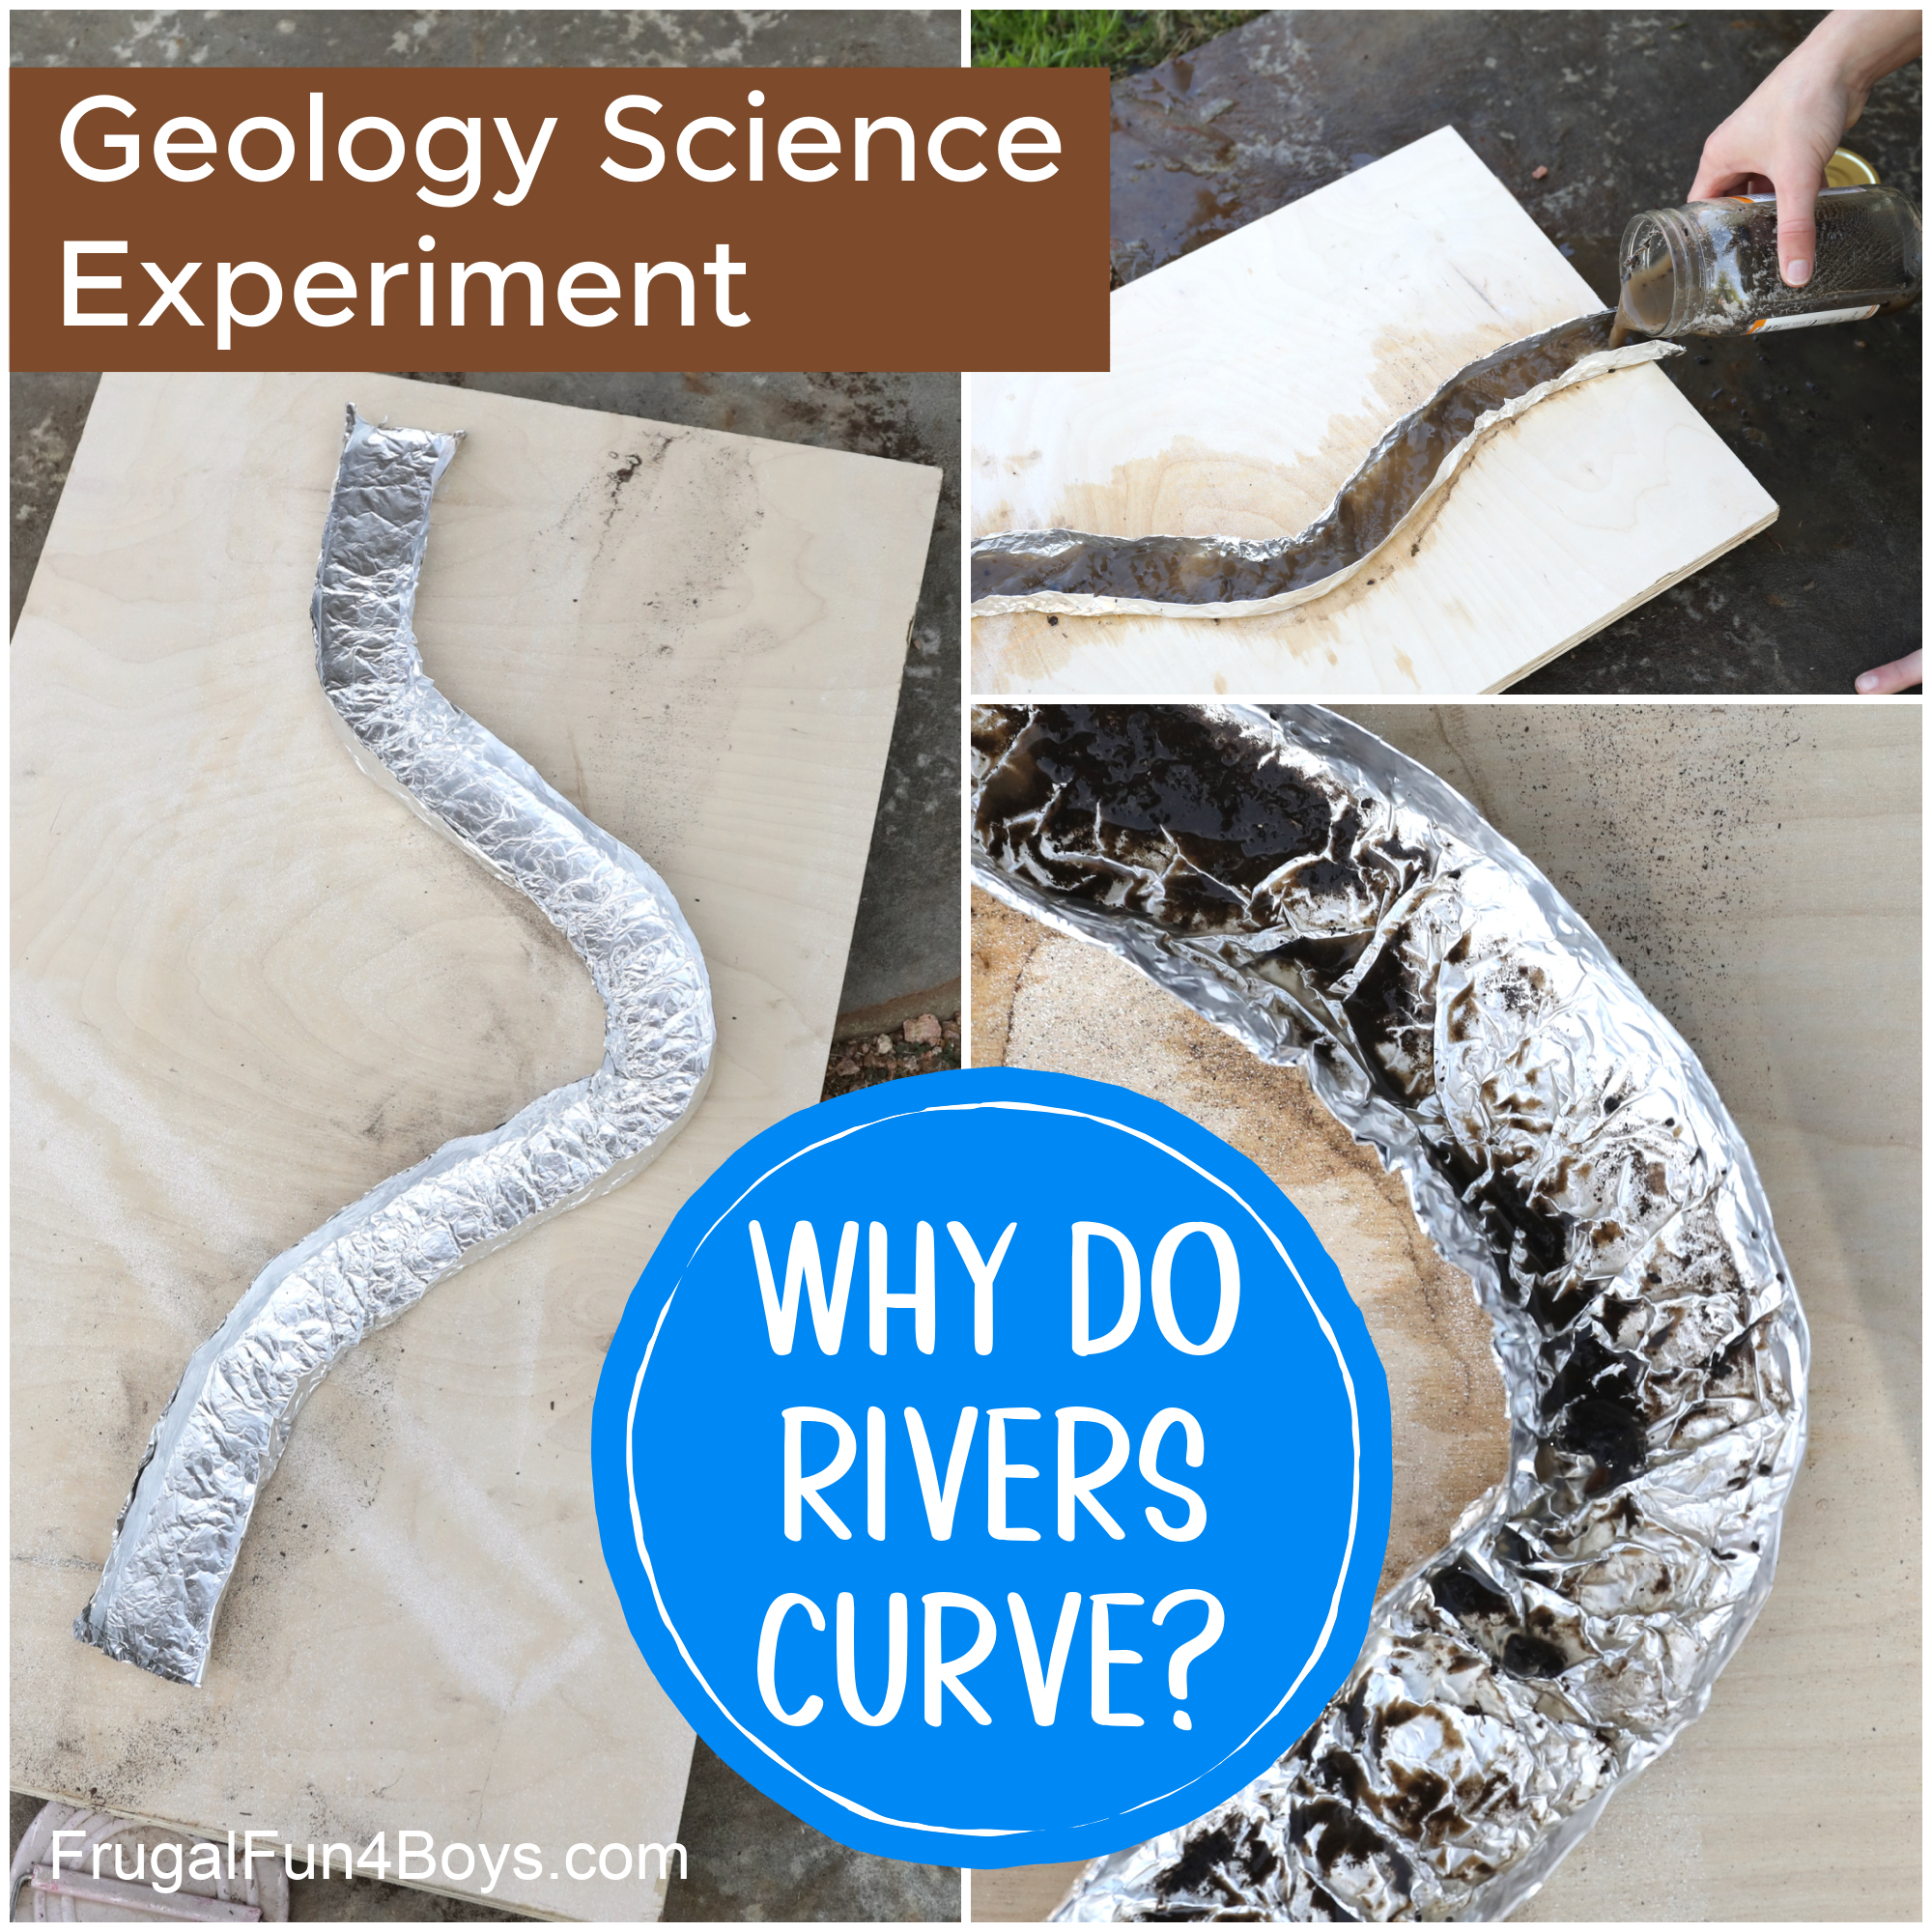
Find out Why Rivers Develop Curves with this simple experiment!
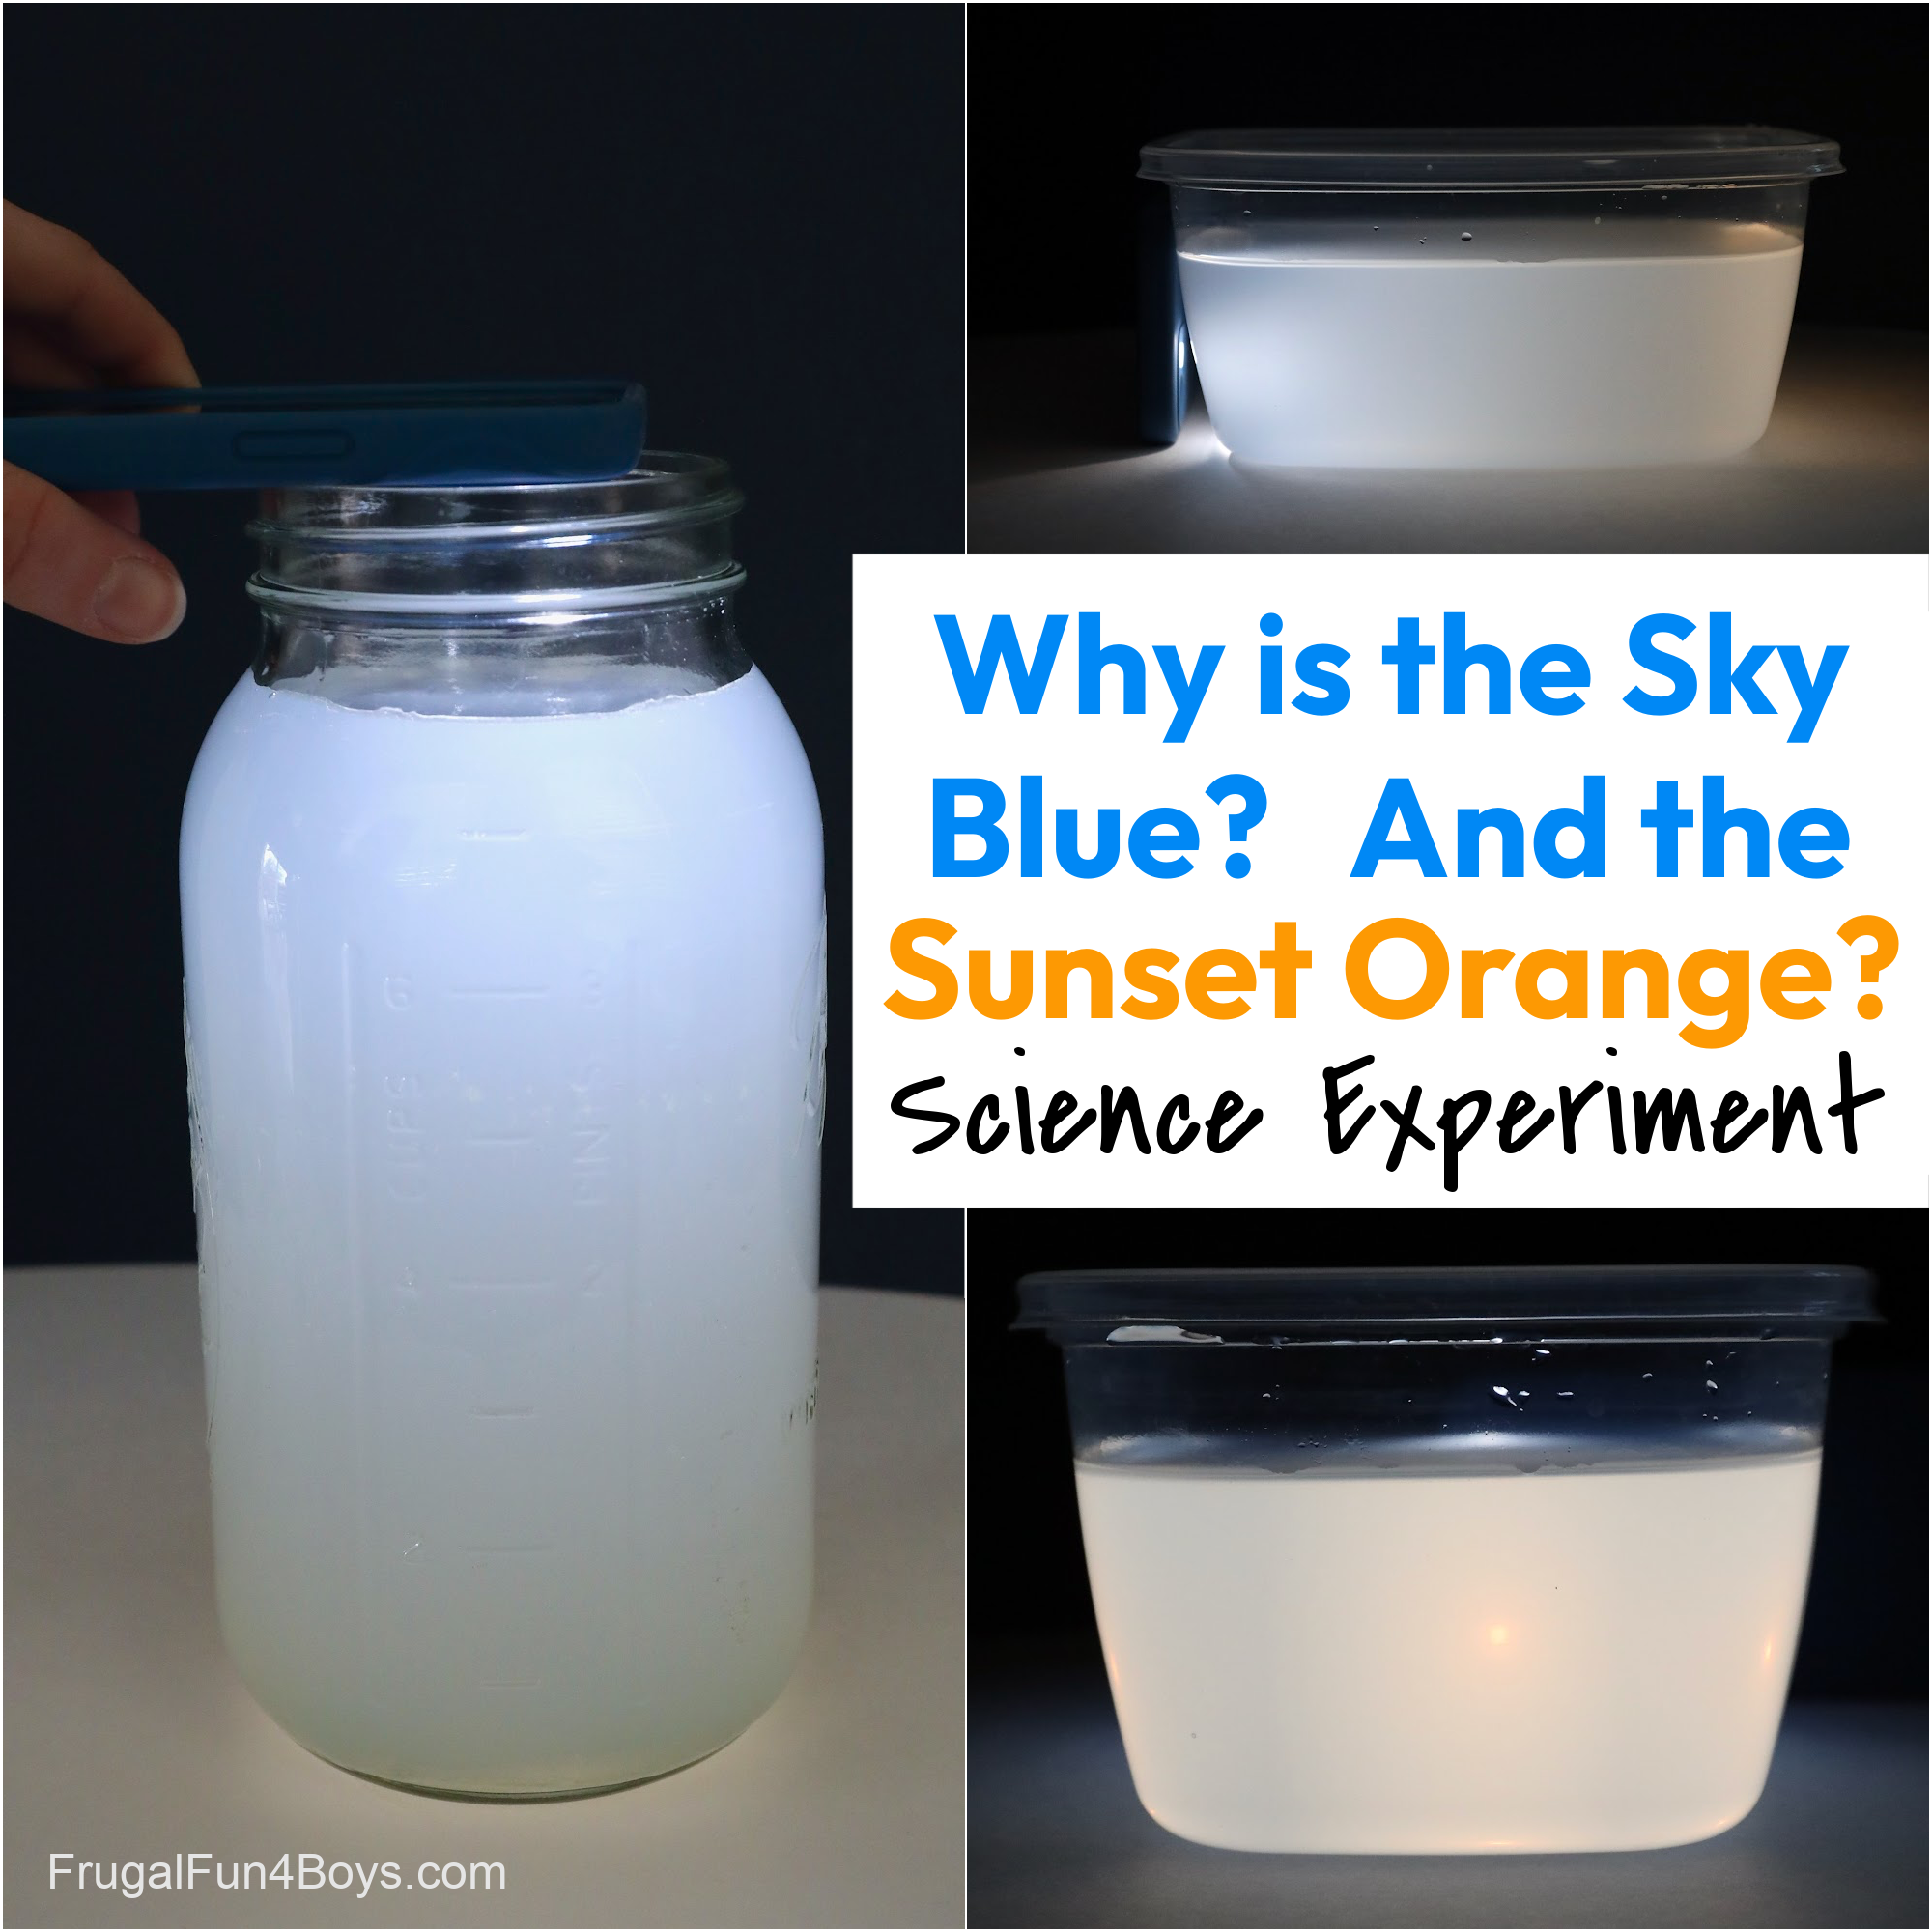
Students will love seeing Why is the Sky Blue? with this easy science demonstration.
0 Comments
Post a Comment