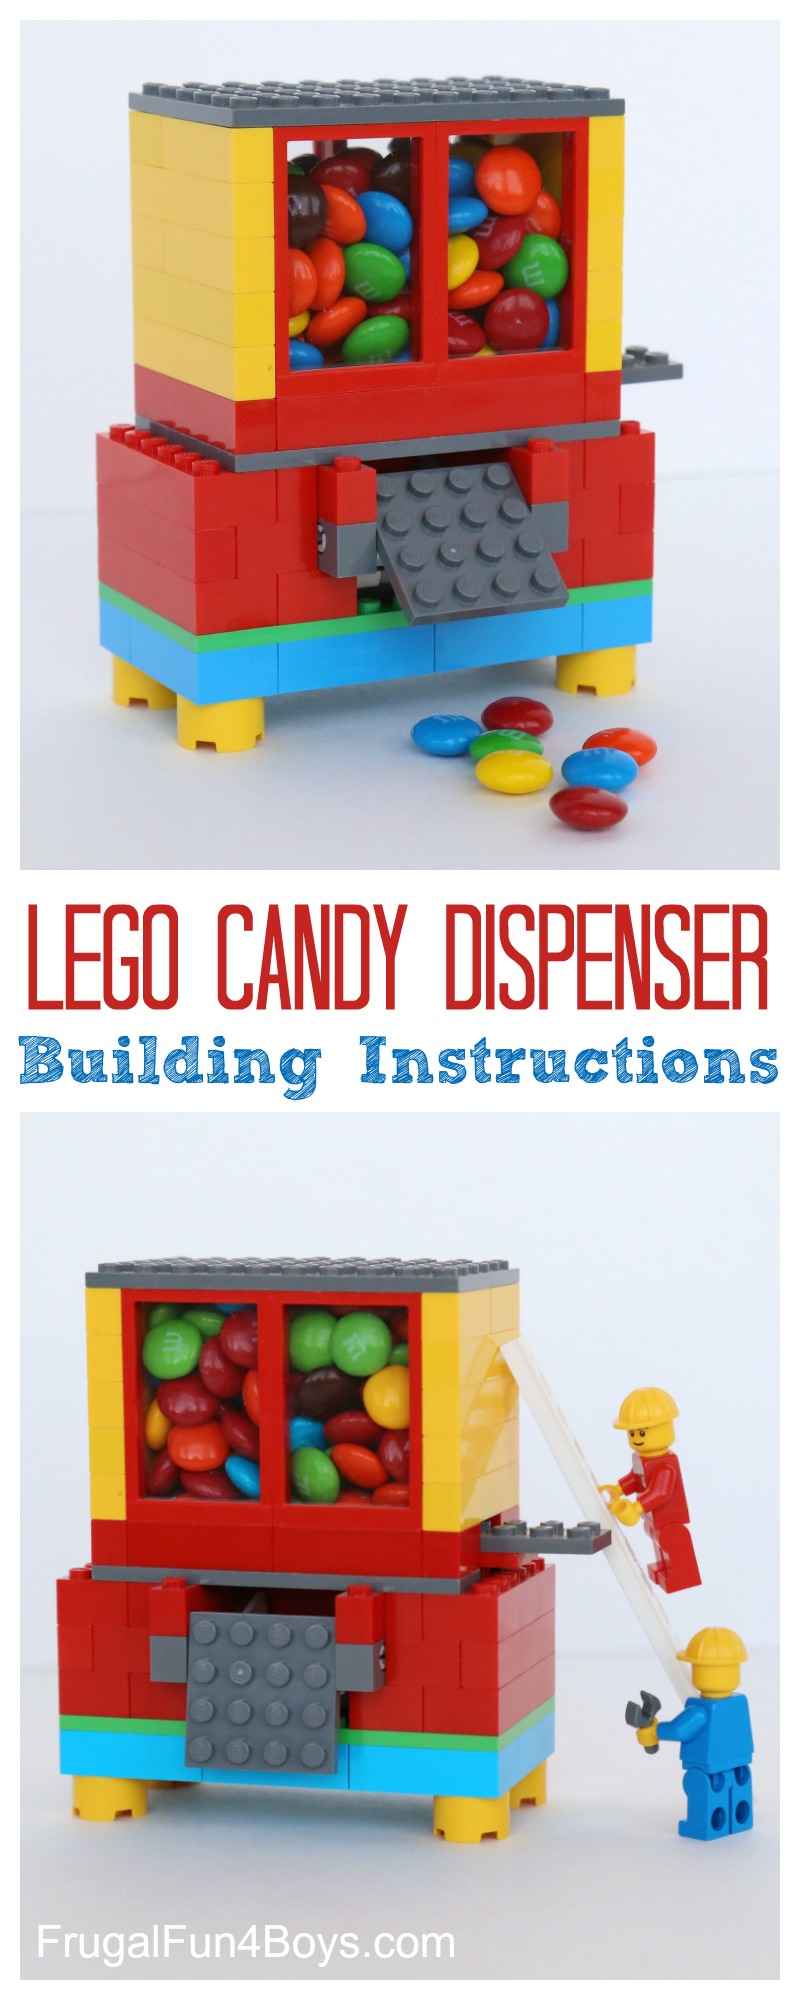
Build a working candy machine out of LEGO® bricks!
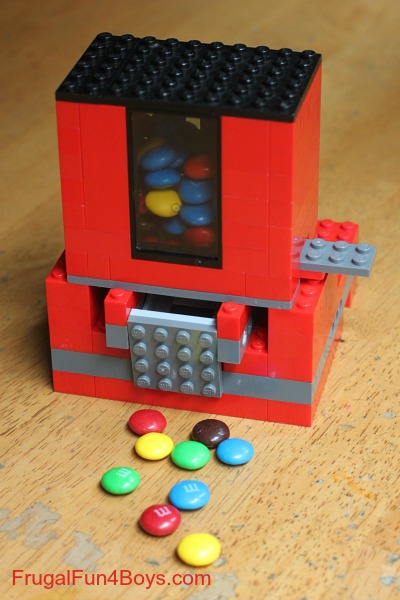
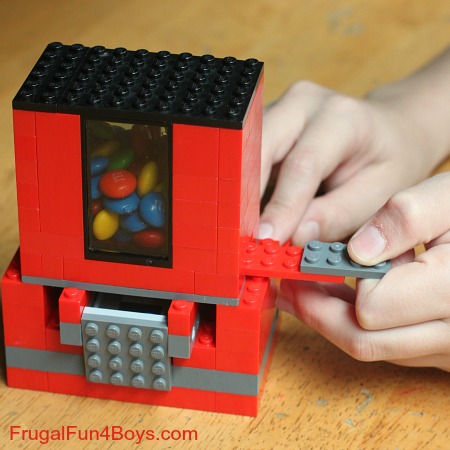
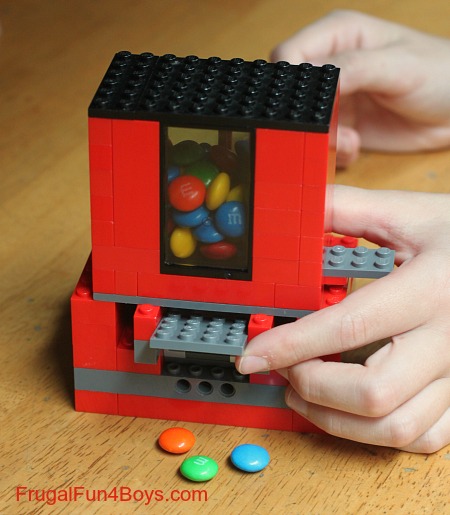
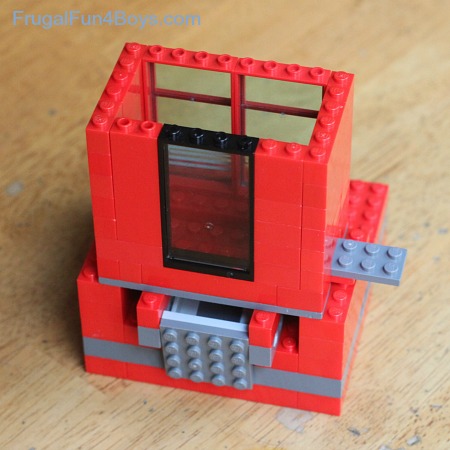
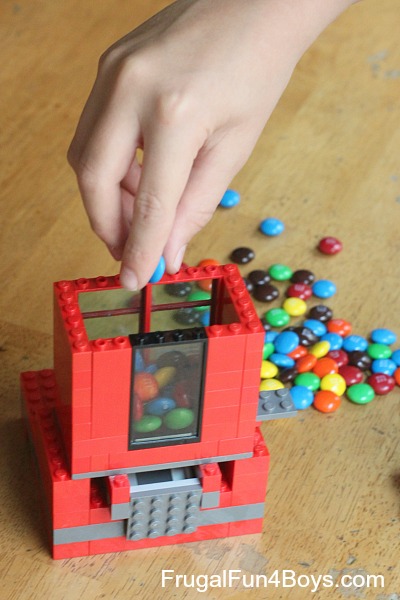
Got M&M’s? Or Skittles? Even if you don’t do trick-or-treating, it seems like there is always plenty of candy floating around during this time of the year… Add a little creativity to your kids’ sugar high with this fun LEGO® project! Slide the handle over to release a few M&M’s into the bottom of the machine. Then open the door, and the candy drops into your hand!
This LEGO® candy machine uses pieces that are pretty easy to find. We’re hoping that you have everything on hand that you need to build it. If not, maybe your kids can find another piece to substitute, or come up with an awesome design of their own!
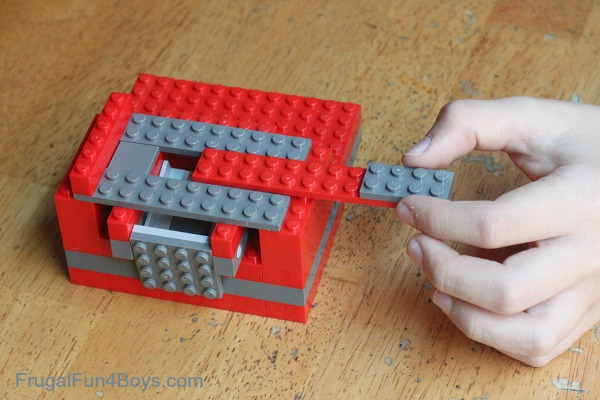
When you pull out the brick on the right side of the photo, M&M’s drop down.
Then open the door in the front, and out comes the candy!
Update: This project has been updated and is featured in our new LEGO® book. The candy dispenser below can be found in the book, along with a parts list and instructions. If your kids like building projects like this, they will love our new book! Check it out here: Awesome LEGO Creations with Bricks You Already Have (affiliate link)
Keep scrolling for instructions to the candy machine pictured above.
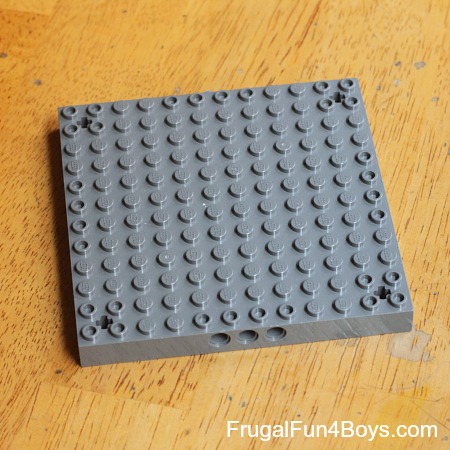
Step 1: Start with a 12 x 12 baseplate or something similar.
Step 2: Add bricks to the bottom of the base plate to boost it up a little.
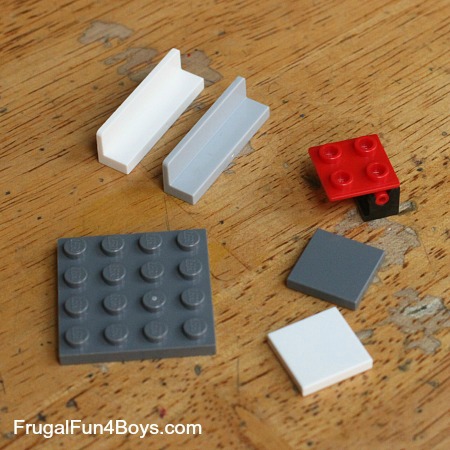
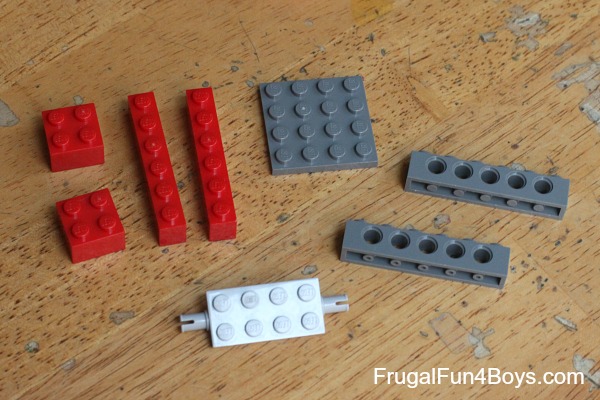
Step 3: Find pieces that look like this.
Update: If you need to order these pieces, the red and black element is actually two bricks. You will need a 2 x 2 rocker plate and 2 x 1 rocker bearing.
Step 4: Assemble the pieces like this. This will be a ramp for the candy to slide down.
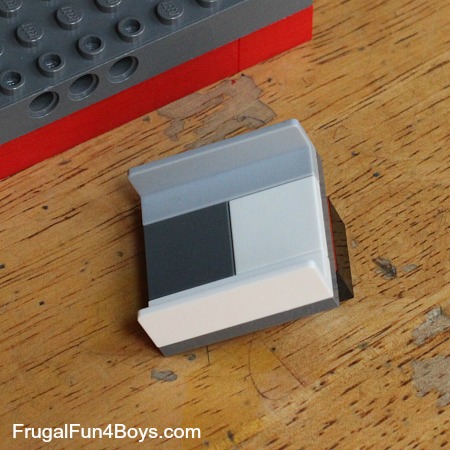
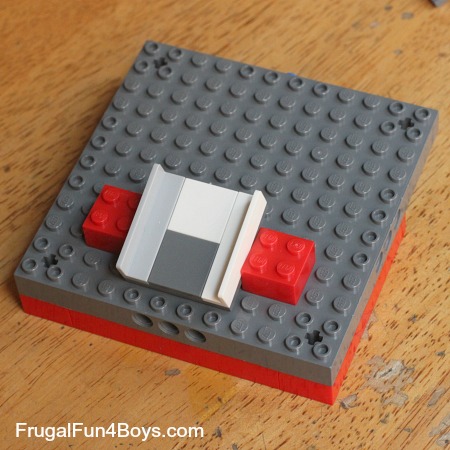
Step 6: Attach the ramp to the base plate as shown. Add two 2 x 2 bricks.
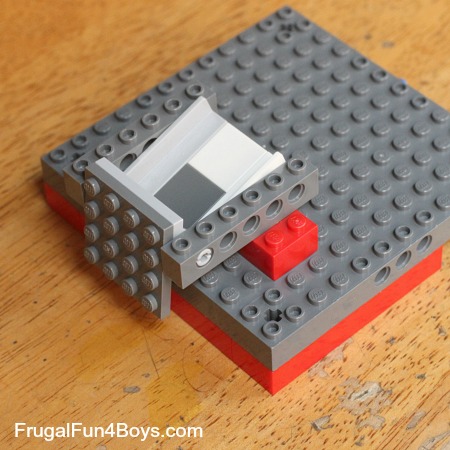
Step 7: Add the door pieces like this.
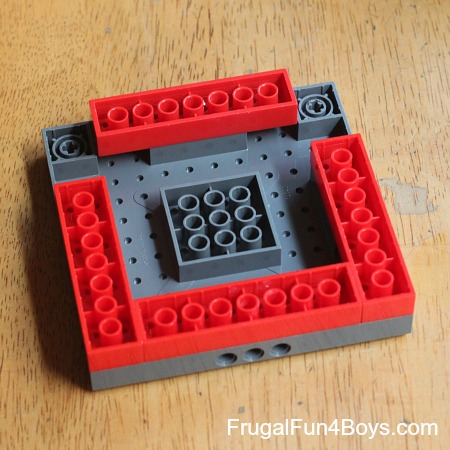
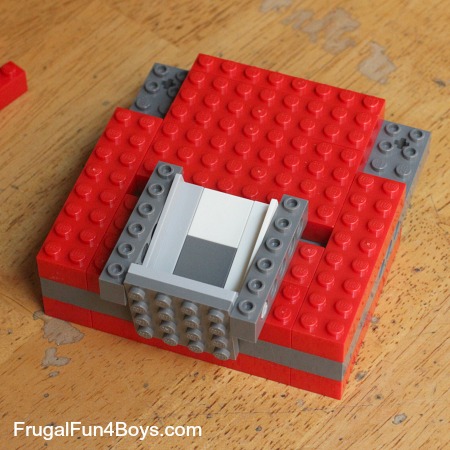
Step 8: Add bricks to the base plate as shown.
Step 9: Add two 2 x 6 bricks to each side. Add one 1 x 6 to each gray piece with holes. Add two 2 x 6 bricks behind the ramp.
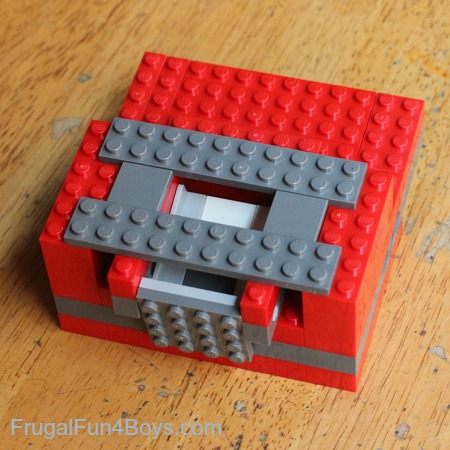
Step 10: Add two flat 2 x 10 pieces above the ramp as shown. Add two flat and smooth 2 x 2 bricks. These bricks will allow the arm that lets the candy out to slide back and forth.
Step 11: Add a 1 x 6 brick to the left side as shown. Build the sliding arm as shown – one 2 x 10 flat brick and one 2 x 4 flat brick.
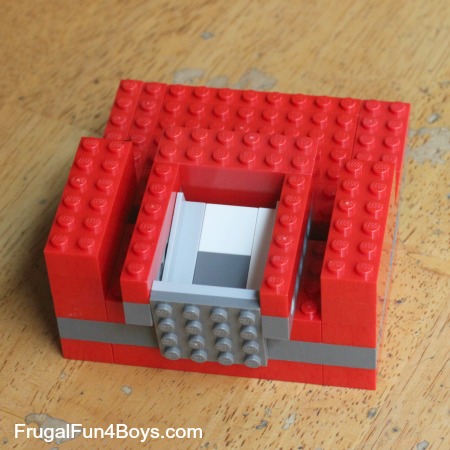
Step 12: Start building up the candy chamber as shown.
Step 13: Add height to the candy chamber. We used some window pieces so that you can see the candy level inside.
Step 14: Fill with candy!
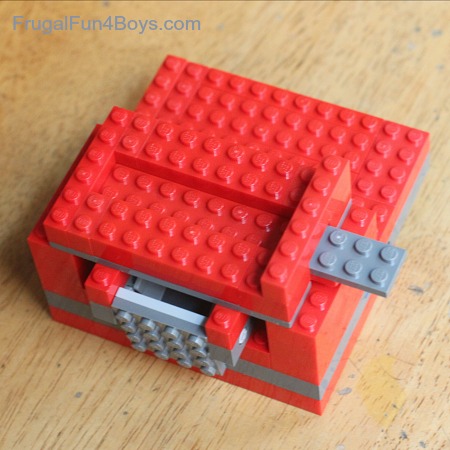
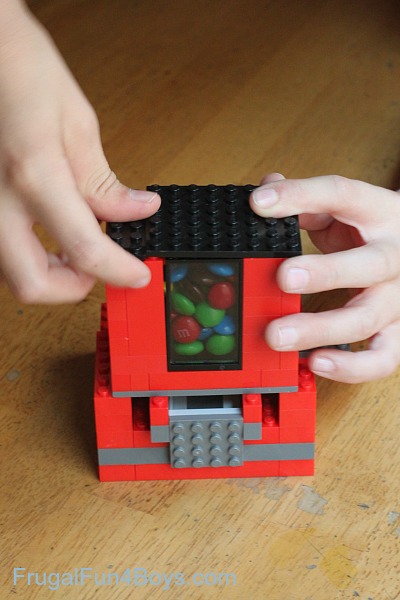
Step 15: Add some flat pieces for the top.
(It’s fun to leave this out on the counter so that Moms can share the M&M’s too… Just sayin’… 🙂 )
Here’s a video that shows how it works:
(The jingling in the background is the dog scratching and making his collar jingle. It’s never quiet at our house. Never!)
Scroll down to the comments and check out the adorable candy dispensers that Suzi put together for her grandkids! Since she needed to order the pieces, she made two fun color schemes and added more windows. They are SO cute.
Like this project? You can find a HUGE collection of our LEGO® projects here: 75+ LEGO Building Ideas
Also don’t forget to order our book! Awesome LEGO Creations with Bricks You Already Have. This book makes a great Christmas or birthday gift!
LEGO® is a trademark of the LEGO® group of companies which does not sponsor. authorize, or endorse this site.
Or, check out these posts:
- DIY Lego Advent Calendar – Three ways!

50 Comments
Lisa @ This Pilgrim Life Oct 21, 2014
Definitely going on my to-do list soon!
mandi Nov 22, 2014
If you go on lego.com, you can buy piece by piece for pennies.
JM Kraemer Nov 23, 2014
You can also use bricklink to buy the parts as well. Would be cheaper over all.
Rebecca Feb 1, 2016
You can just improvise. That's what I did, and it worked just fine. I too barely have any of these pieces.
Victoria Oct 21, 2014
What an awesome idea! Now all I have to do is find all those pieces-I think my little brother will love this!
Erin@chickenbabies Oct 22, 2014
Such a fun idea! I might not show my boys how to do it and see if they can figure out how to make one on their own. It would be a fun engineering project! Thanks for sharing the idea.
Erin Oct 22, 2014
This is great, my daughter will love it! A perfect activity to fill a rainy afternoon. Thank you.
Jacquie Oct 22, 2014
Your boys are just soooo cool!!
Steve Oct 23, 2014
Neat idea! I love doing similar builds with my kiddos.
Have you considered adding some sort of stopper to the sliding piece so you can't pull it all the way out and accidentally empty it in one fell swoop? I realize the door is there, but I still see the potential for mass candy exodus.
A 1 x 2 plate on the left edge on the underside of the slider should allow it to open far enough to let the candy out, but prevent the slider from being pulled all the way out. It looks like there should be enough clearance above the ramp and the smooth piece on the right hand side will act as the stopper.
I love the design, but the engineer in me saw possibility for a tweak to make it a little more kid-safe.
Steve
Sarah Oct 23, 2014
Steve,
Thanks for your comment - that's a great idea! We tried it right away. However, there is actually not enough clearance. We put the 1 x 2 piece on the third dot from the left on the underside of the slider (which is the farthest left it can go and still slide), and it doesn't allow the candy to come out. Basically, there's just not enough width to the candy dispenser for that design to work.
There is actually a low risk of emptying all the candy at once because of two things. One is that the arm doesn't slide completely freely with the candy on top of it. As you pull the arm, the M & M's provide some resistance. Also, even if you do take the arm all the way out, candy will flow out, but because of the size of the opening the M & M's only flow freely for a minute and then stop up the opening themselves. Studying candy flow would be a pretty interesting physics project!
It would be really fun to design different sizes of candy dispensers and compare the candy flow for each one. Your idea of a stopper would likely work well on a larger model. Thanks for stopping by!
Steve Oct 24, 2014
Thanks for trying it out. I was hoping it would open just wide enough for a small amount to come out at a time, even if it took a little shaking. My next thought would be to replace the right hand 2x2 smooth plate with a 1x2 smooth plate (on the right hand side of where the 2x2 currently is) which would allow it to open the same amount as the original build and still providing the stopping function.
We have a 2 1/2 year old, so anything that can be taken out usually is. Our son gets frustrated when she does, so I figure it would be good to be proactive before trying it out.
I agree that candy flow would be an interesting experiment. My anecdotal evidence is that it flows too much when you want it to stop, and too little when you want it to come out. :)
Steve
Steve Oct 24, 2014
Taking another look at the build, it looks like you might have to put some supports under where I propose the 1x2 to go since there currently isn't anything there.
My son went to Lego camp this summer and they call the flat bricks "plates", which works great for us to add clarity to which type of bricks we are talking about.
Katie Dec 15, 2014
This is awesome! Thanks for the idea! I am a 53 year old lego fanatic. I think I am going to try to take it a step farther, and add a "bank" to it for "donations". I don't know if I could actually make it so dispensing depended on a coin being inserted, altho that would be a cool challenge. I have bunches of legos, and also a large collection of technics as well so who knows what will happen when I start adding gears and stuff! Thanks again for sharing!
Sharon Jan 19, 2015
Here is a link to a coin-operated Lego candy dispenser.
https://www.youtube.com/watch?v=RdOvngogbuU#t=23
RottenRobbie Oct 24, 2014
Building one with the little one when the school bus shows up tomorrow.
matthew kanzer Oct 25, 2014
Thanks Guys
Science Kiddo Oct 28, 2014
I love all the creative building activities you have! I love the idea of making my kids work a little to get their candy :)
Suzi More Nov 2, 2014
Hi.....just wanted to say your post inspired me. I made 2 dispensers with the Grandkids in mind. Boys/ Girls. I plan on giving these to the children as part of their Christmas presents. I changed your concept a wee bit to streamline it to cut down on the brick count as I will need to make about a dozen of them. The children will get them "unassembled". Included will be all the pieces needed to build it, candy and instructions. Here's a link to the 2 I made. https://www.flickr.com/photos/sosewsuzi/15695992925/
Thanks again for the great idea.
Suzi
Sarah Nov 2, 2014
Wow, those are ADORABLE!! My son just looked at them and said, "Oh, I wish we had those windows!" Where did you purchase the pieces? And do you mind if I add a link to your picture in the main body of the post? I think people would love to see these!
Suzi More Nov 2, 2014
Hi Sarah,
Re: Window - you can get them from LEGO.com (Pick-A-Brick) they run about $0.90 each.
I ordered some of mine from different stores on Bricklink at http://www.bricklink.com/. You can get them for a bit less about $0.75 each. So you can see using 4 windows per dispenser can really be a budget buster. Since these are for my Grandkids I'm okay with that. Yes to adding a link to the picture in your main post. I took a 2nd picture (side view) which shows the difference from your build. I used built a 6 x 12 stud base to streamline it.
Thanks again for the inspiration...
Suzi More Nov 2, 2014
Forgot the link to the 2nd view....https://www.flickr.com/photos/sosewsuzi/15698137542/
Lyn Nov 22, 2014
Do you have instructions or a list of parts available? I'd love to use this as a favor pack for my son's birthday party. I hate just giving kids junk, but I have enough time to order pieces for everyone. Love!
Suzi More Nov 26, 2014
Hi Lyn,
I've been so busy working I just got a chance to revisit this post. Do you still want/need the info for the candy dispenser?
Apurva May 23, 2015
Hi! I would love to build one of these for my candy loving boyfriend. Would it be possible for you to share a list of all the parts you used? I would have to order them all so it'll be great if I have a list :)
Melissa DeWees Nov 14, 2014
Suzi do you have a link to the instructions you are going to put with this as I would love to do the same for my kids?? Any ideas on where you found all these pieces?
Suzi More Nov 17, 2014
Hi Melissa,
I used LDD Lego Digital Designer to make the instructions for the Candy Dispenser build.
In order to view them you would need to download the application from the LEGO.com website. It's free. It's a new application for me so I am still learning about it. If you have or decide to get the application I can send you the files/directions. I printed out the directions...but it was quite a few pages. If it's for your children then you would not need to print them out just have them build the dispenser while viewing them on the computer.
Lyn Nov 22, 2014
Sorry, I see now about the LDD program. I have downloaded it and would love the file. What's the best way to connect for that?
Rena Nov 24, 2014
Hi Suzi,
We are having a handmade Christmas this year and these would be great gifts for my son to make his cousins.
I've got the LDD app and am hoping you will share the files/directions with me.
thanks so much!
Suzi More Nov 26, 2014
Hi Rena,
You can find the links for 3 LDD Files here as well as 3 links to the screen shots for the parts list. sosewsuziamericangirldollclothes.blogspot.com
Suzi
Suzi More Nov 17, 2014
To address the question about pieces. I purchased most of the basic pieces from the "pick a brick" wall at my local LEGO Store and what they did not carry I shopped at Bricklink.com. The link is posted above in a previous post.
Sarah Nov 22, 2014
Suzi,
Thank you so much for answering all these questions!
brenda Nov 21, 2014
I would love to make these for my boys with your simplified instructions and parts. Could you post them?
Sharon@DiscoverExploreLearn Nov 7, 2014
This is amazing! I also have 4 boys, and they would love this. We're big Lego fans, but have yet to get this involved. I appreciate your step-by-step tutorial. You make it look so easy. :-) Thanks so much for inspiring me to make this with my kids.
Renata Nov 13, 2014
Amazing! Think I'm getting some M&Ms today for that ;-)
Denise Nov 16, 2014
Thank you for this, my son and husband made it today ! So cool!!!
Suzanne Nov 21, 2014
My daughter and I are gonna make this today! We're gonna try dispensing yoghurt coated raspberry drops.
Ariana Nov 21, 2014
This is just about the neatest thing I've seen in a while!! My kids love legos and love candy dispensers, I am SO going to do this with them! Thanks for sharing!
MaLaCoiD Nov 22, 2014
My son loves LEGO and was checking out candy dispensers at the store the other day. This is perfect! But the instructions are somewhat difficult to follow because it's not clear exactly what pieces are needed. Also, the sides should be staggered for strength (instead of 2x1's all the way up, alternate with 3x1's and then replace half the 6x1's with 3x1's and 2x1's). I made a part list in Rebrickable. You can then export it to BSX and use Brickficiency to find the best prices on BrickLink. White seems to be cheapest, and I was able to fill the Wanted List for $6.74 plus shipping and $3 more to meet minimum order requirement (meaning I added fun/cheap parts to meet the requirement).
Andrea Nov 22, 2014
Hey! This is super awesome and I'm ordering the pieces today! In step 3, I'm not sure where to get or what to call the red/black pieces. Can you help? Thanks!
Sarah Nov 22, 2014
Andrea, I scrolled through allllllll the pieces on Pick-a-Brick (lego.com) because my son and I could NOT figure out what to call it, but I found the pieces! You need a 2 x 2 rocker plate and a 2 x 1 rocker bearing. They are both available on Pick-a-Brick, but keep in mind that orders from Pick-a-Brick can take up to a month to arrive because they are shipped from Europe. I'd check Bricklink and see if they have them.
Lyn Nov 22, 2014
Do you have a supply list for the original version on this post?
I'm so excited about these possibilities.
JM Kraemer Nov 23, 2014
I think this is a neat idea. I might have to try and develop one of my own. Would be a fun little side project after my next Lego Church Project build.
Also this is more for the other people posting. I'm one of those "Adult Fan of LEGO". I've been doing my Lego Church Project for 15 years straight. To be honest I've seen in the past few years more girls getting interested in LEGO. Which I see nothing wrong with. It's an amazing toy with a lot of possibilities.
Chloe Grzesiek Nov 23, 2014
Sweet! I would totally would make this!
cyndi powell Dec 15, 2014
Our "elf on the shelf" made this for our son. He did some modifications though. For clearance of the candy he propped up the door area more and used a bigger door 4x6 and put a door laying down on top so it can easily be refilled :)
cyndi powell Dec 15, 2014
Thank you for the idea....LOVE IT!!
Mitch Dec 24, 2014
We have thousands of legos but still didnt have all the pieces. We do have imagination, however, and built an excellent substitute with multiple ramp levels and hinged window for the top as well. Great idea! My son and i had a blast making it and hes super excited mom just brought some some M&M's
Margaret Dec 30, 2014
my nine year d son and I built this last night. We were able to follow your instructions quite easily and made a few minor modifications to work with what we had. It works great and my son is thrilled!
peasblog Jan 1, 2015
Thank you for sharing this!!
Carolyn Jan 1, 2015
Hi! I just wanted to say thank you for posting this cool project. My 8 year old daughter and I built one this afternoon. I found this project on Pinterest and I'm looking forward to checking out some more ideas on your blog.
To the commenters worried about having the correct pieces, don't despair! We didn't have the correct bits at all but we improvised and it worked out great (we had to use a bigger baseplate as well as alternate pieces for the candy ramp -- and we used a garage door for the candy exit). I'm trying to figure out how to dispense just one candy at a time (or a set number of candies similar to a commercial candy dispenser) but for now, we're over the moon with this design.
Kari Jan 2, 2015
Thanks so much for this. I just built this with my two sons and they loved it. We used the bricks we had on hand and used the only candy we had a available and that would fit. Tic tacs works great.
amy Jan 4, 2015
I am 12 years old and I have just built this with my 6 year old brother and he found it easy peasey. It is a great creation and whoever came up with it is very clever.thank you if you have any other ideas can you please email them to me. Thank you.
Jeanne Jan 12, 2015
It would be nice to have a picture of all the parts needed for this project.
michelle Jan 17, 2015
This is a really neat idea. My so is a few weeks shy of being 4 years old and said momma can we buy that kit and build it. So I think I'm going to need to figure out all the pieces needed and get those ordered.. they should just make it a kit and sell them like that. So much easier.
Joan Jan 17, 2015
Is it possible for you to list a complete list of each part needed. I would like to put together two kits of just the pieces and instructions to send to a couple lego fanatics. These projects are awesome!
panda Jan 18, 2015
paint steves face pink!
Jenetta Penner Jan 18, 2015
This is really a cool project! Would love to do this with my 2 young daughters!
Denise Jan 23, 2015
I made this with my daughter and we love it! Only problem was that we can't use it until I go to the store and get some M&Ms or Skittles. Thanks for the fun!
Elaina Feb 13, 2015
I just made one of these with my younger brother and it was so cute! I hope its okay that I linked this page in my blog post about it.
Jenny Mar 5, 2015
This would be a great compliment to my lego phone-charging station on my desk at work. My only complaint is that it's not big enough :) I think I might also add a hinged lid for easy refills.
Shirley May 7, 2015
I will be having my grand kids here for the summer. will love to make these with them. Do you have a list if the parts?
Lexi Michelle Aug 5, 2015
This is super cool! I loved Legos as a kid & I know my son will too! It took me FOREVER to find this original post (it's been linked to a ton!) but I am so glad I did! Pinning for later!!
Strawberry Kids Oct 5, 2015
Love the step by step instructions! Will have kids do this. I am sure they will enjoy building and the final outcome! :)
Becca Jun 17, 2016
Build this today with my 8 and 9 year-olds to give to Daddy for Father's Day. We had to substitute some of the pieces and it's kind of lopsided, but I love it. They are so excited to give it to Dad for his desk at work. We loaded it with Hot Tamales - Dad's favorite!
Kirsten Hobbs Jul 2, 2016
Awesome! I love making these.
Vanessa Schroer Aug 7, 2016
Yeah, it worked!! We made our own version with the pieces we had ☺ Unfortunately can't show a picture here.
GkKool Nov 24, 2016
That's easy to build
Eliza Jolie Feb 22, 2017
So cool! I tried it and it is the best thing since sliced bread!
Cindy deRosier Jun 18, 2017
I'm the Editor of Fun Family Crafts and wanted to let you know that we have featured your fantastic LEGO candy dispenser! You can see it here:
https://funfamilycrafts.com/lego-candy-dispenser/
If you have other kid-friendly craft tutorials, we'd love for you to submit them. Thanks for a great project idea!
Liz Nov 25, 2017
I just finished making this and it was sooo fun I totally recomend it!!!!! ???????
Emily Hurst Grant Feb 11, 2020
This project was fun! I highly recommend this for kids!
Libby Jul 30, 2020
I made this with my kids! It is so cool! We didn't have M&Ms so we used starburst jellybeans. We substituted lots of pieces and it turned out great! I put a flat 2x2 on the bottom end of the lever and it works but the lever is a little lopsided. This is so cool I cant wait to use M&Ms!!!
lily Nov 28, 2020
This was great! I didn't have all the pieces but I improvised. I also added a little landing for when it came out the door. One thing though, I didn't have any candy at first so I used chocolate chips but I don't recommend it. Since they aren't round, they get caught on the door thing.
Jackson willmunder Jun 7, 2021
I put jellybeans in my candy machine
Melina Apr 28, 2022
Just finished this project with my 6 years old son, Mika. We put smarties in it and it works great!! He is super happy, thanks so much! :D Would be great to be able to post photos. :)
Post a Comment