
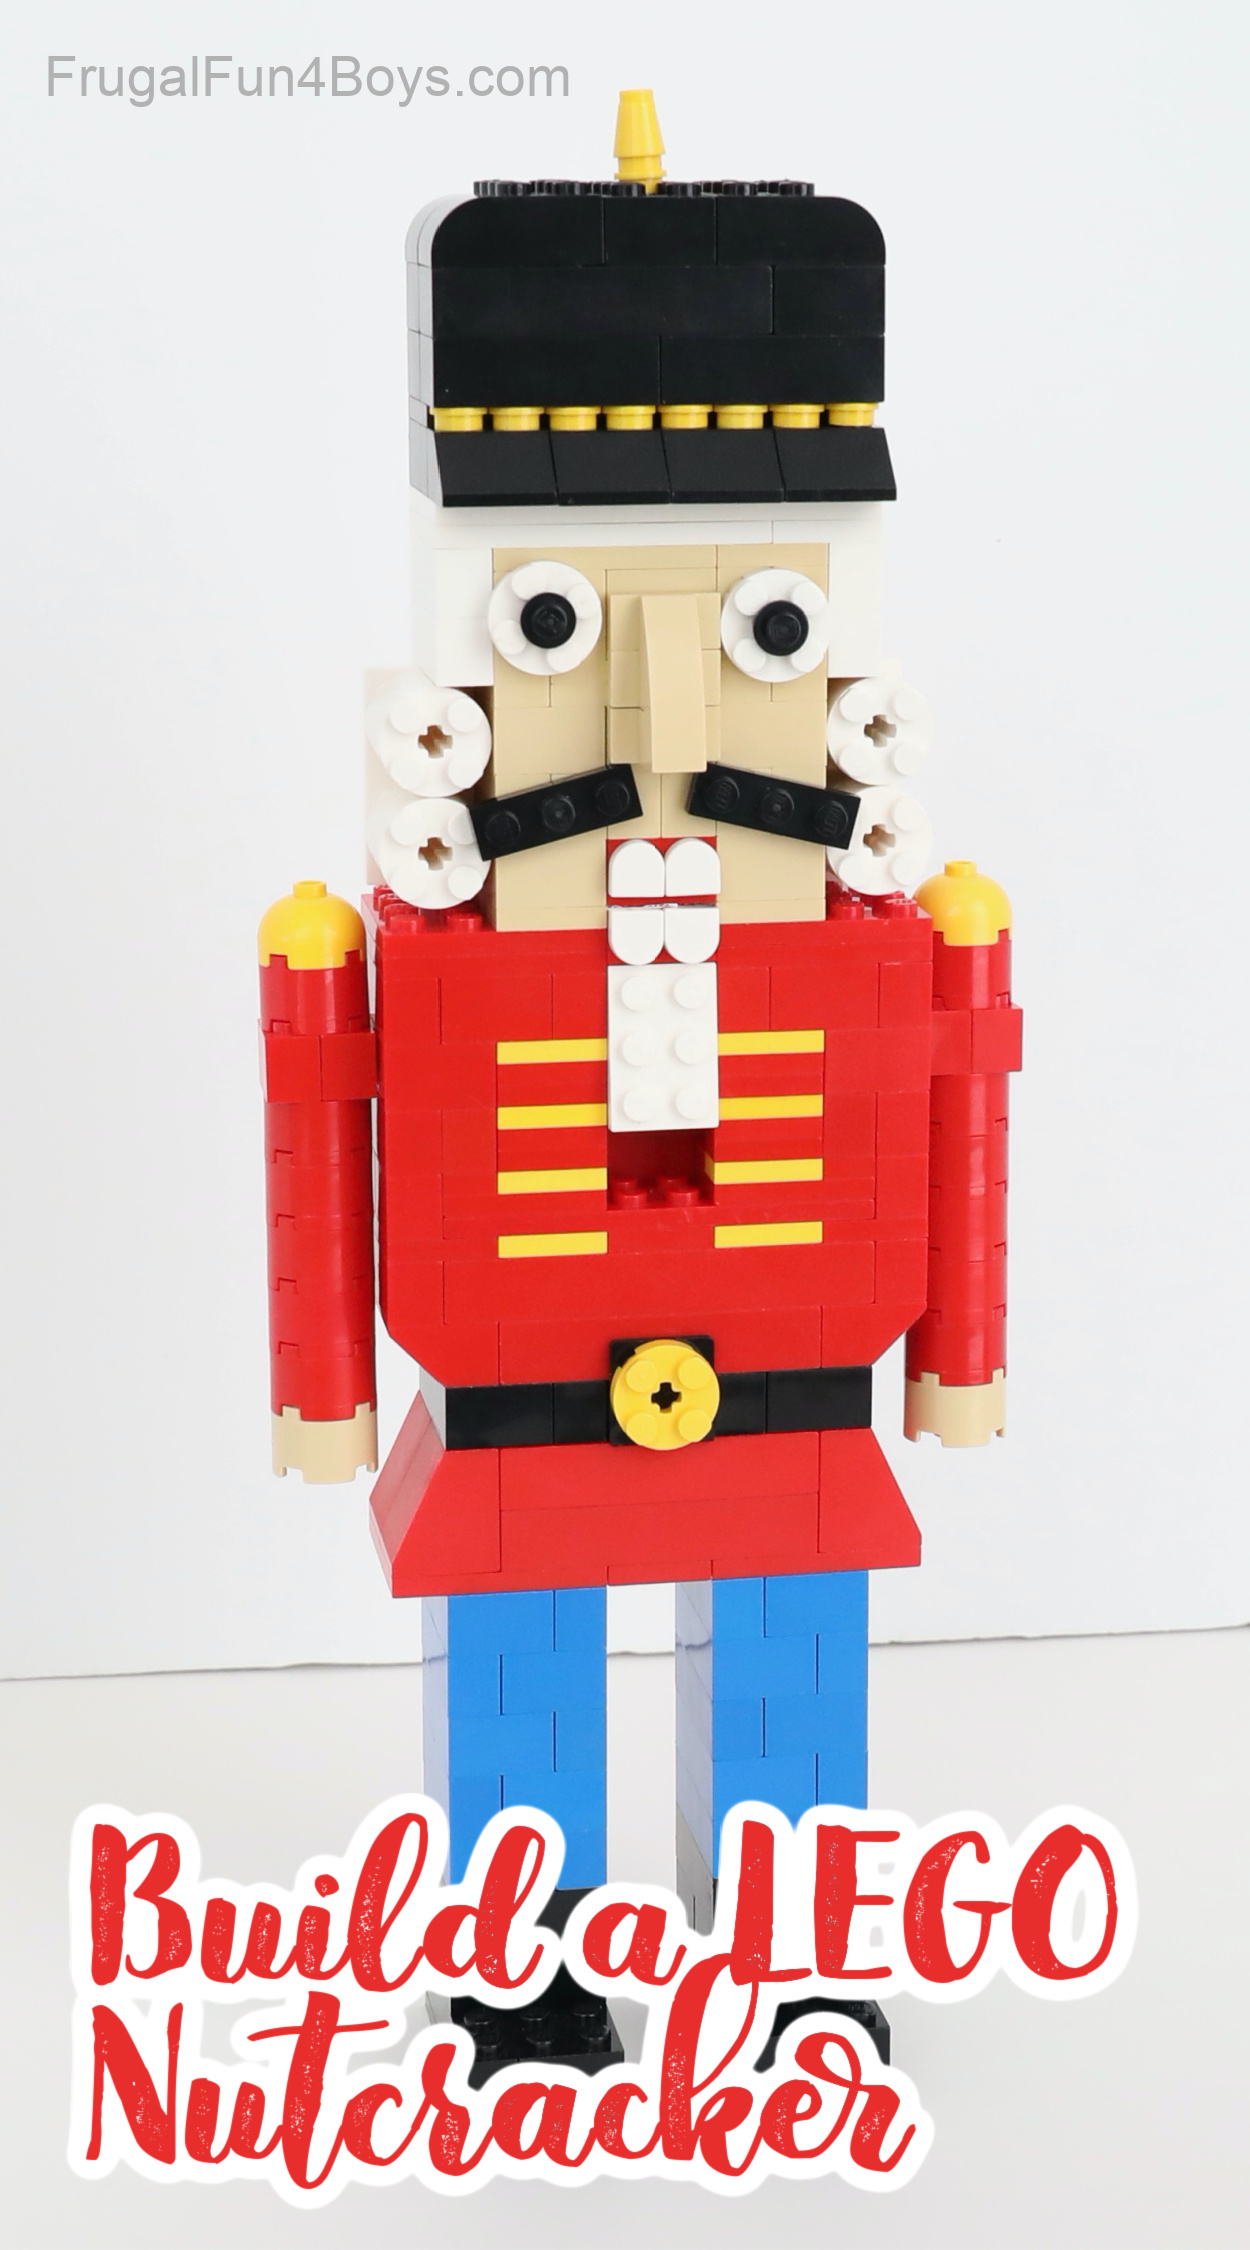
If you’ve followed our site for very long, you know that we love Christmas LEGO projects! We’ve built all kinds of things over the years… ornaments, a nativity set, Christmas mosaics, and more.
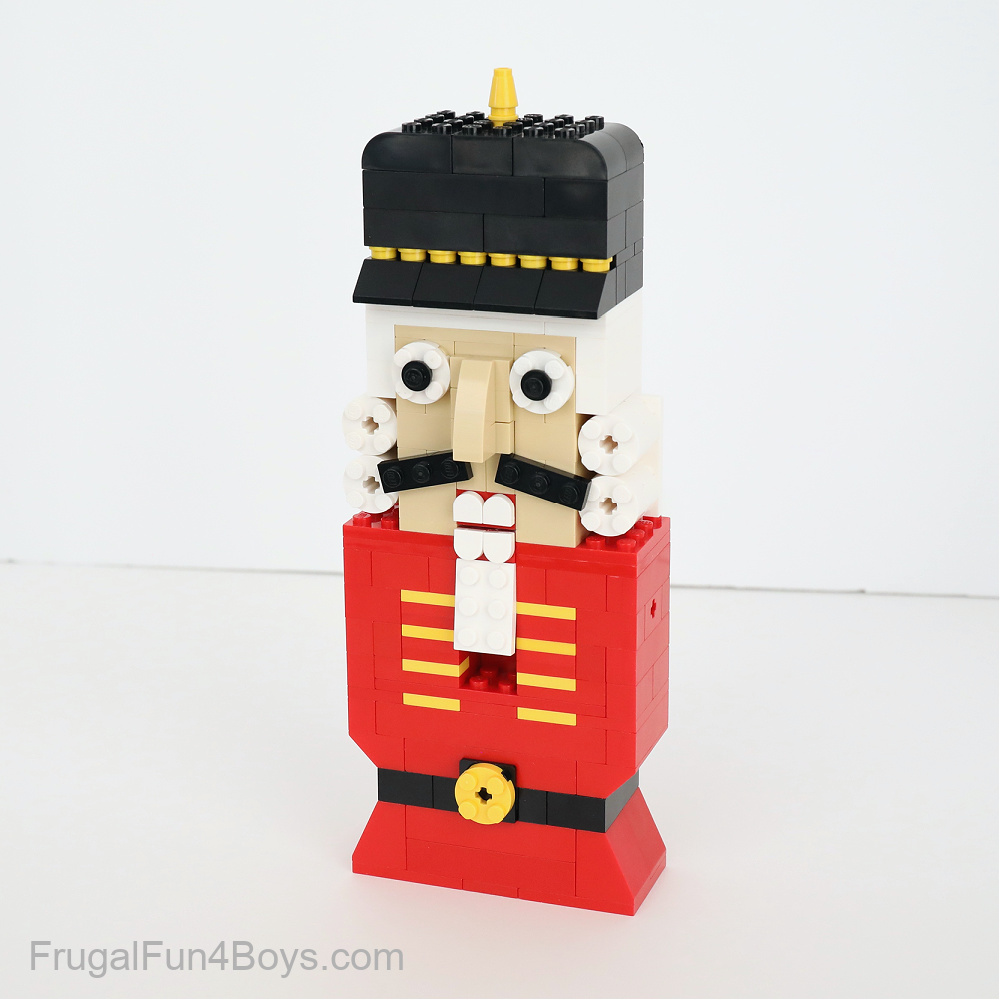
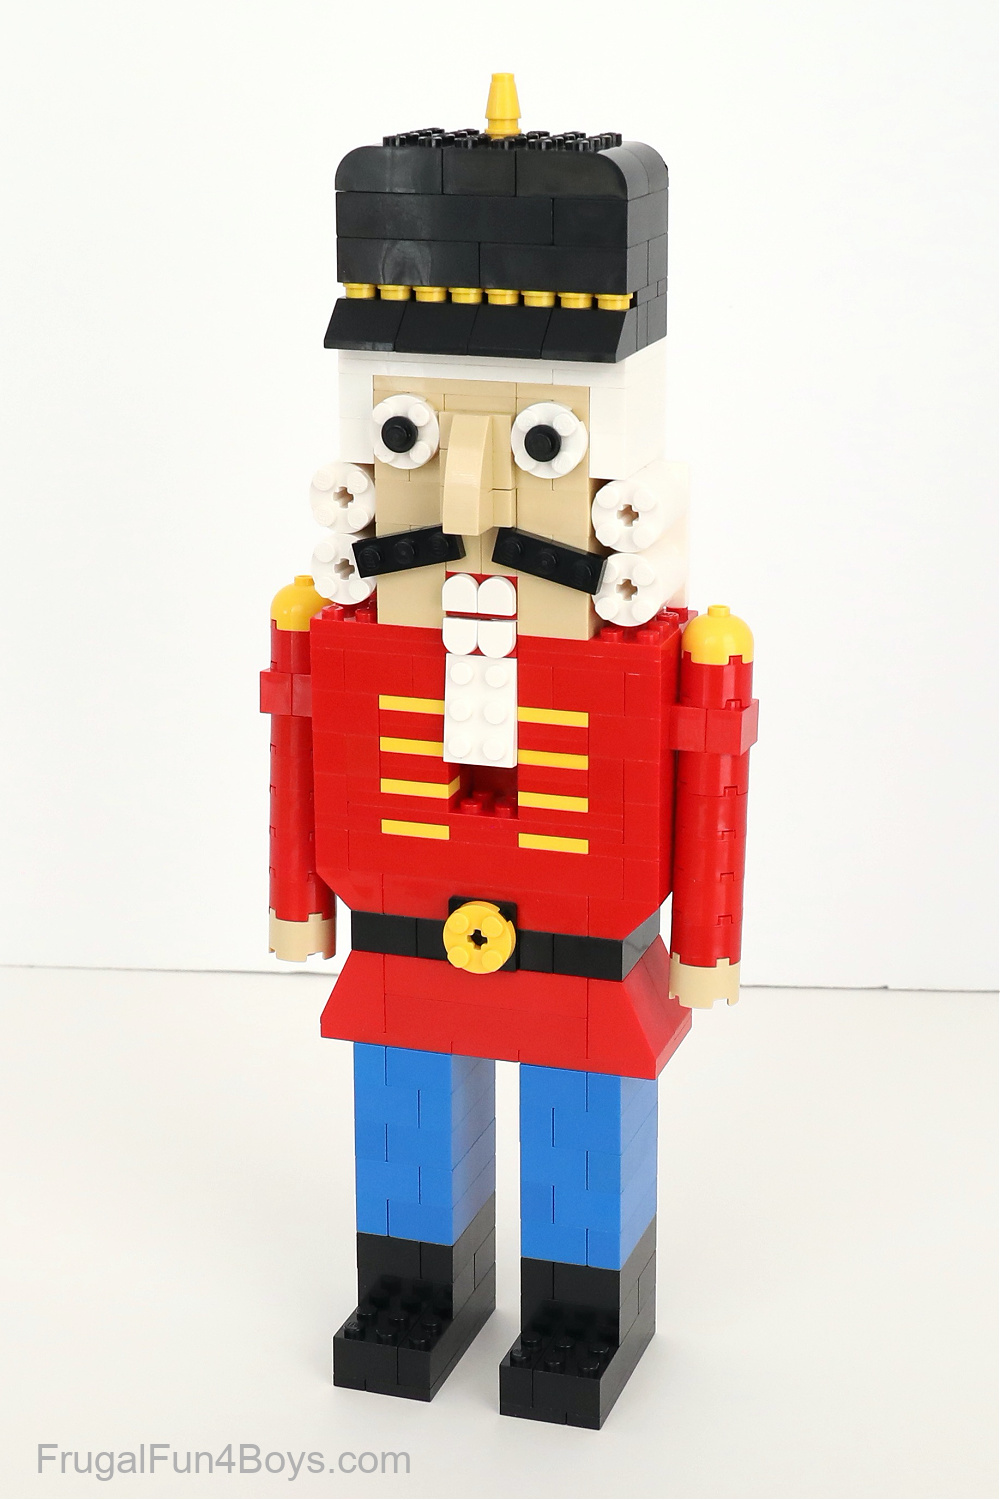
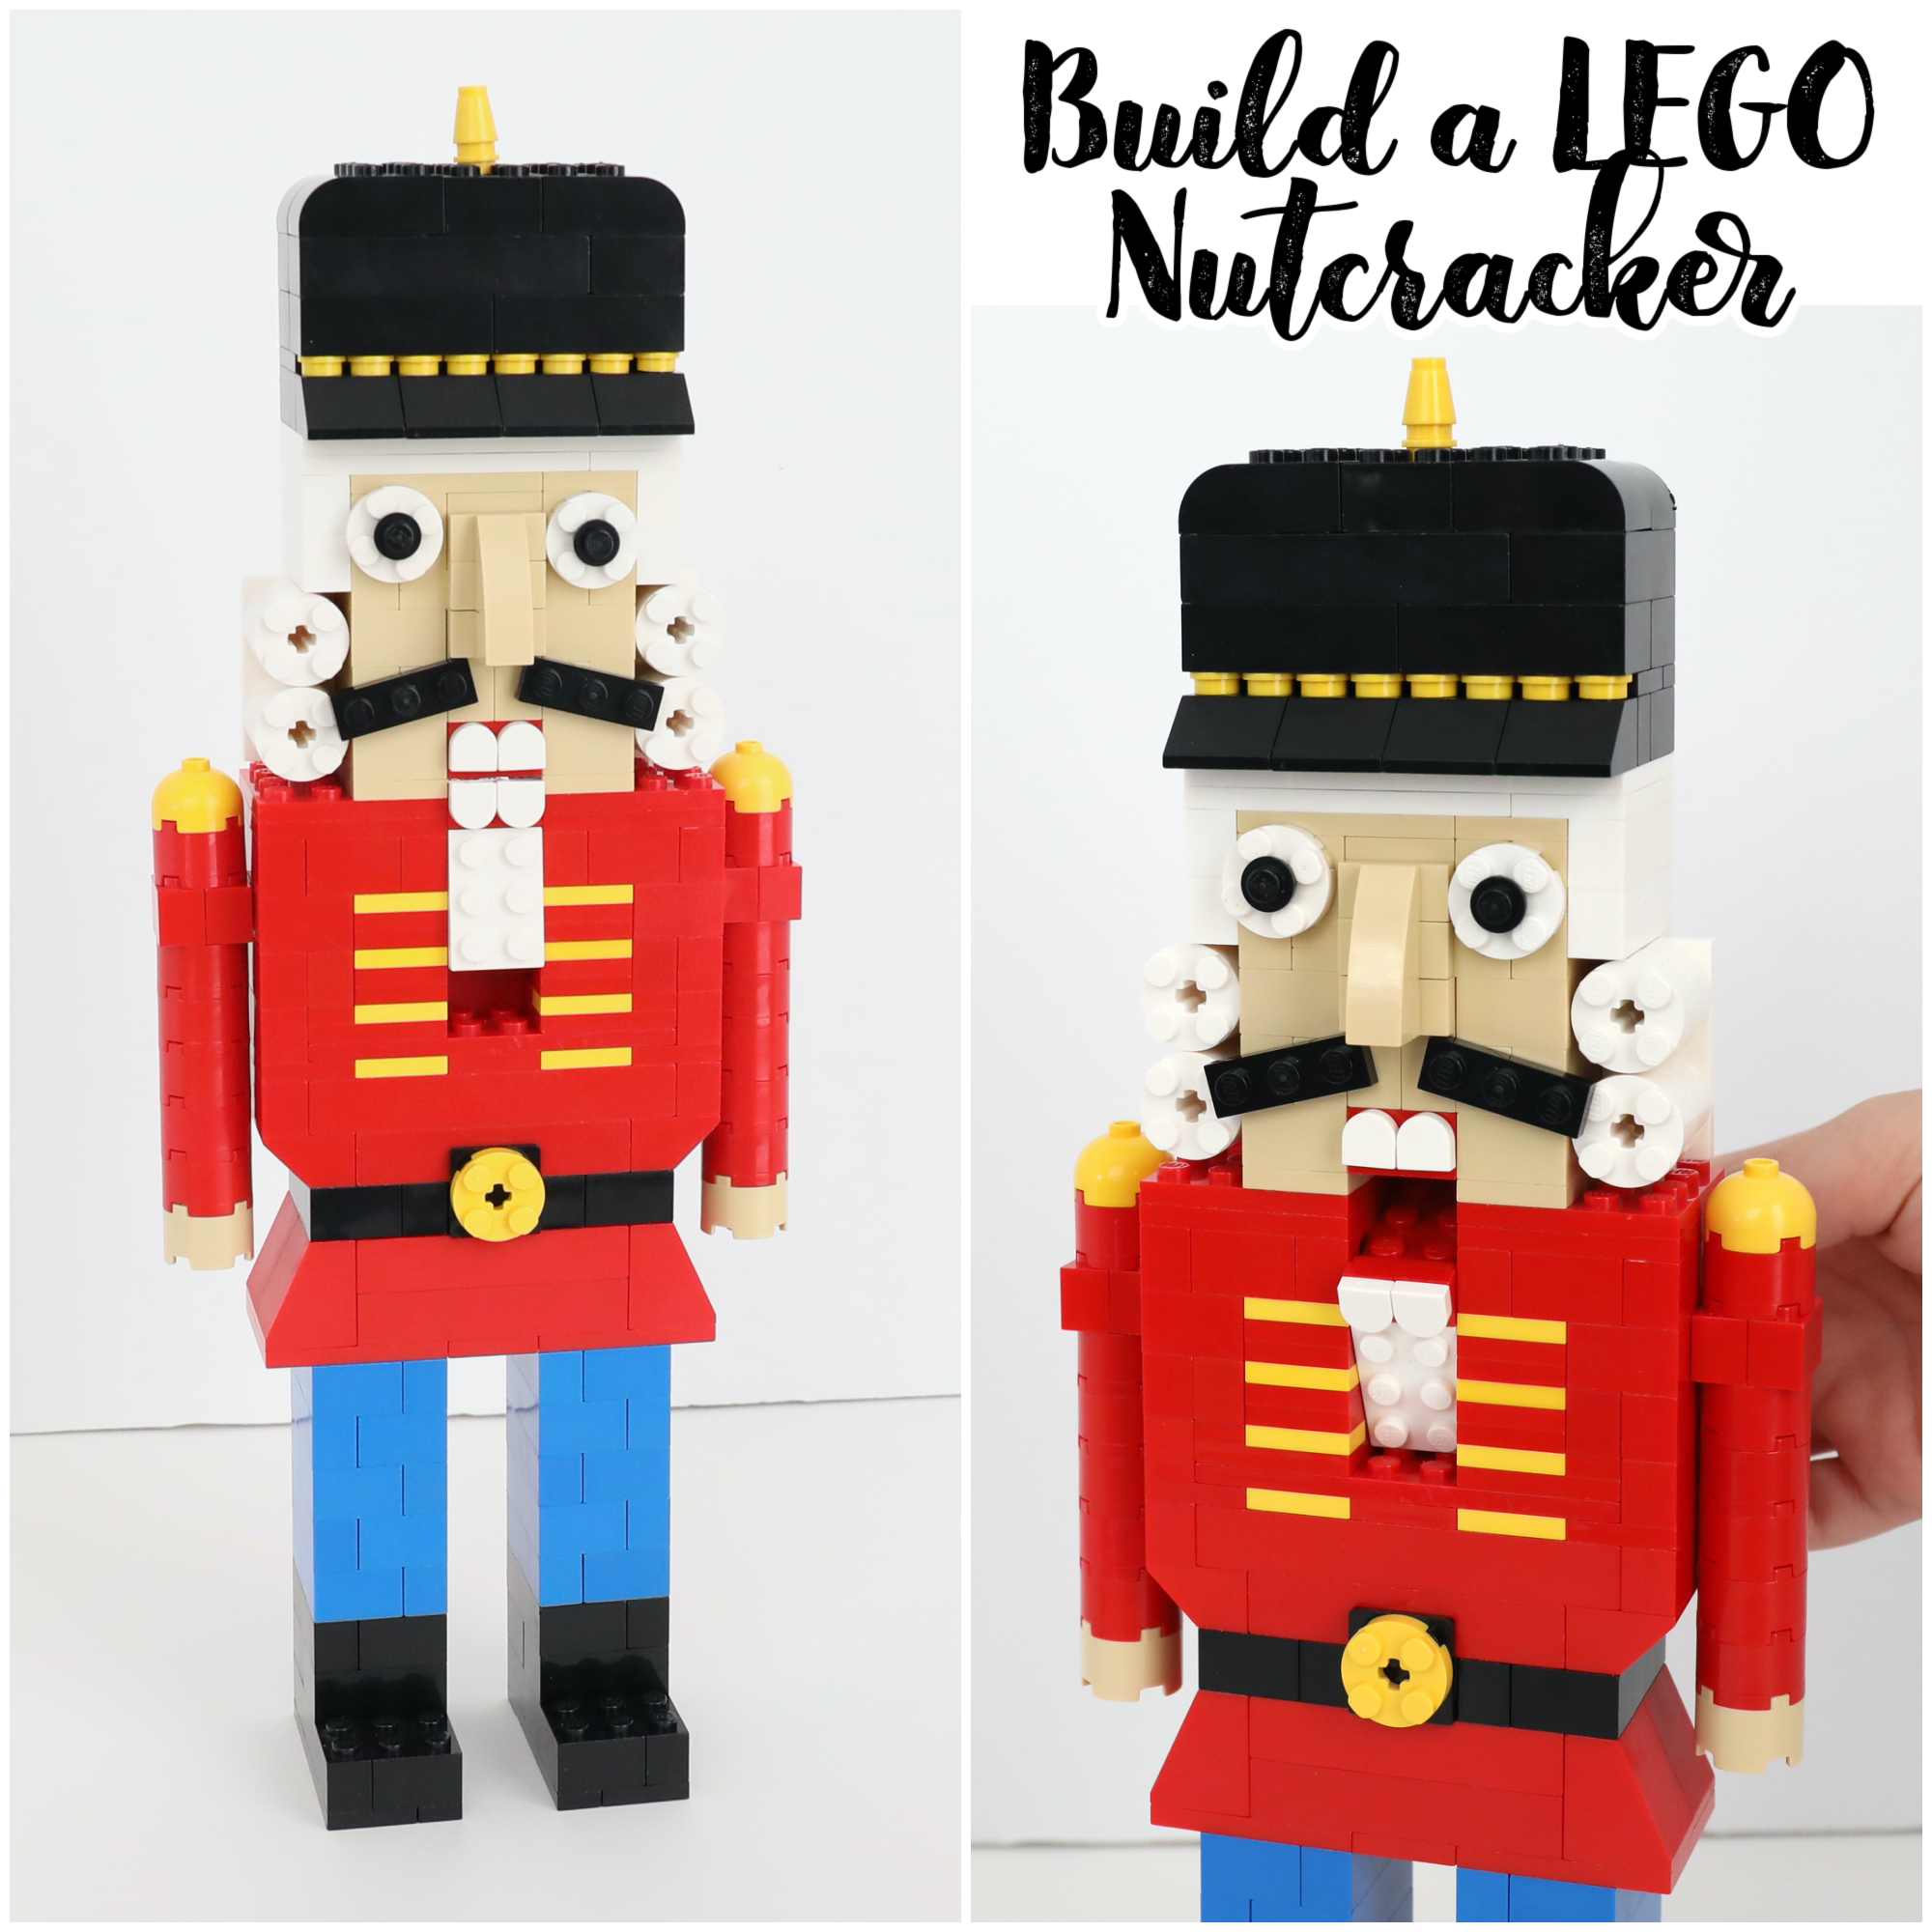
I decided this year I would attempt a LEGO nutcracker. I wanted it to be a working nutcracker too. Well, it doesn’t actually crack nuts, but you can move a lever on his back, and his mouth opens and closes. I consider that a success!
This is such a fun building project! Once kids get the idea of how the nutcracker works, they can build one like mine, or they can design their own on a smaller (or larger!) scale. This is definitely a project that can be modified with the bricks you have. Change his face, the color of his suit, etc. Basically, make it however you like!
The mechanism for this nutcracker is quite simple. It’s just a lever! Raise the lever on the back of the nutcracker’s body, and his mouth opens.
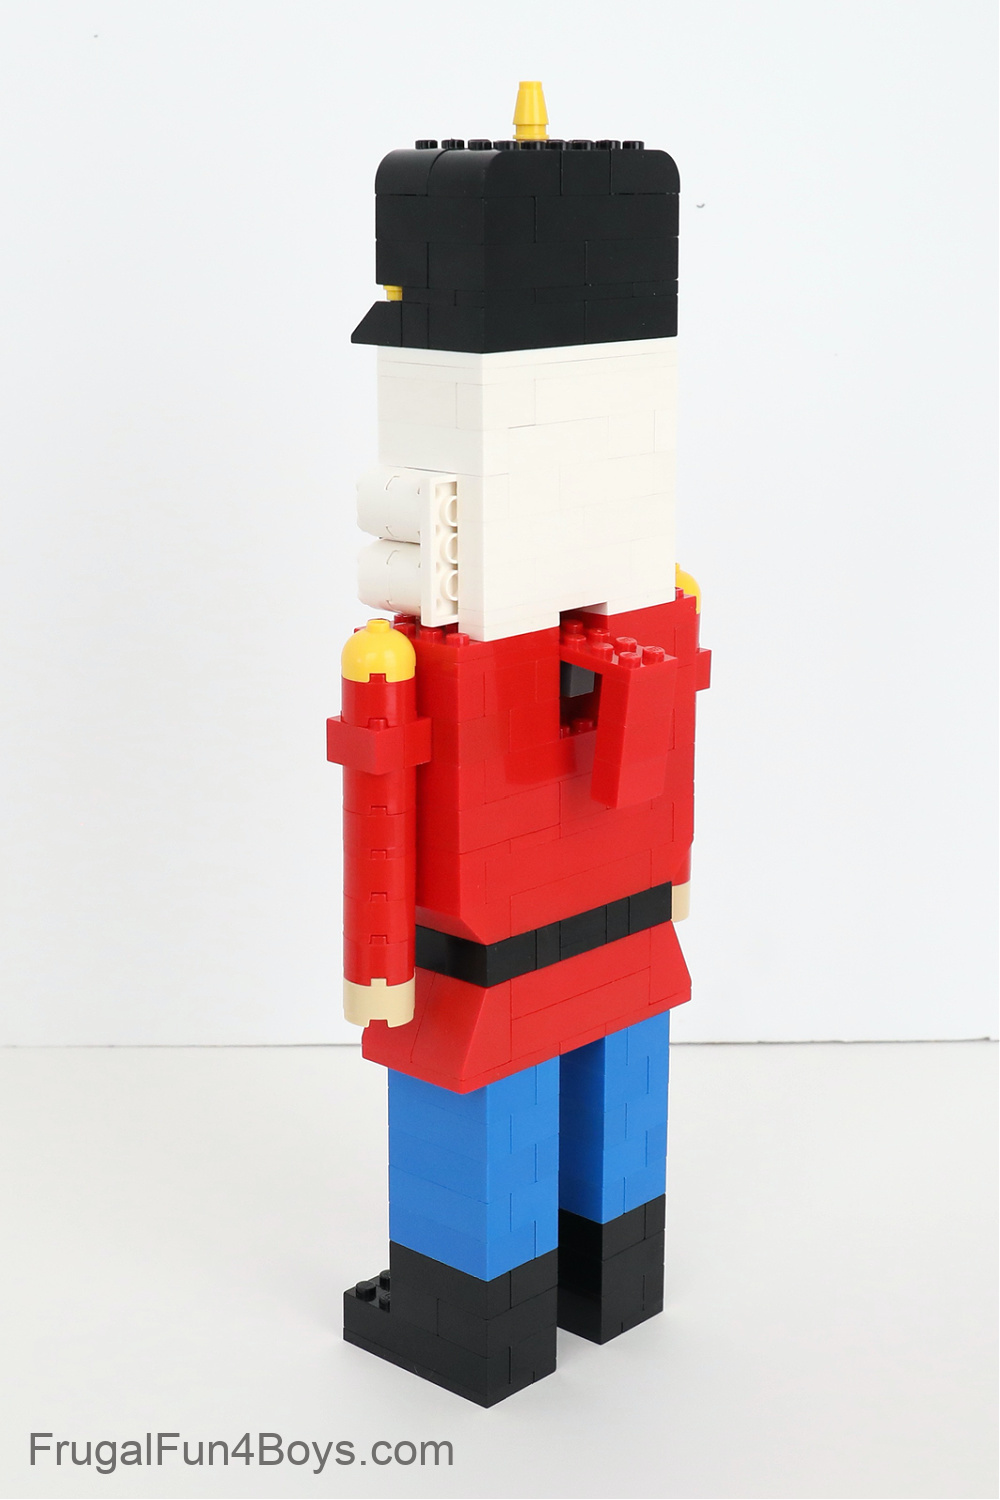
Here’s how his mouth opens and closes. Most real nutcrackers have a fuzzy fabric beard that covers up the opening on the front of the body. Well, that didn’t work so well with LEGO bricks because they don’t bend like fabric does! I had to make do with a visible opening in the body, but I think it still looks okay.
Ready to build a LEGO nutcracker?
There’s no way that I could have done full step-by-step instructions for this one, but I’ve included enough steps that it should be easy to get the idea.
I also made a quick video that shows some of the key steps in building the nutcracker. Hopefully between the two, kids can figure everything out.
LEGO Nutcracker Video
Click the play button to watch the video! If you don’t see a play button, it’s probably because of ad-blocking software on your device. Ads allow me to keep the content on my site free!
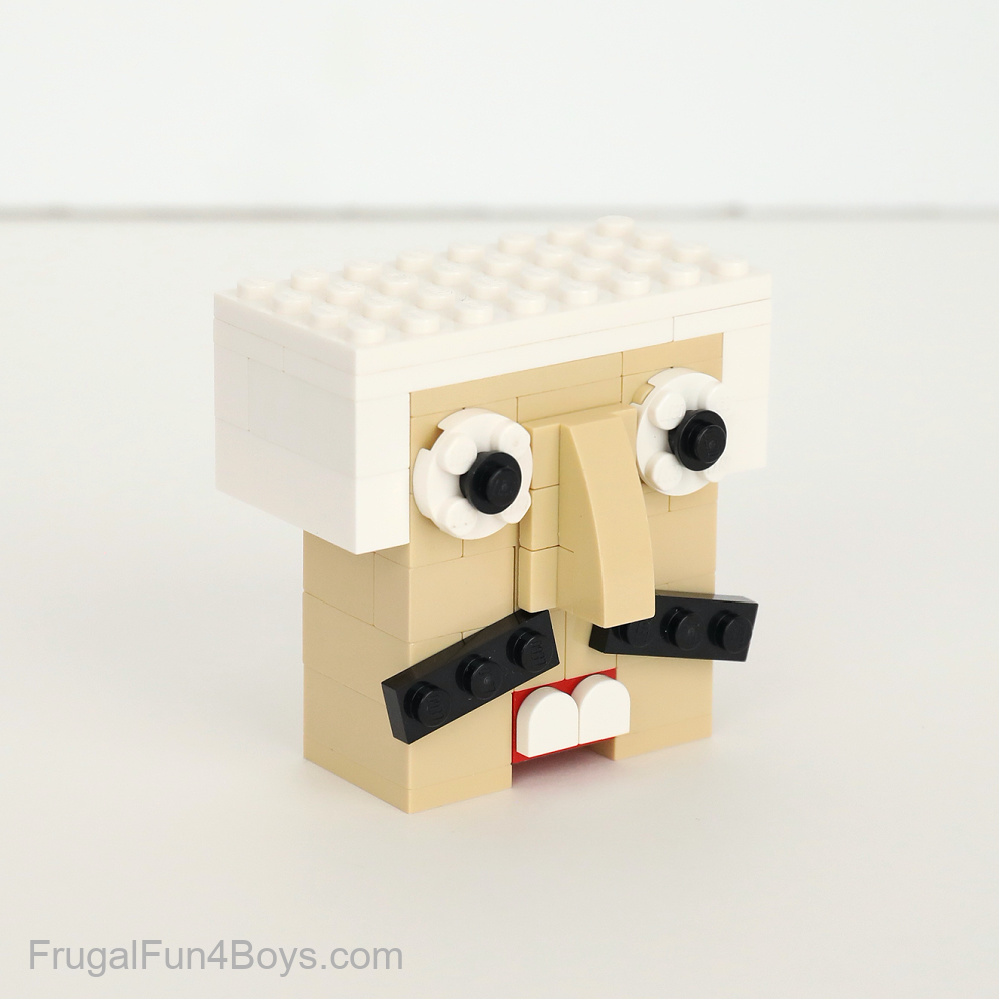
First, build the head. I started with a tan face that is three studs deep. Notice the placement of the studs on the front of the face.
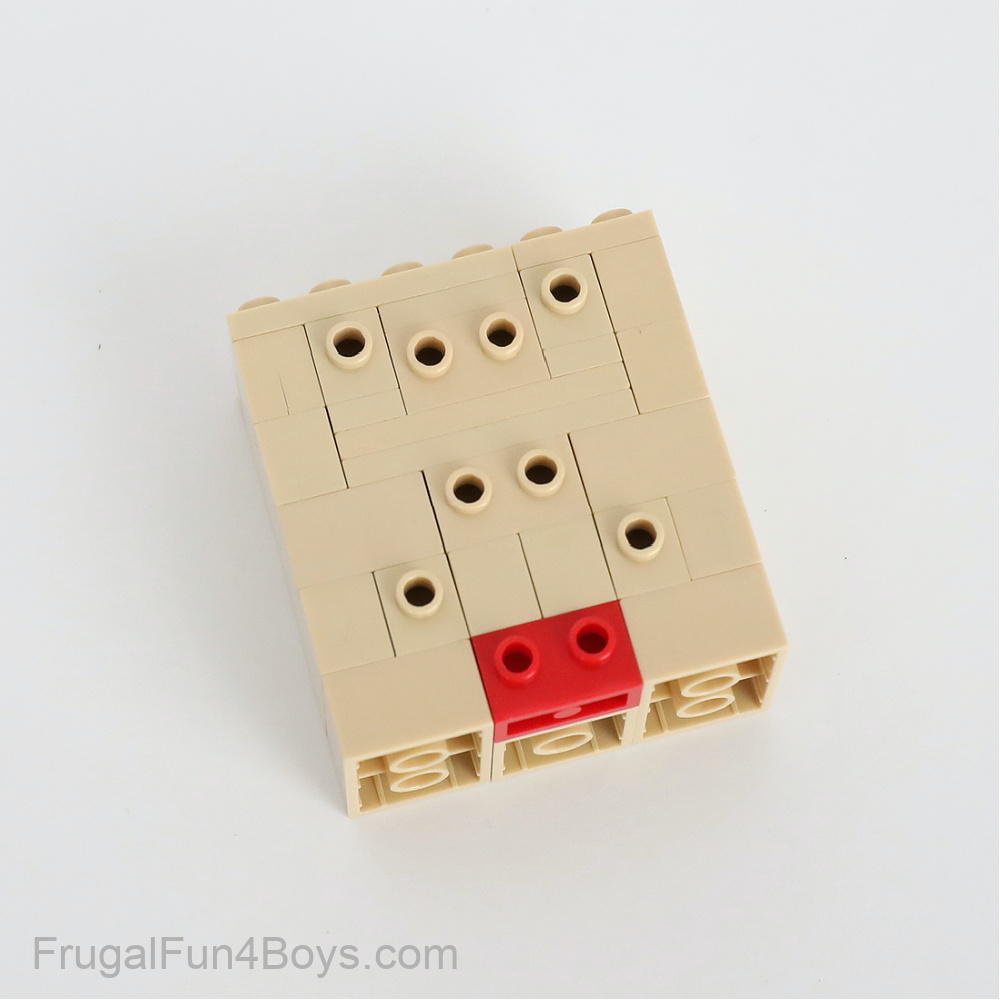
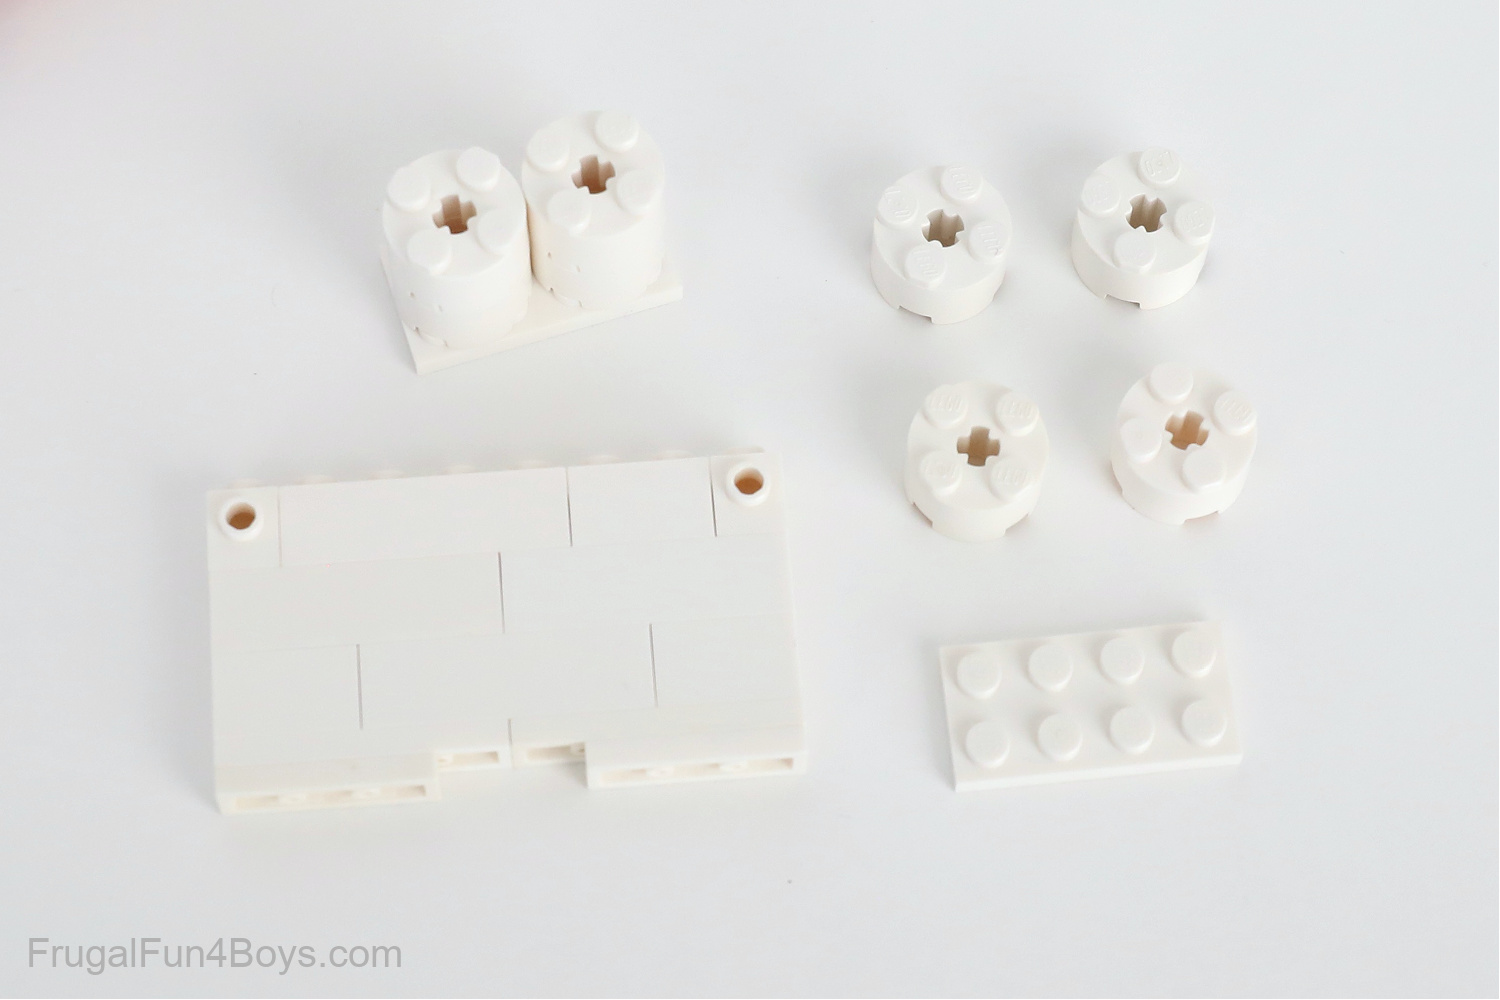
Then gather the pieces shown for building the nose. The two 2 x 3 plates will go on the underside of the head.
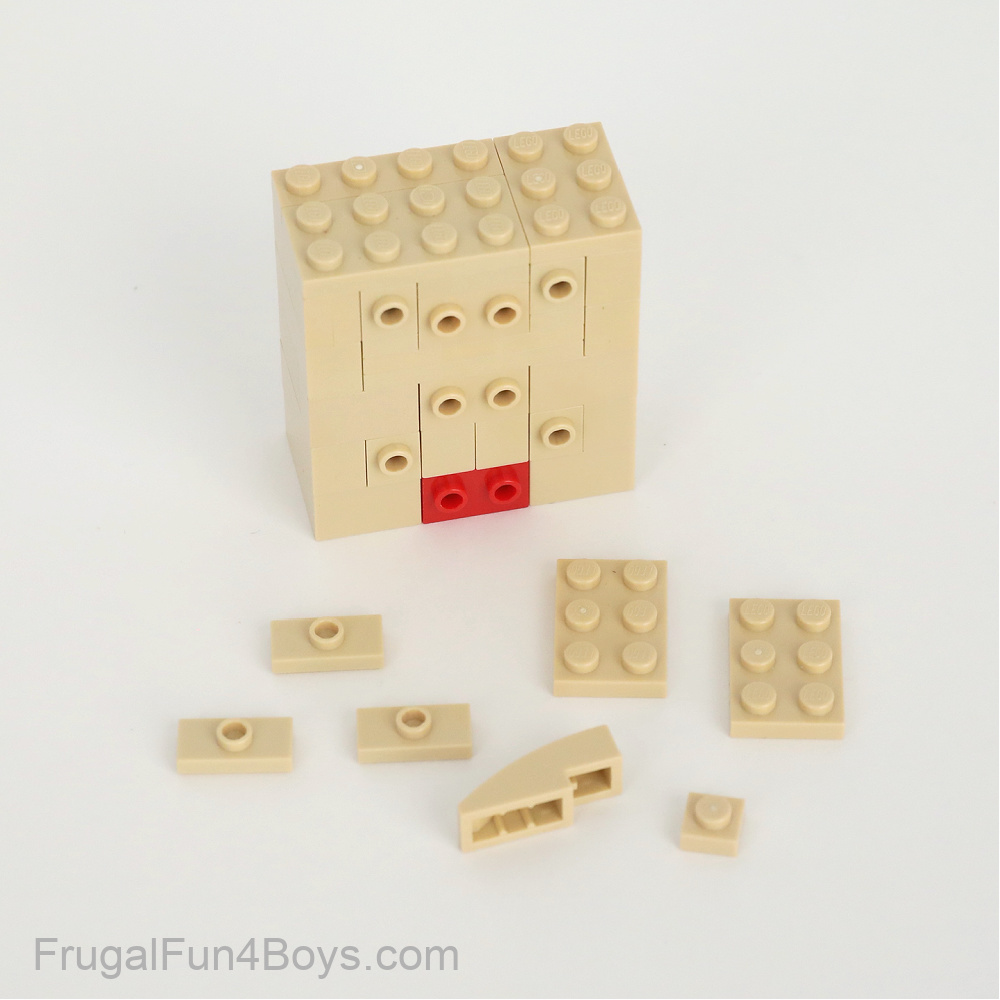
Attach a 2 x 3 tan plate under the head on each side. There should now be a space under the red brick.
Place a 1 x 1 tan plate under a 1 x 3 tan curved slope. Add two 1 x 2 plates with one stud on top (jumper plates) to the face as shown.
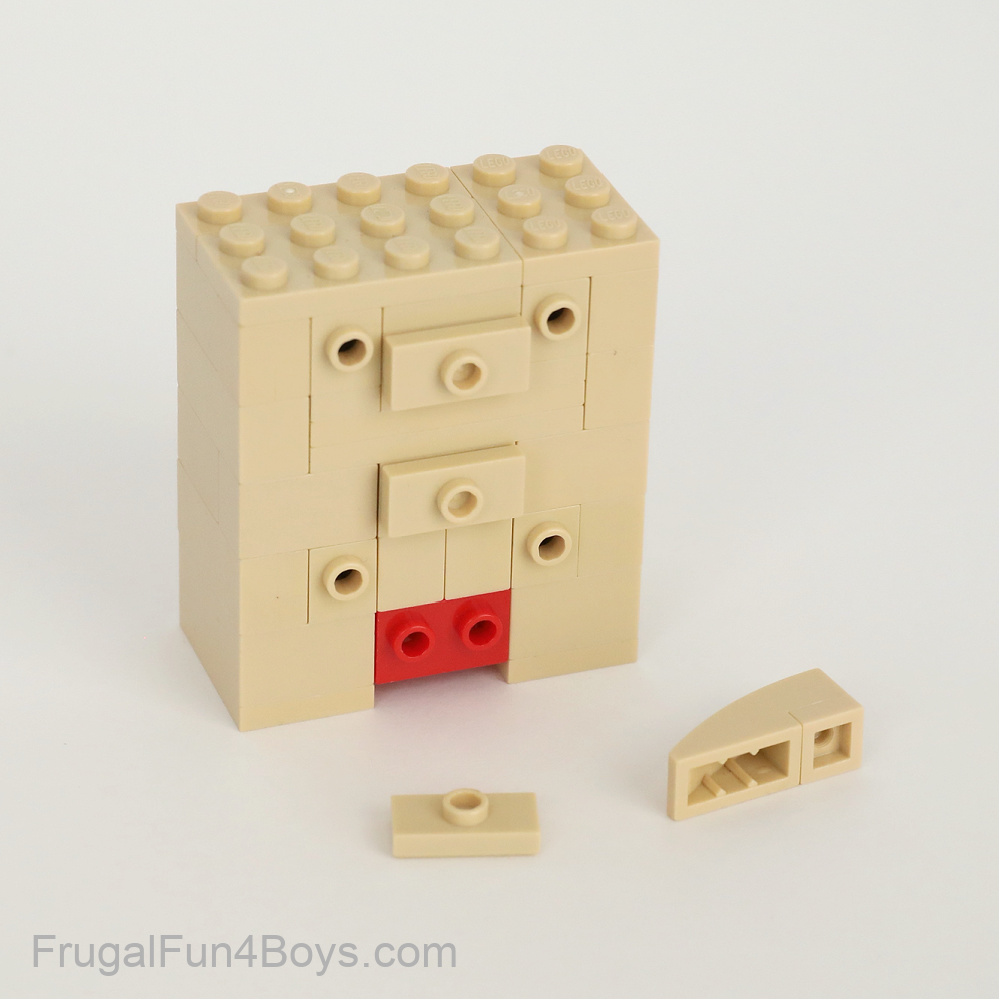
Place the nose on top of a tan jumper plate.
Attach the nose to the face. Note that the middle jumper plate is not actually attached to any bricks on the face! It’s just filling in space.
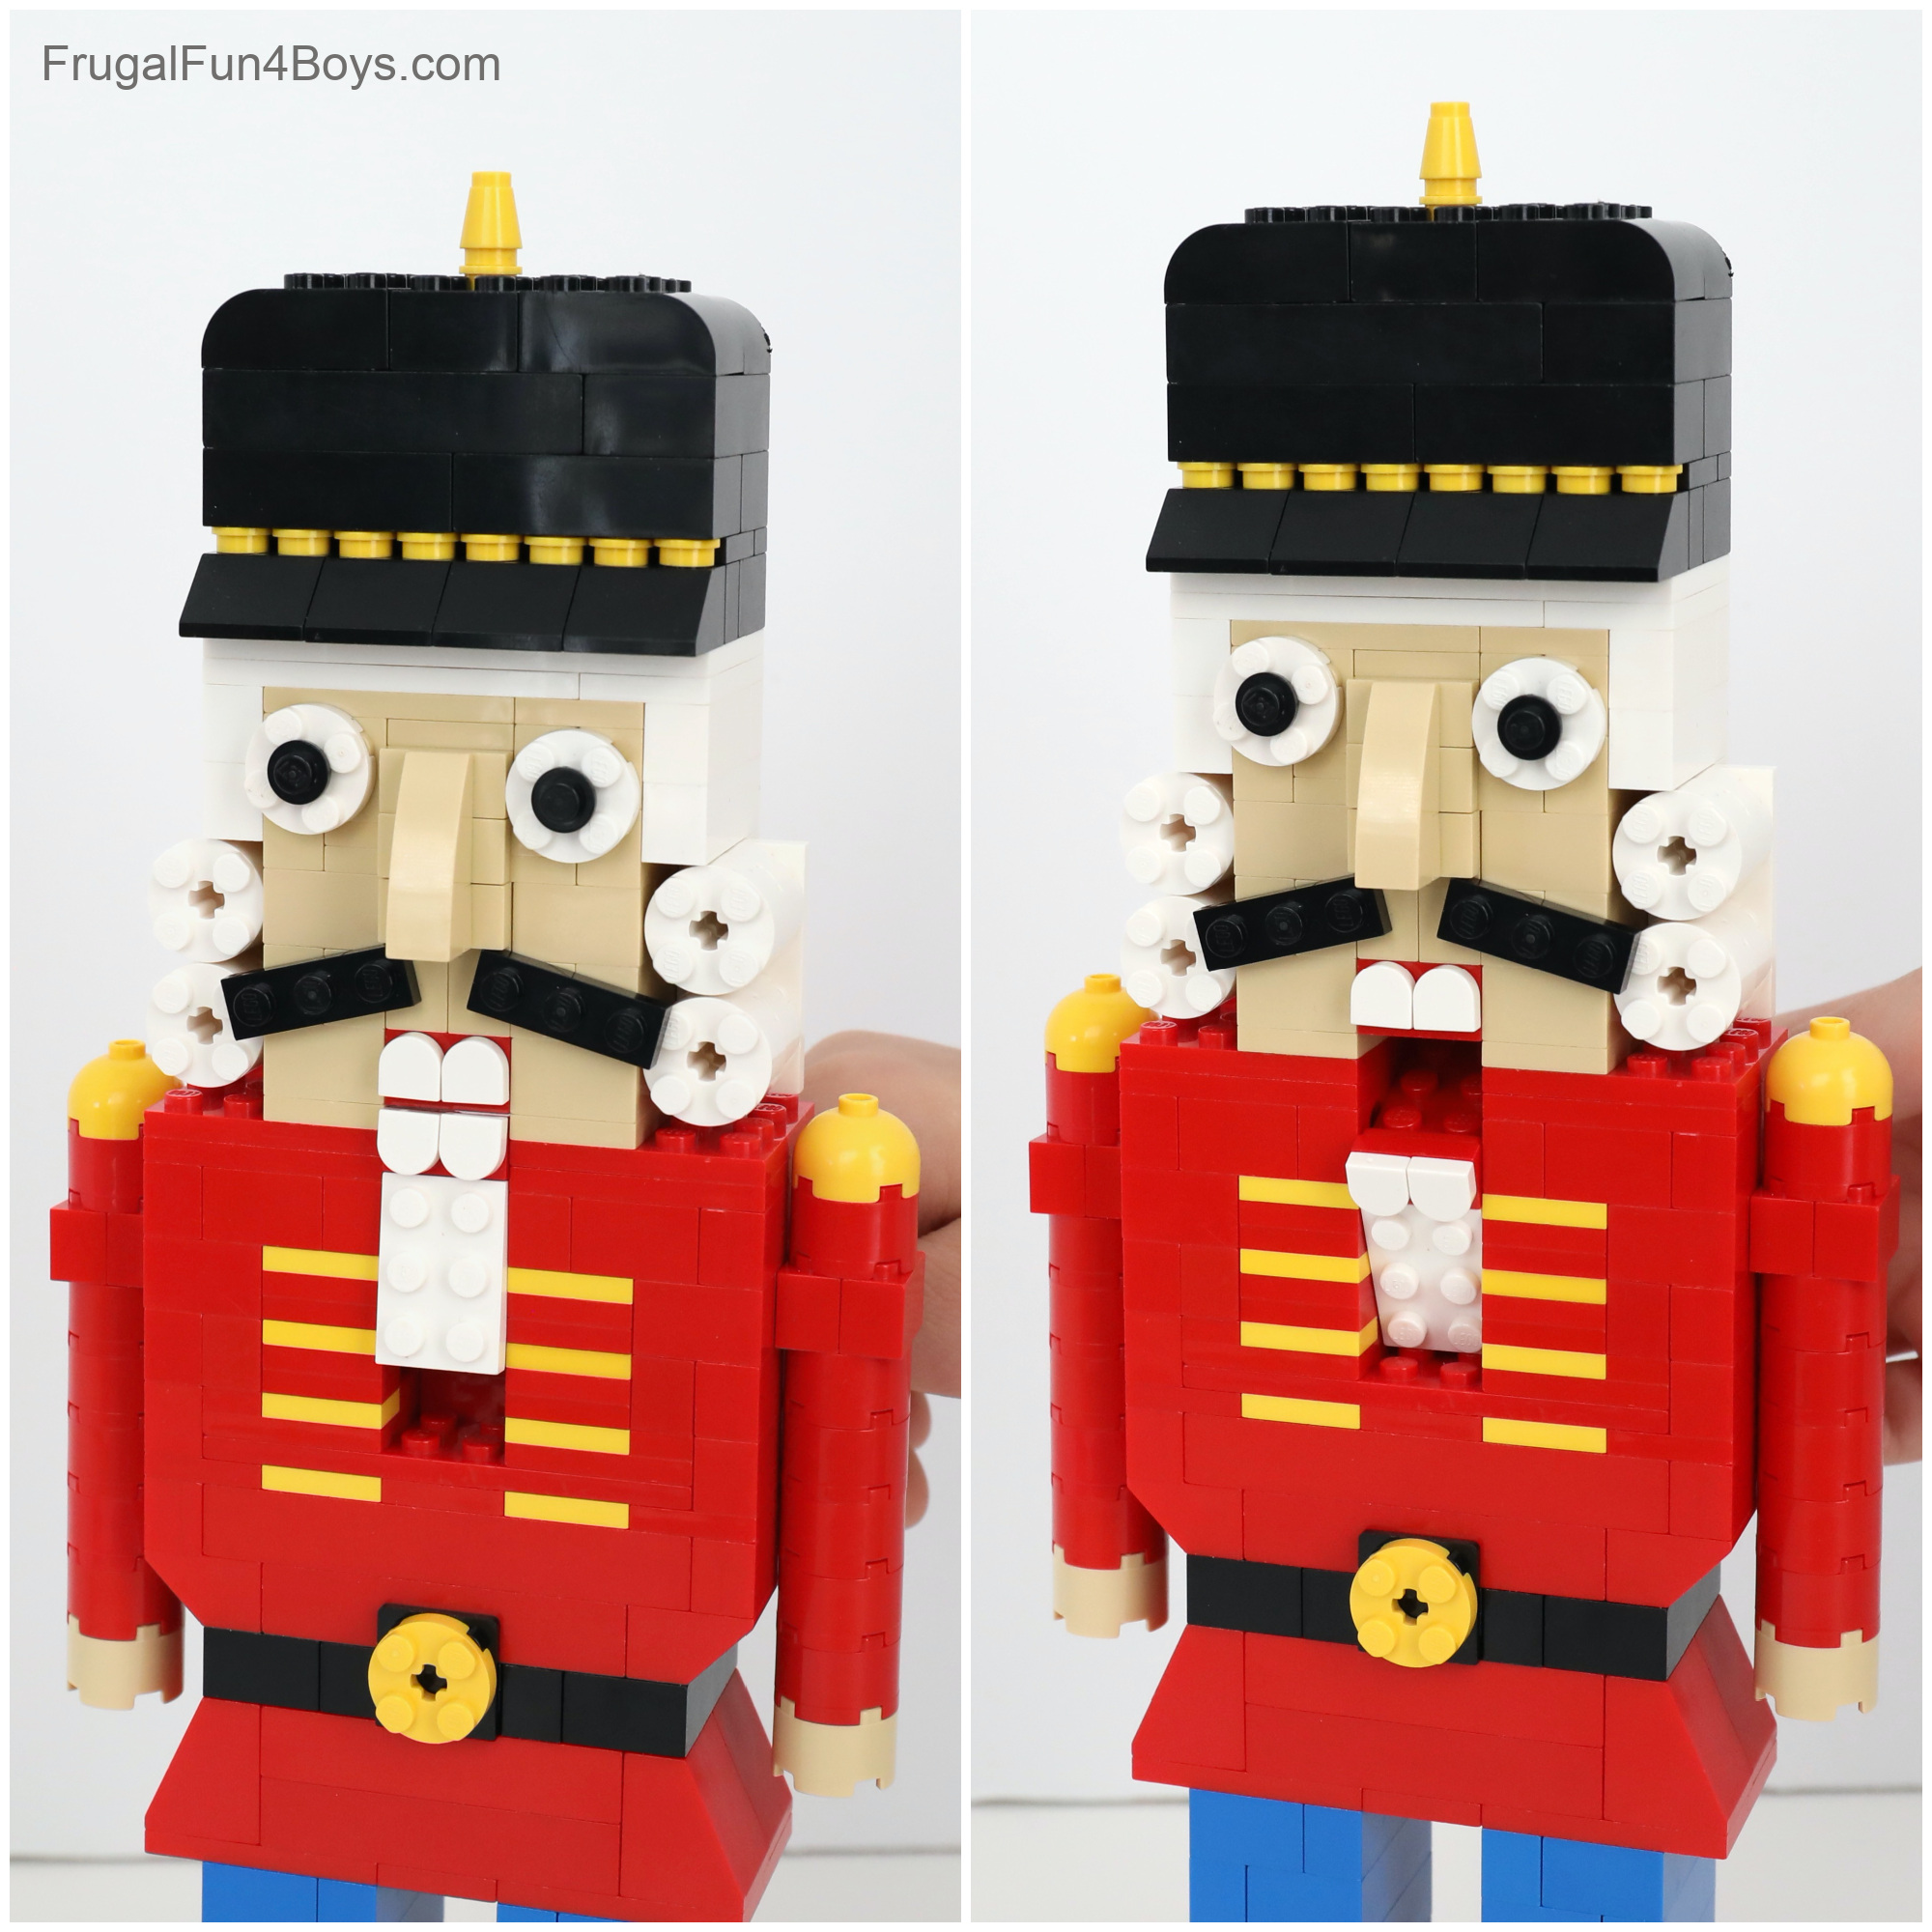
Then add eyes. Each eye is a 2 x 2 white round plate and a 1 x 1 black round plate. Attach two 1 x 3 black plates to be teeth. The two teeth are 1 x 1 tiles, round half circle extended.
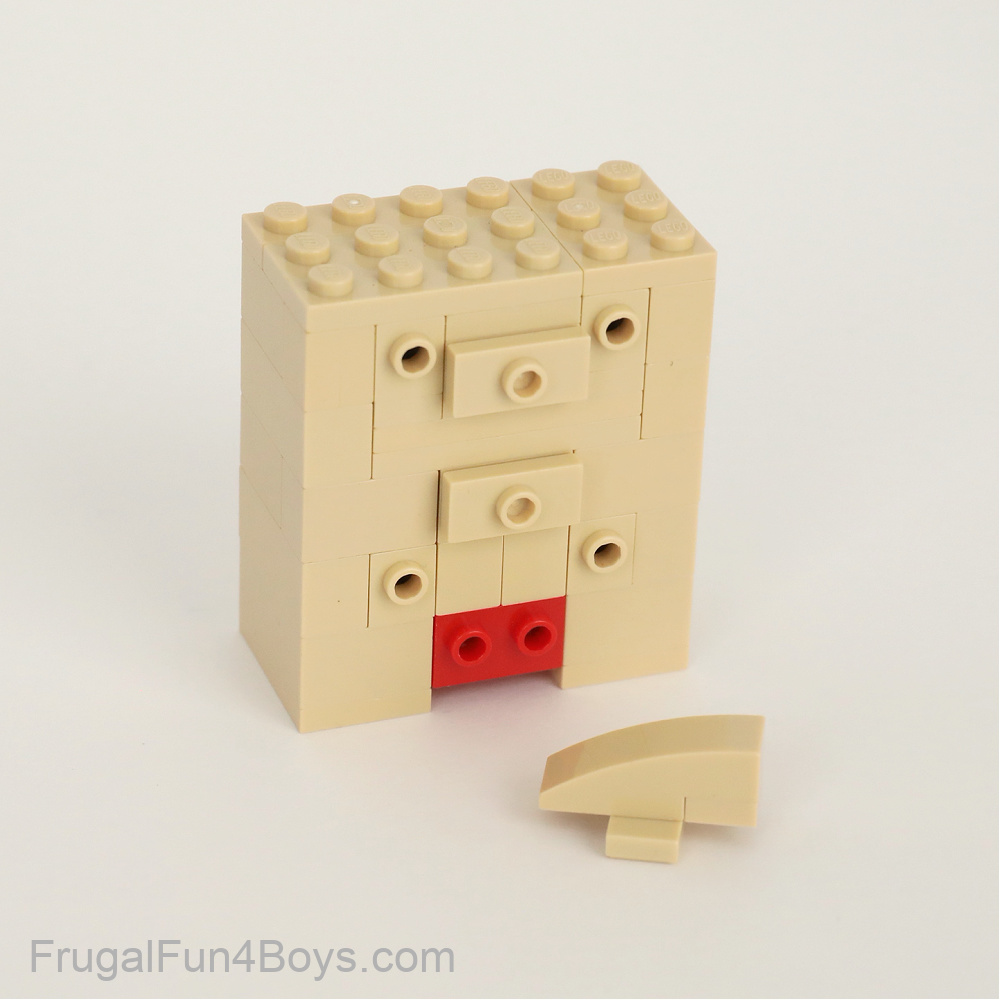
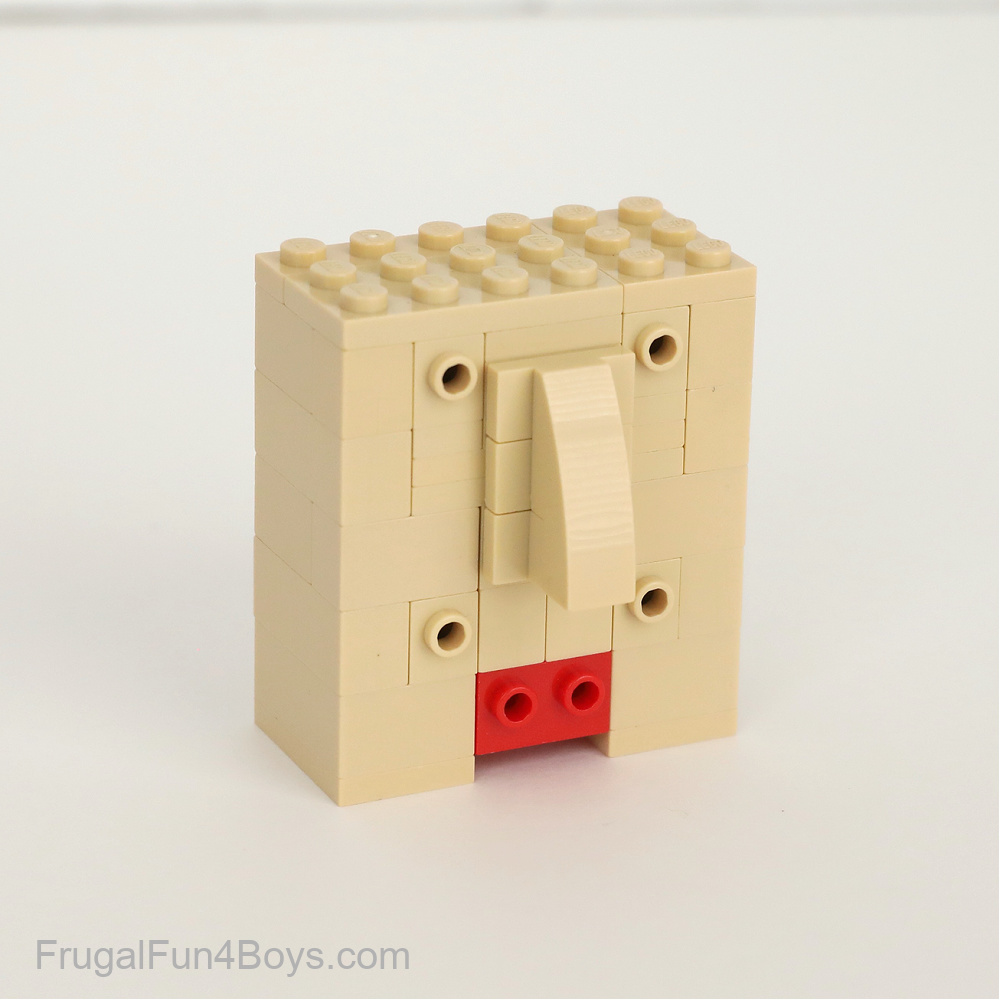
After the face is complete, start building hair. I put two layers of plates on the top of the head, and then two rows of white bricks on the sides and back of the head.
Next, build more hair. For the curly wig, I attached four 2 x 2 white round bricks to a 2 x 4 white plate. I made two of these, one for each side.
The rectangle section is the hair on the back of the head. The two studs will hold the curls.
The rectangle section will be attached to the back of the head so that the studs face the front.
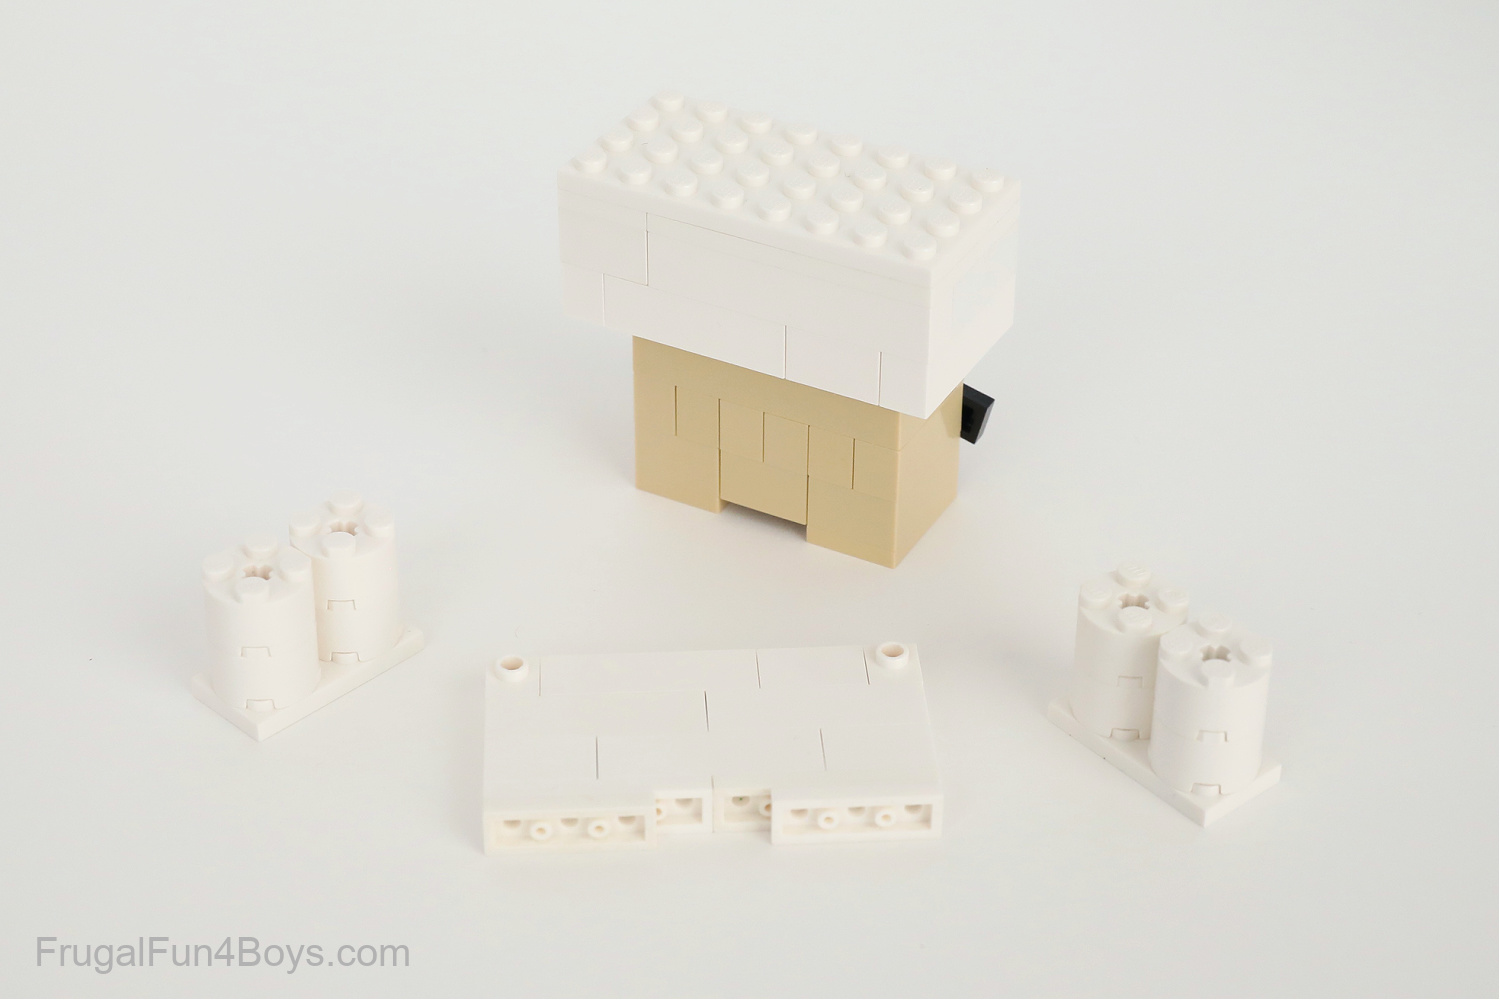
Attach the hair to the underside of the hair already on the head, if that makes sense. The video should help clear up this step.

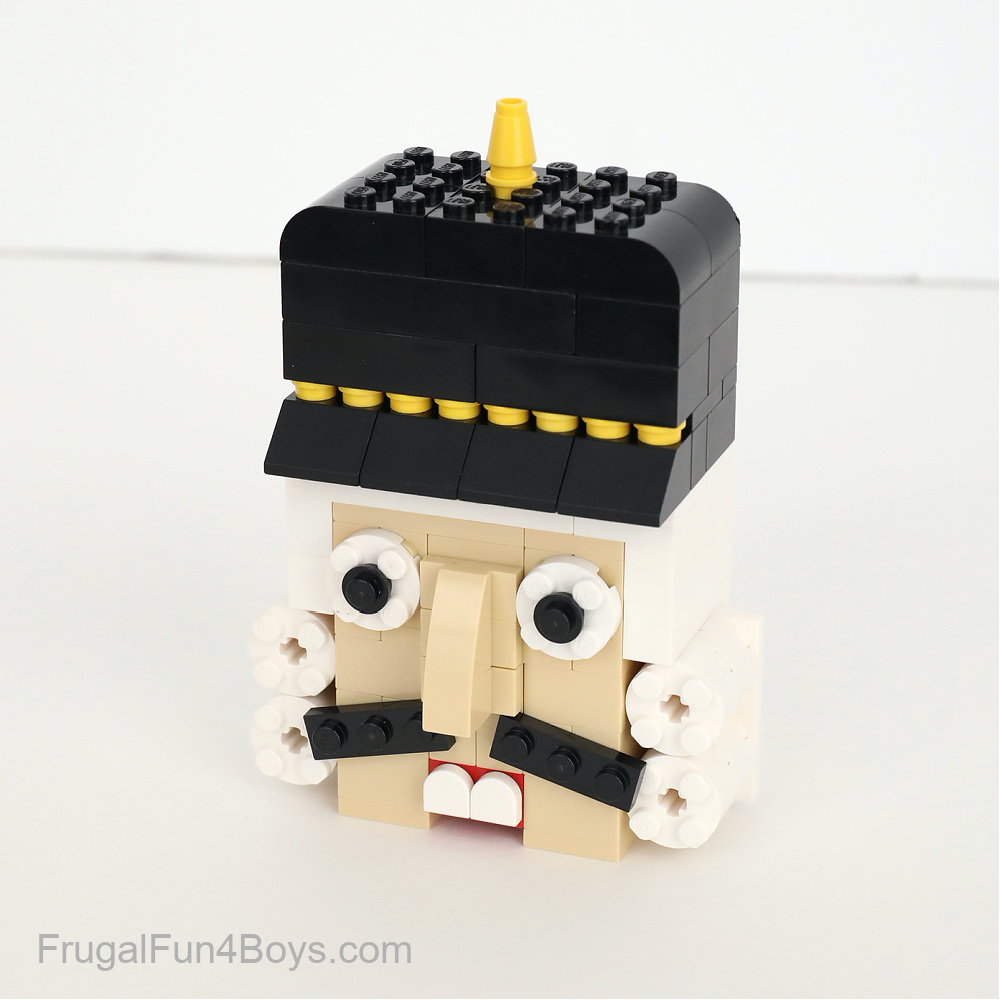
Once the hair is complete, build your nutcracker a black hat. It might help to look at pictures of wooden nutcrackers online. I looked at several different options and chose a design for my hat.
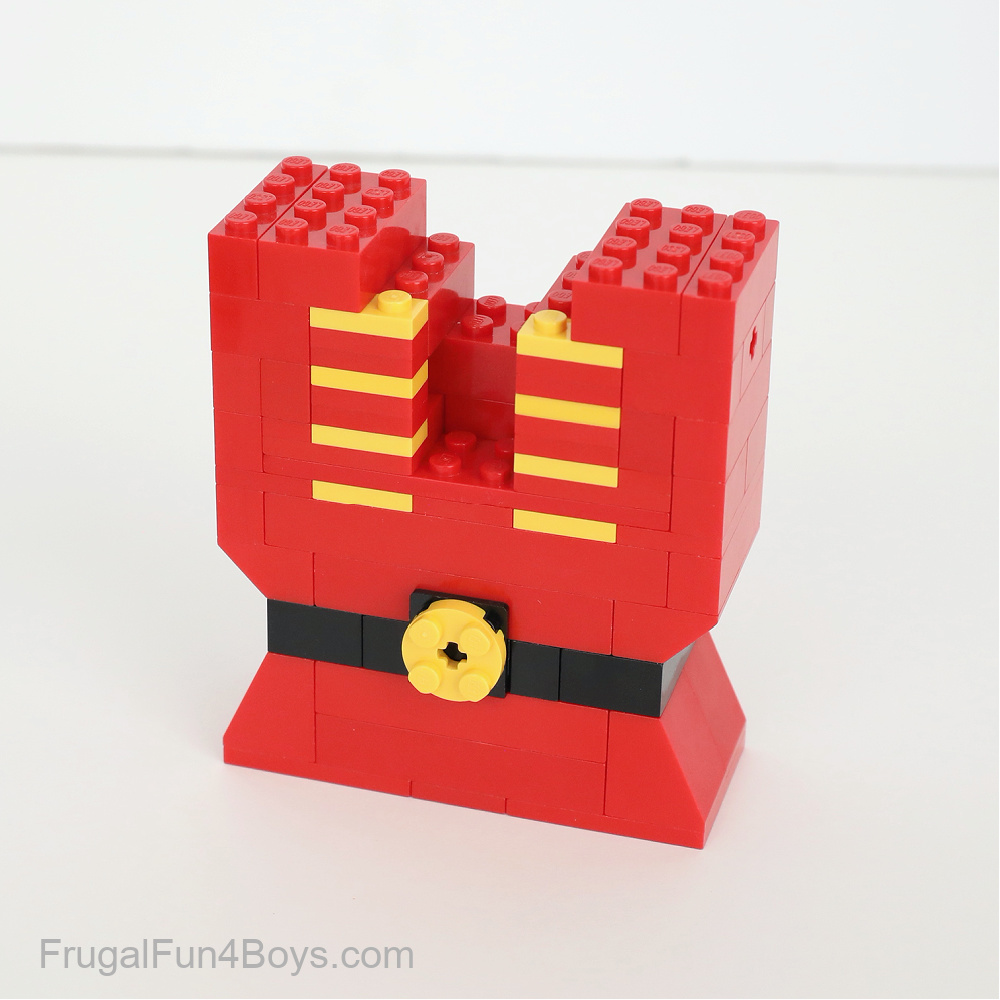
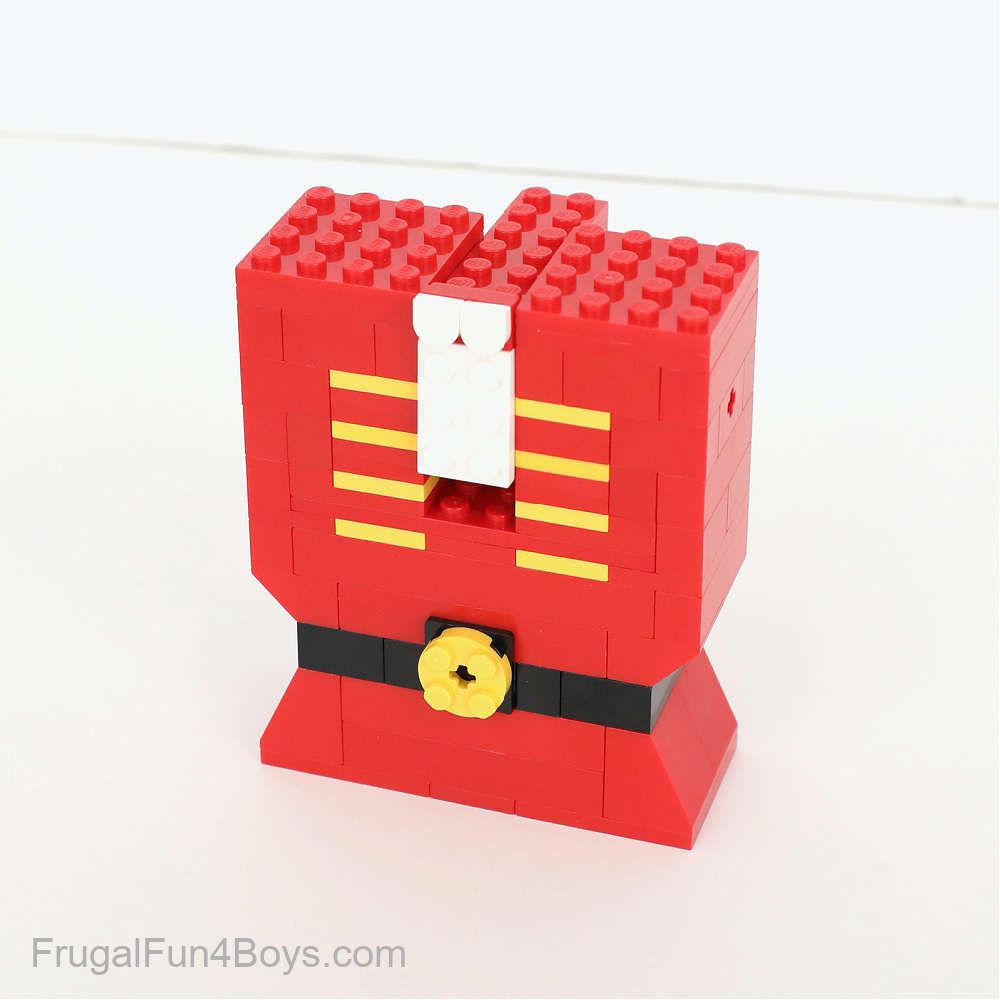
Now it’s time to build the body. I left an opening in the body – you’ll see why in just a minute.
On each side of the body, I included a 1 x 2 red Technic brick with an axle hole. These will hold the arms.
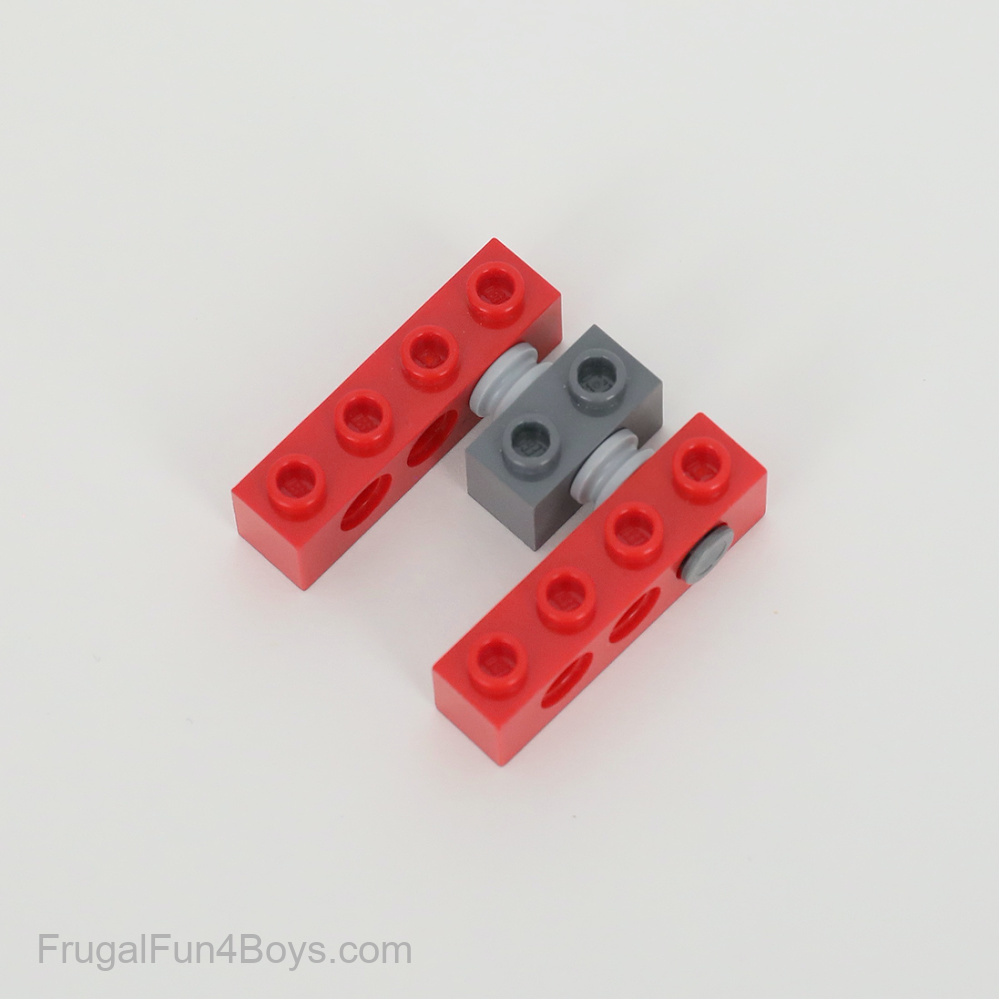
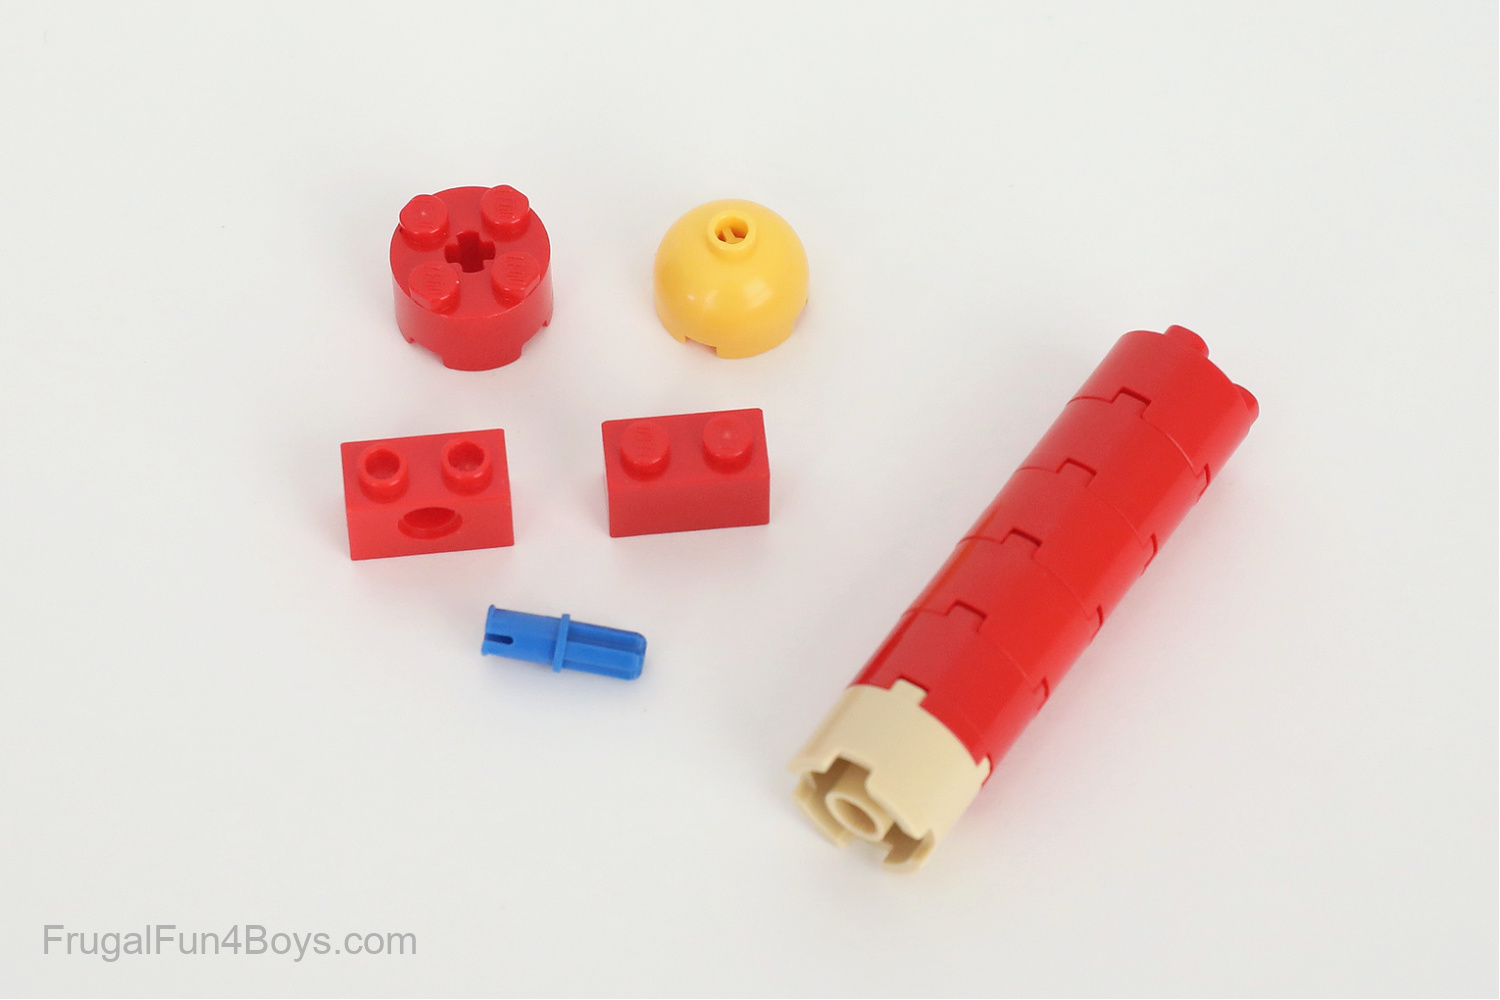
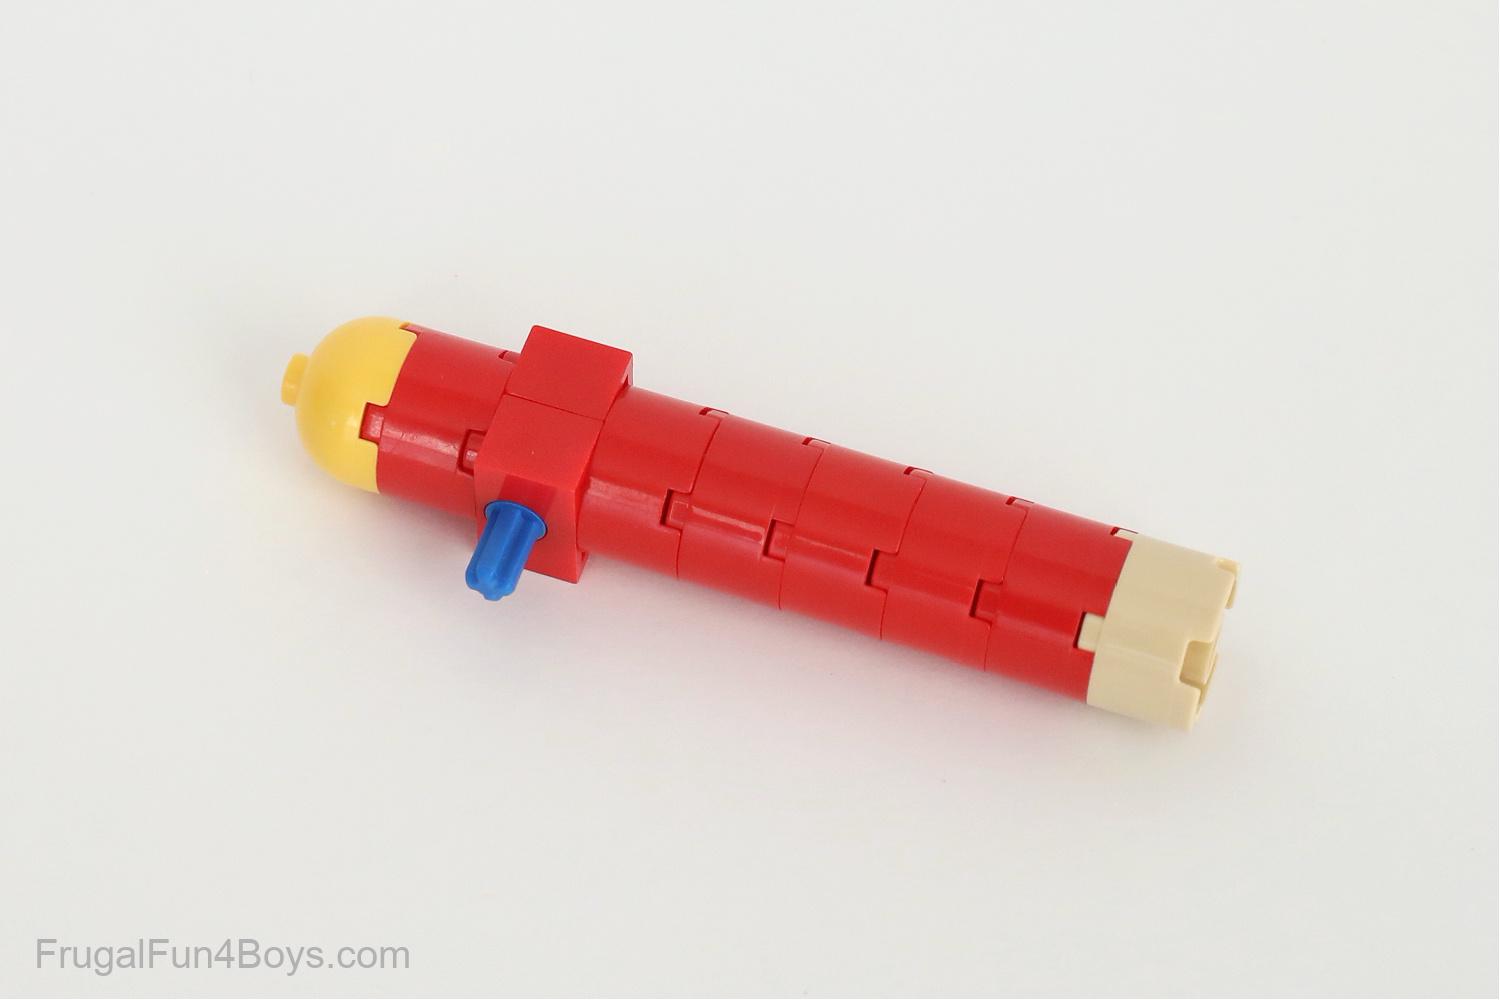
To build the mechanism, you’ll need two 1 x 4 red Technic bricks, one 1 x 2 dark gray Technic brick, two light gray Technic bush (1/2 size), and an axle – 4 studs long with a stop.
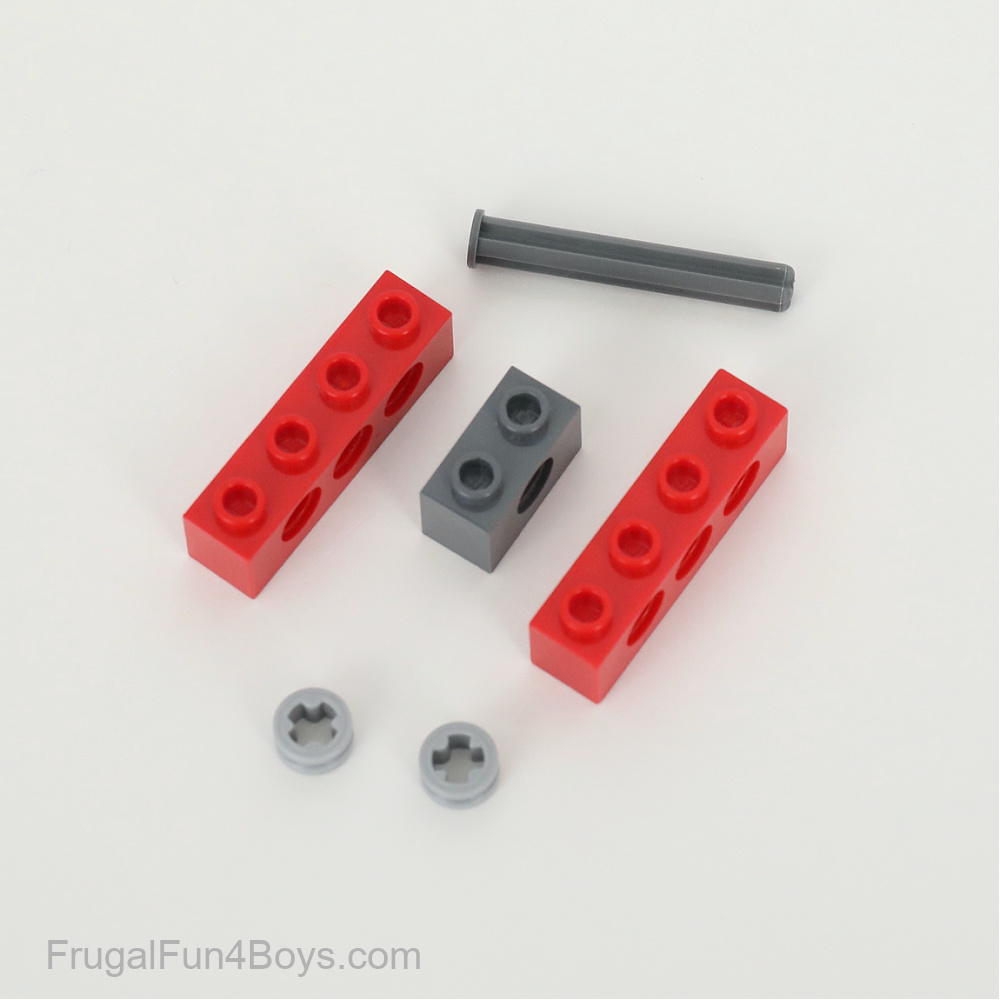
Slide the axle through the last hole on one of the 1 x 4 Technic bricks, then through a bush, then the 1 x 2 Technic bush, then another bush, and then the final 1 x 4 Technic brick.
The axle should not stick out on either side.
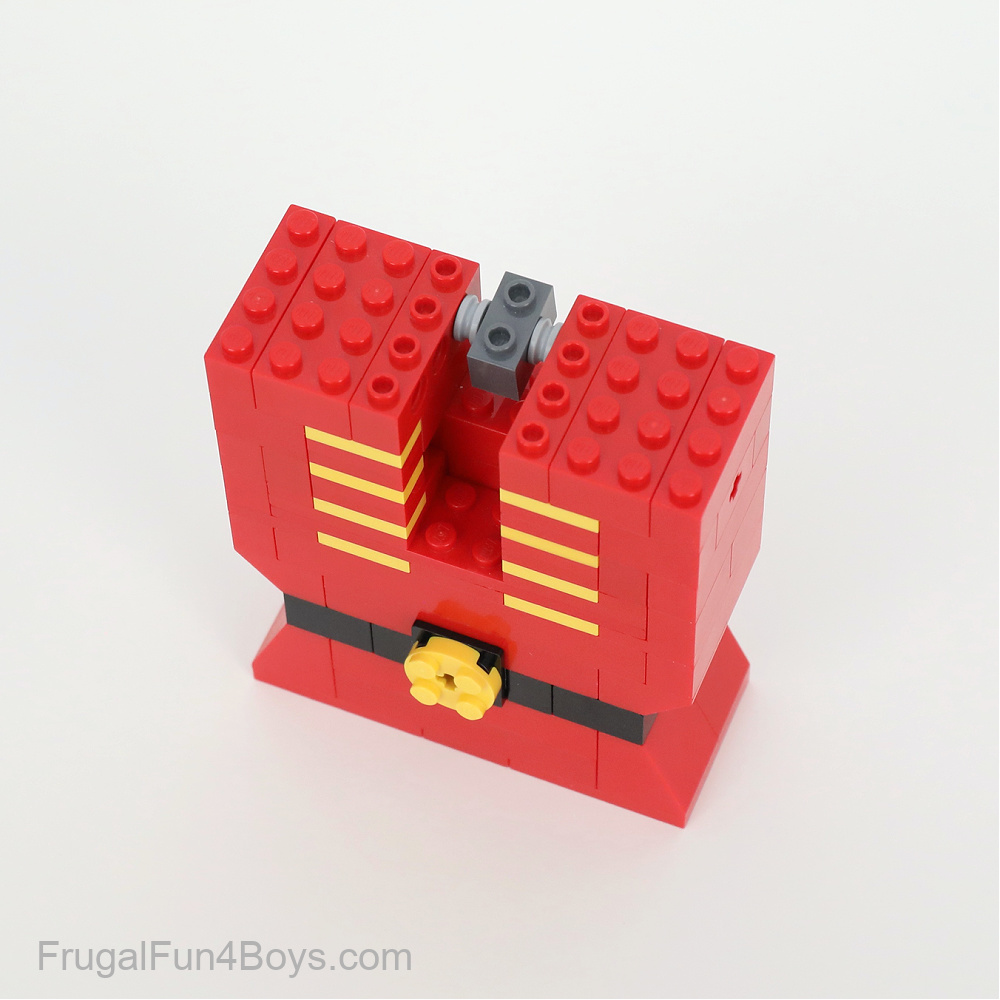
Then add the mechanism to the body as shown.
Now it’s time to build the lower part of the nutcracker’s jaw.
These are the bricks I used. You can easily modify this step with what you have, as long as the lever is long enough to pivot correctly.

Attach two 1 x 2 red plates to a 1 x 2 – 2 x 2 red bracket (inverted).
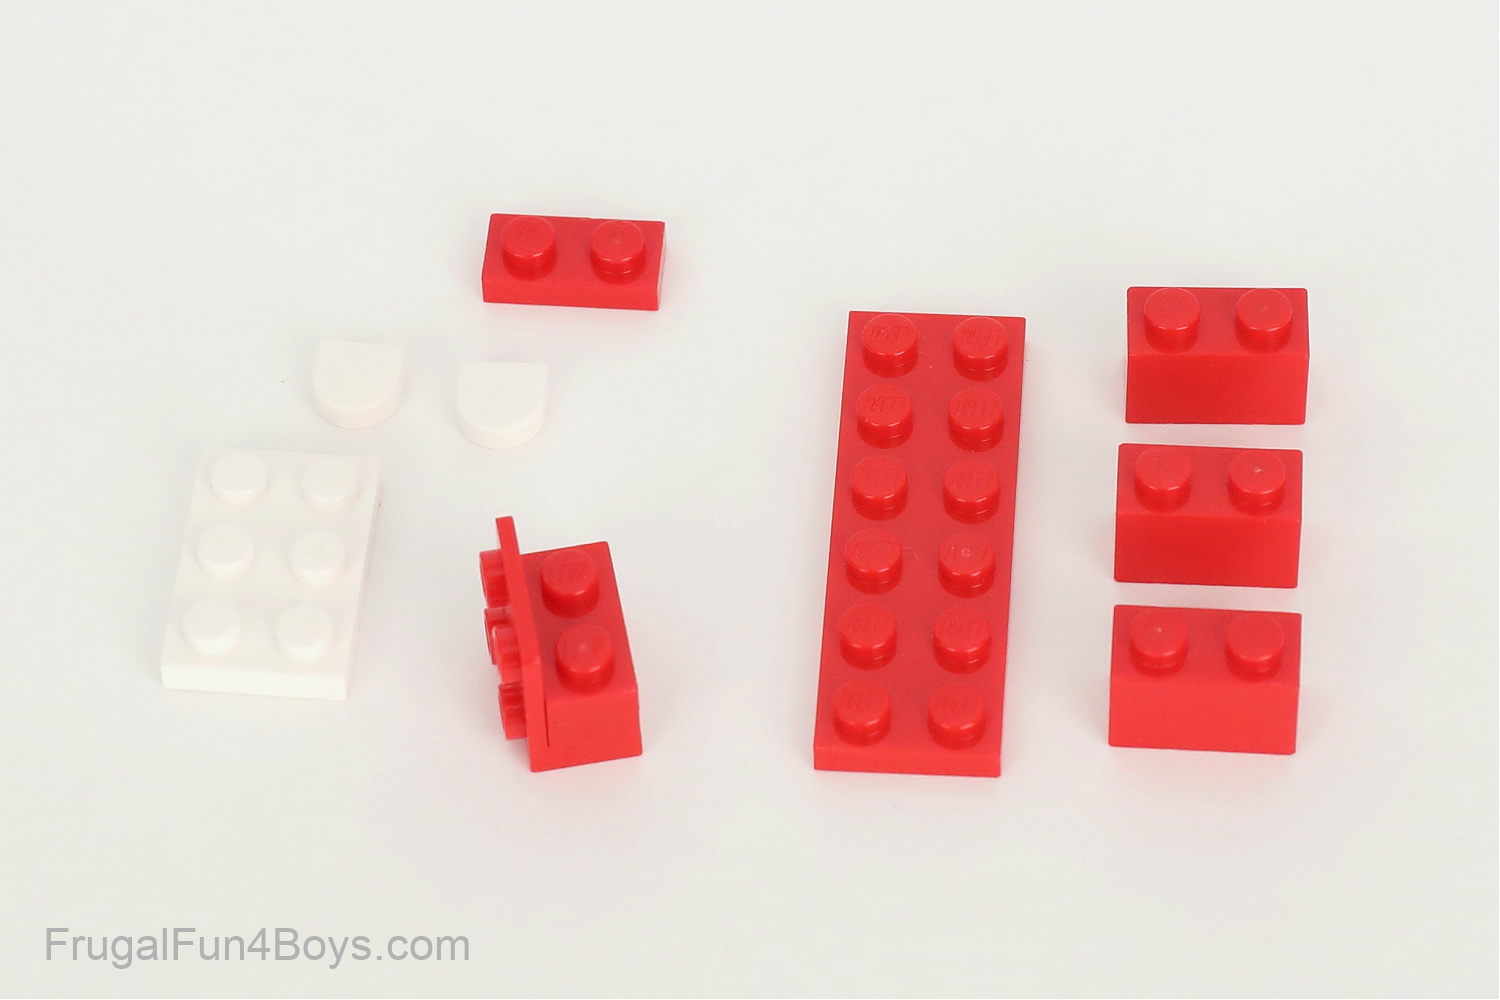
Then attach a 1 x 2 red plate and a 2 x 3 white plate to the front of the bracket.
Attach three 1 x 2 red bricks to one end of a 2 x 6 red plate.
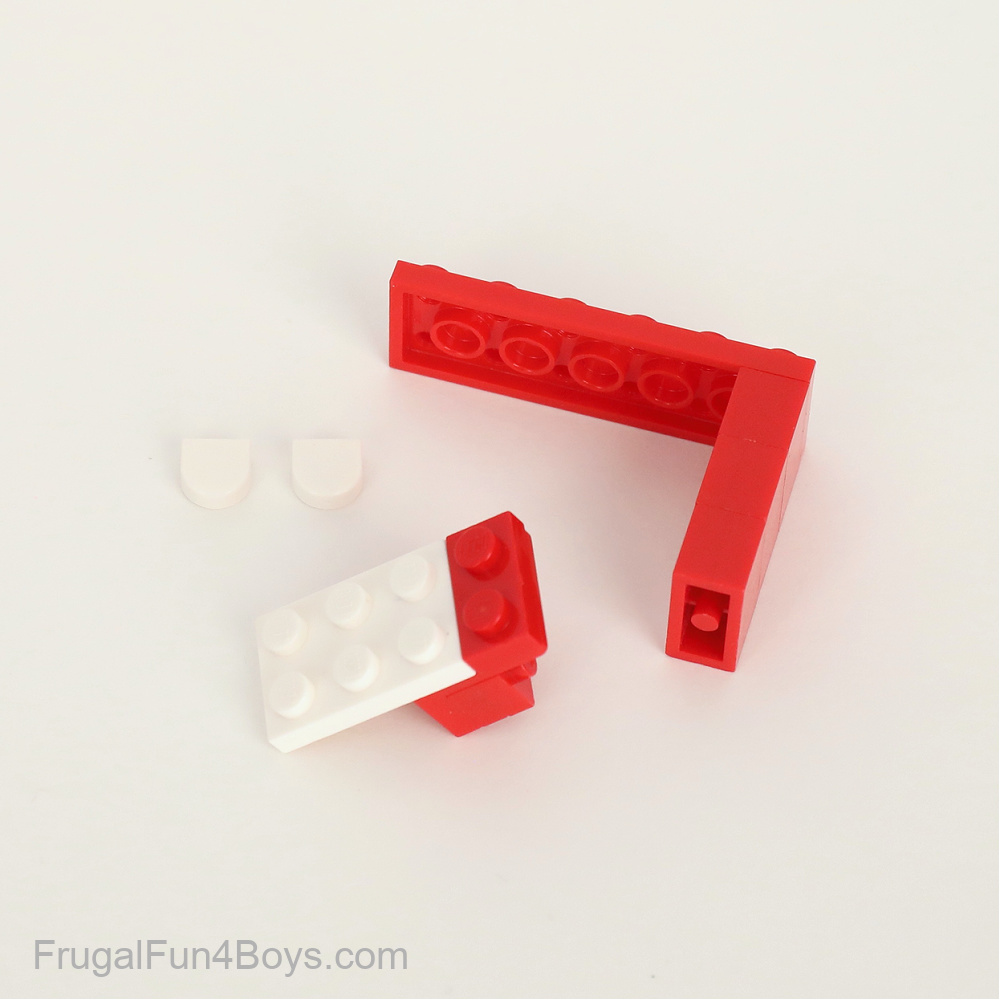
Then add the teeth. Attach the 2 x 6 red plate to the bracket.
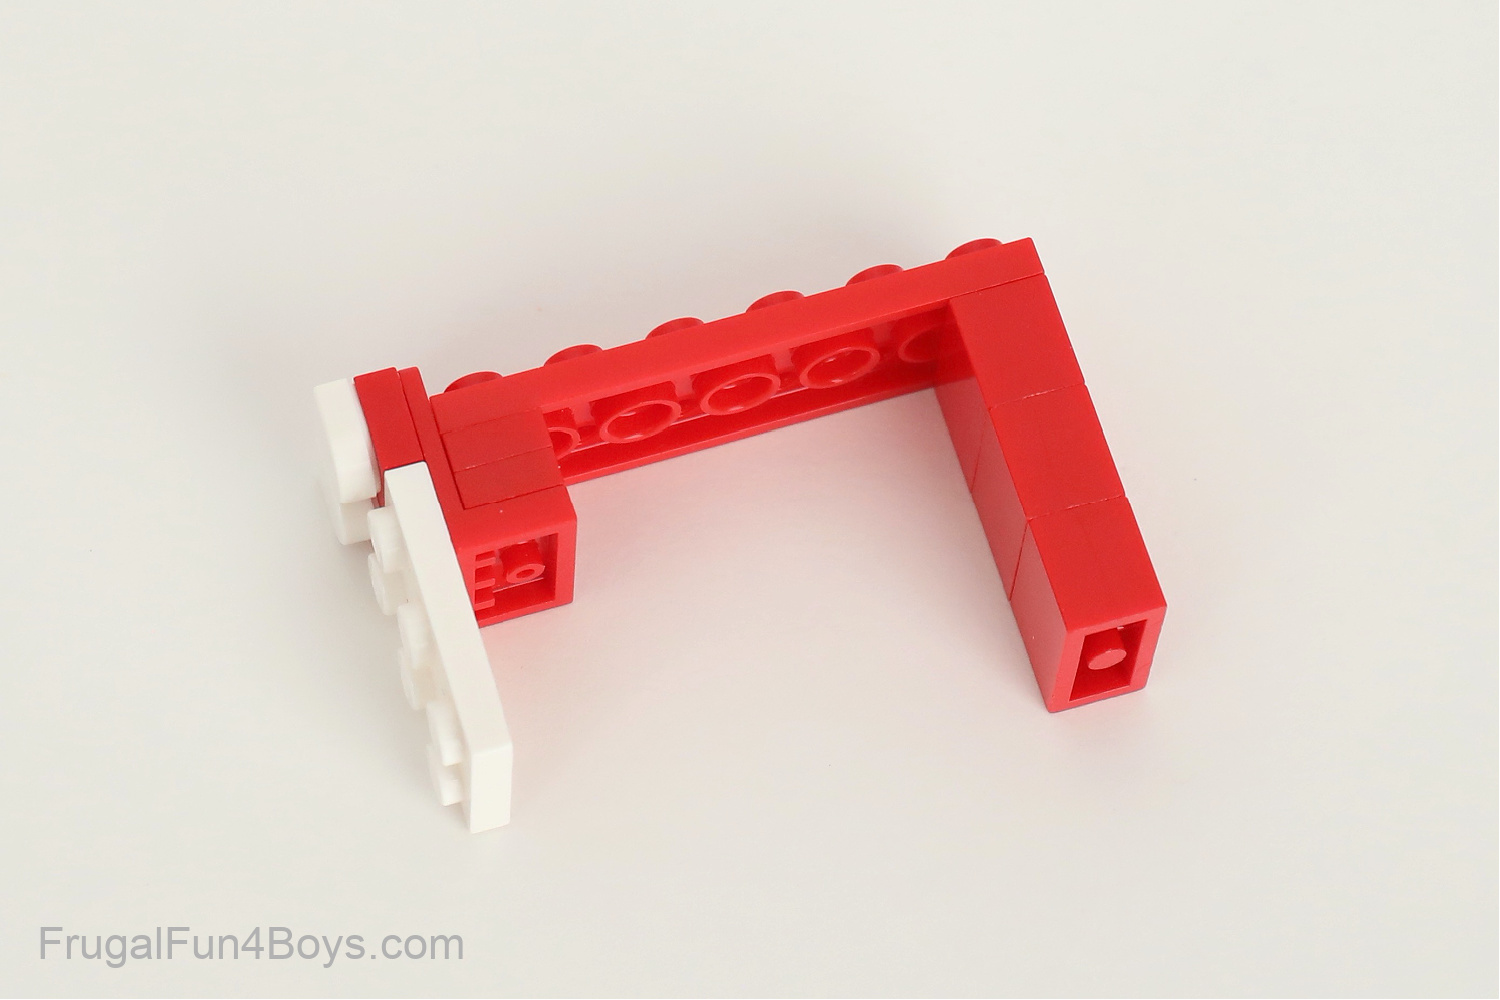
Now it’s time to attach the lower jaw to the body.
Attach the 1 x 2 dark gray Technic brick on the body to the center holes on the underside of the 2 x 6 plate. It may take a couple tries to get it lined up correctly.
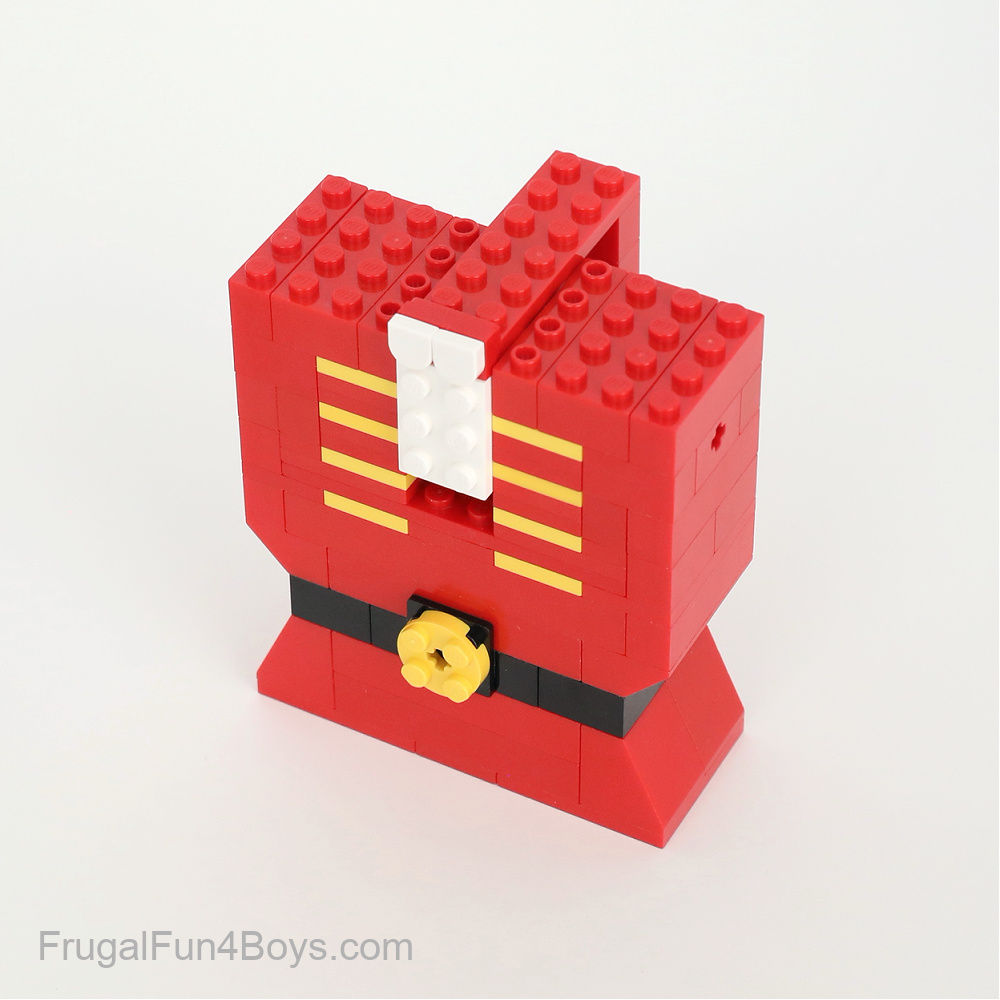
Once you have the lever in place, add two 4 x 4 red plates to each shoulder.
Then attach the nutcracker’s head to the body.
If the top and bottom teeth don’t line up, remove the head and re-position the lever.
Now we just need to add arms and legs! Super simple.
Each arm has a 2 x 2 tan round brick, six 2 x 2 red round bricks, a 1 x 2 red Technic brick, a 1 x 2 red brick, and a 2 x 2 yellow dome. Then you’ll need a blue axle pin to connect the arm to the body.
Regular 2 x 2 bricks will work just fine for the arms, but I chose to order extra round bricks from Brick Link.
Attach the 1 x 2 Technic brick and the 1 x 2 brick right next to each other. Then add another 2 x 2 red round brick and a 2 x 2 yellow dome on top.
Build a second arm, and insert them both into the axle holes on the body.

Then build some legs and boots. These are a very simple design!
Each leg is three studs wide.
And that’s it!
Need more Christmas LEGO Ideas?
These Christmas LEGO Building Challenge Cards are a lot of fun!
Or build Five LEGO Christmas Projects – two with moving elements! Plus a fun elf and more.
Construct your own LEGO Nativity Set. This looks so nice on display.
6 Comments
Anne Nov 28, 2021
I love this! Thank you.
Arts and Bricks Dec 1, 2021
This is such a festive idea! I’m sure my nine-year-old is going to have a blast building his own LEGO nutcracker! I’m excited to show him this idea. Thanks for sharing!
Michelle Patterson Dec 2, 2021
Do you have a complete list of bricks needed for this project?
Sarah Dec 4, 2021
I don't... very time consuming for this one. I will definitely consider adding one!
Jill Dec 19, 2021
Is this a special kit or just random bricks you already had? If it’s a kit where do you buy it?
Sarah Dec 28, 2021
This is not a kit. It's just made from the bricks we have at our house!
Onewishshortofamillion Dec 14, 2022
Absolutely brilliant Sarah!!I'm sure my 10 year old will be thrilled, with 2of her loves combined together in this activity~ She's absolutely crazy about Nutcrackers and Legos😅Thank you so much!
Stacey Dec 3, 2025
My 6 year old has become obsessed with nutcrackers and is also very passionate about our Lego! For whatever reason, this year we can’t seem to find a functioning nutcracker so this checks both boxes! He’s going to be over the moon when I show him! Thanks for sharing- so clever!
Post a Comment