
We love using our bricks to make super cool LEGO video game creations! It’s so fun to build characters and scenes from your favorite video game. You might even want to build the game console itself! (And hey, it’s also a great break from screens!)
Below, we’ll share LEGO Mario mosaics to build (with printable pattern cards), Donkey Kong, Among Us, Breath of the Wild, and Mario, Yoshi, and Mario Kart projects to build.

But first, we’ll show you how to build your own mini Atari style game console.
Then you can scroll down to the other projects below.
One of my sons built this adorable Atari console a few years ago, and we are finally getting the photos together to share it with you!
This project will take you right back to the 80’s, haha.
A fun extension of this project would be fun to add a LEGO TV with a scene from one of the 80’s games.
How to Build a LEGO Atari Console:

Step 1: Start with a 6 x 8 black plate, a 2 x 6 black plate, a 1 x 10 black Technic brick, and a 1 x 2 black Technic brick.

Step 2: Attach the Technic bricks to the two plates as shown.

Step 3: Fill in the rest of the plate area with black bricks. We used three 2 x 4 bricks, a 1 x 4 brick, two 2 x 3 bricks, and a 1 x 8 brick.

Step 4: Add two 2 x 2 black slopes as shown. Then find three 1 x 2 hinge bricks that each have a 2 x 2 black plate.

Step 5: Attach the hinge bricks to the video game console as shown below.

Step 6: Add a 1 x 1 red round plate and a 1 x 1 light gray round tile as buttons on the game console. Then add a 1 x 2 white grill and a 1 x 2 black tile in the center. Insert five light gray Technic pins (1/2 length) into the Technic brick on the front of the game console.

Step 7: This next step involves a LOT of black grills, but it looks so cool! Add ten 1 x 2 black grills to the game console. These are very common pieces, so hopefully you’ll have them. Then find some brown tiles to attach to the front. We used a 1 x 6 and a 1 x 4.

Step 8: Attach the tiles and the game console is complete! Next we’ll build the controllers.

Step 9: Find two 4 x 4 black plates, two 2 x 4 black bricks, a 1 x 2 black plate with one stud on top, and a 1 x 1 red round plate.

Step 10: Start with one 4 x 4 plate. Place two 2 x 4 bricks on that. Then put another 4 x 4 plate on top. Add the 1 x 2 plate with one stud on top (jumper plate) and the 1 x 1 red round plate.

Step 11: Gather the bricks shown to build the joystick. If you don’t have these exact pieces, you can improvise with what you have!

Step 12: The piece on the bottom of the joystick is a 1 x 1 round tile with bar and pin holder.

Step 13: Attach the joystick to the 1 x 2 plate with one stud on top.

Step 14: Now use some LEGO string to attach the joystick to the Technic brick on the back of the console.

To attach two controllers, attach the second string to the stud on the first string.

Ready for more LEGO Video Game Projects?
Build fun LEGO Mario Mosaics with these printable building cards.

Then these Mario LEGO Projects are also lots of fun. Build Mario, Yoshi, Mario Kart, and more!

Here are building instructions for a LEGO Donkey Kong! So cool.

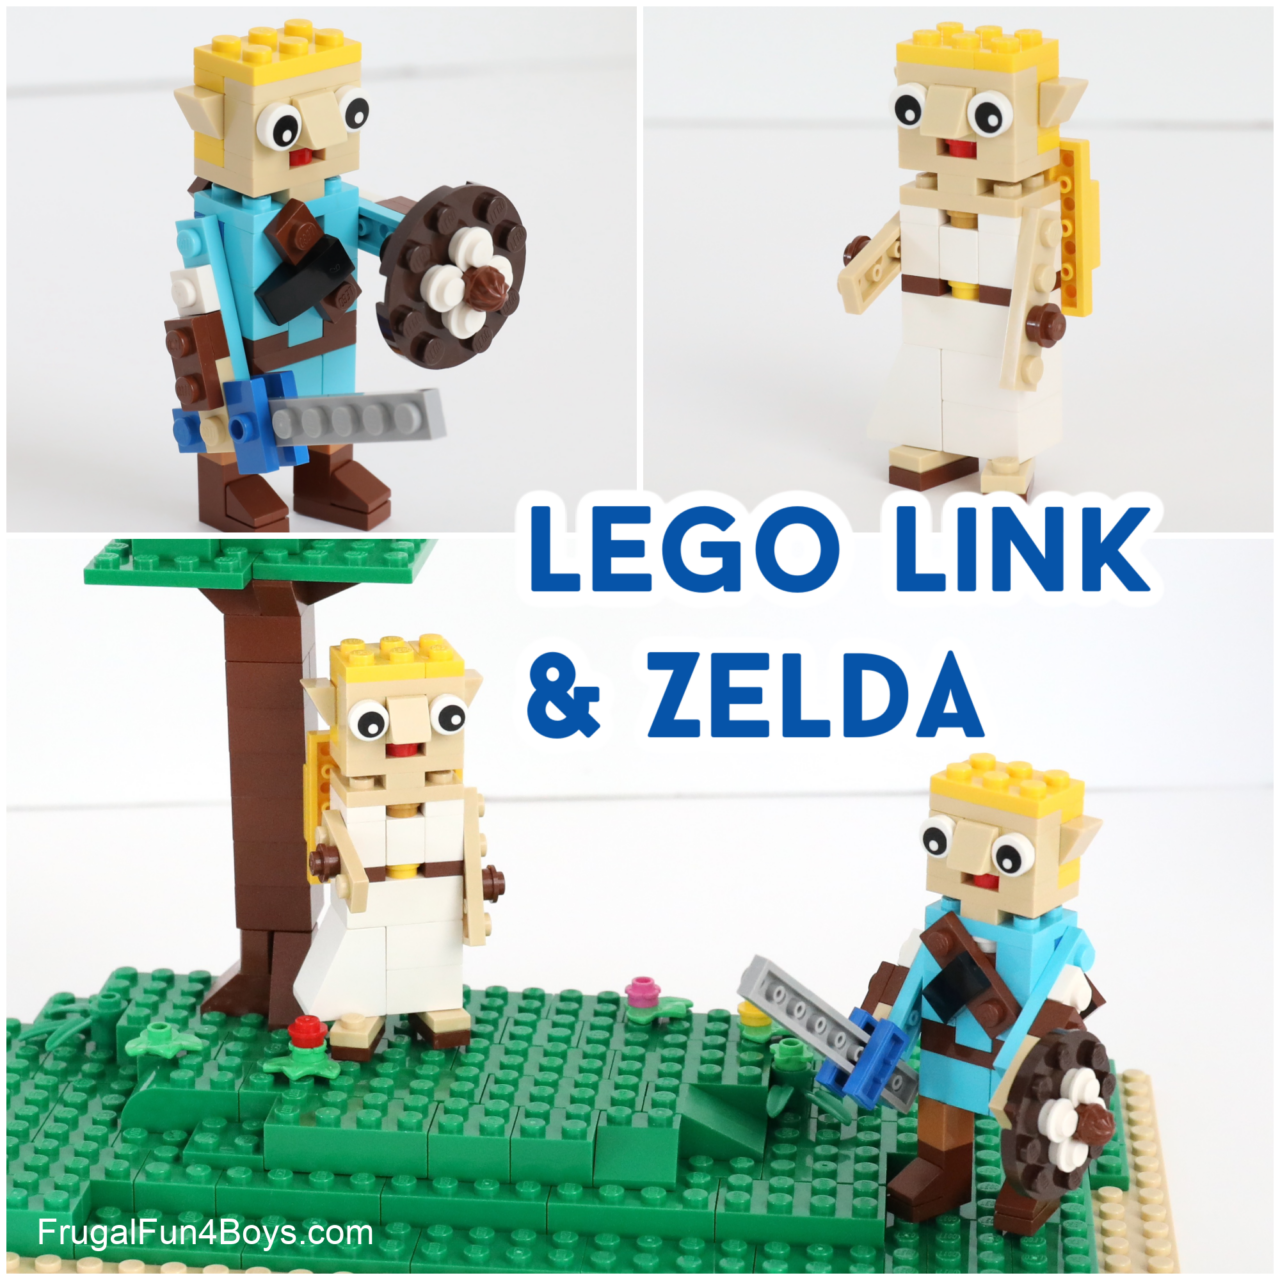
My son is a huge fan of Breath of the Wild! He built these Link and Zelda characters to share with you. Instructions in the post.
Then last but not least, here are building instructions for LEGO Among Us characters and scenes!

0 Comments
Post a Comment